We are Available 24/7

Plumbing

how to use a drain cleaning bladder​
Plumbing

How to Use a Drain Cleaning Bladder: Full Guide

A clogged drain is frustrating. A plunger sometimes works. Chemical drain cleaners often do not. And calling a plumber for every slow drain gets expensive fast. A drain cleaning bladder solves most household clogs in under 15 minutes using nothing but water pressure. It costs $10 to $20 and connects to any standard garden hose. Knowing how to use a drain cleaning bladder correctly is the difference between clearing the clog and making it worse. This guide covers every step, every safety rule, and every situation where this tool works and where it does not. What Is a Drain Cleaning Bladder? A drain cleaning bladder is a small rubber balloon-shaped device that attaches to a garden hose. It is also called a drain bladder, blow bag, or expansion nozzle. The bladder is small when empty. It fits easily into a standard drain pipe. Once you turn the water on, the bladder expands and presses against the inside walls of the pipe. Water builds up behind it and then releases forward in powerful bursts. That pressurized water pushes clogs out of the pipe. Drain bladders come in different sizes for different pipe diameters. The most common sizes cover 1.5-inch to 3-inch pipes, which handles most household sink, shower, and floor drains. Larger bladders are made for 4-inch sewer lines. A drain bladder for sewer line use is the largest type. These handle main line clogs that a standard bladder cannot reach or clear. Make sure you buy the right size for the pipe you are working on. Using a bladder that is too small will not create enough pressure. Using one that is too large will not fit or will not seal against the pipe walls properly. Most hardware stores carry drain bladders in the plumbing section. They are inexpensive and reusable if cared for properly. How Does a Drain Cleaning Bladder Work? The working principle is simple. Water pressure breaks up and pushes the clog through the pipe. When you insert the bladder into the drain and turn on the hose, water flows into the bladder through a small inlet. The bladder inflates and presses against the inside walls of the pipe. This creates a seal that traps water pressure behind the bladder. As pressure builds, it releases forward in pulses through a small jet nozzle at the front of the bladder. These pulses hit the clog with significant force. Hair, grease, soap buildup, and debris get broken up and pushed through the pipe toward the main sewer line. The combination of the bladder sealing the pipe and the pulsing jet creates much more force than a plunger. A plunger pushes air. A drain cleaning bladder pushes water. Water is much denser and transfers force much more effectively to a clog. This is why a drain cleaning bladder works on clogs that a plunger cannot touch. Tools and Materials Needed The list is short. You likely have most of this already. Required: Drain cleaning bladder (sized for your pipe diameter) Garden hose with water source Bucket Old towels or rags Rubber gloves Safety glasses Optional but helpful: Flashlight (to see inside the drain) Drain snake or wire hook (to remove surface hair before using the bladder) Pipe thread tape (if the hose connection leaks) Check the bladder packaging for the pipe size it covers. Most packages show a range like 1.5 to 3 inches. Measure your drain opening if you are unsure. Kitchen sink drains are typically 1.5 to 2 inches. Bathroom sink drains run 1.25 to 1.5 inches. Floor drains and shower drains vary from 2 to 4 inches. Buy a drain bladder that matches or overlaps your pipe size. A bladder that is even one size off will not work correctly. Step-by-Step Guide on How to Use a Drain Cleaning Bladder Follow every step in order. Skipping steps, especially the safety steps, leads to water blowback and property damage. Step 1: Remove Visible Debris From the Drain Before inserting any tool, clear whatever you can reach from the drain opening. Put on your rubber gloves. Use a drain hook, bent wire hanger, or your fingers to pull out any hair, soap chunks, or debris sitting near the drain opening. This is unpleasant but important. If the bladder pushes against a packed surface clog, it may not seal properly against the pipe walls. For bathroom sink drains, remove the stopper first. Most pop-up stoppers unscrew counterclockwise or lift straight out. Some require a small screw underneath to be removed first. Dispose of the removed debris in the trash. Do not push it back into the drain. Step 2: Connect the Bladder to the Garden Hose Thread the drain cleaning bladder onto the end of your garden hose. Most bladders have a standard hose fitting that screws on by hand. Turn it clockwise until it is finger-tight. Do not use a wrench. Over-tightening can damage the rubber fitting. If the connection drips when water is on, wrap the threads with a single layer of pipe thread tape before reconnecting. Thread tape creates a better seal without tightening the fitting further. Check that the bladder is fully deflated before inserting it into the drain. It should be soft and flat. Step 3: Insert the Bladder Into the Drain Push the deflated bladder into the drain opening. Guide it in as far as it will go comfortably. For most sink drains, that is 3 to 6 inches past the drain opening. The bladder needs to be past the P-trap curve for best results. For floor drains and cleanout access points, you can often push the bladder deeper, 12 to 18 inches, to get closer to the clog location. Do not force the bladder around sharp bends. If it meets significant resistance before the hose fitting reaches the drain opening, do not push harder. You risk damaging the bladder or the pipe. Leave the garden hose lying flat and straight on the floor near the drain. Do not coil the hose tightly
how to repair a frost free fauce
Plumbing

How to Repair a Frost Free Faucet: Full Guide

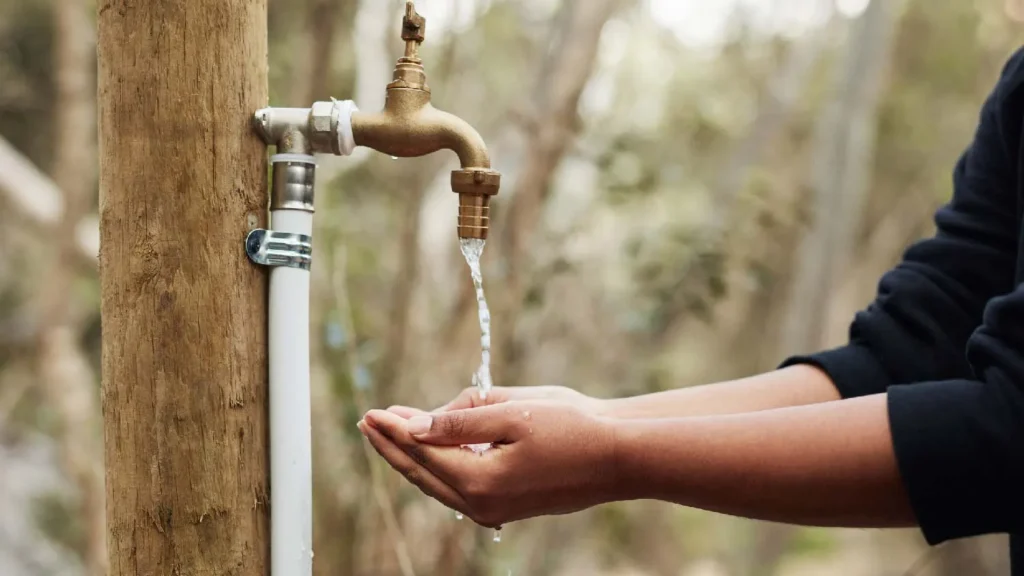
Your outdoor faucet is dripping and winter is coming. That small drip is not just wasting water. It is a warning sign that something inside the faucet has worn out. Most frost free faucet problems are caused by a bad washer, worn packing, or a failed vacuum breaker. Each one costs under $15 to fix with basic tools. Knowing how to repair a frost free faucet correctly saves you from frozen pipes, water damage inside your wall, and an emergency plumber bill. This guide covers every problem, every repair step, and every situation where a pro makes more sense than DIY. What Is a Frost Free Faucet? A frost free faucet is a special outdoor spigot built to prevent freezing in cold weather. A standard outdoor faucet shuts off water right at the spout. When temperatures drop, that water in the spout freezes and expands. Pipes crack. Water floods inside the wall. That is an expensive problem. A frost free faucet works differently. It has a long stem, usually 8 to 12 inches, that extends deep into the wall. The actual water shutoff happens inside the warm part of your home. When you turn the faucet off, water drains out of the cold outdoor section through the spout. No water sits in the cold zone. No freezing. It is also called a frost proof faucet, a sillcock, or an anti-siphon faucet. All of these names describe the same basic design. The anti-siphon feature, handled by a vacuum breaker at the top of the faucet, prevents contaminated water from being pulled back into your home’s water supply. Understanding this design is important. When something goes wrong, the fault almost always traces back to one of three parts: the seat washer, the packing, or the vacuum breaker. Knowing which one failed tells you exactly what to buy and what to fix. Common Problems With Frost Free Faucets Most homeowners deal with one or more of these issues at some point. Dripping from the spout when the faucet is off. This is the most common complaint. The seat washer at the far end of the stem has worn out. It can no longer seal against the valve seat. Water trickles past and drips out the spout. Water leaking around the handle. The packing inside the faucet body has failed. Packing creates a watertight seal around the stem. When it wears out, water escapes around the handle whenever the faucet is running. Frost free faucet leaking from the top of the faucet body. The vacuum breaker has failed. Water drips from the anti-siphon cap on top of the faucet rather than the spout. This is a separate issue from a spout drip and requires a different fix. The faucet will not shut off completely. The seat washer is completely gone or the stem is damaged. Water runs even when the handle is fully closed. Water dripped inside the wall. More serious. The stem, a connection, or the faucet body itself is cracked or damaged. Water is entering the wall cavity instead of the spout. Very low water pressure at the spout. The vacuum breaker is stuck closed or blocked with debris. Water cannot flow freely through the faucet. Frost free faucet leaking after a winter freeze. A hose was left connected over winter. Water could not drain from the stem. It froze, expanded, and cracked something internally. Identifying your specific problem before touching any tools is the most important step. Each issue has a different solution and requires different parts. Tools and Materials Needed You do not need special plumbing experience or an expensive toolkit. Here is what you actually need. Tools: Adjustable wrench or channel-lock pliers Phillips head screwdriver Flathead screwdriver Needle-nose pliers Utility knife Bucket or old towel Materials: Replacement seat washer (bring the old one to match) Replacement packing washer or graphite packing string Vacuum breaker repair kit (if that is the problem) Plumber’s grease or petroleum jelly Teflon tape Hose bib repair kit (optional but covers most parts in one purchase) A hose bib repair kit from any hardware store costs $8 to $15 and typically includes washers, O-rings, and packing material for standard faucet sizes. If your faucet is a common brand like Woodford, BrassCraft, or Mueller, these kits are widely available. For older or less common faucets, bring the old parts to the store to match them. Buy materials after you diagnose the problem, not before. Guessing and buying the wrong parts wastes time and money. Step-by-Step Guide on How to Repair a Frost Free Faucet Follow these steps in order. Do not skip any step to save time. Step 1: Turn Off the Indoor Water Supply Find the shutoff valve for your outdoor faucet. It is usually in the basement, utility room, or crawl space on the pipe that runs to the outdoor spigot. Turn it fully clockwise. Go outside and open the faucet. This releases pressure in the line and drains remaining water from the stem. Water will flow briefly and then stop. Have your towel or bucket ready. If you cannot find the individual shutoff valve, turn off the main water supply to the home. Do not attempt any disassembly with water pressure on the line. Step 2: Remove the Handle Look at the faucet handle. Most frost free faucets have a screw securing the handle to the stem. That screw is either visible on the front, on top, or hidden under a plastic cap. Pry off any decorative cap with a flathead screwdriver. Remove the screw with the appropriate driver. Pull the handle straight off. If it does not come easily, wiggle it gently while pulling. Do not force it. Set the handle and screw somewhere you will not lose them. Step 3: Loosen and Remove the Packing Nut With the handle off, you will see a large hexagonal nut directly behind the handle position. This is the packing nut. It holds the entire stem assembly inside the faucet body. Use your adjustable

how to install toilet fill valve​
Plumbing

How to Install Toilet Fill Valve: Step-by-Step

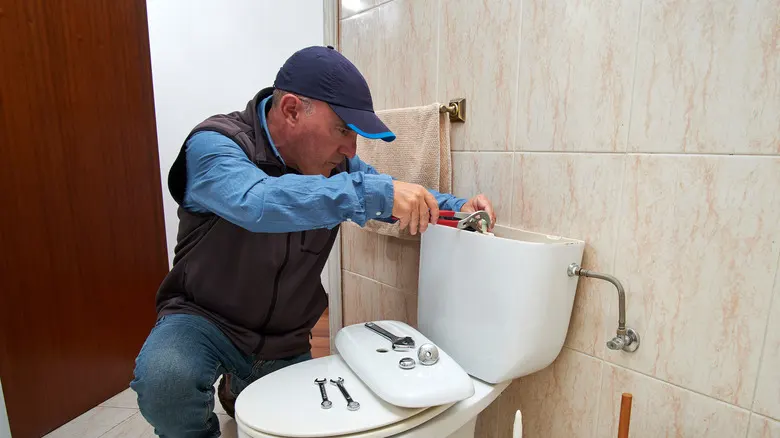
Your toilet keeps running and the water bill is climbing. Nine times out of ten, the fill valve is the problem. The good news is that replacing it takes less than 30 minutes and costs under $20 in parts. No plumber required for most homeowners. Knowing how to install toilet fill valve correctly means no leaks, no wasted water, and a quiet tank after every flush. This guide walks you through every step, every tool, and every mistake to avoid. What Is a Toilet Fill Valve? The fill valve is the part inside your toilet tank that refills it with water after every flush. When you flush, the flapper opens and water drains from the tank into the bowl. Once the tank empties, the fill valve turns on and sends water back in. When the water reaches the right level, the valve shuts off automatically. It is also called a ballcock in older toilets. Modern fill valves are float-cup style or floatless. They are more reliable, quieter, and easier to adjust than the old ballcock design. Without a working fill valve, your toilet either will not refill at all or it will run constantly. Both waste water and money. Signs You Need to Replace a Toilet Fill Valve Do not wait for a flood to act. Watch for these warning signs. The toilet runs non-stop. If you hear water trickling in the tank after the flush cycle should be done, the fill valve is failing. It may not be shutting off at the right water level. The tank takes too long to fill. A healthy fill valve refills the tank in 30 to 60 seconds. If yours takes 3 to 5 minutes, the valve is clogged or worn out. You hear a hissing or whistling sound. That noise is water forcing through a damaged or partially blocked valve. The water level is too high or too low. If water sits above the overflow tube or the tank never fills fully, the valve is not regulating correctly. The toilet randomly flushes on its own. This is called ghost flushing. It often means water is trickling from the tank into the bowl, but a bad fill valve can trigger it too. Any one of these signs is reason enough to install fill valve toilet parts right away. You can read about: Why Do Toilet Valves Go Bad Tools and Materials Needed You do not need a toolbox full of equipment. Here is the short list. Tools: Adjustable wrench or channel-lock pliers Sponge or small towel Bucket Flathead screwdriver (sometimes) Materials: New toilet fill valve (Fluidmaster 400A or equivalent) New supply line (optional but recommended if yours is old) The Fluidmaster 400A is the most widely used fill valve in the US. It fits almost every toilet tank and costs around $10 to $15. You can find it at any hardware store or online. Buy a new braided supply line while you are at it. If yours is plastic or more than 5 years old, replace it at the same time. Step by Step: How to Install Toilet Fill Valve Follow these steps in order. Do not skip steps to save time. Each one matters. Step 1: Turn Off the Water Supply Find the shut-off valve on the wall behind or below the toilet. Turn it clockwise until it stops. Flush the toilet once to drain most of the water from the tank. If the shut-off valve is stuck or does not work, turn off the main water supply to your home. A stuck shut-off valve should be replaced, but that is a separate job. Step 2: Remove Remaining Water from the Tank Even after flushing, 1 to 2 inches of water stays in the bottom of the tank. Use a sponge to soak it up. Wring the sponge into a bucket. Get the tank as dry as possible. This prevents water from spilling on the floor when you remove the old valve. Step 3: Disconnect the Water Supply Line Under the tank, you will see a supply line connecting the shut-off valve to the bottom of the tank. Use your wrench to unscrew the nut connecting it to the fill valve shank at the bottom of the tank. Have a towel ready. A little water will drip out. Step 4: Remove the Old Fill Valve Look under the tank. You will see the fill valve shank sticking through a hole in the tank bottom. There is a large plastic locknut holding it in place. Turn it counterclockwise to loosen. Hand-tight is usually enough to remove it. Once the locknut is off, lift the old fill valve straight up and out of the tank. Discard it. Step 5: Prepare the New Fill Valve Take your new fill valve out of the box. Most modern valves like the Fluidmaster 400A have an adjustable shank height. This is important. Hold the new valve next to the overflow tube inside the tank. The critical fill line on the valve should sit about 1 inch below the top of the overflow tube. Twist the shank to adjust the height until it lines up. This adjustment prevents overfilling the tank, which wastes water and can cause the valve to run constantly. Step 6: Install the New Fill Valve Drop the new valve into the hole in the bottom of the tank. Make sure the shank goes straight through the hole. Press down firmly so the rubber gasket on the underside of the tank seals against the tank bottom. Go underneath the tank. Thread the plastic locknut onto the shank by hand. Turn it clockwise. Tighten it with your hand until it is snug, then give it one more quarter turn with your wrench. Do not overtighten. The plastic threads can crack. Step 7: Attach the Refill Tube Inside the tank, you will see a small flexible tube clipped onto the fill valve. This is the refill tube. It should direct water into the overflow tube, not just

how much does it cost to install a water heater​
Plumbing

How Much Does It Cost to Install a Water Heater? | 2026 Guide

How Much Does It Cost to Install a Water Heater? In 2026, a standard tank water heater installation typically costs about $1,600 to $2,400, while tankless installation can cost around $2,400 to $5,400. Your actual price depends on the heater type, size, fuel source, labor, and any plumbing, electrical, gas-line, or venting work required. A simple replacement using the same type of heater and existing connections usually costs less. A new installation or tankless upgrade can cost more because additional equipment and modifications may be needed. Understanding these costs before hiring a plumber helps you compare estimates and plan your budget. Average Water Heater Installation Cost in 2026 There is no single price that applies to every home. Home Depot currently reports an average total of about $1,950 for standard tank installation, with a typical range of $1,600 to $2,400. Its current tankless installation range is about $2,400 to $5,400, with an average of $4,300. Other 2026 sources report different ranges. This Old House lists overall water heater installation costs from about $1,600 to $5,400, while Angi reports a lower range for many tank-style replacements. These differences are normal because installation projects are not identical. A simple replacement in the same location can be relatively straightforward. A new installation may require new plumbing, electrical work, gas piping, venting, or changes to the installation area. For that reason, use national cost ranges as a starting point rather than a guaranteed price for your home. Water Heater Cost by Type The type of water heater you choose has a major effect on your total installation cost. Traditional Tank Water Heater A traditional storage tank keeps a supply of hot water ready for use. These systems are available in several sizes and can run on electricity, natural gas, or propane. They are usually less expensive to install than tankless systems. Current national estimates put many standard tank installations around $1,600 to $2,400, although smaller or simpler replacements can cost less. A direct replacement is generally less complicated when the new heater uses the same fuel type and fits the existing location. Tankless Water Heater Tankless systems heat water when you need it instead of storing a large volume in a tank. The upfront tankless water heater installation cost is usually higher than a basic tank replacement. Current 2026 estimates range from roughly $1,400 to $3,900 in many projects, while Home Depot reports a broader $2,400 to $5,400 range for tankless purchase and installation. The difference depends heavily on the existing setup. A gas tankless system may need gas-line and venting changes. An electric model may need additional circuits or electrical capacity. These upgrades can make the installation much more expensive than simply purchasing the unit. Heat Pump Water Heater Heat pump water heaters use electricity to move heat from surrounding air into the water. They usually have a higher purchase price than basic tank models but can use less energy during operation. This type also needs an appropriate installation space and electrical connection. Current installation guides describe heat-pump water heater installation as a project that can require professional work, especially when plumbing or electrical changes are needed. You can read about: How to Install a Water Heater What Is Included in Water Heater Installation? When you receive a quote, the equipment itself is only one part of the project. A complete installation may include: Water heater Plumbing connections Installation labor Shutoff valves Required safety components Gas or electrical connections Venting for applicable gas systems Removal of the old heater Disposal Installation materials Permit fees Inspection costs The exact list depends on your home and the selected water heater. For example, Home Depot’s tankless installation estimate includes the heater, permits, installation materials, labor, and removal of the old unit. Always ask what is included before comparing two quotes. A lower quote may leave out work that another contractor has already included. What Factors Affect Water Heater Installation Cost? Several factors can change your final water heater installation cost. Water Heater Size The size of your heater should match your household’s hot-water demand. For tank systems, capacity is measured in gallons. Common residential sizes include 40, 50, 75, and 80 gallons. Larger tanks generally cost more and may require more space. For tankless systems, sizing is based on flow rate and temperature rise rather than storage capacity. Choosing the correct size helps prevent two common problems: paying for more capacity than you need or buying a system that cannot meet your peak demand. Fuel Source Electric and gas water heaters have different installation requirements. An electric heater needs suitable electrical service and wiring. A gas heater needs an appropriate gas supply and safe venting. Changing from one fuel source to another can add substantial work. This may involve new wiring, gas piping, breakers, venting, or other modifications. Installation Location Location can have a major impact on labor. A heater in an open garage or accessible utility room may be easier to replace than one inside a narrow closet, attic, crawlspace, or difficult-to-reach area. Moving the heater can also require longer water lines, new electrical connections, gas piping, or venting. Existing Plumbing Old connections may not fit the new equipment. The plumber may need to replace shutoff valves, modify water lines, repair corroded connections, or reposition piping. These smaller changes can add to the final project cost. Venting Gas water heaters need proper venting for safe operation. If the new unit uses a different venting system from the old heater, additional materials and labor may be required. Tankless gas systems can have especially different venting requirements, depending on the model. Permits and Code Requirements Permit requirements depend on your local jurisdiction and the type of installation. A project may also require an inspection after the work is completed. Ask your plumber whether required permits and inspections are included in the estimate. How Much Does Water Heater Labor Cost? Labor can make up a significant portion of the total project. The amount depends on the type

what is belly in sewer line
Plumbing

What Is Belly in Sewer Line? | Causes & Fixes

Most homeowners never think about their sewer line until something goes wrong. Slow drains, recurring clogs, and foul odors are all warning signs and one of the most common causes behind those symptoms is a pipe belly hiding underground. So what is belly in sewer line systems? A sewer belly is a low spot or downward sag in a sewer pipe that traps waste instead of letting it flow freely to the main sewer. It does not fix itself and gets worse over time. This guide explains exactly what causes it, how to spot it, and what to do about it. What Is Belly in Sewer Line? A sewer line belly also called a pipe belly is a section of your underground sewer pipe that has dropped below the correct slope. Sewer pipes are installed at a precise downward angle, typically 1/4 inch of drop per linear foot. That slope is what moves waste from your home to the municipal sewer or septic system using gravity alone. When a section of that pipe sinks or shifts, it creates a reverse slope or a flat spot. Waste reaches that low point and slows down. Solids settle. Water pools. Over time, that pooling creates blockages, odors, and sewage backups that no amount of drain cleaning fully resolves. What is a belly in a sewer line in practical terms? Think of a garden hose laying flat across a bumpy lawn. Water moves fine on the slope but stalls at any low point. Your sewer line works the same way and a belly is that low point underground where everything stops moving the way it should. How Does a Sewer Belly Form? Sewer bellies do not happen overnight. They develop gradually over months or years as the soil supporting the pipe shifts or settles beneath it. Soil Settlement This is the most common cause. When a home is built, the soil around new sewer lines is disturbed during excavation and then backfilled. That backfilled soil takes years to compact fully. As it settles unevenly, sections of the pipe sink with it. Pipes installed in sandy or loose soil settle faster than those in clay or compacted ground. Tree Root Activity Tree roots grow toward moisture. Sewer lines carry warm, moist air and occasional slow leaks that attract root growth. As roots wrap around or penetrate a pipe, they can gradually displace and push sections of the pipe out of alignment. Ground Shifting and Erosion Freeze-thaw cycles in colder climates cause soil to expand and contract repeatedly. Over years, this movement displaces pipe segments from their original position. Water erosion beneath the pipe from leaks or surface water infiltration removes supporting soil and allows the pipe to drop. Poor Original Installation Sometimes what is a belly in the sewer line traces directly back to how the pipe was installed. If the pipe was not bedded in properly compacted material, if the slope was incorrect from day one, or if the backfill was done carelessly, a belly can develop within just a few years of installation. Age of the Pipe Older clay, cast iron, and Orangeburg pipes are significantly more prone to bellies than modern PVC systems. These materials corrode, crack, and lose structural integrity over decades making them more susceptible to displacement as the surrounding soil moves. Signs You May Have a Belly in Sewer Line The tricky thing about a pipe belly is that it is underground and invisible. You identify it from what it does to your drains and plumbing, not from seeing it directly. Slow drains throughout the house not just one fixture but multiple. When the belly is in the main line, every drain in the house is affected to some degree. Recurring clogs you clear the drain, it works for a few days, then slows again. The belly keeps accumulating waste in the same spot, so the problem returns no matter how many times you snake the line. Gurgling sounds from drains or toilet air gets trapped in the low point of the belly. When water pushes through, it displaces that air and creates gurgling or bubbling sounds at nearby fixtures. Sewage odors inside or outside the home waste sitting stagnant in a belly generates hydrogen sulfide gas. That gas finds its way back through drain traps and into living spaces, or surfaces as a sulfur smell in the yard above the pipe. Wet or unusually green patches in the yard and a belly that has progressed to a full blockage or pipe failure can push sewage into the surrounding soil. Grass and plants directly above the pipe line grow noticeably faster and greener than the surrounding area. Frequent need for professional drain cleaning if you are calling a plumber to clear the same drain every few months, the issue is structural, not just debris. A belly is one of the most common structural causes of recurring clogs. How Plumbers Diagnose a Belly in Sewer Line The only reliable way to confirm a belly is a sewer camera inspection. No surface-level test or guesswork replaces it. A plumber inserts a waterproof camera on a flexible cable through a cleanout access point. The camera transmits live video of the inside of the pipe as it moves through the line. The technician watches for: Sections of standing water inside the pipe that should be dry between uses A visible sag or low point where the pipe changes direction downward then back up Sediment accumulation at the low point sand, silt, and organic buildup that has settled there over time Root intrusion or pipe damage at or near the belly location Alongside the camera, many plumbers use a locating device that tracks the camera head’s position above ground. This allows them to mark the exact surface location and depth of the belly for accurate excavation if repair is needed. The camera inspection typically takes 45 minutes to 1.5 hours depending on the length of the sewer line and access conditions. Why a

what is considered a plumbing emergency
Plumbing

What Is Considered a Plumbing Emergency? A Simple Guide

A burst pipe at 2 AM. A toilet overflowing with no sign of stopping. Raw sewage backing up into your shower. These aren’t just stressful, they can cause serious damage to your home within minutes if you don’t act fast. Knowing the difference between a problem that can wait and one that can’t save you money, stress, and a lot of water damage. So, what is considered a plumbing emergency? Simply put, it’s any plumbing issue that puts your health, safety, or home structure at immediate risk. If water is spreading fast, sewage is coming up, or you’ve lost your water supply entirely, that’s an emergency. Keep reading. We’ll walk you through exactly what qualifies, what to do first, and when it’s okay to wait for a regular appointment. What Is Considered a Plumbing Emergency? Not every plumbing problem needs a midnight phone call. But some absolutely do. A plumbing emergency is any situation where delay causes significant damage, creates a health hazard, or leaves your home without basic water service. What counts as a plumbing emergency typically falls into three categories: Active water damages water leaking or flooding where it shouldn’t be. Sewage or contamination risk raw sewage, gas smells near pipes, or black water backup. Total loss of service: no running water, no hot water during extreme cold, or a completely blocked main line. If your situation fits one of these, stop reading and call a plumber now. If you’re not sure, keep going. We’ve got a full breakdown below. Signs You Are Facing a Plumbing Emergency Catching the right plumbing emergency signs early is the difference between a $200 fix and a $20,000 restoration job. Watch for these red flags: Water is spreading fast. If water is actively pooling on your floor, soaking drywall, or dripping through a ceiling every second counts. Water damages compounds quickly. You smell sewage. A strong sewage smell indoors means your drain or sewer line may be cracked or backed up. This is a serious health hazard. Don’t ignore it. Your toilet is overflowing and won’t stop. One flush that overflows is annoying. A toilet that keeps overflowing with no sign of stopping is a plumbing emergency especially if the shutoff valve isn’t working. No water anywhere in the house. If you’ve turned on every faucet and nothing comes out, there’s a major blockage, broken main line, or pressure failure. A pipe has visibly burst or cracked. You can see water shooting or streaming from a pipe. Shut off your main water valve immediately and call. Multiple drains are backed up at once. One slow drain is a clog. Two or more drains backing up at the same time points to a main sewer line issuing a true emergency. The water heater is leaking or making banging sounds. A leaking water heater can flood fast. Banging sounds may indicate dangerous pressure buildup. You can read about: How to Handle a Plumbing Emergency Common Plumbing Emergencies and How We Handle Them Burst Pipes Pipes burst from freezing temperatures, old age, or sudden pressure changes. When this happens, water spreads into walls, floors, and ceilings within minutes. We shut off the water supply, locate the break, and replace the damaged section. We also inspect surrounding pipes for hidden weaknesses. Sewage Backup This is one of the most urgent plumbing emergency signs. Raw sewage contains bacteria and pathogens. If sewage is coming up through a floor drain, toilet, or tub, your sewer line is likely fully blocked or collapsed. We use camera inspection and hydro-jetting to clear or repair the line. Overflowing Toilets If the toilet keeps running water after multiple flushes and the shutoff valve fails, water can spread across the bathroom floor in minutes. We assess the cause of blockage, failed flapper, or tank issue and fix it on the spot. Gas Line Plumbing Leaks If you smell gas near your water heater or any gas-connected appliance, leave the house immediately and call your gas company first, then a licensed plumber. This is a life-safety issue. No Hot Water in Winter In freezing temperatures, loss of hot water can be dangerous for elderly people or young children. If your water heater has completely failed, we treat this as an urgent call. Major Leak Under a Slab Slab leaks are sneaky. You might hear water running when everything is off, or notice warm spots on your floor. Left untreated, slab leaks destroy foundations. Early detection saves enormous cost. You can read about: what to do if ceiling is leaking ? First Steps to Take During a Plumbing Emergency Don’t panic. These steps protect your home while you wait for help. Step 1: Shut off the water. Know where your main shutoff valve is before an emergency happens. It’s usually near your water meter, under the sink, or behind a wall panel. Turn it clockwise to close. Step 2: Turn off the water heater. If you’ve shut off the main supply, protect your water heater from running dry by switching it to “pilot” or turning it off. Step 3: Open drains and faucets. After shutting off the main, open faucets to drain the remaining water from pipes. This reduces pressure and slows any active leak. Step 4: Don’t use electrical switches near standing water. Water and electricity are a deadly combination. If flooding is near outlets or panels, stay out and call an electrician too. Step 5: Document the damage. Take photos and video before cleanup. You’ll need this for insurance claims. Step 6: Call a licensed emergency plumber. Now is the time to call. Don’t wait until morning if water is actively spreading. You can read about: How Much Do Plumbers Charge Per Hour Plumbing Problems That Are Usually NOT Emergencies Knowing when to call emergency plumber services also means knowing when NOT to. Here are issues that can wait for a regular appointment: A slow-draining sink. Annoying, yes. Emergency? No. A standard drain cleaning appointment will handle this. Running toilet. If the

can tankless water heater be installed outside
Plumbing

Can Tankless Water Heater Be Installed Outside? Full Guide

Yes, you can install a tankless water heater outside if you choose a model specifically designed for outdoor use. These units save significant indoor space and do not require complex indoor venting systems. However, your local climate and proper freeze protection are the most important factors to consider before moving your unit outdoors. Many homeowners ask, can tankless water heater be installed outside to free up space in a laundry room or closet. In warmer regions like Los Angeles, this is a very common practice that simplifies the installation process. You just need to ensure the unit is rated for exterior elements and installed by a professional who understands local codes. Can Tankless Water Heater Be Installed Outside Safely? Safety comes down to two things: the unit and the installation. Outdoor-rated tankless water heaters are built to handle weather exposure. They have enclosures that protect the internal components from rain, dust, and UV rays. They are also tested and certified to operate within specific temperature ranges. The safety concern most people have is about gas lines and venting. Outdoor gas units vent combustion gases directly into the open air, which eliminates the need for indoor flue systems. This is actually a safer venting arrangement than many indoor setups because there is no risk of carbon monoxide buildup inside the home. Electric outdoor units have sealed enclosures that protect the electrical components from moisture. As long as the installation meets local electrical code requirements, they are just as safe outdoors as indoors. The main safety risk with outdoor installation is freezing temperatures. A unit that is not rated for your local climate or that is not properly winterized can freeze and sustain serious internal damage. More on that in a moment. Benefits of Installing a Tankless Water Heater Outside There are real advantages to choosing an outside tankless water heater, and they go beyond just saving indoor space. No venting required for gas units. Indoor gas water heaters need a flue or direct vent system to route combustion gases outside. Outdoor units vent naturally into the air. This eliminates venting materials, installation complexity, and ongoing maintenance of the vent system. Frees up indoor space. Even a compact tankless unit takes up wall space. Installing it outside keeps utility rooms, garages, and basements clear for other uses. Easier access for maintenance. Annual flushing, filter cleaning, and inspection are all easier when the unit is mounted on an exterior wall rather than tucked into a utility closet. Reduced installation cost in some cases. When the unit can be mounted directly on an exterior wall close to the gas meter or electrical panel, the supply runs are shorter. Shorter runs mean less material and less labor. Good for warm and moderate climates. In areas where temperatures rarely drop below freezing, an outside tankless water heater works year-round without any additional freeze protection measures. Best Climate for Outdoor Tankless Water Heaters Climate is the biggest factor when deciding whether you can install a tankless water heater outside. Warm climates are ideal. Southern California, Arizona, Texas, Florida, and similar regions see very few freeze events. In these areas, an outdoor tankless water heater works well year-round with minimal concern about temperature-related damage. Moderate climates with occasional cold snaps can work too, but the unit needs freeze protection features. Most quality outdoor models from brands like Rinnai, Noritz, and Navien include built-in freeze protection that activates automatically when temperatures drop. These systems typically protect the unit down to about 5 degrees Fahrenheit. Cold climates are the most challenging. In areas that regularly see temperatures well below freezing for extended periods, an outdoor installation requires careful planning. Insulated enclosures, heat tape on water lines, and possibly a recirculation system to keep water moving through the unit are all worth considering. If your area sees sustained temperatures below minus 20 degrees Fahrenheit, an indoor installation is likely the more practical long-term choice. Types of Outdoor Tankless Water Heaters Not every tankless unit is built for outdoor use. Understanding the types helps you buy the right product. Purpose-built outdoor models are designed from the ground up for external installation. They have weather-resistant enclosures, sealed component compartments, and built-in freeze protection. This is the right choice for most homeowners considering a tankless water heater outside. Indoor models with outdoor enclosures are standard units housed in an aftermarket protective cabinet. This approach works but requires careful selection of the enclosure to make sure it is compatible with the unit and rated for your local conditions. Condensing outdoor units are the most efficient gas option. They extract additional heat from combustion gases before venting, which pushes efficiency ratings above 90 percent. They cost more upfront but deliver lower operating costs over time. Non-condensing outdoor units are less expensive and simpler to maintain. They are a good choice for homeowners who want reliability without the higher price of a condensing model. Gas vs. Electric Outdoor Tankless Water Heaters Both fuel types work outdoors, but they have different strengths. Gas outdoor units are the most popular choice for whole-home hot water. They heat water faster and handle higher flow rates, which means they can supply multiple fixtures at the same time without pressure or temperature drops. Natural gas and propane models are both available. For outdoor gas installation, the key requirements are a properly sized gas line, a shutoff valve within reach of the unit, and compliance with local gas code setbacks. Most codes require gas appliances to be a certain distance from windows, doors, and other openings. Electric outdoor units are simpler to install because there is no gas line or combustion to manage. They work well for point-of-use applications or smaller homes with lower hot water demand. The challenge with whole-home electric tankless units is electrical capacity. They draw significant amperage and often require panel upgrades. In an outdoor installation, the electrical run from the panel also needs to be weatherproofed and properly rated for outdoor use. For most households asking can

can water heater explode if turned off​
Plumbing

Can Water Heater Explode If Turned Off? What You Must Know

A water heater explosion is one of those events most homeowners never think about until something goes wrong. These units run quietly in the background every day, and it is easy to assume they are completely safe. But under certain conditions, they can become dangerous fast. Can water heater explode if turned off? In most cases, turning it off reduces the risk. But it does not eliminate danger entirely if the unit already has internal problems. This guide explains exactly what causes explosions, what warning signs to watch for, and how to keep your home safe. Understanding How a Water Heater Works Before getting into risk, it helps to understand what is actually happening inside the unit. A standard tank water heater stores 30 to 80 gallons of water and keeps it at a set temperature, usually between 120 and 140 degrees Fahrenheit. A gas burner or electric element heats the water. As water heats up, pressure builds inside the tank. To manage that pressure, every water heater is equipped with a temperature and pressure relief valve, commonly called a T&P valve. This valve is designed to open automatically if pressure or temperature gets too high, releasing water and relieving the stress on the tank. When everything works correctly, the T&P valve keeps pressure in a safe range and the unit runs without issue. The danger starts when this system fails. So, Can Water Heater Explode If Turned Off? This is the question most people come here with, so here is a direct answer. Turning off a water heater lowers the risk of explosion because it stops the heating element or burner from adding more heat to the water. Less heat means less pressure buildup. In that sense, a turned-off unit is safer than one actively heating. But can water heater explode if turned off completely? Yes, under specific conditions. If the T&P valve is already faulty and the tank is already under excessive pressure when you turn the unit off, that pressure does not disappear immediately. The water inside stays hot for hours. If the valve fails to release that pressure, the risk remains. A turned-off unit with a corroded tank, a stuck T&P valve, or sediment buildup that has damaged the lining is still a potential hazard. Turning it off is the right first step, but it is not a complete fix for an already compromised unit. What Are the Causes of an Exploding Water Heater? Water heater explosions are rare, but they do happen. When they do, the cause is almost always one of these: 1. Faulty or Blocked T&P Valve The T&P valve is the primary safety device. If it corrodes, gets stuck, or is physically blocked, pressure cannot escape. The tank continues to build pressure until something gives. That something is usually the tank wall, and the result is a water heater explosion. T&P valves should be tested once a year. Lift the test lever briefly and check that water flows out. If nothing comes out or the valve leaks constantly after the test, it needs to be replaced immediately. 2. Excessive Sediment Buildup Over time, minerals from hard water settle at the bottom of the tank. This layer of sediment acts as insulation between the burner and the water. The burner has to work harder and longer to heat the water through the sediment layer. That extra heat causes the tank lining to overheat and weaken. In severe cases, the bottom of the tank overheats, the metal warps, and the pressure inside spikes dangerously. Flushing the tank once a year prevents this. 3. Thermostat Set Too High A thermostat set above 140 degrees Fahrenheit pushes the unit to heat water beyond a safe temperature range. High water temperatures produce more steam and higher pressure. If the T&P valve cannot keep up, the risk of a hot water heater exploding rises sharply. The recommended setting is 120 degrees Fahrenheit. This is hot enough for everyday use and safely below the threshold where pressure becomes dangerous. 4. Gas Leaks For gas-powered units, a gas leak near the water heater creates a completely different kind of explosion risk. This is not a pressure explosion inside the tank. It is a combustion explosion caused by ignition of leaked gas. This type of event is often more violent and more destructive. If you smell gas near your water heater, do not touch any switches. Leave the house immediately and call your gas utility or emergency services. 5. Corrosion and Tank Degradation Older tanks corrode from the inside out. The anode rod, which is designed to attract corrosive minerals and protect the tank lining, eventually depletes. Once it is gone, the tank itself starts to corrode. Thin or corroded walls cannot withstand normal operating pressure, and the risk of failure grows each year. Most tanks last 8 to 12 years. After that, the risk of structural failure rises significantly. You can read about: How to Drain a Hot Water Heater What Are the Signs of a Water Heater Likely to Explode? Can hot water heaters explode without warning? Not usually. There are almost always signs before a serious failure. Knowing what to look for can save your home and your life. Popping or rumbling sounds. A banging or rumbling noise during heating is a sign of heavy sediment buildup at the bottom of the tank. This is one of the most common warnings people ignore. Water leaking from the T&P valve. A small drip from the relief valve occasionally is normal during heating. Constant dripping or water pooling under the valve means it is under more stress than it should be. Get it inspected right away. Rotten egg smell near the tank. For gas units, this is a potential gas leak. Treat it as an emergency. Brown or rusty water from hot taps. Rust-colored water means the inside of your tank is corroding. This weakens the tank walls over time and increases the risk of rupture. Water around the

will drain cleaner dissolve hair
Plumbing

Will Drain Cleaner Dissolve Hair? Here’s the Truth

Yes, most chemical drain cleaners can dissolve hair, but they rarely clear the entire clog. These products use harsh chemicals like sodium hydroxide to melt the organic proteins in hair. However, they often leave behind a thick, sticky sludge that causes the drain to clog again very quickly. Many homeowners ask, will drain cleaner dissolve hair effectively enough to skip a plumber? While it works on a surface level, it is rarely a long-term fix. At Derks Plumbing, we see that these chemicals often damage your pipes more than they help the hair move through. Will Drain Cleaner Dissolve Hair Effectively? The short answer is yes, certain drain cleaners do dissolve hair. But the key word is certain. Caustic drain cleaners, like those containing sodium hydroxide (lye), are the most effective at breaking down hair. Hair is made of a protein called keratin. Sodium hydroxide breaks the chemical bonds in keratin, turning solid hair into a soft, mushy material that can wash down the pipe. Products like Drano Max Gel and Liquid-Plumr are built around this chemistry. They are thick, so they sink through standing water and sit directly on the clog. That said, will drain cleaner dissolve hair completely every time? Not always. A large, compacted hair clog that has mixed with soap scum and grease may not fully dissolve with one treatment. Some clogs need a second application or a different approach entirely. How Drain Cleaners Work on Hair Understanding the chemistry helps you pick the right product and use it correctly. Caustic (Alkaline) Cleaners These are the most common types you find at a hardware store. They contain lye or potassium hydroxide. Here is what happens when they contact hair: The chemical generates heat inside the pipe. That heat speeds up the reaction. The lye breaks apart the keratin bonds in hair strands. Hair turns soft and dissolves into small particles. Water flushes those particles out. This process usually takes 15 to 30 minutes, depending on the product and the size of the clog. Oxidizing Cleaners These use bleach, peroxides, or nitrates. They release oxygen when they react with organic material. That oxygen breaks down the hair cells. They are less aggressive than caustic cleaners but still work on light to moderate hair clogs. Acid-Based Cleaners These are the strongest options. They use sulfuric acid and can dissolve hair very quickly. But they are not sold widely to consumers because they are dangerous. They can burn skin on contact and damage most pipe materials. Leave acid-based products to licensed plumbers. Enzyme Cleaners Enzyme drain cleaners use bacteria to digest organic material. They will break down hair, but slowly. They work best as a monthly maintenance treatment, not for clearing a full hair clog. If your drain is completely blocked, an enzyme cleaner will not give you fast results. Does Drain Cleaner Dissolve Hair in All Types of Drains? Does drain cleaner dissolve hair in every situation? That depends on where and what you are dealing with. Bathroom sink drains: Yes, caustic drain cleaners work well here. Hair and soap scum are the main culprits, and these products are designed for that combination. Shower drains: Same result. Drano Max Gel is a popular choice here because it handles the standing water that tends to build up. Bathtub drains: These can be trickier. The drain opening is smaller, and the clog may be deeper. A drain cleaner that dissolves hair works if the clog is within reach, but deep clogs may need a snake. Kitchen sinks: Hair is rarely the issue in kitchen drains. The clog is more likely grease and food. Using a hair-focused product here is not the best choice. Toilets: Most drain cleaners are not safe for toilets. They are not designed for the materials used in toilet traps. Stick to products made specifically for toilet use. You can read about: How Much Does it Cost To Snake a Drain Are Drain Cleaners Always Effective for Hair Clogs? No. There are situations where even the best drain cleaner that dissolves hair will not be enough. When the clog is too large: A big ball of tangled hair mixed with soap and grease is too dense for chemicals to fully penetrate. The outer surface may dissolve, but the inner core stays intact. When there are multiple clogs: If your pipe has several partial blockages, a chemical cleaner may clear one and leave others behind. Water flow might improve slightly but not fully return to normal. When the clog is too deep: Chemicals lose strength as they travel down a pipe. A clog sitting deep in the line may not get enough chemical contact to dissolve. When the pipe is damaged: If your pipe is cracked or corroded, a chemical cleaner can make things worse. It may widen a crack or eat through weakened sections. In these cases, learning how to dissolve hair in drains with chemicals is not the solution. A physical method or professional help is the better path. Risks of Using Drain Cleaner on Hair Clogs Drain cleaners do work on hair, but they come with real risks. You should know these before you pour anything down your drain. Pipe Damage Caustic chemicals generate heat. In older metal pipes or PVC pipes with existing wear, that heat can warp or weaken the material over time. Using chemical cleaners repeatedly in the same drain speeds up this damage. Chemical Burns These products are serious. They burn skin and eyes on contact. Always wear gloves. Keep the room ventilated. Do not lean over the drain while pouring. Mixing Products Never mix two drain cleaners. Never pour a new product into a drain that still has a previous cleaner sitting in it. The chemical reaction can be violent and produce harmful gases or cause pipes to crack under pressure. Septic System Damage If your home uses a septic system, strong chemical cleaners can kill the bacteria that keep your tank working. Enzyme cleaners are the safe choice

how to install a shut off valve for toilet​
Plumbing

How to Install a Shut Off Valve for Toilet Step-by-Step

Installing a toilet shut off valve is a vital skill for any homeowner. You can finish this project in under an hour by turning off the main water, cutting the old pipe, and securing a new compression or push-fit valve. This simple fix prevents leaks and makes future bathroom repairs much easier to handle. Learning how to install a shut off valve for toilet protects your home from sudden water damage. At Derks Plumbing, we believe every homeowner should know the basics of their water system. This guide will help you choose the right part and install it like a pro using basic tools you likely already own. What Is a Toilet Shut Off Valve? A toilet shut off valve is a small valve located on the water supply line behind or beneath your toilet. It controls the water flow into the toilet tank. When you need to make repairs or stop a leak, this valve lets you cut the water supply without turning off water to your whole house. Most homes have one of two types: a compression valve or a ball valve. The valve connects the supply line from the wall to the bottom of the toilet tank. Quick Fact: Shut off valves are also called “stop valves” or “supply valves.” They all do the same job. Signs You Need to Replace or Install a New Valve Not sure if your valve needs attention? Look for these warning signs:       Water pooling around the base of your toilet       The valve handle is stuck and won’t turn       Slow or weak water refill after flushing       Visible corrosion, rust, or mineral buildup on the valve body       Dripping water from the valve connection point       You’re doing a full toilet replacement and the old valve is worn If you spot any of these issues, it’s time to replace the toilet water supply valve. Waiting too long can lead to bigger water damage and higher repair costs. Tools and Materials You’ll Need Before you start, gather everything you need. Running back to the hardware store mid-job is frustrating. Tools       Adjustable wrench or channel-lock pliers       Pipe cutter or hacksaw (if cutting copper pipe)       Bucket and old towels       Teflon tape (also called plumber’s tape)       Flashlight or headlamp       Screwdriver (flathead) Materials       New shut off valve (match the type to your pipe)       New supply line (flexible braided stainless is best)       Compression ring and nut (if not included with valve) Pro Tip: Bring your old valve to the hardware store. This helps you match the size and thread type exactly. Types of Toilet Shut Off Valves Explained Choosing the right valve matters. The wrong type won’t fit your pipe or may leak. Here are the main options: 1. Compression Valve This is the most common type in older homes. It uses a brass ring that compresses around the pipe when you tighten the nut. No soldering needed. Works on copper and plastic pipe. 2. Ball Valve Ball valves use a rotating ball mechanism inside. They’re very reliable and tend to last longer. They open and close with a quarter-turn handle. Great for new installs. 3. Angle Stop Valve This is the standard shape for most toilets. The inlet comes from the wall and the outlet angles up to the supply line. Most toilet installations use this style. 4. Straight Stop Valve Used when the water supply pipe comes up through the floor instead of the wall. Less common but still widely available. 5. Push-Fit (SharkBite) Valve Push-fit valves don’t need tools or soldering. You just push them onto the pipe. They’re fast and work on copper, PEX, and CPVC. Great for beginners. How to Install a Shut Off Valve for Toilet (Step-by-Step) Here’s how to install a shut off valve for toilet the right way. Follow each step carefully and take your time. Step 1: Turn Off the Main Water Supply Find your home’s main water shut off valve. It’s usually near the water meter, in the basement, or in a utility closet. Turn it clockwise until it stops. Open a nearby faucet to release pressure and confirm the water is off. Safety Note: Never skip this step. Even a small flow of water can make the job messy and difficult. Step 2: Flush and Empty the Toilet Tank Flush the toilet to remove as much water as possible from the tank. Then use a sponge or towels to soak up any remaining water inside the tank and the supply line. Place your bucket under the valve connection point. Step 3: Disconnect the Old Supply Line Use your adjustable wrench to unscrew the supply line from the bottom of the toilet tank. Turn counterclockwise. Have your bucket ready, as some water will drip out. Set the old supply line aside. Step 4: Remove the Old Shut Off Valve Now unscrew the old valve from the water supply pipe. If it’s a compression valve, you’ll need to remove the compression nut and ring too. If the old valve is soldered (common in older homes), you may need a pipe cutter to remove it. Cut the pipe just behind the valve and leave enough pipe length for the new valve to attach. Heads Up: If your pipe is soldered, this step is trickier. Push-fit or compression valves are the easiest replacement options. Step 5: Clean and Prep the Pipe Wipe the pipe clean with a dry cloth. If it’s copper, use emery cloth to lightly sand the outside of the pipe end. This helps the new valve seat properly and prevents leaks. Check for any corrosion and cut it off if needed. Step 6: Install the New Shut Off Valve Slide the compression nut onto the pipe first (threads facing out), then the compression ring. Push

Fast and Efficient Plumbing Services in Eagle Rock

Client Reviews

Posted on Google Google
Ryan Haden profile picture
Ryan Haden
Google star 1Google star 2Google star 3Google star 4Google star 5Trustindex verifies that the original source of the review is Google.
Could not have been happier with Alex! We was right on time, polite, fixed all my kitchen sink issues and have me good tips on how to best maintain. I will for sure be using him again and highly recommend anyone who needs a great plumber to use his services as well. Thank you!
Posted on Google Google
Lorena Marcoe profile picture
Lorena Marcoe
Google star 1Google star 2Google star 3Google star 4Google star 5Trustindex verifies that the original source of the review is Google.
Talk about a professional...yes, I am talking about Alex Derks, Derks Plumbing. He is by far the most knowledgeable plumber we have ever had the pleasure of hiring. He's been in the plumbing business for years and it shows. Any questions you have re: plumbing issues, install, etc., Alex is your man. So happy with his work and he has a great sense of humor as well... extremely easy to talk to...thank you Alex!!!
Posted on Google Google
Andrew Jalil profile picture
Andrew Jalil
Google star 1Google star 2Google star 3Google star 4Google star 5Trustindex verifies that the original source of the review is Google.
Alex did a great job installing my kitchen faucet and an under-sink Aquasana water filter. He also addressed a few other plumbing-related issues. He was friendly and helpful. Excellent work!
Posted on Google Google
Abigail Bigham profile picture
Abigail Bigham
Google star 1Google star 2Google star 3Google star 4Google star 5Trustindex verifies that the original source of the review is Google.
Alex does what other plumbers cannot do! He is our go to.
Posted on Google Google
Danielle Driver profile picture
Danielle Driver
Google star 1Google star 2Google star 3Google star 4Google star 5Trustindex verifies that the original source of the review is Google.
Alex is very friendly and responsive. What a pleasure to work with!
Posted on Google Google
Lawrence Isaacs profile picture
Lawrence Isaacs
Google star 1Google star 2Google star 3Google star 4Google star 5Trustindex verifies that the original source of the review is Google.
Very very happy with the work Alex did for us replacing the tanks in our Aquasana filtration system. From first contact over the phone through job completion Alex was a pleasure to work with. He explained what he was doing, and why, every step of the way, and made sure we understood what we needed to do to maintain the system. Strongly recommend Alex!
Posted on Google Google
Joey Aucoin profile picture
Joey Aucoin
Google star 1Google star 2Google star 3Google star 4Google star 5Trustindex verifies that the original source of the review is Google.
Alex Derks has been such a lifesaver for me. Anytime I'm in a pinch with the plumbing in my home, Alex is only a phone call away and I've only seen great results from his work. He's reliable, knowledgable, and entirely trustworthy. A must-have source when owning a home.
Posted on Google Google
Eric Gorman profile picture
Eric Gorman
Google star 1Google star 2Google star 3Google star 4Google star 5Trustindex verifies that the original source of the review is Google.
After working with dozens of plumbing services in the LA area, I can confidently say Derks is the best in the business. On time, reliable and capable of even the most difficult tasks, Derks goes above and beyond to make sure your water system is working correctly.
Posted on Google Google
Jason Gruenbaum profile picture
Jason Gruenbaum
Google star 1Google star 2Google star 3Google star 4Google star 5Trustindex verifies that the original source of the review is Google.
Excellent know-how and fast!! Reasonable pricing and super responsive!!
Posted on Google Google
Jonathan Hepfer profile picture
Jonathan Hepfer
Google star 1Google star 2Google star 3Google star 4Google star 5Trustindex verifies that the original source of the review is Google.
Alex is an expert plumber, and he always goes out of his way to educate me about how to prevent future issues. Highly recommended!

Derks Plumbing has been providing professional plumbing services to Eagle Rock residents for over 20 years. Our experience and strong reputation have allowed us to grow, and we are proud to serve customers in 15 nearby areas, including Venice, Santa Monica, Beverly Hills, and more.

Contact

Hours of Operation

Monday: Open 24 Hours
Tuesday: Open 24 Hours
Wednesday: Open 24 Hours
Thursday: Open 24 Hours
Friday: Open 24 Hours
Saturday: Open 24 Hours
Sunday: Open 24 Hours

© 2026 Created by Localpro1

Scroll to Top