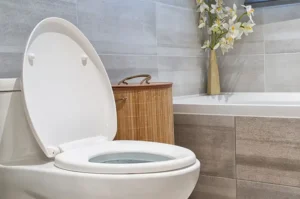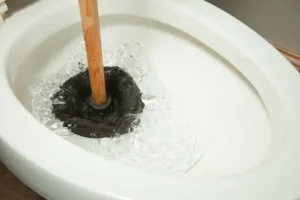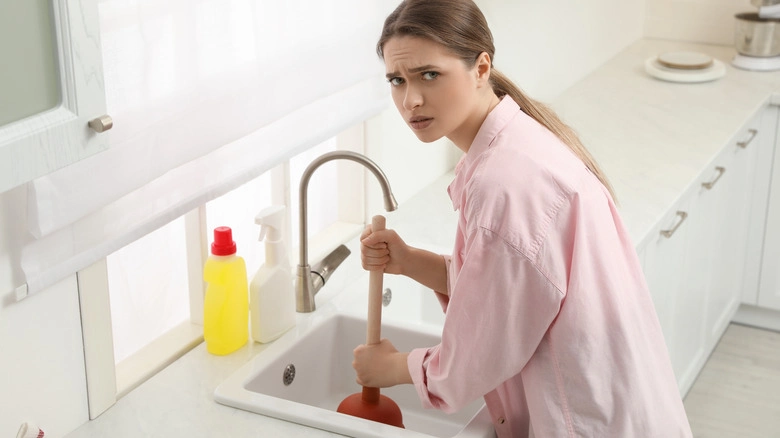
A clogged drain is frustrating. A plunger sometimes works. Chemical drain cleaners often do not. And calling a plumber for every slow drain gets expensive fast. A drain cleaning bladder solves most household clogs in under 15 minutes using nothing but water pressure. It costs $10 to $20 and connects to any standard garden hose.
Knowing how to use a drain cleaning bladder correctly is the difference between clearing the clog and making it worse. This guide covers every step, every safety rule, and every situation where this tool works and where it does not.
What Is a Drain Cleaning Bladder?
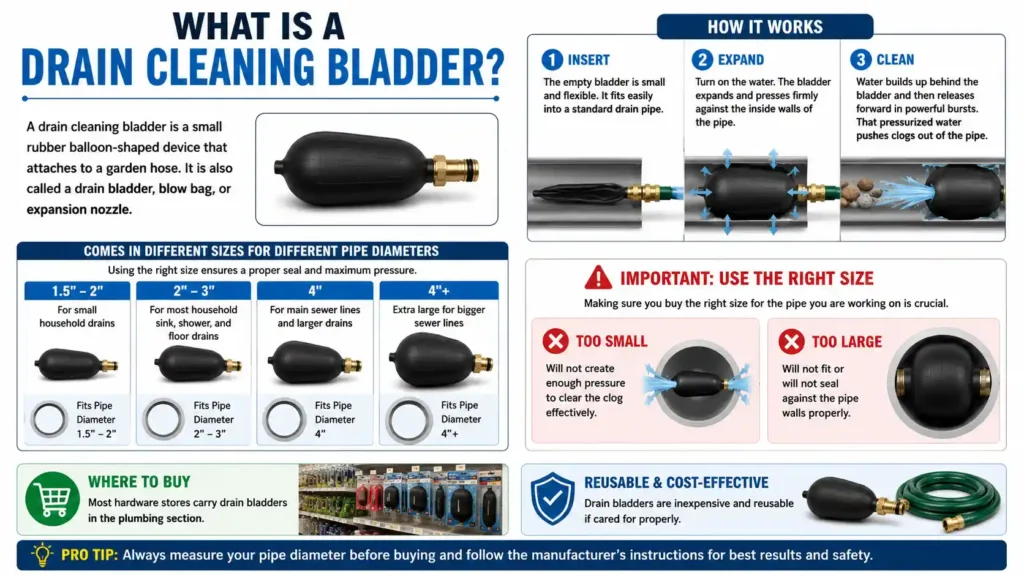
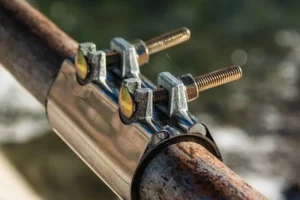
A drain cleaning bladder is a small rubber balloon-shaped device that attaches to a garden hose. It is also called a drain bladder, blow bag, or expansion nozzle.
The bladder is small when empty. It fits easily into a standard drain pipe. Once you turn the water on, the bladder expands and presses against the inside walls of the pipe. Water builds up behind it and then releases forward in powerful bursts. That pressurized water pushes clogs out of the pipe.
Drain bladders come in different sizes for different pipe diameters. The most common sizes cover 1.5-inch to 3-inch pipes, which handles most household sink, shower, and floor drains. Larger bladders are made for 4-inch sewer lines.
A drain bladder for sewer line use is the largest type. These handle main line clogs that a standard bladder cannot reach or clear. Make sure you buy the right size for the pipe you are working on. Using a bladder that is too small will not create enough pressure. Using one that is too large will not fit or will not seal against the pipe walls properly.
Most hardware stores carry drain bladders in the plumbing section. They are inexpensive and reusable if cared for properly.
How Does a Drain Cleaning Bladder Work?
The working principle is simple. Water pressure breaks up and pushes the clog through the pipe.
When you insert the bladder into the drain and turn on the hose, water flows into the bladder through a small inlet. The bladder inflates and presses against the inside walls of the pipe. This creates a seal that traps water pressure behind the bladder.
As pressure builds, it releases forward in pulses through a small jet nozzle at the front of the bladder. These pulses hit the clog with significant force. Hair, grease, soap buildup, and debris get broken up and pushed through the pipe toward the main sewer line.
The combination of the bladder sealing the pipe and the pulsing jet creates much more force than a plunger. A plunger pushes air. A drain cleaning bladder pushes water. Water is much denser and transfers force much more effectively to a clog.
This is why a drain cleaning bladder works on clogs that a plunger cannot touch.
Tools and Materials Needed
The list is short. You likely have most of this already.
Required:
- Drain cleaning bladder (sized for your pipe diameter)
- Garden hose with water source
- Bucket
- Old towels or rags
- Rubber gloves
- Safety glasses
Optional but helpful:
- Flashlight (to see inside the drain)
- Drain snake or wire hook (to remove surface hair before using the bladder)
- Pipe thread tape (if the hose connection leaks)
Check the bladder packaging for the pipe size it covers. Most packages show a range like 1.5 to 3 inches. Measure your drain opening if you are unsure. Kitchen sink drains are typically 1.5 to 2 inches. Bathroom sink drains run 1.25 to 1.5 inches. Floor drains and shower drains vary from 2 to 4 inches.
Buy a drain bladder that matches or overlaps your pipe size. A bladder that is even one size off will not work correctly.
Step-by-Step Guide on How to Use a Drain Cleaning Bladder
Follow every step in order. Skipping steps, especially the safety steps, leads to water blowback and property damage.
Step 1: Remove Visible Debris From the Drain
Before inserting any tool, clear whatever you can reach from the drain opening.
Put on your rubber gloves. Use a drain hook, bent wire hanger, or your fingers to pull out any hair, soap chunks, or debris sitting near the drain opening. This is unpleasant but important. If the bladder pushes against a packed surface clog, it may not seal properly against the pipe walls.
For bathroom sink drains, remove the stopper first. Most pop-up stoppers unscrew counterclockwise or lift straight out. Some require a small screw underneath to be removed first.
Dispose of the removed debris in the trash. Do not push it back into the drain.
Step 2: Connect the Bladder to the Garden Hose
Thread the drain cleaning bladder onto the end of your garden hose. Most bladders have a standard hose fitting that screws on by hand. Turn it clockwise until it is finger-tight. Do not use a wrench. Over-tightening can damage the rubber fitting.
If the connection drips when water is on, wrap the threads with a single layer of pipe thread tape before reconnecting. Thread tape creates a better seal without tightening the fitting further.
Check that the bladder is fully deflated before inserting it into the drain. It should be soft and flat.
Step 3: Insert the Bladder Into the Drain
Push the deflated bladder into the drain opening. Guide it in as far as it will go comfortably. For most sink drains, that is 3 to 6 inches past the drain opening. The bladder needs to be past the P-trap curve for best results.
For floor drains and cleanout access points, you can often push the bladder deeper, 12 to 18 inches, to get closer to the clog location.
Do not force the bladder around sharp bends. If it meets significant resistance before the hose fitting reaches the drain opening, do not push harder. You risk damaging the bladder or the pipe.
Leave the garden hose lying flat and straight on the floor near the drain. Do not coil the hose tightly during use. Water needs to flow freely through the hose.
Step 4: Plug the Drain Overflow (Critical Safety Step)
This step is essential and most guides skip it. If you skip it, water blows back out of the overflow hole and floods your sink or bathtub area.
Every sink and bathtub has an overflow opening. On bathroom sinks, it is the small oval hole near the top of the basin. On bathtubs, it is behind the overflow plate near the faucet end.
Plug this opening completely with a wet rag or a rubber stopper before turning on the water. Press the rag firmly into the overflow hole. If water can escape through the overflow, pressure cannot build inside the pipe and the bladder will not work.
If you are working on a floor drain or main cleanout, there is no overflow to worry about. Skip this step for those applications.
Step 5: Turn the Water On Slowly
Go to the outdoor spigot or utility sink and turn the water on slowly. Do not turn it to full pressure immediately.
Start at about one-quarter pressure. Watch and listen. You should hear the bladder inflating inside the drain and feel the hose become slightly rigid as pressure builds.
After 10 to 15 seconds at partial pressure, increase to half pressure. After another 15 seconds, go to full pressure if needed.
Let the bladder run at full pressure for 30 to 60 seconds. The pulsing water jets are working through the pipe during this time. You may hear gurgling or movement in the drain as the clog starts to break up.
Step 6: Turn Off the Water and Wait
After 60 seconds, turn the water off at the source. Do not pull the bladder out while the water is still running. The bladder is inflated and pressed against the pipe walls. Pulling it out under pressure tears the rubber and may damage the pipe connection.
Wait 20 to 30 seconds after turning the water off. The bladder deflates slowly as pressure releases. When it feels soft again, it is safe to remove.
Step 7: Remove the Bladder Carefully
Pull the bladder straight out of the drain slowly. Have your bucket and towels ready. Some water and debris will come back out with the bladder.
Inspect the drain. Run hot water from the tap and watch how it drains. If it drains freely, the clog is cleared. If it still drains slowly, the clog is partially cleared. Repeat the process once or twice more.
If the drain is still blocked after three attempts, the clog may be too large, too far down the line, or made of material the bladder cannot break up. At that point, a drain snake or professional service is the next step.
Step 8: Flush the Drain With Hot Water
Once the clog is cleared, run hot water through the drain for 2 to 3 minutes. This flushes any remaining debris through the pipe and toward the main sewer line.
For greasy kitchen sink clogs, add a cup of hot water mixed with a few drops of dish soap. This helps clear remaining grease that the bladder broke up but did not fully push out.
That is the complete process for how to use a drain cleaning bladder from start to finish.
You can read about: Linear Shower Drain Pros And Cons
How to Use a Drain Bladder on Different Drain Types
The basic process is the same for all drains, but a few details change depending on where you are working.
Kitchen Sink Drains
Kitchen clogs are usually grease and food debris. Insert the bladder past the P-trap beneath the sink. If the sink has two basins, block the second drain opening with a wet rag before using the bladder. Otherwise, pressure escapes through the second drain and the bladder cannot build force.
Remove the P-trap first if the clog is visible inside it. A P-trap clog clears faster and easier by opening the trap than by using a bladder. Use the bladder for clogs further down the line past the trap.
Bathroom Sink Drains
Bathroom sink clogs are almost always hair and soap buildup. Remove as much hair as possible from near the drain opening before using the bladder. A bladder pushes debris forward. If there is a dense hair clog right at the drain, a wire hook removes it faster than any pressure tool.
Plug the overflow hole firmly before every use.
Shower and Tub Drains
Shower drains accumulate hair, soap, and body wash residue. Remove the drain cover first. Most covers unscrew with a Phillips head screwdriver. Remove visible hair with a drain hook before inserting the bladder.
For tub drains, plug the overflow plate opening with a rag. The overflow connects directly to the drain line and will release all pressure if left open.
Floor Drains
Floor drains connect to larger pipes, often 3 to 4 inches. Use a larger drain bladder sized for these pipes. The bladder for sewer line work fits most floor drains.
Floor drains sometimes have a sediment trap inside them. Remove the trap cover and clean it out before using the bladder. A clogged sediment trap is often the entire problem and does not need a bladder at all.
Main Sewer Line Cleanout
Using a drain bladder for sewer line access requires the largest bladder size and a high-flow water source. Connect to an outdoor hose bib rather than an indoor faucet for maximum flow.
Insert through the main cleanout access point. Do not use a drain bladder on a main sewer line you suspect has a root intrusion or collapsed section. Pressure will not clear roots and may damage a compromised pipe further.
Safety Tips for Using a Drain Cleaning Bladder
These rules prevent injury and property damage. Follow every one of them.
Always turn off the water before removing the bladder. A pressurized bladder pulled from a pipe sprays water with significant force. It can cause injury and instant flooding.
Never use a drain bladder in a pipe that may be cracked or corroded. Water pressure can split a weakened pipe from the inside. If you have old galvanized or clay pipes, have a plumber assess them before using any pressure tool.
Always plug the overflow. Forgetting this step means water sprays from the overflow under pressure. In a bathroom sink, this floods the vanity cabinet. In a tub, it sprays the wall.
Wear safety glasses. Water and debris can spray back unexpectedly when the bladder is inserted or removed. Eye protection is not optional for this job.
Start with low pressure. Full hose pressure immediately can burst an old or degraded bladder. Increase pressure gradually over the first minute.
Do not exceed the bladder’s rated pressure. Most residential drain bladders are rated for standard household water pressure of 40 to 80 PSI. If your home has unusually high water pressure, use a pressure regulator on the hose line before connecting the bladder.
Keep hands away from the drain opening during use. Do not put your hand over the drain while the bladder is running. Blowback can occur if the seal fails suddenly.
Common Mistakes to Avoid
These errors prevent the bladder from working or cause damage.
Using the wrong bladder size. A bladder that is too small slides around inside the pipe without sealing. A bladder that is too large does not fit past the drain opening. Match the bladder size to the pipe diameter before buying.
Not plugging the overflow. Already covered above but worth repeating. This single mistake accounts for most failed drain bladder attempts. No overflow plug means no pressure buildup.
Turning on full pressure immediately. Starting at full pressure before the bladder has expanded and seated against the pipe walls causes the bladder to slide backward out of the drain instead of sealing. Build pressure gradually.
Pulling the bladder out while water is still running. The inflated bladder pops out of the pipe and sprays water at high velocity in any direction. Always turn off the water and wait for full deflation before removal.
Using the bladder when the drain is completely sealed. If no water moves through the drain at all, the bladder may not be able to build enough force to break the clog. Try a drain snake first to open a partial path, then use the bladder.
Using it in the wrong pipe. A drain bladder for sewer line use is not appropriate for small 1.5-inch sink drains. A small sink bladder used in a 4-inch line creates no pressure at all. Match tool to pipe every time.
You can read about: Will Drain Cleaner Dissolve Hair
Benefits of Using a Drain Cleaning Bladder
Understanding why this tool is worth having explains why so many plumbers recommend it.
It is cheap. A quality drain bladder costs $10 to $20. A single plumber service call for a clogged drain typically costs $100 to $300. One successful use pays for the tool many times over.
It is chemical-free. Chemical drain cleaners contain lye or sulfuric acid. These damage pipes over time, especially older plastic and metal pipes. A drain bladder uses only water. No chemicals, no pipe damage, no fumes.
It works on clogs far into the pipe. A plunger works on clogs near the drain surface. A drain snake reaches further but requires skill to navigate bends. A drain bladder pushes water forward through the pipe and clears clogs several feet down the line.
It is reusable. One bladder clears dozens of drains over years of use if stored properly. Rinse it after each use and allow it to dry before storage.
It is faster than most alternatives. The full process from setup to completion takes 10 to 15 minutes for most clogs. That is faster than waiting for a chemical drain cleaner to work and far faster than scheduling a plumber visit.
When a Drain Cleaning Bladder May Not Work
This tool is effective but not universal. Know its limitations before relying on it.
Root intrusions. Tree roots growing into sewer lines are a mechanical blockage. Water pressure alone cannot cut through roots. A mechanical auger or hydro-jetting from a professional is required.
Collapsed or crushed pipes. If a pipe has collapsed due to age, ground shifting, or damage, no amount of water pressure opens it. Camera inspection is needed to identify this problem and excavation is usually required to fix it.
Solid object blockages. Toys, bottle caps, jewelry, and other solid objects that have fallen into a drain do not respond to water pressure. They need to be physically retrieved with a snake, a retrieval tool, or by opening the pipe.
Very old and weakened pipes. Clay pipes, severely corroded cast iron, and old galvanized pipes may not handle the water pressure from a bladder. If your home has pipes older than 40 years, consult a plumber before using any pressure tool.
Grease completely solidified in the pipe. Hot water and pulsing pressure breaks up soft or semi-solid grease. A pipe that is fully packed with hardened grease may need chemical treatment or mechanical cleaning to clear before a bladder can finish the job.
Signs You Need a Professional Plumber
How to use a drain cleaning bladder covers most household clogs. But some situations need professional equipment and expertise.
Multiple drains backing up at the same time. When two or more drains in the home back up simultaneously, the clog is in the main sewer line, not individual branch pipes. A single drain bladder cannot address a main sewer blockage. A plumber with a main line auger or hydro-jet is required.
Sewage smell coming from drains. This indicates a blockage or venting issue that is allowing sewer gas into the home. Sewer gas contains hydrogen sulfide and methane. This is a health and safety issue. Call a plumber immediately.
Water backing up into other fixtures. Running the washing machine and seeing water back up into the kitchen sink means the main line is blocked. The connection between fixtures shares the same main line. Only main line clearing fixes this.
The drain bladder cleared the clog but it returned within days. A clog that keeps coming back signals a deeper problem. Root intrusion, partial pipe collapse, or a severe grease buildup further down the line all cause recurring clogs. A plumber can camera inspect the line to find the cause.
Black sludge or unusual debris coming from the drain. Unexpected materials in drain backflow can signal main sewer line issues or contamination that needs professional assessment.
You used the bladder but the pipe made cracking or popping sounds. Stop immediately. Those sounds suggest pipe stress or movement. A damaged pipe that is pushed with water pressure can fail completely.
For Drain Cleaning Services in Eagle Rock, the team at Derks Plumbing handles everything from stubborn household clogs to full main sewer line clearing. Our licensed plumbers use professional drain cameras, hydro-jetting equipment, and mechanical augers to clear any blockage quickly and safely. Derks Plumbing serves Eagle Rock homeowners with transparent pricing and same-day service for urgent drain problems. If your drain bladder is not getting the job done, call Derks Plumbing before the problem gets worse.
Preventing Future Drain Clogs
The easiest drain clog to deal with is the one you prevent. These habits keep drains clear.
Use drain screens on every drain. A simple mesh screen over shower, sink, and tub drains catches hair and debris before it enters the pipe. Empty the screen after every shower or sink use. This single habit prevents the majority of bathroom drain clogs.
Never pour grease down the drain. Hot cooking grease is liquid when it goes down but solidifies as it cools in the pipe. It builds up over time and eventually creates a solid blockage. Pour cooled grease into a container and dispose of it in the trash.
Run hot water after each kitchen sink. After washing dishes or rinsing food, run the hot water for 30 seconds. Hot water keeps light grease deposits flowing toward the main line instead of cooling and sticking to pipe walls.
Use dish soap regularly. Dish soap is a degreaser. Running a squirt of dish soap with hot water through the kitchen drain weekly prevents grease buildup before it becomes a problem.
Flush bathroom drains monthly. Once a month, pour a full kettle of boiling water down each bathroom drain. This dissolves soap scum and light hair product buildup before it accumulates into a clog. Do not pour boiling water into PVC pipes. Use hot tap water for plastic pipes.
Do not flush anything other than waste and toilet paper. Wipes labeled flushable are not truly flushable. They do not break down in pipes the way toilet paper does. Cotton balls, paper towels, and hygiene products all contribute to sewer line clogs.
Have main lines inspected every 5 years. For homes older than 20 years, a periodic camera inspection of the main sewer line catches root intrusion and buildup before it causes a full blockage. This preventive inspection costs $100 to $300 and saves thousands in emergency repair costs.
Final Thoughts
A drain cleaning bladder is one of the most useful plumbing tools a homeowner can own. It clears most household clogs in under 15 minutes with no chemicals and no plumber required. At $10 to $20, it pays for itself on the first use.
Now that you know how to use a drain cleaning bladder correctly, you have everything you need to tackle most clogged drains with confidence. Use the right bladder size, plug the overflow, build pressure gradually, and always turn off the water before removing the bladder.
For clogs that come back repeatedly, multiple drains backing up, or any situation involving sewage smell or pipe sounds, Call Derks Plumbing. Some problems need professional equipment and experienced hands.

Frequently Asked Questions
How to use a drain cleaning bladder for a completely blocked drain?
If the drain has zero flow, try a drain snake first to open a small path through the blockage. Then use the drain bladder to flush the remaining debris. A completely sealed drain sometimes does not allow the bladder to seat and pressurize properly without a starter path through the clog.
What size drain cleaning bladder do I need?
For bathroom and kitchen sinks: 1.25 to 2-inch bladder. For shower and tub drains: 2 to 3-inch bladder. For floor drains and main cleanouts: 3 to 4-inch bladder. Match the bladder size to the pipe diameter, not the drain opening size.
How to use a drain bladder without a garden hose connection?
Most drain bladders require a standard garden hose connection. Some models connect to a laundry faucet or utility sink using an adapter. If you have no outdoor hose bib, buy a bladder with an indoor faucet adapter included. These are available at most plumbing supply stores.
How many times should I run the bladder on a stubborn clog?
Run the bladder three times before concluding it is not working. Each run pushes the clog further. Allow 30 seconds between runs. If the drain is still blocked after three full attempts, use a mechanical drain snake or call a plumber.
Can I use a drain cleaning bladder on a toilet?
No. Drain bladders are not designed for toilet drain geometry. Toilet drains have an S-trap built into the porcelain that prevents the bladder from seating properly. Use a toilet auger or closet auger for toilet clogs.
Is a drain bladder safe for old pipes?
Use caution with pipes older than 40 years, especially clay, cast iron, or galvanized steel pipes that may be weakened by corrosion. Start at very low water pressure and increase slowly. If you hear any cracking or popping sounds, stop immediately and call a plumber for an inspection.
How do I store a drain cleaning bladder after use?
Rinse the bladder thoroughly with clean water after each use. Allow it to dry completely before storing. Store in a cool, dry location away from direct sunlight. UV exposure degrades rubber over time. A properly stored bladder lasts several years of regular use.