We are Available 24/7

Plumbing

sewer backup repair cost
Plumbing

Sewer Backup Repair Cost & Estimates | Derks Plumbing

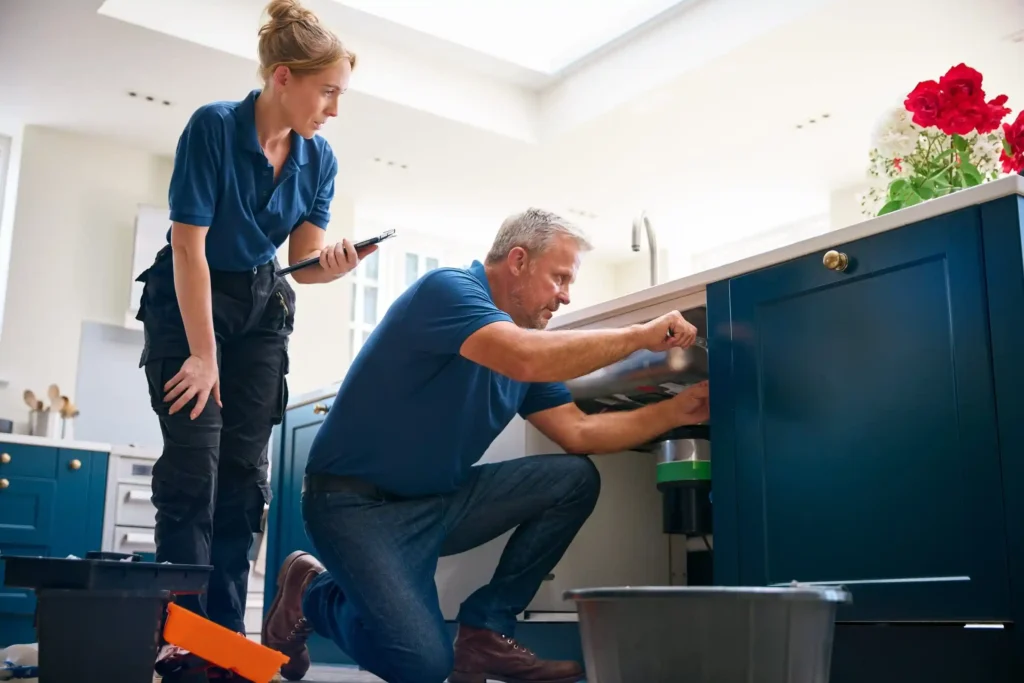
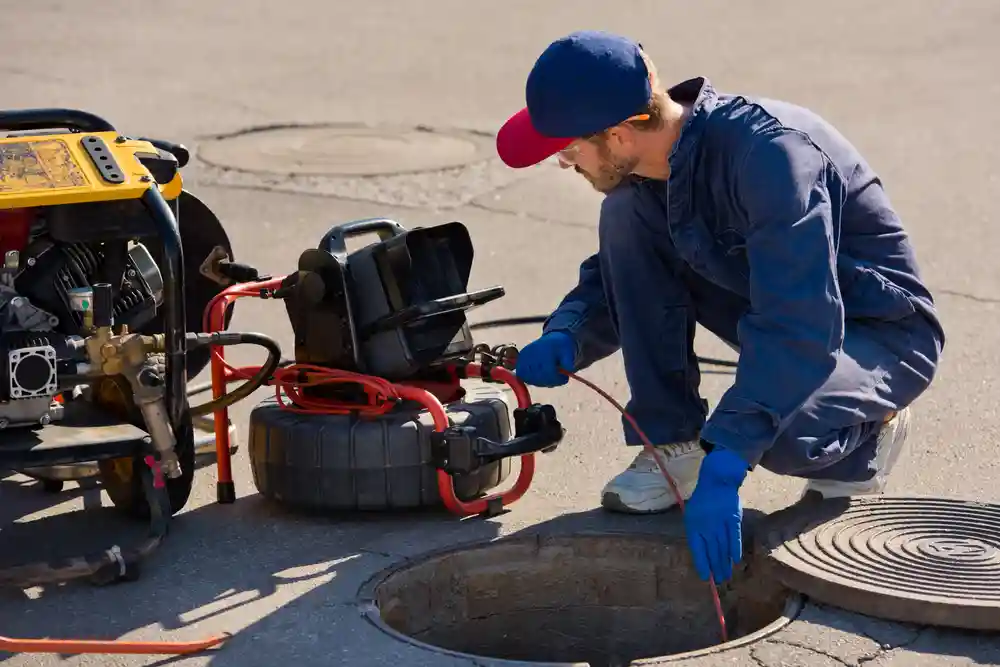
Sewer backup repair cost typically runs between $200 and $2,000 for basic cleanup and clog removal, while a full sewer line repair or replacement can climb to $3,000 to $10,000 or more depending on the damage. The exact number depends on what’s actually causing the backup. That’s the short version for most homes. The rest of this guide breaks down pricing by service type, what drives costs up or down, and how to avoid paying for more than you need. What Is a Sewer Backup? A sewer backup occurs when the normal flow of wastewater is blocked. Instead of traveling to the municipal sewer system or your septic tank, the waste has nowhere to go. It forces its way back up through your home’s drains, toilets, or floor drains. This creates a health risk and can cause significant damage to floors, walls, and personal property if not handled immediately. Common Causes of Sewer Backups A few issues cause most sewer backups: Tree root intrusion, which cracks pipes and creates blockages over time Grease and debris buildup that narrows the pipe until waste can’t pass through Collapsed or cracked pipes, often in older clay, cast iron, or Orangeburg lines Flushed items like wipes, paper towels, or feminine products that don’t break down Municipal line backups that push waste back into your home during heavy rain Older homes with aging pipe materials tend to see this problem more often than newer construction with modern PVC lines. A home built before the 1960s is especially likely to still have clay or cast iron pipe somewhere in the system, and both materials degrade in ways that create the exact conditions a backup needs to form. Signs You Have a Sewer Backup Watch for these warning signs before a small problem turns into a major one: Multiple drains backing up at the same time, not just one fixture Gurgling sounds from toilets or drains when water runs elsewhere A sewage smell coming from drains or your yard Water or waste coming up through floor drains or the lowest fixture in your home Slow drainage across the entire house, not just one sink or tub If more than one drain is affected at once, that’s usually the clearest sign the problem is in the main line, not a single fixture. How Much Does Sewer Backup Repair Cost? The sewer backup repair cost typically ranges from $2,500 to $4,000 for standard repairs. If your situation requires a full sewer line replacement, expect to pay between $3,000 and $7,000. These prices vary based on the extent of the damage, the location of the pipe, and the method used to fix it. Smaller blockages that only need professional drain cleaning might cost significantly less, often starting under $500 depending on the complexity of the clog. Average Sewer Backup Repair Cost by Service Type Repairing a sewer line isn’t a one-size-fits-all job. Costs shift depending on what your specific system needs to get back to working order: Professional Drain Cleaning: $75–$200 for minor clogs. Tree Root Removal: $80–$1,000 depending on how deep the roots have grown. Camera Inspection: $100–$500 to find the exact location of the break. Trenchless Repair: $60–$250 per linear foot. Traditional Excavation: $50–$250 per linear foot. Factors That Affect Sewer Backup Repair Cost Several things push your total bill up or down: The severity of the damage. A small clog costs far less than a collapsed pipe. Pipe material. Older clay or Orangeburg pipes often need more extensive work than modern PVC. Access to the line. Pipes under concrete, driveways, or mature landscaping cost more to reach. Pipe depth and length. Deeper or longer runs mean more excavation or trenchless footage. Emergency timing. After-hours or weekend service usually adds a premium to the base cost. You can read about: How to Remove Tree Roots from Sewer Line Repair vs. Sewer Line Replacement Cost A simple repair is almost always cheaper than a full replacement. You should consider a repair if the damage is isolated to one small section of the pipe. However, if your pipe is aged, crumbling throughout, or has multiple breaks, a full replacement is the smarter long-term investment. While the sewer line backup service to clear a clog is immediate, a replacement prevents you from paying for repeat repairs in the near future. Does Insurance Cover Sewer Backup Repair? Standard homeowners insurance usually does not cover sewer backup damage. You often need a specific endorsement or rider added to your policy to get protection. Even with an endorsement, insurance may cover damage to your floors or belongings but might not pay to fix the actual pipe itself. Always review your policy and talk to your agent to see what specific perils are covered under your current plan. Emergency Repair Pricing for Sewer Backups Emergency repairs are necessary when you cannot use your water or your home is flooding. Because these services often require immediate dispatch, after-hours labor, and urgent coordination, the sewage backup cleanup cost can be higher than a scheduled repair. Professional plumbers may charge a higher hourly rate for emergency calls. To keep these costs down, try to mitigate damage by shutting off your main water valve as soon as you notice the backup. DIY vs. Hiring a Professional While you might want to try a store-bought drain cleaner, avoid chemical solutions for major backups. They are rarely effective against severe clogs and can actually damage your pipes or be dangerous to handle. Professionals have the tools to safely identify the root cause using cameras. They can also perform hydro-jetting or trenchless repairs that a DIY enthusiast simply cannot do. Hiring a pro ensures the job is done right the first time. How Professionals Repair a Sewer Backup Plumbers start with a camera inspection to see what is happening inside your pipes. Once they find the blockage or break, they choose the best tool for the job. For clogs, they might use high-pressure water or specialized augers to clear the debris.
How to Drain a Hot Water Heater
Plumbing

How to Drain a Hot Water Heater: Step-by-Step Guide

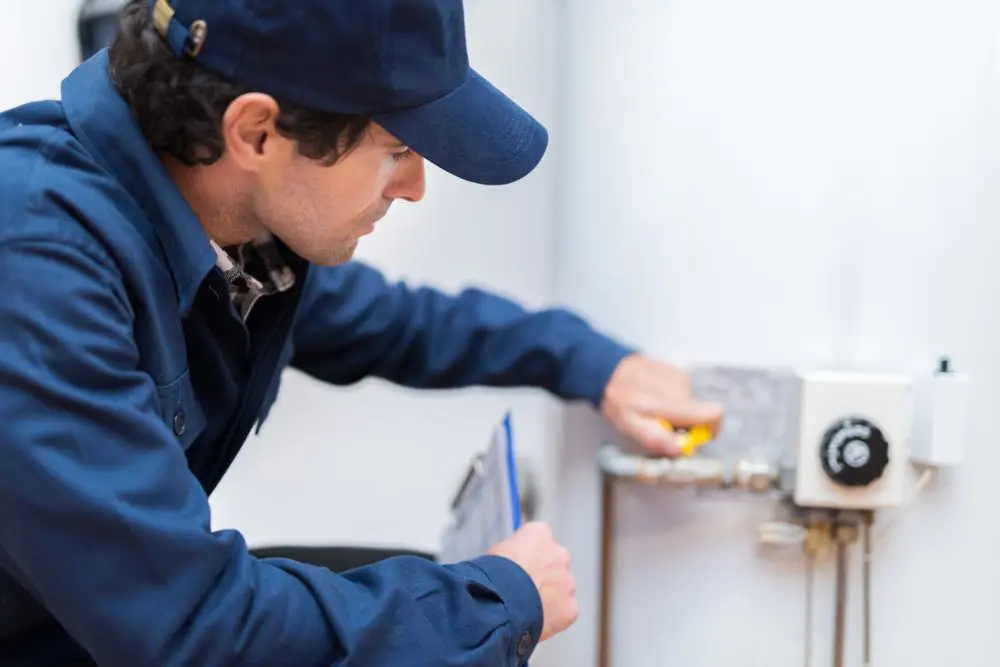
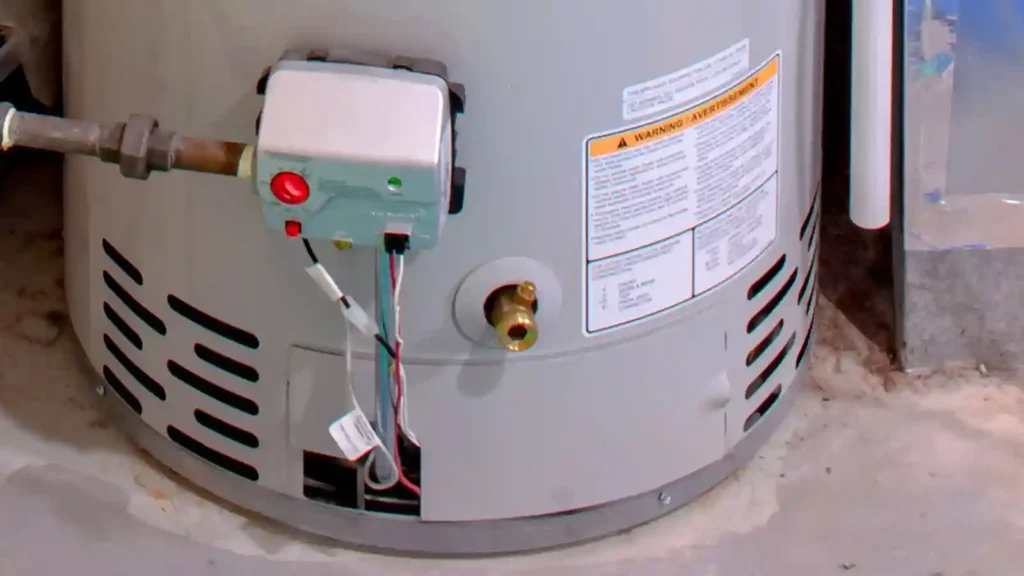
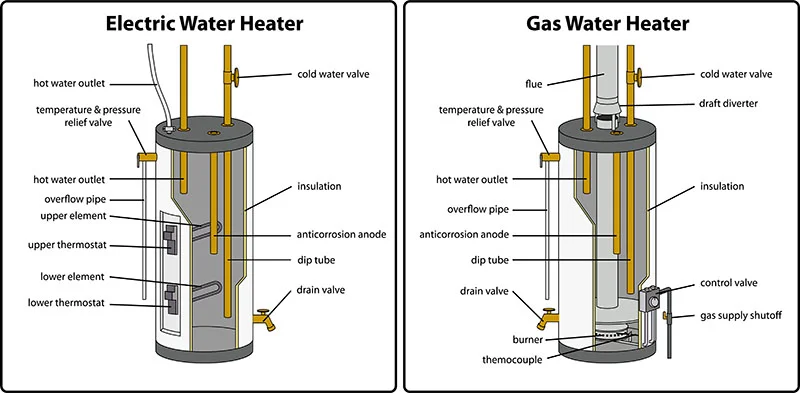
Sediment builds up inside your water heater over time. This buildup reduces efficiency, raises energy bills, and shortens the life of your unit. Draining it once a year keeps it running clean and strong. Most homeowners skip this step and end up paying for early replacements. Learning how to drain a hot water heater is easier than it sounds. You need basic tools, about an hour, and this guide. We will walk you through every step clearly and safely. Signs Your Water Heater Needs Draining Not sure if it is time? Look for these warning signs: Rusty or discolored water coming from your hot tap Popping or rumbling sounds when the heater runs (that is sediment at the bottom) Slow hot water recovery after showers or dishes Higher energy bills without a clear reason Water that smells like rotten eggs or metal Visible grit or particles in your hot water If you notice any of these, it is past time to drain hot water heater sediment out. Benefits of Draining Your Water Heater Draining your tank is not just maintenance. It is an investment in your home. Here is what you gain: Longer lifespan. Sediment acts like an insulator at the bottom. It forces the burner to work harder and wear out faster. Removing it regularly can add years to your unit. Lower energy bills. The U.S. Department of Energy notes that sediment buildup makes water heaters use more energy to heat the same amount of water. Flushing it out keeps efficiency high. Better water quality. Minerals and rust sitting in standing hot water affect taste and smell. A clean tank means cleaner water at your tap. Fewer repairs. Sediment creates hot spots on the tank lining. Over time those hot spots crack the tank. Regular hot water tank draining prevents that kind of damage. Types of Water Heaters Before you start, know what type of unit you have. The draining process is mostly the same but there are small differences. Standard tank water heaters are the most common. They hold 30 to 80 gallons and heat water continuously. These need draining the most often. Gas water heaters have a pilot light and a gas valve. You will set the thermostat to “Pilot” before draining, not completely off. Electric water heaters have two heating elements inside. You must cut power at the breaker before you start. Running an electric heater dry will burn out the elements. Tankless water heaters do not store water, so they do not need the same draining process. They need a vinegar flush to clean the heat exchanger instead. Power vent and direct vent heaters are gas models with different exhaust setups. The draining steps are the same for both. Tools and Materials Required Gather everything before you start. You do not want to stop mid-job to search for a part. Garden hose (long enough to reach a floor drain or outside) Flat-head screwdriver Work gloves Safety goggles Bucket Hose with a female end fitting Channel-lock pliers (optional, for stiff drain valves) That is it. No special equipment needed. Safety Precautions Before You Begin Water inside a heater can reach 120 to 140 degrees Fahrenheit. That water can cause serious burns. Take these steps first. Turn off the power or gas. For electric units, flip the breaker. For gas units, turn the thermostat knob to “Pilot.” Let the water cool. Wait at least 1 to 2 hours after shutting it down. Overnight is safer if you have time. Turn off the cold water supply. Find the cold water inlet valve on top of the unit. Turn it clockwise to close it. Open a hot water faucet nearby. This prevents a vacuum from forming inside the tank. Keep it open during the whole process. Check the area around your heater. Make sure there is nothing flammable nearby if it is a gas unit. Step-by-Step Guide How to Drain a Hot Water Heater This is the core of knowing how to drain a hot water heater the right way. Follow each step in order. Step 1: Turn Off Power or Gas Electric heaters: go to your breaker panel and turn off the circuit labeled “water heater.” Gas heaters: turn the thermostat to “Pilot.” Do not turn it to “Off” completely or you may need to re-light the pilot light. Step 2: Shut Off the Cold Water Supply Valve This is usually directly above the unit. It is a lever or round knob. Turn it off completely. Step 3: Open a Hot Water Faucet in Your Home Go to any sink or tub and open the hot side. Leave it open. This allows air in so water drains freely. Without this, suction can slow or stop the drain. Step 4: Connect a Garden Hose to the Drain Valve The drain valve is near the bottom of the tank. It looks like a hose bib (a small spigot). Screw your garden hose onto it tightly. Run the other end of the hose to a floor drain, outside, or into a large bucket. Make sure the drainage point is lower than the valve. Step 5: Open the Drain Valve Turn the valve counterclockwise to open it. Water will start flowing out. The first water that comes out may be dark or murky. That is the sediment leaving the tank. If the water flows slowly, check that your hot water faucet inside is still open. Step 6: Flush the Tank With Cold Water Once the tank is empty, turn the cold water supply back on for 1 to 2 minutes. This stirs up remaining sediment at the bottom and pushes it out through the hose. Watch the water draining from the hose. When it runs clear, you are done. This step is the key difference between simply draining and doing a full flush a water heater job. Do not skip it. Step 7: Close the Drain Valve and Disconnect the Hose Turn the drain valve clockwise until it is snug. Do

How to Tell If Water Heater Is Gas or Electric?
Plumbing

How to Tell If Water Heater Is Gas or Electric Fast

Your water heater runs quietly in the background every day. But do you actually know what type it is? Most homeowners don’t until something breaks. Knowing your water heater type saves time, money, and a lot of confusion when repairs or replacements come up. So, how to tell if water heater is gas or electric? Look for a flue pipe on top (gas) or a power cord and two thick wires at the bottom (electric). That’s the quickest way. This guide walks you through every method so you know for sure. Why Knowing Your Water Heater Type Matters It’s not just a fun fact. It’s practical information every homeowner needs. Getting the wrong replacement unit is a costly mistake. A plumber who expects a gas unit and finds an electric one has to stop, re-quote, and reschedule. That delay adds up fast. Maintenance is also different for each type. Gas heaters need burner inspections and venting checks. Electric heaters need element testing and thermostat checks. If you don’t know which you have, you can’t maintain it properly. Energy costs are another reason. If your bills seem high and you’re wondering how to tell if electric hot water heater is on, you need to first confirm it’s electric. A unit running inefficiently on the wrong fuel type wastes money every month. Here’s a quick comparison: Feature Gas Water Heater Electric Water Heater Power Source Natural gas or propane Electrical wiring Vent/Flue Yes — pipe at top No flue pipe Pilot Light Often present Never present Operating Cost Usually lower Usually higher Lifespan 8–12 years 10–15 years Recovery Rate Faster Slower You can read about: Electric vs Gas Tankless Water Heater Inspect External Fuel Indicators This is the fastest check you can do. Walk up to your water heater and look at two things: the top and the bottom. At the top: A gas water heater will have a metal flue pipe or vent stack. It connects from the top of the unit and runs up through the ceiling or wall. This pipe carries combustion gases outside the home. If you see that pipe, it’s gas. At the bottom: Electric water heaters have a power cord or two thick electrical conduit wires running into the unit from the wall. These carry the voltage needed to heat the water with internal elements. For propane users: If you see a gas line but no connection to a utility line, you likely have a propane tank outside. That’s still a gas heater, just a different fuel source. Quick tip: No flue pipe and no gas line? It’s electric. No power cord but a flue pipe? It’s gas. It’s really that simple most of the time. Inspect the Heater’s Power Source Go further than just looking. Trace the connections. For gas heaters: Follow the pipe that connects to the burner at the base. This pipe will connect to your home’s gas supply line. You’ll also likely see a small thermocouple or igniter wire near the burner assembly. Gas units also have a gas control valve, usually with a dial that says “Pilot,” “On,” and “Off.” For electric heaters: You’ll see an electrical panel or disconnect box nearby. Two heavy gauge wires (usually red and black, sometimes wrapped in conduit) run from that box into the heater. Electric water heaters in North America typically run on 240 volts that’s a dedicated circuit, not just a regular outlet. If you’re still unsure whether your boiler is gas or electric, trace the main supply lines. Gas lines are typically copper, black iron pipe, or flexible yellow CSST tubing. Electrical lines are rigid conduit or wire sheathing. Check the Manufacturer’s Plate or Label Every water heater has a data plate or rating label. It’s usually a sticker or metal plate on the side of the tank. This label tells you everything. Look for: Fuel Type — listed as “Natural Gas,” “LP Gas,” or “Electric” BTU Input — only listed on gas units Wattage/Voltage — only listed on electric units Model Number — you can cross-reference this online if the label is faded The model number is your backup plan. Go to the manufacturer’s website and enter it. The specs will confirm fuel type immediately. Common manufacturers include Rheem, Bradford White, A.O. Smith, and State Water Heaters. If the label is unreadable, take a photo of whatever numbers you can make out and call the manufacturer. They can usually identify the unit from a partial serial number. You can read about: How to Adjust Water Heater Temperature How Each Type Functions Understanding how they work helps you identify them and troubleshoot problems later. How Gas Water Heaters Work Gas heaters use a burner at the base of the tank. When cold water enters, the thermostat signals the gas valve to open. Gas flows to the burner and ignites either through a standing pilot light or an electronic ignition. The flame heats the water in the tank from the bottom up. Hot combustion gases rise through a flue in the center of the tank and exit through the vent pipe at the top. This design is why gas heaters heat water faster than electric ones. Older gas heaters often have a standing pilot and a small constant flame. Newer ones use electronic ignition, which only sparks when needed. How Electric Water Heaters Work Electric heaters use two heating elements mounted inside the tank, one near the top and one near the bottom. When cold water enters, the lower thermostat activates the bottom element first. As the water heats up, the upper element kicks in. There’s no flame, no combustion, and no venting needed. The element works like a giant version of the coil in an electric kettle. Heat transfers directly into the water. Because of this design, electric heaters generally recover slower than gas units. But they’re safer in enclosed spaces and easier to install. You can read about: How to Troubleshoot Your Water Heater Check Your Energy Bills Your monthly

why is my toilet making a hissing sound
Plumbing

Why Is My Toilet Making a Hissing Sound? (And How to Fix It)

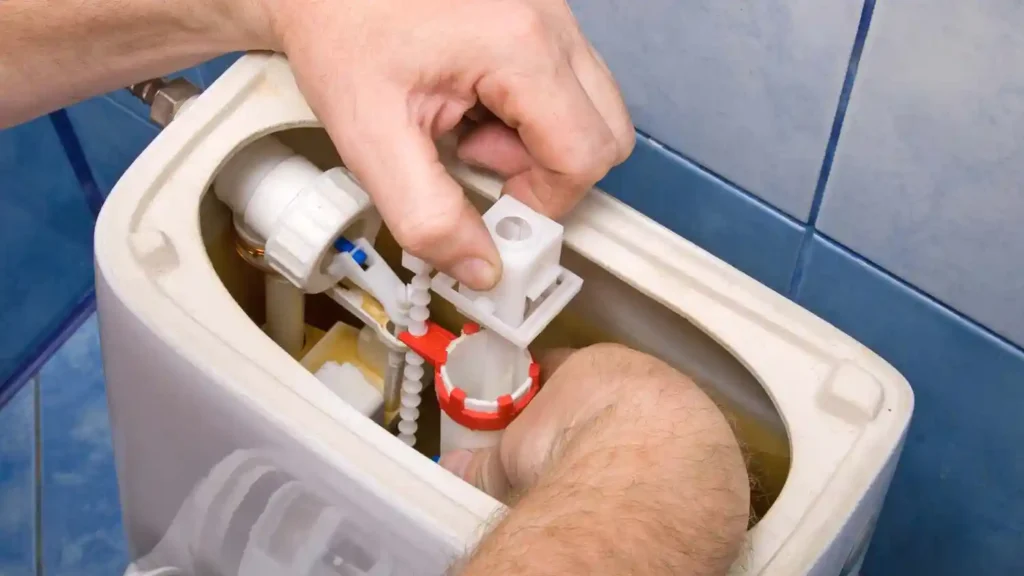
There’s nothing quite as unsettling as walking past your bathroom and hearing a quiet, persistent hiss coming from the toilet especially when no one’s used it in hours. That sound isn’t just annoying. It’s your toilet’s way of telling you something is wrong, and ignoring it could mean wasted water, higher utility bills, and eventually a more expensive repair. If you’ve been Googling why is my toilet making a hissing sound, you’ve come to the right place. At Derks Plumbing, we’ve diagnosed and repaired this exact problem hundreds of times across homes in Eagle Rock and the surrounding areas. In this guide, we’ll walk you through every likely cause, how to diagnose it yourself, what you can fix on your own, and when it’s time to call in a professional. Understanding Toilet Hissing Sounds Before you panic, it’s worth knowing that a hissing toilet is one of the most common plumbing complaints homeowners report. The sound typically originates from one of two sources: water leaking from the tank into the bowl, or water entering the tank from the supply line when it shouldn’t be. In both cases, what you’re hearing is pressurized water moving through a gap it shouldn’t be passing through. Think of it like air escaping a balloon with a tiny pinhole: the smaller the gap, the higher-pitched and more persistent the hiss. The key distinction to make early on is whether your toilet is hissing constantly or only after a flush. A toilet hissing sound after flush that stops within 60 seconds is usually just normal tank refilling. A hiss that continues well beyond that or never stops points to a malfunction that needs attention. Common Reasons for Toilet Hissing 1. A Faulty Fill Valve The fill valve is the component responsible for refilling the tank after you flush. Over time, the rubber seal inside the valve wears down, warps, or gets coated with mineral deposits. When this happens, water seeps through even when the valve is supposed to be closed, creating a steady hissing noise. This is the single most common reason a toilet makes a hissing sound, and it’s also one of the easiest fixes. 2. A Worn or Warped Flapper The flapper is the rubber seal at the bottom of the tank. When you flush, it lifts to let water into the bowl. When the tank is full, it settles back down to create a watertight seal. If the flapper warps, hardens, or collects mineral buildup, it won’t seal properly, and water will continuously trickle into the bowl. This is called a “phantom flush” situation and if your toilet makes a hissing sound, especially paired with occasional random refilling, a bad flapper is almost certainly involved. 3. High Water Pressure If your home’s water pressure is too high (above 80 PSI), it can force water through the fill valve or around the flapper even when both are in reasonable condition. This creates a situation where my toilet makes a hissing sound no matter how many times you replace parts — because the real problem is upstream. A pressure-reducing valve (PRV) installed on your main line is the fix here. This is a job for a licensed plumber. 4. A Waterlogged or Mispositioned Float The float ball (or float cup in newer toilets) tells the fill valve when to stop adding water. If it’s set too high, water rises above the overflow tube and drains constantly into the bowl producing a hissing or trickling sound. If the float is waterlogged and sitting lower than it should, it can trigger the fill valve to run more than necessary. 5. Mineral Buildup in the Fill Valve In areas with hard water, calcium and magnesium deposits can accumulate inside the fill valve over time. This narrows the opening and forces water through at higher velocity, which creates that familiar hissing noise. It’s especially common in older toilets that haven’t been serviced in years. 6. A Cracked Overflow Tube The overflow tube prevents the tank from overfilling by channeling excess water into the bowl. If it’s cracked or the water level is set too high, you’ll hear a toilet making a hissing noise combined with a faint trickling sound. How to Diagnose the Hissing Problem You don’t need any special tools to figure out where the hiss is coming from. Here’s a simple step-by-step approach: Step 1 — Listen closely. Lift the tank lid and stand quietly. Does the hissing seem to come from the fill valve (right side of tank), or is there water visibly trickling through the flapper? Step 2 — The food coloring test. Add a few drops of food coloring to the tank water. Wait 10–15 minutes without flushing. If color appears in the bowl, your flapper is leaking. Step 3 — Check the water level. Look at where the water sits in relation to the overflow tube. If it’s right at the top of or flowing into the overflow tube, your float is set too high. Step 4 — Listen after flushing. Time how long the hissing lasts after a flush. If it stops cleanly within 60–90 seconds, the system may be working normally. If it continues longer or never stops you have an active leak or fill valve problem. Step 5 — Check your water pressure. If you have a pressure gauge, attach it to a hose bib near the toilet supply line. Pressure above 80 PSI is a red flag. You can read about: How to Repair Garbage Disposal Humming DIY Fixes for a Hissing Toilet Many toilet hissing issues are genuinely DIY-friendly. Here’s what you can realistically tackle yourself: Replacing the flapper is the easiest fix in home plumbing. Turn off the water supply valve behind the toilet, flush to empty the tank, unclip the old flapper, and snap in a new one. Universal flappers are available at any hardware store for under $10. After replacing it, run the food coloring test again to confirm the seal. Replacing the fill

how can a tankless water heater pump more gpm
Plumbing

How Can a Tankless Heater Pump More GPM? | Tips

You turned on the shower, started the dishwasher, and someone in the kitchen opened the hot tap and suddenly the water coming out of your showerhead felt like a cold drizzle. Sound familiar?If you own a tankless water heater and you’re frustrated with inconsistent or weak hot water flow, you’re not imagining it. The problem is real, and it comes down to one thing: GPM gallons per minute. Understanding how a tankless water heater pumps more GPM (and what limits it in the first place) can save you from unnecessary upgrades, wasted money, and daily frustration. At Derks Plumbing, we’ve seen this issue come up again and again with homeowners across Eagle Rock and the surrounding areas. This guide is built on real field experience not generic manufacturer talking points to help you understand exactly what’s happening inside your system and what you can actually do about it. What Determines GPM in a Tankless Water Heater? GPM gallons per minute is the measure of how much hot water your tankless heater can deliver continuously at any given moment. Unlike a traditional tank heater that stores pre-heated water, a tankless unit heats water on demand, which means the flow rate is directly tied to its heating capacity. Three core factors control this: BTU output (gas units) or kW rating (electric units) — The more heating power the unit has, the more water it can heat per minute. Incoming water temperature — Cold groundwater takes more energy to heat than warm water. Set output temperature — The higher your target temperature, the fewer gallons the unit can heat per minute. Here’s a real-world example: A 199,000 BTU gas tankless heater might advertise 9.8 GPM on the box. But that number assumes a 35°F temperature rise. If you’re in a colder climate where groundwater comes in at 40°F and you want 120°F output, you’re asking for an 80°F rise and that same unit may only deliver 5 to 6 GPM reliably. Understanding Temperature Rise Temperature rise is probably the most overlooked factor when homeowners ask how many GPM a tankless water heater needs to handle their household. Temperature Rise = Desired Output Temp − Incoming Water Temp In warmer southern states, groundwater might come in at 68°F to 72°F. In northern states and high-altitude areas, that same pipe might deliver water at 40°F to 45°F. The difference matters enormously. Here’s a simple breakdown: Incoming Water Temp Desired Output Temperature Rise Approximate GPM (200K BTU unit) 70°F 120°F 50°F ~7.5 GPM 55°F 120°F 65°F ~5.8 GPM 40°F 120°F 80°F ~4.7 GPM So before asking how can a tankless water heater pump more GPM, you first need to know what temperature rise you’re actually dealing with. This one number changes everything. How Many GPM Do You Actually Need? Most households underestimate their simultaneous hot water demand. Here’s what typical fixtures use: Shower: 1.5 – 2.5 GPM Kitchen faucet: 1.0 – 1.5 GPM Dishwasher: 1.0 – 1.5 GPM Washing machine: 1.5 – 2.0 GPM Bathroom faucet: 0.5 – 1.0 GPM So if you’re running a shower and the kitchen sink at the same time, you need roughly 3 to 4 GPM of true hot water output not the peak rating printed on the spec sheet.When thinking about how many GPM for a tankless water heater, the practical rule is: Calculate your peak simultaneous demand, then add 20–25% as a buffer. A family of four with two bathrooms typically needs 6 to 9 GPM of reliable output, factoring in temperature rise. Many homeowners buy a unit rated at 8 GPM but get confused when they only see 5 GPM in actual use. Now you know why. Why Does My Flow Rate Drop? This is the question we hear constantly on service calls. Your unit worked fine for a year, and now the hot water seems weaker. Here’s what’s usually happening: Mineral Scale Buildup Hard water deposits calcium and magnesium inside the heat exchanger over time. This acts like insulation between the burner and the water, reducing heat transfer efficiency which means the unit has to slow flow to compensate. Partially Blocked Inlet Filter Tankless heaters have a small mesh filter at the cold water inlet. If yours hasn’t been cleaned in 12+ months, it may be restricting flow before water even reaches the heating element. Undersized Gas Line This one surprises people. A gas tankless unit running at full capacity needs a properly sized gas supply line. If the line is too small, the unit can’t reach full BTU output — especially when demand spikes. Venting Restrictions Improper or partially blocked venting on gas units can cause the unit to throttle down as a safety measure. Cold Weather Drop Winter hits and groundwater gets colder. Your unit isn’t broken, it’s just working harder for the same output. How Can a Tankless Water Heater Pump More GPM? Now we get to the practical part. Here are the most effective, real-world methods to increase your tankless water heater’s GPM output. 1. Lower Your Set Temperature (Strategically) Set your tankless heater to 120°F and install a mixing valve at point-of-use fixtures. Why? Because the heater produces more GPM at lower output temps. A mixing valve then blends cold water in at the fixture to reach your comfort temperature. You get more volume from the heater without sacrificing comfort. 2. Descale the Heat Exchanger Annually Flushing your tankless unit with a descaling solution (white vinegar or a commercial descaler) removes mineral buildup and restores heat transfer efficiency. Most manufacturers recommend this every 12 months in hard water areas. It’s the single most impactful maintenance task you can do, and it often restores lost GPM without any hardware changes. 3. Clean or Replace the Inlet Filter It takes five minutes. Turn off the water supply, unscrew the inlet filter screen, rinse it under running water, and reinstall. You’d be surprised how often this alone fixes a “low flow” complaint. 4. Upgrade Your Gas Line If you’ve verified that your unit is

how much to fix burst pipe
Plumbing

How Much to Fix Burst Pipe: 2026 Cost Guide

A burst pipe can turn your home upside down fast. Water damage spreads quickly, and the repair bill can surprise you if you’re not prepared. The good news is that most homeowners pay somewhere between $150 and $2,000 to fix the problem but the final number depends on a few key factors. So, how much to fix burst pipe? On average, expect to pay $500 to $800 for a standard repair. Costs go higher when the pipe is hidden inside a wall, ceiling, or underground. Understanding the Factors Influencing Burst Pipe Repair Costs Not every burst pipe costs the same. Several things push the price up or down. Pipe location is the biggest one. A pipe under your kitchen sink is easy to reach. A pipe inside a concrete slab or buried underground is a different story. Contractors charge more when they have to dig or tear open walls. Pipe material matters too. Old galvanized steel pipes cost more to fix than modern PVC or copper. Older materials are harder to source, and they often need full section replacements instead of a quick patch. Severity of the damage plays a role. A small crack is a simple fix. A pipe that has split wide open or caused water damage to surrounding areas takes more time and money to repair. Time of the call affects cost more than people expect. Emergency plumbing calls on nights, weekends, or holidays can cost 1.5x to 2x the normal rate. Your location also affects pricing. Labor rates in Los Angeles or New York are higher than in rural areas. Local demand, licensing requirements, and cost of living all factor in. Average Burst Pipe Repair Costs Here’s a general breakdown of what homeowners pay across the U.S.: Repair Type Average Cost Minor crack or pinhole leak $150 – $350 Standard pipe section repair $400 – $800 Pipe inside wall (drywall access needed) $700 – $1,500 Underground or slab pipe repair $1,000 – $4,000 Full pipe replacement (whole house) $3,000 – $15,000 These numbers represent total burst pipe cost including both labor and materials. Always get at least two quotes before approving any work. Cost Breakdown: Labor and Materials Understanding where your money goes helps you spot fair pricing. Labor Costs Plumbers typically charge $45 to $200 per hour depending on experience and location. Most standard burst pipe repairs take 2 to 4 hours. Emergency calls add a flat fee of $100 to $300 on top of the hourly rate. A licensed master plumber costs more than a general plumber but complex jobs are worth paying for. Cutting corners on licensing can lead to code violations and bigger problems later. Material Costs Material costs for a typical repair range from $20 to $200. Here’s what affects the price: PVC pipe: $0.50 – $5 per linear foot Copper pipe: $3 – $10 per linear foot PEX tubing: $0.40 – $2 per linear foot Pipe fittings, couplings, clamps: $5 – $50 depending on type Pipe insulation (preventive): $1 – $5 per foot Copper is the most expensive material. PEX is popular now because it’s flexible, affordable, and less likely to burst in cold weather. How Much Does It Typically Cost to Repair a Burst Pipe? The cost to fix a burst pipe sits around $500 to $800 for most homeowners dealing with a standard repair. But let’s break it down more specifically based on common scenarios. Scenario 1: Visible pipe under a sink Quick access, no wall damage. Expect to pay $150 to $400 total. This is the best-case scenario. Scenario 2: Pipe inside a drywall The plumber needs to cut open the wall, fix the pipe, and patch the drywall. Total cost: $700 to $1,500. Drywall repair alone can add $200 to $500. Scenario 3: Frozen pipe that burst in winter The pipe burst repair cost for a frozen pipe depends on how much of the line is damaged. If only one section cracked, you’re looking at $400 to $900. If multiple sections froze and split, costs climbed to $1,500 or more. Scenario 4: Slab leak This is the most expensive type. Contractors must detect the leak (often using electronic equipment), jackhammer the concrete, repair the pipe, and pour new concrete. Total cost: $2,000 to $4,500+. Scenario 5: Burst pipe after water damage If water soaked into floors, ceilings, or walls, you’ll also need water damage restoration. That alone can cost $1,000 to $5,000 depending on the extent. You can read about: How to Fix Pinhole in Copper Pipe Cost Breakdown by Location of Burst Pipe Where the pipe sits in your home directly shapes the broken pipe repair cost. Kitchen or Bathroom (Exposed Pipes) These are the easiest and most affordable. Plumbers can access them quickly. Expect to pay $200 to $600. Inside Walls or Ceilings Drywall needs to be cut open. Labor goes up. Expect $700 to $1,500 once you include drywall patching and repainting. Basement Pipes Basements are usually accessible, but pipes here often run long distances. Costs range from $300 to $1,000 depending on the length of the repair. Crawl Space Tight, uncomfortable spaces mean slower work. Add 20–30% to standard rates. Expect $500 to $1,200. Underground or Exterior Pipes This is where costs spike. Excavation is expensive. Costs for underground burst pipe repair cost range from $1,000 to $4,000 or more depending on depth and pipe length. Slab Foundation The highest cost category. Expect $2,000 to $4,500+ for a slab leak repair. Warning Signs You Have a Burst Pipe Knowing the early signs saves money. The sooner you catch it, the cheaper the repair. Sudden drop in water pressure Water stains on ceilings or walls Unexplained spike in your water bill Sound of running water when all taps are off Wet spots or puddles on your floor Musty smell (sign of mold from hidden moisture) If you notice any of these, call a licensed plumber right away. Waiting turns a $500 repair into a $5,000 problem. Can You Fix a Burst Pipe

how to replace a tankless water heater​
Plumbing

How to Replace a Tankless Water Heater at Home

Your tankless water heater worked great for years. Now it’s leaking, underperforming, or just done. Before you panic, the good news is that a tankless water heater replacement is manageable if you know what you’re doing. Most homeowners can handle the basics with the right tools and a clear plan. Learning how to replace a tankless water heater can save you hundreds in labor costs. This guide covers everything from warning signs to final testing. Follow each step carefully, and you’ll have hot water running again in no time. Signs You Need to Replace a Tankless Water Heater Not every problem means you need a full replacement. But some signs are hard to ignore. Watch for these red flags: The unit is more than 15 to 20 years old You see rust or corrosion around the heat exchanger Water flow drops even after descaling Error codes appear repeatedly after repairs Repair costs are close to 50% of a new unit’s price You get lukewarm water no matter the setting If you’re seeing two or more of these, it’s time to replace your water heater rather than patch it again. Tools and Materials Needed Before you start, gather everything. Stopping mid-job to run to the hardware store wastes time. Tools: Pipe wrench and adjustable wrench Screwdrivers (flathead and Phillips) Voltage tester (for electric units) Pipe cutter Teflon tape and pipe thread compound Drill and drill bits Level Materials: New tankless water heater (gas or electric) Flexible water supply lines Mounting hardware Gas line fittings (if gas unit) Venting pipes (if needed) Pressure relief valve Having everything ready means a smoother job and fewer surprises. Safety Precautions Before Replacement This is not the section to skip. Rushing past safety steps causes injuries and damage. For gas units: Turn off the gas supply valve completely Wait 10 minutes before disconnecting any lines Never use a flame near gas connections Use a gas leak detector spray on fittings after reconnecting For electric units: Turn off the circuit breaker for the heater Use a voltage tester to confirm power is off Never assume the power is off without testing For both: Shut off the main water supply Open a nearby faucet to release pressure Let the unit cool down before touching it These steps protect you and your home. Don’t skip them. Step-by-Step Guide: How to Replace a Tankless Water Heater Here’s how to replace a tankless water heater from start to finish. Step 1: Turn Off All Utilities Gas units: close the shut-off valve on the gas line Electric units: flip the circuit breaker off Shut off cold water supply to the unit Step 2: Drain the Unit Connect a hose to the drain port Open the pressure relief valve Let all water drain out completely Step 3: Disconnect the Old Unit Disconnect water lines (hot and cold) Disconnect the gas line or electrical connections Remove the venting pipe if it’s a gas unit Unmount the unit from the wall Step 4: Prepare the Installation Area Inspect the wall for damage or mold Make sure the mounting area meets the manufacturer’s clearance requirements Check that your gas line or electrical panel supports the new unit’s load Step 5: Mount the New Unit Use a level to make sure the unit is straight Secure it with the mounting brackets provided Follow the manufacturer’s specifications exactly Step 6: Reconnect Water Lines Use flexible water supply lines for easier connection Apply Teflon tape to all threaded connections Connect cold water inlet and hot water outlet Step 7: Reconnect Gas or Electrical Gas: Connect the gas line using approved fittings Apply gas-rated thread sealant Turn on gas slowly and check for leaks using soapy water Electric: Connect the wiring according to the wiring diagram Double-check wire gauge matches the unit’s requirements Turn on the breaker and test Step 8: Reconnect Venting (Gas Units Only) Attach the vent pipe to the unit’s exhaust outlet Make sure all joints are sealed Check that the vent exits the building properly Step 9: Flush and Test Turn on the cold water supply Open a hot water faucet to bleed air from the lines Turn on the unit and check for leaks Let hot water run for a few minutes to confirm proper operation This is the full process for how to replace a tankless water heater correctly. You can read about: How Much Does a Hot Water Heater Cost How to Choose the Right Replacement Unit Don’t just buy the same model. Your needs may have changed. Key factors to consider: Flow rate (GPM): If you’ve added bathrooms or appliances, you may need a higher GPM rating. A typical home needs 6 to 10 GPM. Fuel type: Stick with your current fuel source unless you’re doing a bigger renovation. Switching from gas to electric (or vice versa) adds cost and complexity. Energy factor (UEF): Look for units with a high Uniform Energy Factor. Higher means more efficient. Brand reliability: Brands like Rinnai, Navien, Rheem, and Noritz have strong track records. Read real user reviews, not just specs. Warranty: A good tankless hot water heater replacement comes with at least a 5-year warranty on parts and 10 years on the heat exchanger. Replacing a Tank Water Heater with a Tankless: Key Differences Some homeowners use this moment to upgrade from a tank to a tankless unit. That’s a smart move, but it’s a bigger job. What changes: You’ll need to resize your gas line or upgrade your electrical panel Venting requirements are completely different You’ll remove the old tank and patch the water lines The installation location may change The cost to replace a water heater this way is higher upfront. But you’ll save money on energy bills long-term. Tankless units use 24% to 34% less energy than tank heaters, according to the U.S. Department of Energy. This type of switch is often best handled by a licensed plumber unless you have strong plumbing and gas/electrical experience. You can read about: How

how much do plumbers charge per hour
Plumbing

How Much Do Plumbers Charge Per Hour in 2026?

When a sudden plumbing issue occurs, the first question many homeowners want an answer to is, “How much do plumbers charge per hour?” Having that information on the cost of a plumber professional service will allow you to have better preparation for an unexpected expense, give you a general ideas on what to find on your bill, and may help you to select the best plumber that fits your needs. Whether it’s a dripping tap, a blocked drain, or a large installation job, you’ll find a surprising amount can be learned from the difference between a high and a low price tag. When you bring the trusted name Derks Plumbing into your home or business, you want to be certain you are presented with honest, transparent rates that are competitive with the rest of the industry.When you choose a plumbing service, like Derks Plumbing service you want to make sure the price you pay is fair and reasonable compared to what other plumbers charge. Plumbing is not only a regular home service it’s one of the most integral components to the safe, functional home. In this comprehensive guide, we will discuss the factors that affect plumber costs, the average cost per hour, unexpected additional charges , and how to identify a quality plumber. Understanding Hourly Plumbing Rates Plumbers have a mix of technical expertise, licensing, tools, and safety training  so their rates can vary dramatically. To get a grasp on the plumber’s price per hour, you first have to know what factors into the cost. When you need a plumber to come to your house, it is not about the plumber showing up and fixing the issue. The plumbing service call includes a lot of things like overhead costs, materials, labor, and sometimes you have to pay for travel or emergency fees. The cost of hiring a plumber can be really confusing for people who own a home because the price that plumbers charge per hour is different depending on where you live, how much experience the plumber has, and how hard the job is. You can read about: How Much Does an Emergency Plumber Cost Factors That Affect Plumbers’ Hourly Costs Several factors affect plumbers’ charges per hour. Nothing about these changes is arbitrary it’s a product of business operations, legal, and market demands. Location and Local Market Conditions Where you reside has a lot to do with how much a plumber will cost you. Urban regions with a high cost of living, which most people are familiar with, have higher hourly rates because the overhead and labor costs are higher. Rates might be lower in areas. There are not many plumbers to serve those areas. This means more people want plumbers, which makes prices go up. Type of Work Being Performed Even small work like drain cleaning is less expensive per hour than gas line installation or sewer line repair. Special tools, materials, and safety procedures increase the hourly cost, especially in risky work. Why Some Plumbing Jobs Have Higher Rates The basic hourly rate works for a lot of services. Sometimes the cost goes up. This happens when plumbing companies need to keep the quality of their work high and deal with emergencies or jobs that require a lot of work. Emergency or After-Hours Services Plumbers will often charge more for calls on the weekend, holidays, or at night. “It just reflects the urgency of your problem and the inconvenience of keeping the technicians who come out, please, out of their normal business hours.” Burst pipes, sudden leaks, or sewer backups typically fall into this group, he said. Complex Repairs and Installations Working with green, finding good-quality clean water supervision line(bath units list conversion whole-home redox):….. That means many jobs that involve water heaters, sewer lines, bathroom remodels, or whole-home work require teams of skilled technicians or many more people. This additional manpower will be reflected in your rates, particularly if more than one specialist is required for the task. Typical Additional Fees to Expect Just like the standard plumber’s hourly rate, the cost may vary, and homeowners may be hit with some extra fees. The fees cover labor, fuel, materials, and time for setup and dismantling. Service Call or Trip Fee Many plumbing companies also charge a service call fee or trip charge to cover their travel costs and the basic assessment of the situation. This is usually a separate charge from the hourly rate, but it can be waived in some cases if you do choose to take the repair suggestion. Parts and Materials Replacement parts like valves, fittings, and pipes cost extra. Some plumbers have parts in their trucks. Others have to get items, which takes more time and costs more money. The final bill includes these components. Clean-Up and Disposal Costs Disposal charges may be added after your replacement and repairs to the rig pipes, fixtures, or sewage materials. Cleanup or sanitizing procedures must be done for certain jobs to guarantee your home is secure once the restoration is complete. You can read about: How Much for Plumbing in Los Angeles How to Evaluate a Plumbing Company’s Hourly Rate Knowing what to charge for rates is only part of the process; you also have to decide if the plumber is worth the rate in terms of Value, Reliability, and Professionalism. The lowest quote isn’t always the best when it comes to work, particularly with something as finicky as plumbing. Check Reviews and Reputation Before you agree to any service charge, read up on customer reviews and testimonials. Trust is fostered through quality and transparency, and that’s exactly what you get with Derks Plumbing Company. Well-established reputation can justify a higher hourly rate to ensure the work quality. Ask About Warranties or Guarantees Commercial plumbers said their repairs or services come with guarantees. Warranties add to your peace of mind, and especially so when you are paying for an overdue repair. How Homeowners Can Reduce Plumbing Costs You do not have control over rates but you can take steps to manage your overall expenses and avoid repairs that are not necessary. Fix Issues Early Slow drains and tiny leaks do not usually go away

Cold Field Water Heater Meaning
Plumbing

Cold Field Water Heater Meaning | What It Is and How to Fix It

You turn on the hot water tap and nothing comes out but cold water. That’s frustrating. Your water heater is running, the pilot light is on, but the water stays cold. This problem is more common than most people think, and it can happen at any time of year, though cold weather makes it worse. If you’ve been searching for a cold field water heater meaning, you’re in the right place. It refers to a water heater that stops heating water properly, often caused by a failed heating element, thermostat issues, or weather-related stress on the unit. This guide covers everything you need to know, from causes to fixes. What Does Cold Water Heater Mean? A cold water heater is exactly what it sounds like: a water heater that is no longer doing its job. Instead of heating your water to a warm, usable temperature, it delivers cold or lukewarm water to your taps. This can happen with both tank-style and tankless water heaters. The term cold field water heater meaning is often used by plumbers and HVAC techs to describe a unit that has failed in the field, meaning it stopped working at the installation site rather than in a factory or lab setting. Understanding the difference between a completely cold heater and one that produces lukewarm water matters. A fully cold unit usually means a total component failure. Lukewarm water suggests the heater is partially working, possibly with one failed heating element out of two. Tank vs. Tankless: Does the Type Matter? Yes, it does. With tank-style water heaters, the most common reasons for cold water are a broken heating element or a faulty thermostat. With tankless units, it’s usually a flow sensor issue, a tripped reset button, or an ignition failure on gas models. Both types can be affected by cold weather, but tank units are more vulnerable because the stored water can lose heat fast when temperatures drop. You can read about: How to Install a Water Heater Common Reasons and Causes Behind This Problem There’s no single reason why a water heater stops producing hot water. Most of the time, it comes down to one of these issues: 1. Failed Heating Element This is the most common cause in electric water heaters. Most electric units have two heating elements, one at the top and one at the bottom. If both fail, you get cold water. If only one fails, you might get less hot water than usual. Heating elements wear out over time. Mineral buildup from hard water can coat them and reduce their efficiency. Eventually, they stop working entirely. 2. Broken Thermostat The thermostat tells your water heater when to heat and when to stop. If it fails, the heater may never turn on, or it might not heat water to the right temperature. Electric water heaters typically have two thermostats matching the two heating elements. 3. Pilot Light or Ignition Failure (Gas Heaters) For gas water heaters, a blown-out pilot light is one of the first things to check. If the pilot light goes out, the burner won’t ignite, and you’ll get cold water. This can happen due to a faulty thermocouple, a gas supply issue, or simply a strong draft. 4. Tripped Reset Button Electric water heaters have a reset button, sometimes called an emergency cut-off or ECO switch. If the water gets too hot, the reset trips to protect the unit. A tripped reset will shut off your heater completely. You can press it to restore power, but if it trips often, there’s an underlying problem. 5. Sediment Buildup Over time, minerals in your water settle at the bottom of the tank. This layer of sediment acts like insulation between the burner and the water, making it harder to heat. You may hear popping or rumbling sounds when this happens. Flushing the tank regularly helps prevent this. 6. Faulty Dip Tube The dip tube pushes cold incoming water to the bottom of the tank so it can be heated before rising to the top. If this tube breaks or cracks, cold water mixes with hot water near the top, and you end up with lukewarm output. You can read about: How Do You Clean Hard Water Stains Off Glass? Why This Issue Is Common in Winter Seasons Cold weather affects your water heater more than most people realize. When outdoor temperatures drop, it puts extra pressure on your unit in several ways. First, the water coming into your home is colder in winter. Your water heater has to work harder and longer to bring it up to the right temperature. This extra workload puts more stress on heating elements, thermostats, and gas burners. Second, if your water heater is in an unheated space like a garage, basement, or utility room, the unit itself gets cold. A cold water heater in an unheated area loses heat fast. The unit runs almost constantly trying to keep up, which accelerates wear. Third, pipes can freeze in very cold weather. If the pipes connected to your heater freeze, no water flows at all, which can look like a heater problem when it’s actually a pipe problem. Does cold weather affect water heater performance? Absolutely. Studies and real-world plumbing reports consistently show a spike in water heater service calls during winter months, especially in regions where temperatures drop below 20 degrees Fahrenheit. What Temperature Is Too Cold for a Water Heater? Most water heaters are designed to work in spaces above 40 degrees Fahrenheit. If your unit is in a space that drops below that, you risk reduced performance, pipe damage, and faster wear on internal components. Some tankless units have built-in freeze protection, but tank-style heaters generally don’t. You can read about: Why Is My Hot Water Not Working Warning Signs That You Should Not Ignore Don’t wait until you have no hot water at all. These are the signs that tell you something is going wrong:     Your hot water runs out

How to Fix a Running Toilet
Plumbing

How to Fix a Running Toilet: Easy DIY Guide

A running toilet is more than just a rude noise in the middle of the night; it’s wasted water, resulting in higher bills and a sign that something is wrong with the inner workings of your tank. Knowing how to fix a running toilet isn’t going to require you to be a master plumber. As a matter of fact, most homeowners can do the job with just a few tools and a little know-how. And if it is something worse, Derks Plumbing Company or any other such professional can come out and take care of the repair safely and efficiently.  The article below is a full guide on what causes a running toilet, how to detect the problem, and the solutions from the easiest to the most complex that you can try at home to solve this problem.  Why a Running Toilet Matters More Than You Think Many people neglect a running toilet for days or weeks, hoping the problem will fix itself. However, such a problem can waste hundreds of gallons of water, resulting in inflated utility bills and unnecessary environmental damage. A running toilet can also indicate that one or more internal components are broken. Taking care of the problem early can prevent leaks, water damage, and more costly repairs down the road. And fixing it can never hurt when it comes to making sure your bathroom remains useful and efficient. Homeowners who want to keep their homes caring for their homes need to be able to identify and fix this problem. That is why they, such as Derks Plumbing Company, advise that you act right away if you see anything unusual when using your toilet The Most Common Reasons Your Toilet Won’t Stop Running When your toilet won’t stop running, the culprit is generally one of three internal components: the flapper, the float, or the fill valve. These components control the water flow within the tank, and when one malfunctions, the toilet can run continuously. Knowing which component is malfunctioning is the key to fixing it. Here are the most common reasons why your toilet won’t work and how they affect its performance. Worn or Misaligned Toilet Flapper A flapper allows water to flow from the tank into the bowl. If it becomes worn or doesn’t seat properly, the water leaks nonstop, causing the tank to keep refilling. It’s one of the most common causes of running toilets. Flappers can become warped, mineral deposits can prevent them from sealing, or the flapper chain may be too tight or too loose. Replacing a flapper is cheap and usually fixes the problem immediately. It’s an easy fix for anyone comfortable with basic plumbing. If you want to know if your flapper is closing properly, you can perform a simple dye test that will show you if you are missing flapper sealing right away. Incorrect Float Height or Faulty Float Mechanism The fill for the toilet tank stops when the float rises. If it is adjusted too high, the water level will rise until it drips into the overflow tube, telling the fill valve to remain on. Malfunctioning float The balance can be disrupted by a malfunctioning float, which can be either a stuck arm or a waterlogged float ball. An adjustment to the float height will typically fix the problem. Modern toilets frequently employ a cylinder-style float rather than a floating ball. Both types of balls can fail if the tank becomes encrusted with sediment. Inspecting and adjusting the float is a matter of minutes, and no special tools are necessary. Faulty or Old Fill Valve The flush fill valve will recycle each time, regaining the water in the tank. Wear, clogging, or sticking of the valve may cause the toilet to run endlessly. Mineral deposits caused by hard water may also cause the valve to not close all the way. Fill valves in older toilets commonly fail because of age. An active fill valve replacing it must be replaced and not repaired. Fortunately, modern fill valves are inexpensive, and installation guides are very simple to follow. Replacement of this part guarantees an adequate flow of water and is beneficial for the longevity of the toilet in general.  You can read about: Why were bathrooms called water closets How to Stop the Toilet From Running If you know how to manage a home repair toilet, you can work on this common problem that can waste so much water on your own. These instructions should work for most standard toilets. Step 1: Remove the Tank Lid and Inspect the Parts Slowly raise the tank lid and place it on its edge on a firm surface. Watch the internals with the toilet running.  Notice the flapper, float, and fill valve to see which one is not working. A fast visual check will expose leaks, loose parts, or misalignment. Step 2: Adjust or Replace the Toilet Flapper Is the flapper sealing the flush valve opening? If it’s warped or not flat, it probably needs to be replaced.  Before replacing the flapper, shut off the water supply with the valve located near the base of the toilet.  Take off the old flapper by unhooking the chain and the rubber arms, then secure the new one firmly.  Have a little slack in the chain, but not so much that it gets caught under the flapper when you adjust the slack. Step 3: Adjust the Float Height If the water level becomes too high, move the float up so that the fill valve closes sooner. For older ball floats, carefully bend the float arm downward. For cylinder floats, turn the adjustment screw or clip. Set the water level to approximately 1 inch below the overflow tube for best performance. Ensure the float is unobstructed and is not affected by any mineral deposits. Step 4: Replace the Fill Valve if Necessary If raising the float doesn’t work, the fill valve could be broken. Turn off the water supply and flush the toilet to drain the tank. Remove the old fill valve, then install the new one as per the manufacturer’s instructions. Reattach the water supply and press check that the toilet has a nice, slow, quiet refilling cycle. You can read about: Why Is My Toilet Water Yellow?  When to Call a Professional Plumber That said, not all

Fast and Efficient Plumbing Services in Eagle Rock

Client Reviews

Posted on Google Google
Ryan Haden profile picture
Ryan Haden
Google star 1Google star 2Google star 3Google star 4Google star 5Trustindex verifies that the original source of the review is Google.
Could not have been happier with Alex! We was right on time, polite, fixed all my kitchen sink issues and have me good tips on how to best maintain. I will for sure be using him again and highly recommend anyone who needs a great plumber to use his services as well. Thank you!
Posted on Google Google
Lorena Marcoe profile picture
Lorena Marcoe
Google star 1Google star 2Google star 3Google star 4Google star 5Trustindex verifies that the original source of the review is Google.
Talk about a professional...yes, I am talking about Alex Derks, Derks Plumbing. He is by far the most knowledgeable plumber we have ever had the pleasure of hiring. He's been in the plumbing business for years and it shows. Any questions you have re: plumbing issues, install, etc., Alex is your man. So happy with his work and he has a great sense of humor as well... extremely easy to talk to...thank you Alex!!!
Posted on Google Google
Andrew Jalil profile picture
Andrew Jalil
Google star 1Google star 2Google star 3Google star 4Google star 5Trustindex verifies that the original source of the review is Google.
Alex did a great job installing my kitchen faucet and an under-sink Aquasana water filter. He also addressed a few other plumbing-related issues. He was friendly and helpful. Excellent work!
Posted on Google Google
Abigail Bigham profile picture
Abigail Bigham
Google star 1Google star 2Google star 3Google star 4Google star 5Trustindex verifies that the original source of the review is Google.
Alex does what other plumbers cannot do! He is our go to.
Posted on Google Google
Danielle Driver profile picture
Danielle Driver
Google star 1Google star 2Google star 3Google star 4Google star 5Trustindex verifies that the original source of the review is Google.
Alex is very friendly and responsive. What a pleasure to work with!
Posted on Google Google
Lawrence Isaacs profile picture
Lawrence Isaacs
Google star 1Google star 2Google star 3Google star 4Google star 5Trustindex verifies that the original source of the review is Google.
Very very happy with the work Alex did for us replacing the tanks in our Aquasana filtration system. From first contact over the phone through job completion Alex was a pleasure to work with. He explained what he was doing, and why, every step of the way, and made sure we understood what we needed to do to maintain the system. Strongly recommend Alex!
Posted on Google Google
Joey Aucoin profile picture
Joey Aucoin
Google star 1Google star 2Google star 3Google star 4Google star 5Trustindex verifies that the original source of the review is Google.
Alex Derks has been such a lifesaver for me. Anytime I'm in a pinch with the plumbing in my home, Alex is only a phone call away and I've only seen great results from his work. He's reliable, knowledgable, and entirely trustworthy. A must-have source when owning a home.
Posted on Google Google
Eric Gorman profile picture
Eric Gorman
Google star 1Google star 2Google star 3Google star 4Google star 5Trustindex verifies that the original source of the review is Google.
After working with dozens of plumbing services in the LA area, I can confidently say Derks is the best in the business. On time, reliable and capable of even the most difficult tasks, Derks goes above and beyond to make sure your water system is working correctly.
Posted on Google Google
Jason Gruenbaum profile picture
Jason Gruenbaum
Google star 1Google star 2Google star 3Google star 4Google star 5Trustindex verifies that the original source of the review is Google.
Excellent know-how and fast!! Reasonable pricing and super responsive!!
Posted on Google Google
Jonathan Hepfer profile picture
Jonathan Hepfer
Google star 1Google star 2Google star 3Google star 4Google star 5Trustindex verifies that the original source of the review is Google.
Alex is an expert plumber, and he always goes out of his way to educate me about how to prevent future issues. Highly recommended!

Derks Plumbing has been providing professional plumbing services to Eagle Rock residents for over 20 years. Our experience and strong reputation have allowed us to grow, and we are proud to serve customers in 15 nearby areas, including Venice, Santa Monica, Beverly Hills, and more.

Contact

Hours of Operation

Monday: Open 24 Hours
Tuesday: Open 24 Hours
Wednesday: Open 24 Hours
Thursday: Open 24 Hours
Friday: Open 24 Hours
Saturday: Open 24 Hours
Sunday: Open 24 Hours

© 2026 Created by Localpro1

Scroll to Top