We are Available 24/7

Plumbing

what is abs in plumbing
Plumbing

What Is ABS in Plumbing? | Pipe Guide & Uses

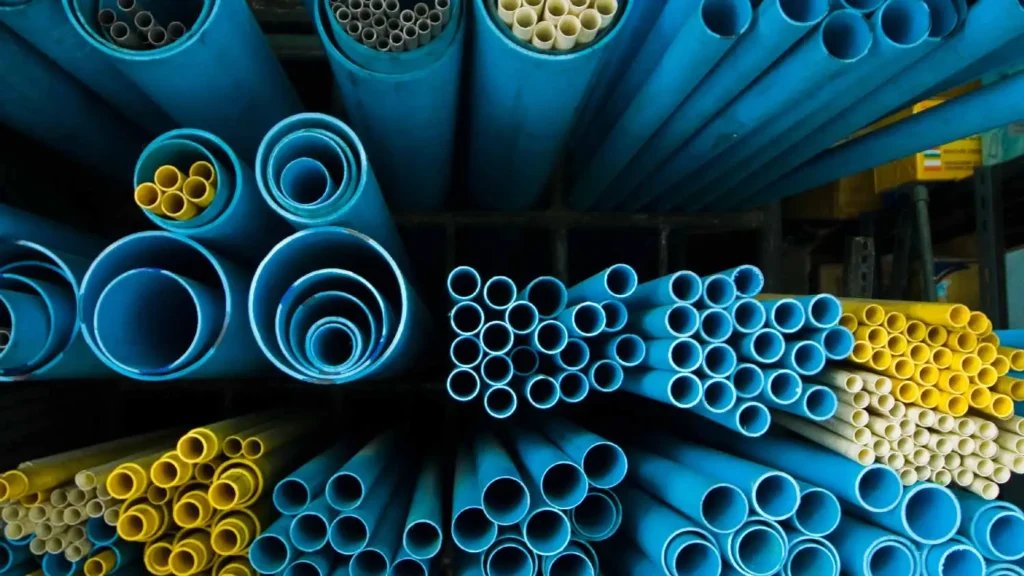
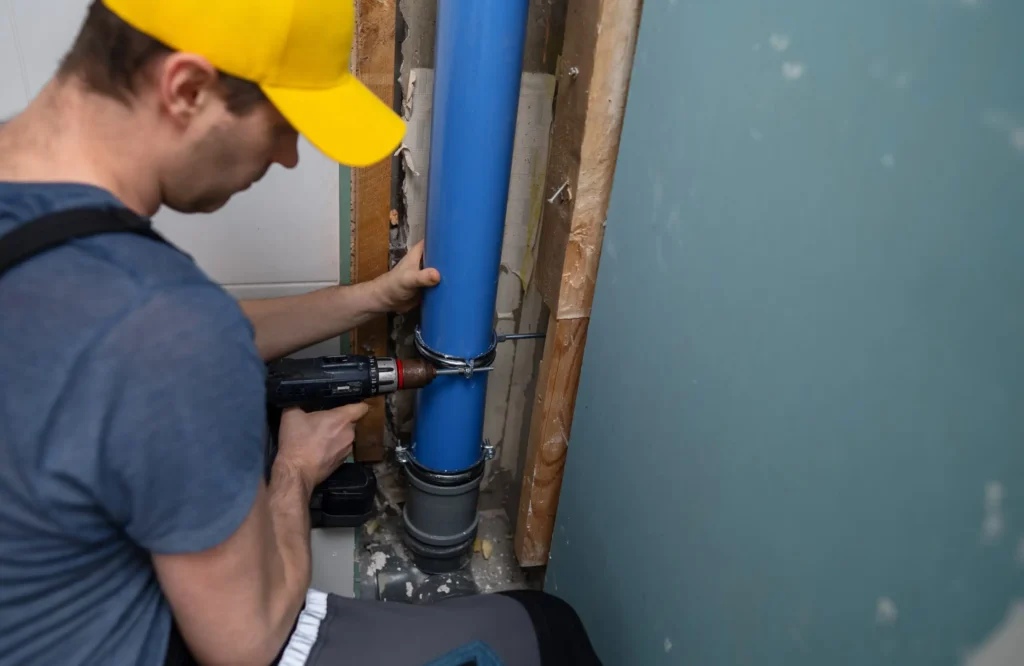
ABS in plumbing stands for Acrylonitrile Butadiene Styrene, a black plastic pipe used in drain, waste, and vent systems. If you’ve ever looked under your sink and seen a black pipe, that’s probably ABS. It’s tough, lightweight, and handles wastewater without breaking down. So what is ABS in plumbing exactly, and why does it matter to you as a homeowner? This guide breaks it down in plain language. You’ll learn what it’s made of, where it’s used, how long it lasts, and whether it’s still a smart choice today. What Does ABS Stand for in Plumbing? ABS stands for Acrylonitrile Butadiene Styrene. That’s a mouthful, so most plumbers just call it ABS. It’s a type of thermoplastic, which means it can be heated and shaped, then it hardens and holds its form. The material became popular in plumbing back in the 1950s. A builder in Arizona tested it for home plumbing systems and found it worked well. After more research, building authorities approved it for residential use, and it spread across the country from there. Today, when people ask what is an ABS pipe, the simple answer is this: it’s a rigid black plastic pipe designed mainly for drainage and venting, not for carrying pressurized water. What Is ABS in Plumbing Used For? ABS pipe is built for drain, waste, and vent systems, often shortened to DWV. These systems carry wastewater away from your sinks, toilets, and showers, and they vent sewer gases safely out of your home. Here’s where you’ll typically find ABS plumbing pipe in a house: Under-sink drain lines in kitchens and bathrooms Toilet drain connections Main waste stacks that run through walls Vent pipes that stick out through the roof Sewer lines connecting to the city system One thing to keep in mind: ABS pipe is not meant for pressurized lines. You won’t see it used for your main water supply or for compressed air systems. It’s strictly for gravity-fed waste removal. If ABS pipe is used outdoors, it usually needs to be buried underground or covered. Sun and heat exposure can damage the pipe over time if it’s left exposed outside. You can read about: what does fip mean in plumbing Characteristics of ABS Plumbing Pipes Understanding what is abs plastic pipe made of helps explain why it behaves the way it does. ABS is created by combining three chemical compounds, which gives the material its strength and flexibility. Here are the main traits of ABS pipe: Color and appearance. The ABS pipe is solid black. This makes it easy to spot and tell apart from white PVC pipe at a glance. Lightweight build. A 10-foot section of 3-inch ABS pipe weighs under 10 pounds. That makes it easy to carry, cut, and install without heavy equipment. Impact resistance. ABS pipe can resist mechanical damage even in temperatures as low as -40°F. It holds up well against bumps and drops during construction. Temperature stability. ABS absorbs heat or cold slowly, which helps it stay tough when temperatures change quickly. This matters because drain pipes often carry both hot and cold wastewater. Single-step installation. Most ABS pipe connections use solvent cement in one step. No primer is required before applying the cement, which speeds up the job for plumbers. Standard sizing. ABS pipe comes in common sizes like 1.5 inch, 2 inch, 3 inch, 4 inch, and 6 inch diameters, matching standard schedule 40 measurements used across the plumbing industry. Advantages of ABS Plumbing Pipes Why do plumbers reach for abs plumbing pipe so often? A few clear reasons stand out. Faster installation. A typical two-bathroom home DWV system, with around 100 joints, can be completed two to six hours faster with ABS than with other materials. For a plumber working on a tight schedule, that time savings adds up. Cost-effective. ABS pipe tends to cost less than cast iron and is competitively priced against PVC in many regions. Lower material costs combined with faster labor time often mean lower bills for homeowners. Strong under pressure from soil and structures. ABS pipe can handle the crushing loads from soil, slab foundations, and surface weight without collapsing. This makes it reliable for pipes buried under driveways or foundations. Good for cold climates. Because it stays tough at very low temperatures, ABS holds up in regions with harsh winters better than some other plastics. Easy to repair and modify. Cutting and joining ABS is simple with basic tools. If you need to add a branch line or fix a section, the work doesn’t require specialized equipment. Quiet operation. ABS pipe tends to dampen the sound of water rushing through it better than thinner-walled materials, which means less noise from your walls. ABS vs. PVC Plumbing Pipes This is one of the most common questions homeowners ask. Both are plastic pipes used in plumbing, but they have real differences. Material and color. ABS is black and made from a single-step manufacturing process. PVC is usually white or cream colored and made from a different chemical formula entirely. Flexibility. ABS is more rigid but also more impact-resistant in cold weather. PVC can become brittle and crack in freezing temperatures more easily than ABS. Installation method. ABS typically uses a one-step solvent cement. PVC usually requires a primer step before cement is applied, which adds a bit more time to each joint. Sound levels. ABS tends to be quieter when water flows through it. PVC can produce more noticeable noise, especially in exposed pipe runs. UV resistance. PVC holds up slightly better than ABS when exposed to direct sunlight for long periods. If ABS pipe is installed outdoors, it generally needs protection from sun and heat exposure. Building codes. This is the big one. Many local plumbing codes allow both PVC and ABS schedule 40 pipes and fittings for drains, waste, and vents in residential buildings. However, some cities and states have restrictions on ABS, especially for multi-story commercial buildings. Always check with your local permit office before choosing either
what is a plumbing stack
Plumbing

What Is a Plumbing Stack? A Complete Guide for Homeowners

Most homeowners never think about their plumbing until something goes wrong. But behind every wall in your home runs a system of pipes that quietly handles every flush, every drain, and every drop of wastewater 24 hours a day. The plumbing stack is the backbone of that system. So what is a plumbing stack exactly? It is the main vertical pipe that runs from your basement or foundation all the way up through your roof. Every drain in your home sinks, toilets, tubs, and showers connects to it. This guide explains how it works, what can go wrong, and when to call a plumber. What Is a Plumbing Stack? A plumbing stack is a large vertical pipe that serves as the central drainage and venting system in your home. It collects wastewater from every fixture on every floor and carries it down to the main sewer line beneath your foundation. The stack pipe typically runs straight up through the interior of the building through walls, floors, and the roof. At the bottom, it connects to the building drain that leads to the city sewer or your septic system. At the top, it opens above the roofline as a vent pipe that lets air into the system. Without a functioning plumbing stack, your entire drainage system fails. Toilets would not flush properly. Sinks would drain slowly or not at all. You would smell sewer gas inside the home. Every fixture depends on this single pipe to function correctly. Most homes have one main stack. Larger homes or multi-bathroom properties sometimes have a secondary stack for a far-end bathroom or kitchen that is too distant from the main line. Why Is a Plumbing Stack Important? The stack does two critical jobs at the same time and both have to work together. Job 1: Drain wastewater. Every time you flush a toilet or drain a sink, the wastewater drops down through the stack by gravity. The pipe is sized large enough typically 3 to 4 inches in diameter to handle the combined flow from all fixtures simultaneously. Job 2: Vent the system. This is the part most homeowners do not know about. As water drains down the stack, it creates negative air pressure behind it. Without a way to equalize that pressure, the water would siphon the P-traps dry. P-traps are the curved sections of pipe under your sinks and behind your toilets that hold a small amount of water to block sewer gas. If they dry out, sewer gas enters your home directly. The stack pipe extends above the roof to let outside air into the system continuously. This keeps pressure balanced so water drains smoothly and traps stay full. It is the reason your toilet flushes quietly and your sink does not gurgle. How Does a Plumbing Stack Work? Picture your home from the side as a cross-section. The plumbing stack runs vertically through the center, like a spine. Every fixture drain the toilet in the upstairs bathroom, the kitchen sink on the ground floor, the utility tub in the basement connects to the stack through a horizontal branch drain. These branch drains slope slightly downward toward the stack so gravity moves the waste without pumps. When you flush a toilet upstairs, the waste drops down the stack at speed. The vertical momentum carries it all the way to the building drain at the bottom, which slopes toward the street. Simultaneously, air enters through the vent at the top of the roof stack, preventing any vacuum from forming behind the falling water. The whole system runs on two forces only: gravity and air pressure. No motors, no pumps, no power required. When it works, it is invisible. When something blocks the airflow or the drain path, every fixture in the house feels it. Types of Plumbing Stacks and Their Functions Soil Stack The soil stack is the main drain stack that carries human waste from toilets. It is the largest pipe in the system usually 4 inches in diameter in residential homes because it needs to handle solid waste without blocking. The soil stack connects directly to the sewer main. Waste Stack A waste stack carries gray water only meaning wastewater from sinks, showers, bathtubs, dishwashers, and washing machines. It does not carry toilet waste. In older homes, waste stacks were sometimes separate from the soil stack. In most modern homes, they combine into one main stack. Vent Stack The vent stack is the upper portion of the main stack that extends above the roof. Its only job is to let air in. It has no wastewater running through it it is purely for pressure equalization. In some configurations, a separate vent pipe called a dry stack runs from fixtures to the roof without connecting to a drain. Stack Vent A stack vent is different from a vent stack. It is the top section of the main soil or waste stack, above the highest drain connection, that continues up through the roof. It does double duty part of it carries waste, and the upper section vents the system. Understanding what is a stack in plumbing means understanding that “stack” refers to the complete vertical assembly not just one section. Components of a Plumbing Stack System The stack plumbing system has several key components that work together: Stack pipe: The main vertical pipe. In older homes, this is cast iron. In homes built after the 1970s, it is typically ABS or PVC plastic. Branch drains: Horizontal pipes that connect individual fixtures to the stack. Each branch drain slopes at a minimum 1/4 inch per foot toward the stack. P-traps: The curved pipe sections under sinks and at the base of other fixtures. They hold water to block sewer gas and connect to branch drains. Cleanout: A removable cap installed at the base of the stack usually near floor level in the basement or utility room. Plumbers use this to access the stack for blockage clearing without removing walls. Roof vent: The

how to unclog a drain
Plumbing

How to Unclog a Drain: Every Method That Actually Works

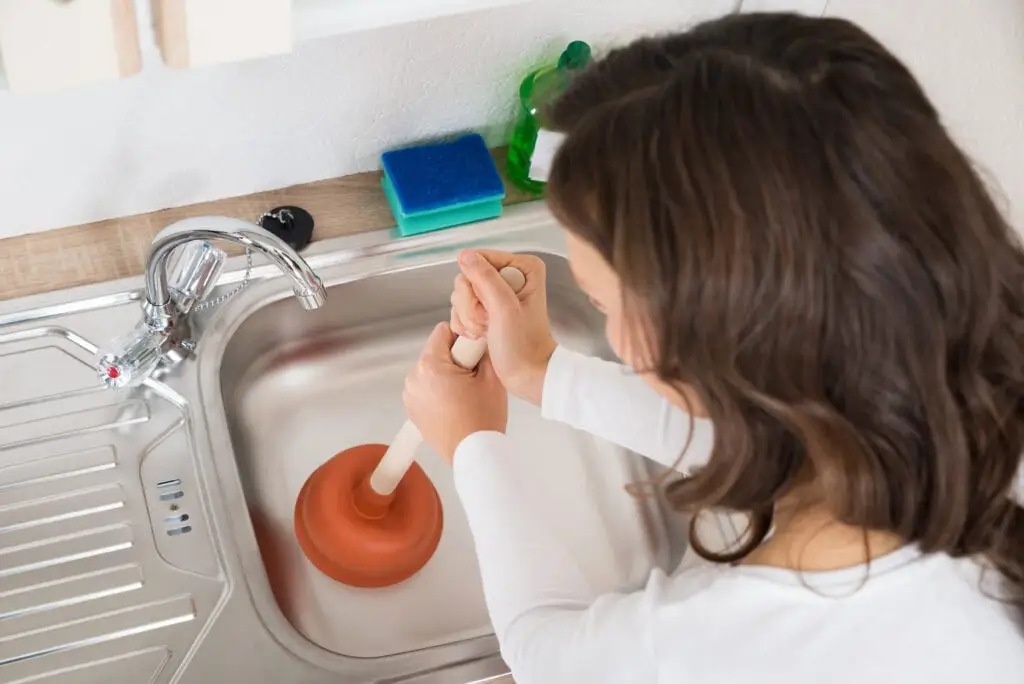
A clogged drain is one of those problems that shows up at the worst possible time. Standing water in the sink, a shower that pools around your feet, or a kitchen drain that barely moves all frustrating, all fixable. Most clogs clear with tools and materials you already have at home. Knowing how to unclog a drain correctly saves you time and money. This guide covers every method from simple to advanced, tells you when each one applies, and explains clearly when it is time to stop DIYing and call a plumber. What Causes a Drain to Clog? A clogged drain rarely happens overnight. Most blockages build gradually over weeks or months. Understanding the cause helps you pick the right fix. Kitchen drains clog from grease and cooking oil that coat the inside of pipes, food particles that slip past the strainer, and soap buildup that thickens over time. Coffee grounds and starchy foods like rice and pasta are especially problematic; they compact rather than break down. Bathroom drains clog mainly from hair. Hair tangles around soap scum and builds a dense mesh that traps everything passing through. Toothpaste residue, shaving cream, and mineral deposits from hard water all contribute. Toilet clogs come from flushing things that should never enter plumbing wet wipes, cotton balls, paper towels, dental floss, and excessive toilet paper in a single flush. Slow drains across multiple fixtures usually signal a deeper problem in the main drain line, tree root intrusion, a collapsed pipe section, or years of buildup past the point that household tools can reach. Signs You Have a Clogged Drain Catch a clog early and you deal with it in minutes. Ignore the signs and you end up with a backup. Here is what to watch for: Water drains noticeably slower than it used to Standing water in the sink, tub, or shower after use Gurgling sounds from the drain after water goes down Unpleasant odor rising from the drain often from trapped organic material Water backing up into a nearby fixture when you flush or run water elsewhere The toilet bowl bubbles or gurgles when you run the bathroom sink Multiple slow drains at the same time almost always means the clog is in the main line, not an individual fixture drain. That requires a different approach than a standard drain unclogging method. How to Unclog a Drain Using Boiling Water This is the first method to try for any slow kitchen or bathroom drain. It is free, takes two minutes, and works surprisingly well on grease and soap buildup. How to do it: Boil a full kettle of water. Pour it directly into the drain opening in two or three stages not all at once. Wait 10 to 15 seconds between pours. The heat softens and loosens grease and soap deposits clinging to the pipe walls. When it works: Early-stage kitchen clogs caused by grease buildup, and slow bathroom drains with soap scum accumulation. When to skip it: Do not use boiling water on PVC pipes sustained high heat can soften the joints. Use very hot tap water instead if your home has PVC drain lines. Also skip this method if you have a full standing water situation the water needs to reach the clog, and if the drain is completely blocked, it will not get there. How to Unclog a Drain with Baking Soda and Vinegar This combination creates a fizzing reaction that loosens light clogs and freshens the drain. It works best as a maintenance step or for minor slowdowns rather than full blockages. How to do it: Pour one cup of baking soda directly into the drain. Follow with one cup of white vinegar. Cover the drain immediately with a stopper or a cloth that forces the reaction downward into the pipe rather than up and out. Wait 20 to 30 minutes. Finish with a full kettle of hot water to flush everything through. When it works: Mild soap and grease buildup, slow drains that are not fully blocked, and as a monthly maintenance flush to prevent future clogs. What it does not do: This method will not break apart a hair clog, dissolve a grease plug deep in the line, or clear any kind of solid obstruction. If the drain does not improve after two attempts, move on to a physical method. You can read about: Will Drain Cleaner Dissolve Hair How to Unclog a Drain with a Plunger A plunger is the most effective tool for clearing a drain clogged with a localized blockage. Most people only use one in the toilet but plungers work well on sinks and tubs too. What you need: A cup plunger for sinks and tubs. A flange plunger for toilets the extra rubber flap creates a proper seal in the toilet opening. How to do it: For a sink: Seal the overflow opening (the small hole near the rim of the sink) with a wet cloth. This prevents air from escaping and makes the plunger effective. Place the cup over the drain opening and fill the sink with a few inches of water. Push down firmly and pull up sharply so you do not break the seal. Repeat 10 to 15 times. On the final pull, lift the plunger completely to release pressure. For a toilet: Place the flange plunger into the bowl so the flange fits inside the drain opening. Push and pull firmly without lifting the plunger out of the water. The water movement, not air, is what shifts the blockage. Key mistake to avoid: A dry plunge pushes air, not water. Always make sure there is water covering the plunger cup before you start. How to Unclog a Drain Using a Drain Snake A drain snake also called a hand auger is the right tool when a plunger does not work. It physically reaches the blockage and either breaks it apart or hooks it so you can pull it out. How to do it: Feed the

How Much Does a Dripping Faucet Cost Per Month?
Plumbing

How Much Does a Dripping Faucet Cost Per Month? | Full Guide

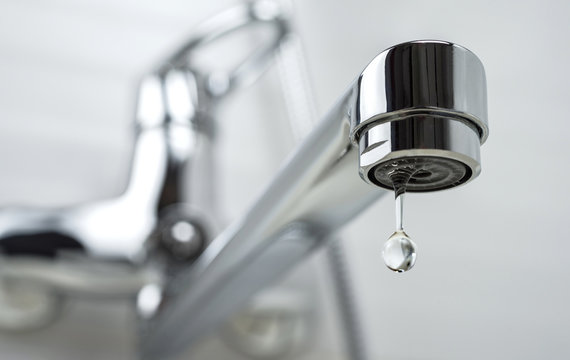
A dripping faucet feels harmless. But that small, steady drip adds up fast. One drip per second wastes about 3,000 gallons of water per year. That’s money going straight down your drain. So, how much does a dripping faucet cost per month? On average, a faucet dripping once per second costs between $1 to $20 per month, depending on your local water rates and how fast it drips. A fast drip can push that number much higher. How Much Water Does a Dripping Faucet Waste? Before we talk about money, let’s talk about water. The EPA says a single leaky faucet dripping once per second wastes around 3,000 gallons per year. That’s roughly 250 gallons per month. Here’s a simple breakdown by drip rate: Drips Per Minute Gallons Per Day Gallons Per Month 10 0.5 15 60 (1/sec) 8.6 259 120 17.3 520 240 34.6 1,040 A slow drip might not seem bad. But a faucet dripping at 120 drips per minute wastes over 500 gallons a month. That’s the same as taking 10 extra showers. How Much Does a Dripping Faucet Cost Per Month? Here’s the number you came for. The average U.S. household pays about $0.004 to $0.006 per gallon for water and sewer combined. Using that rate: Slow drip (10 drips/min): Around $0.06 to $0.09/month Medium drip (60 drips/min): Around $1 to $2/month Fast drip (120 drips/min): Around $2 to $4/month Very fast drip (240 drips/min): Around $4 to $8/month Now multiply that by the number of faucets in your home. Most homes have 8 to 10 faucets. If two or three are dripping, your monthly cost jumps fast. In high-cost water areas like California or New York, the cost of a dripping faucet can be 2 to 3 times higher than the national average. Some homeowners in those areas report paying an extra $15 to $20 per month from just one fast-dripping faucet. You can read about: How to Change Bathroom Sink Faucet  Factors That Affect the Cost The cost of leaky faucet damage isn’t just about drip rate. Several things change the total: Local Water Rates Water rates vary widely. In some cities, water costs as little as $0.002 per gallon. In others, it can reach $0.015 per gallon or more. Check your water bill or contact your utility to find your exact rate. Hot vs. Cold Water Drips If your hot water faucet is dripping, the cost of a dripping faucet goes higher. Your water heater works harder to keep up. That adds to your energy bill, not just your water bill. How Fast the Faucet Drips Obviously, a faster drip costs more. But most people underestimate how fast their drip rate actually is. Time 10 drips with your phone. If it takes under 10 seconds, that’s a fast drip. Time Left Unrepaired Every day you wait makes it worse. A faucet dripping for six months adds up to more than just wasted water. It can damage pipes, stain sinks, and lead to bigger plumbing problems. Type of Faucet Ball faucets, cartridge faucets, and compression faucets all have different failure points. Some are easier to fix and less likely to drip heavily. Ceramic disc faucets tend to last longest. The Hidden Costs of a Dripping Faucet The how much does dripping faucet cost question goes beyond your water bill. There are hidden costs too. Sink and Fixture Damage Constant dripping leads to mineral buildup and staining. Over time, it can corrode your sink basin, especially with hard water. Replacing a stained or corroded sink costs $150 to $500 or more. Increased Energy Bills A leaking hot water faucet keeps your water heater in near-constant use. Even a small drip can add $5 to $10 per month to your energy bill in colder climates. Mold and Mildew Risk Moisture under the sink or around the faucet base promotes mold growth. Mold remediation costs $500 to $3,000 depending on how far it spreads. Structural Damage If a faucet drips inside a cabinet or near a wall, water can seep into wood and drywall. That damage often isn’t visible until it’s serious and expensive. Lower Home Value When selling your home, visible water damage or a history of plumbing neglect can reduce your asking price. Buyers notice stained sinks and soft wood under cabinets. Signs Your Faucet Needs Repair Catching a problem early saves money. Watch for these signs: You can hear dripping when the house is quiet Water appears in the sink basin when the faucet is off The handle feels loose or takes more force to fully shut There’s rust, green buildup, or white mineral crust around the base Your water bill went up with no obvious reason There’s moisture or staining under the sink cabinet If you notice any of these, don’t wait. The longer you leave it, the higher the cost of leaky faucet damage becomes. Why Faucets Start Dripping Understanding why your faucet drips helps you fix it faster. Worn Washers This is the most common cause. Every time you use the faucet, the rubber washer rubs against the valve seat. Over years, it wears out and lets water through. Most common in compression-style faucets. Damaged O-Ring The O-ring seals the stem of the faucet handle. It wears out with regular use. When it fails, water leaks from the base of the handle or spout. Loose Packing Nut The packing nut holds the stem assembly in place. If it loosens, water drips near the handle. Sometimes hand-tightening fixes this. Corroded Valve Seat The valve seat connects the faucet and the spout. Sediment buildup corrodes it over time and causes leaking around the spout area. Worn Cartridge In cartridge faucets, the cartridge controls water flow. Worn cartridges cause persistent drips. Replacing a cartridge is usually a simple DIY fix. High Water Pressure Too much water pressure forces water past seals even when the faucet is closed. If your faucet drips only at night or certain times of day, high pressure may be

what does fip mean in plumbing
Plumbing

what does fip mean in plumbing​ | Simple Guide

Ever stared at a pipe fitting and had no idea what “FIP” stamped on it means? You’re not alone. Most homeowners run into this term during a repair or a trip to the hardware store. It sounds technical, but it’s pretty simple once you know what to look for. So, what does fip mean in plumbing? FIP stands for Female Iron Pipe. It’s a type of threaded pipe fitting where the threads are on the inside. Think of it like a nut that screws around a bolt. That’s exactly how FIP works with male pipe threads. What Does FIP Mean in Plumbing? FIP means Female Iron Pipe. It refers to a fitting with internal threads. These threads sit on the inside of the fitting and wrap around the outside threads of a male pipe. When plumbers talk about FIP plumbing meaning, they’re referring to this internal thread design. The “iron pipe” part comes from the original use of iron pipes in older plumbing systems. Today, FIP fittings are made from brass, stainless steel, PVC, and other materials. But the name stuck. So when you’re shopping for parts and see “FIP” on the label, it simply means the threads are inside the fitting. Here’s a quick breakdown: FIP = Female Iron Pipe = threads on the inside MIP = Male Iron Pipe = threads on the outside These two work together. MIP goes inside FIP. Just like a bolt screws into a nut. You can read about: What Is PRV in Plumbing Real-Life Example: Learning the Hard Way A homeowner in Los Angeles once tried replacing a leaky valve under the kitchen sink. He grabbed the first fitting that looked right at the hardware store. When he got home, he realized the threads didn’t match. The new fitting had external threads. The pipe he needed to connect to had internal threads. He had bought MIP when he needed FIP. After a second trip to the store, he got the right part. What does fip mean in plumbing? He now knows. It means the threads are on the inside. That simple detail cost him an extra hour and another trip to the store. This happens all the time. Knowing the difference between FIP and MIP before you shop saves time and frustration. Why Understanding FIP Matters Using the wrong fitting can cause leaks. A bad connection can lead to water damage, mold, or pressure loss. None of those are cheap to fix. Understanding FIP plumbing meaning helps you: Buy the right parts the first time Avoid leaky connections Communicate clearly with a plumber Save money on callbacks and repairs If you’re doing a DIY repair, this knowledge is basic but critical. If you’re hiring a plumber, knowing these terms helps you follow the conversation and ask better questions. Common Places You’ll Find FIP Plumbing Fittings FIP fittings show up in many spots around the house. Here are the most common places: Under the kitchen sink — Shutoff valves and supply lines often use FIP connections. Bathroom faucet supply lines — Most bathroom faucets connect to shutoff valves using FIP threads. Water heaters — The hot and cold inlet/outlet ports on most water heaters are FIP. Irrigation systems — Garden hose valves and irrigation manifolds often use FIP fittings. Washing machine hookups — Supply hoses for washers typically thread into FIP ports on the wall. Outdoor hose bibs — Many hose bibs are installed using FIP connections to the main supply pipe. If you’re working on any of these areas, check whether the connection is FIP or MIP before buying parts. FIP vs. NPT: Are They the Same? This is a question that trips a lot of people up. So let’s clear it up. NPT stands for National Pipe Taper. It’s a standard for how pipe threads are shaped and sized in the United States. The threads on NPT fittings are tapered, meaning they get slightly narrower toward the end. This taper helps create a tight seal as you tighten the fitting. So where does FIP fit in? FIP fittings follow the NPT standard. They use the same tapered thread design. The difference is just direction: FIP has the threads on the inside, while MIP has them on the outside. Both are NPT-compliant. Think of it this way: NPT = the thread standard (like ISO or metric standards) FIP = female version of NPT threads MIP = male version of NPT threads So FIP and NPT are related, but not exactly the same thing. FIP is a subset of NPT. When a product says “NPT threads,” check whether it’s FIP or MIP before assuming compatibility. Quick Tip: Use Teflon Tape Whenever you’re connecting FIP threads to MIP threads, use Teflon tape. It’s also called PTFE tape or thread seal tape. Wrap the tape around the male threads before screwing them in. Go clockwise, and wrap two to three times. This fills in any tiny gaps between the threads and prevents leaks. Skipping Teflon tape is one of the most common DIY plumbing mistakes. Even a small leak at a threaded connection can cause big problems over time. Is FIP Only Used in Metal Pipes? No. Despite the name “Iron Pipe,” FIP fittings are used with many types of pipe material today. The term comes from history. When these threading standards were first developed, most pipes were made of iron. The name never changed, even as the industry moved to newer materials. Today, you’ll find FIP fittings made from: Brass — most common for water supply applications Stainless steel — used in high-pressure or corrosive environments PVC — used in drain and irrigation systems Chrome-plated brass — common in decorative or visible plumbing So FIP is more of a thread type than a material type. The “iron” in the name is just a legacy from older times. What Sizes Do FIP Fittings Come In? FIP fittings come in standard sizes. The most common ones you’ll find at a hardware store are: FIP Size

what is prv in plumbing
Plumbing

What Is PRV in Plumbing? Full Homeowner’s Guide

High water pressure feels great in the shower, but it quietly destroys your home’s plumbing. It wears out pipe joints, cracks fixtures, and shortens the life of appliances like your dishwasher and washing machine. Most homeowners never think about water pressure until something breaks and by then, the damage is already done. That is where a PRV comes in. If you are wondering what is PRV in plumbing and whether your home needs one, the short answer is this: a pressure reducing valve is a small device that protects your entire plumbing system from the damage that high municipal water pressure causes every single day. What Is a Pressure Reducing Valve? A pressure reducing valve also called a PRV, water pressure regulator, or pressure regulator valve is a plumbing device that automatically reduces the incoming water pressure from your municipal supply line to a safe, steady level inside your home. Municipal water systems operate at pressures between 60 and 150 PSI (pounds per square inch). Your home’s plumbing, fixtures, and appliances are designed to handle 40 to 80 PSI. Anything above 80 PSI puts constant stress on every pipe, fitting, valve, and appliance in your home. The water pressure reducing valve sits on the main supply line where it enters your home typically near the water meter or where the supply pipe comes through the foundation wall. It works automatically, 24 hours a day, without any action from you. Most PRVs are set from the factory at 50 to 60 PSI. A licensed plumber can adjust this to fit your home’s specific needs. The standard safe range recommended by the Uniform Plumbing Code is 40 to 80 PSI, with 60 PSI being the sweet spot for most residential homes. What does a PRV look like? It is a bell-shaped brass fitting about the size of a fist. You will see an adjustment screw or bolt on top, a locknut to hold the setting in place, and threaded connections on both ends where it connects to your supply pipe. You can read about: What Is an Expansion Tank How Does a Pressure Reducing Valve Work? The mechanism inside a water pressure regulator valve is straightforward once you understand the parts. The five main components inside a PRV: Inlet port: Where high-pressure municipal water enters the valve Diaphragm: A flexible rubber disc that moves in response to downstream pressure Spring: Pushes against the diaphragm to maintain the set pressure Adjustment screw: Controls the spring tension and therefore the output pressure Outlet port: Where regulated, lower-pressure water exits into your home’s pipes Here is how it works in real time: When you open a faucet, water flows from the municipal line through the PRV and into your home. The diaphragm senses the downstream pressure. If that pressure drops below your set point (say, 60 PSI), the valve opens wider to allow more flow. If the pressure rises above the set point because demand dropped when you close a faucet the spring pushes the diaphragm to partially close the valve, restricting flow and bringing pressure back down. This constant self-adjustment happens automatically. You never see it or hear it when the valve is working properly. The only time you notice it is when it fails. Self-contained vs. pilot-operated PRVs Most residential homes use self-contained PRVs of the type described above. Large commercial or industrial buildings often use pilot-operated PRVs, which handle higher flow rates and use a separate pilot valve to control the main valve. For a standard single-family home, a self-contained brass PRV is the right tool. Where Is a PRV Installed? Knowing where your water pressure regulator is located helps you check it, adjust it, and notice problems early. In most homes, the PRV is installed: On the main supply line, within 12 inches of where the water enters the home Near the water meter (sometimes outside, sometimes inside near the meter box) In the basement or crawl space, on the main line before it branches off to different areas Near the water shut-off valve they are often installed together If your home was built after 1985, there is a good chance it already has a PRV. Homes built before that era may not, especially if they have not had a plumbing upgrade. To check your current water pressure without a plumber, buy a simple pressure gauge at any hardware store for $10 to $20. Thread it onto an outdoor hose bib (spigot), turn the water on fully, and read the gauge. Anything above 80 PSI means you need a PRV or your existing one needs adjustment. How to Adjust a Pressure Reducing Valve The water pressure regulator valve has an adjustment screw on top, usually brass or steel, with a locking nut underneath it. Adjusting it is a straightforward process, but it requires a pressure gauge to do accurately. What you need: Pressure gauge (thread onto any hose bib) Flat-head or Phillips screwdriver (or a wrench for the adjustment bolt) Pliers or wrench for the locknut Step-by-step adjustment process: Step 1 — Measure your current pressure. Attach the pressure gauge to an outdoor hose bib. Turn the water on and record the reading. This tells you where you are starting from. Step 2 — Locate the PRV. Find your pressure reducing valve on the main supply line. Most are in the basement, utility room, or near the main shut-off valve. Step 3 — Loosen the locknut. Use a wrench to loosen the locknut below the adjustment screw. Do not remove it, just loosen it enough so the adjustment screw can turn freely. Step 4 — Adjust the screw. Turn the adjustment screw clockwise to increase pressure. Turn it counterclockwise to decrease pressure. Make small adjustments a quarter turn at a time. Step 5 — Check the pressure. Go back to the hose bib and check the gauge again. Repeat the adjustment until you reach your target pressure (60 PSI for most homes, no higher than 75 PSI). Step 6 —

what is an expansion tank
Plumbing

What Is an Expansion Tank? Everything Homeowners Need to Know

Your water heater heats cold water all day long. As water heats up, it expands. That extra volume has to go somewhere. In older homes with open plumbing systems, it pushed back toward the main supply line without issue. In modern homes with closed systems, it cannot and that trapped pressure builds up fast. If you have ever wondered what is an expansion tank and whether your home needs one, the short answer is this: it is a small safety device that protects your water heater, pipes, and fixtures from pressure damage. Most homes built after 2005 require one by code. What Is an Expansion Tank? An expansion tank is a small pressurized vessel connected to your water heater’s cold water supply line. It gives expanding hot water a safe place to go when pressure builds inside a closed plumbing system. The tank itself is about the size of a basketball for most residential installations. Inside, a rubber diaphragm divides the tank into two chambers: The water side: Accepts the expanding water from your plumbing system. The air side: Pre-charged with air or nitrogen at a set pressure, usually matching your home’s water pressure (typically 50 to 80 PSI). When water in your heater heats up and expands, the extra volume pushes into the expansion tank. The diaphragm compresses the air cushion to make room. When you open a faucet and pressure drops, the air cushion pushes the water back into the system. This back-and-forth happens silently dozens of times a day. You never notice it and that is exactly the point. Why Thermal Expansion Is an Issue Water expands when it heats up. This is basic physics. A 50-gallon water heater holding water at 120°F contains about 0.5 gallons more volume than the same tank filled with cold water. That extra half-gallon needs somewhere to go. In an open plumbing system (no check valve or backflow preventer on the main supply line), that extra water simply pushes back into the municipal supply. No pressure buildup. No problem. In a closed plumbing system which most homes have today a check valve or pressure reducing valve (PRV) on the main line blocks that reverse flow. The expanding water is trapped inside your home’s pipes with nowhere to go. The result is a condition called thermal expansion pressure. Here is what that does over time: Damages your water heater. The pressure relief valve (T&P valve) on your heater is designed to open at 150 PSI. If thermal expansion regularly pushes pressure toward that limit, the valve cycles open and close repeatedly. It wears out, starts leaking, or fails sometimes catastrophically. Wears out fixtures and valves. Faucets, toilet fill valves, and washing machine hoses are not rated for repeated pressure spikes. Constant thermal expansion stress shortens their lifespan significantly. Causes pipe stress. Pressure spikes travel through every pipe in your home. Over years, this contributes to pinhole leaks, joint failures, and water damage. Voids your water heater warranty. Most manufacturers require an expansion tank on closed systems. Installing a water heater without one on a closed system can void the warranty immediately. The hot water expansion tank purpose is simple: absorb that thermal expansion before it causes any of the above damage. How Expansion Tanks Work The working principle is straightforward once you understand the two-chamber design. At rest (cold water, no heating): The diaphragm sits in a neutral position. The air side is pre-charged to match your home’s water supply pressure. The water side holds a small amount of system water. During heating (water heater active): As your water heater warms the water, volume increases. Pressure rises in the closed system. That pressure pushes water through the cold supply line into the expansion tank’s water chamber. The diaphragm flexes, compressing the air cushion on the other side. Pressure in the system stabilizes. When you use hot water: Opening a faucet drops system pressure. The compressed air in the expansion tank pushes water back into the plumbing system. The diaphragm returns toward its neutral position. This cycle repeats every time your water heater fires. A properly sized and pre-charged expansion tank handles it all without any moving parts wearing out because there are none. The rubber diaphragm does all the work. Pre-Charge Pressure: Why It Matters The air side of the tank comes pre-charged from the factory, usually at 40 PSI. Before installation, a plumber adjusts this pre-charge to match your home’s cold water supply pressure. If the pre-charge is too low, the tank fills with water immediately and stops working. If it is too high, the tank never accepts water at all. Getting the pre-charge right is the most important part of a proper expansion tank installation. It requires a pressure gauge on the cold water supply line and a tire pump or compressor on the tank’s Schrader valve (the same type as a bicycle tire valve). You can read about: Do dishwashers heat the water? Do You Need an Expansion Tank in Your Home? Not every home needs one. But many do and local plumbing codes in most U.S. cities now require them on closed systems. You likely need an expansion tank if: Your home has a pressure reducing valve (PRV) on the main water supply line Your home has a check valve or backflow preventer installed by your water utility You have a tankless water heater on a closed system (yes, tankless units need them too) Your local building code requires one (check with your city most jurisdictions adopted this requirement after 2002) Your T&P relief valve drips regularly (a common sign of thermal expansion pressure) Your water pressure gauge shows spikes above 80 PSI You likely do not need one if: Your home has a true open plumbing system with no check valve or PRV Your water utility confirmed no backflow preventer on your meter The fastest way to know for certain: have a licensed plumber test your system pressure and check whether you have a closed system.

Can You Put Drain Cleaner in a Toilet
Plumbing

Can You Put Drain Cleaner in a Toilet? Why It Is a Costly Mistake

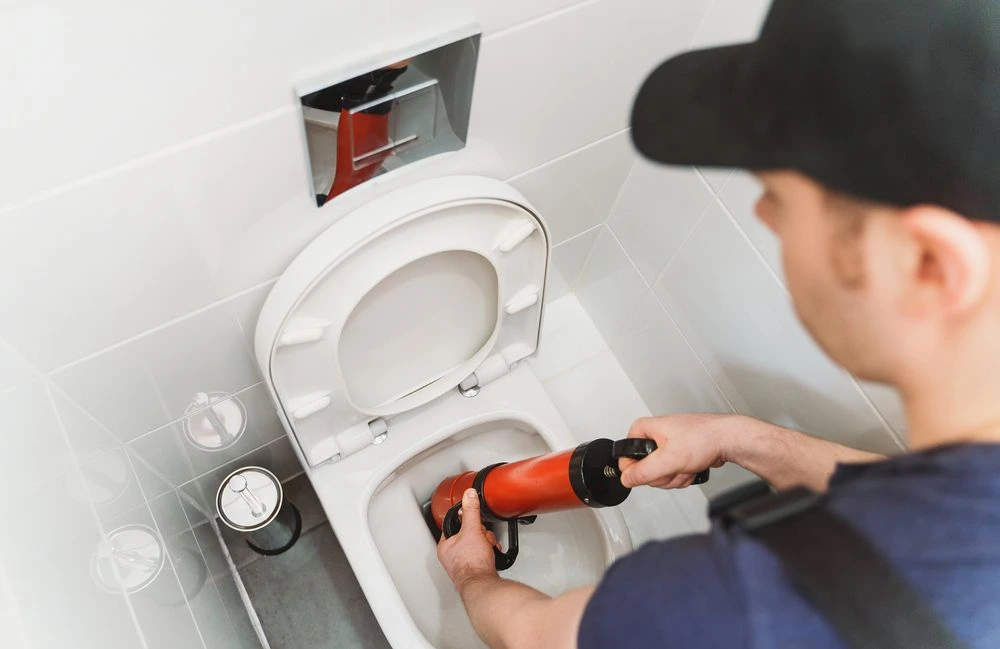
A clogged toilet is one of the most stressful household problems. When the plunger isn’t working, it’s tempting to reach for whatever drain cleaner is under the sink and pour it in. It makes sense in theory that a drain cleaner unclogs drains, a toilet is a drain. But the logic breaks down fast once you understand what these chemicals actually do inside a toilet. So, can you put drain cleaner in a toilet? Technically you can, but you really shouldn’t. Most chemical drain cleaners can damage your toilet, crack the porcelain, and create dangerous chemical reactions without actually fixing the clog. This guide explains why, and what to do instead. Can You Use Drain Cleaner in a Toilet? Let’s be direct. Most standard drain cleaners products like Drano or Liquid-Plumr are not designed for toilets. Their labels say this explicitly. Can I use drain cleaner in a toilet? The answer from every major manufacturer is no. Here’s why this matters: drain cleaners are formulated for sinks, tubs, and shower drains. Those drains deal primarily with hair, soap, and grease. A toilet clog is almost always caused by something completely different: waste, toilet paper, or a non-flushable item that went down accidentally. Chemical drain cleaner for toilet use is a mismatch from the start. The chemistry isn’t designed for the type of material causing the blockage. And the toilet’s structure, specifically its porcelain bowl and wax seal, is vulnerable to the heat and caustic reactions these chemicals generate. There is one narrow exception: Drano makes a product called Drano Max Build-Up Remover, which uses enzymes rather than harsh chemicals and is labeled safe for toilets. But this is for slow drains from buildup not for a fully blocked toilet. Why Drain Cleaners and Toilets Don’t Mix There are three core reasons drain cleaners are a bad idea in toilets. 1. The Chemistry Creates Dangerous Heat Most household drain cleaners contain sodium hydroxide (lye). When sodium hydroxide contacts water, it generates heat, sometimes significant heat. In a sink, that heat disperses quickly through the drain system. In a toilet, the situation is different. The bowl holds standing water. The heat concentrates inside the porcelain bowl. Porcelain is ceramic; it doesn’t handle sudden, intense heat changes well. That thermal shock can cause the bowl to crack. Replacing a toilet costs $300 to $600 or more, plus labor. 2. The Chemicals Don’t Reach the Clog Toilet traps and drain lines are designed differently from sink drains. The water in the bowl sits in a trap, a curved section of pipe that holds water to block sewer gases. When you pour chemical drain cleaner for toilet use into the bowl, the chemicals dilute heavily in that standing water before they ever reach the actual clog. By the time the solution reaches the blockage, it’s too diluted to work effectively. You’ve used harsh chemicals, created heat and fumes, and the clog is still there. 3. It Can Make the Problem Worse If the clog doesn’t clear, you now have a toilet full of highly caustic chemical solution. You can’t plunge it; the splash risk is serious and dangerous. You can’t flush it, it may overflow. And you can’t easily call a plumber because they’ll need to neutralize or remove the chemical before they can safely work. Can I put drain cleaner in toilet situations? You’ve just made a simple clog into a complex, potentially expensive problem. Drain Cleaners Are Inherently Dangerous Even when used correctly in sinks, drain cleaners demand respect. In a toilet, the risks multiply. Fumes. Sodium hydroxide and the heat it generates release caustic fumes. In an open, ventilated kitchen, this is manageable. In a small bathroom, fumes concentrate quickly and can cause respiratory irritation, eye watering, and throat burning. Splash risk. A toilet bowl is at knee height. If any chemical splashes back whether from pouring or from agitation it contacts skin, clothing, or eyes at a close range. Sodium hydroxide causes chemical burns on contact. Mixing with toilet bowl cleaner. Many households have chlorine-based toilet bowl cleaners already in the tank or recently used in the bowl. Mixing sodium hydroxide-based drain cleaner with chlorine compounds creates chlorine gas, a toxic substance that causes serious respiratory damage even in small quantities. Never mix drain cleaners. If you’ve already poured one product and it didn’t work, don’t add a second. The combination of two different drain cleaning chemicals whether both alkaline, or one alkaline and one acidic can cause violent reactions, extreme heat, and dangerous gas release. You can read about: Is Drain Cleaner Acidic or Basic The Health and Environmental Risks Is drain cleaner safe for toilets from an environmental standpoint? No and this matters beyond just your home. Sodium hydroxide and sulfuric acid don’t just disappear when they go down the drain. In municipal sewer systems, these chemicals can disrupt the biological treatment processes at wastewater plants. Beneficial bacteria that break down waste are killed by highly alkaline or highly acidic solutions. For homes on septic systems, this is an even bigger concern. Drain cleaners destroy the bacterial culture inside a septic tank. Without those bacteria, solid waste stops breaking down. The result is a septic system failure, an expensive and unpleasant problem that costs $3,000 to $10,000 or more to repair or replace. From a health perspective: poison control centers receive thousands of calls every year related to drain cleaner exposure. Children and pets are especially at risk in homes where these products are stored under sinks near toilets. How Should You Solve Your Toilet Clog? If the drain cleaner is off the table, what actually works? Here’s the right approach, in order of what to try first. Step 1: The right plunger. Most people use a cup plunger, the flat, dome-shaped kind. That’s designed for sinks. For toilets, you need a flange plunger, which has an extended rubber lip that fits into the toilet drain opening. The seal it creates is far more effective. Use firm, steady

Is Drain Cleaner Acidic or Basic
Plumbing

Is Drain Cleaner Acidic or Basic? What You Must Know

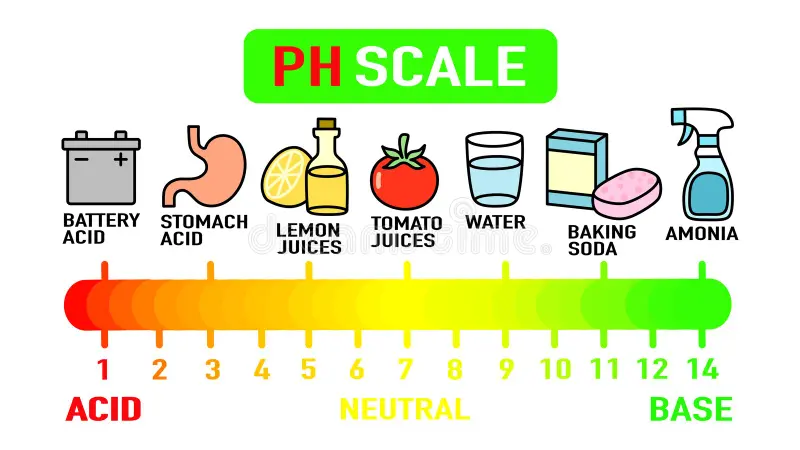
If you’ve ever poured a drain cleaner down a clogged sink and wondered what’s actually happening inside that pipe, you’re not alone. These products work through chemistry and understanding that chemistry helps you use them safely and pick the right one for the job. Not all drain cleaners are the same, and the difference matters. So, is drain cleaner acidic or basic? Most common household drain cleaners are basic (also called alkaline), with a pH of 11 to 14. But some professional-grade products are strongly acidic. Knowing which type you have and how each one works protects your pipes, your health, and your home. This guide explains it all in plain language. What Does Acidic or Basic Mean? Before we get into drain cleaners, a quick chemistry refresher. Everything in chemistry sits on a scale called the pH scale. It runs from 0 to 14. 0 to 6 = Acidic. The lower the number, the stronger the acid. 7 = Neutral. Pure water sits here. 8 to 14 = Basic (or alkaline). The higher the number, the stronger the base. Common examples help put this in context: Lemon juice: pH 2 (strongly acidic) Vinegar: pH 3 (mildly acidic) Baking soda: pH 9 (mildly basic) Bleach: pH 12 (strongly basic) Battery acid: pH 1 (extremely acidic) Acids and bases react differently with materials. That’s why the type of drain cleaner you use affects how it interacts with organic matter, grease, hair, and the pipe material itself. Most Drain Cleaners Are Basic The majority of drain cleaners you’ll find at a hardware store or supermarket are basic, not acidic. Brands like Drano, Liquid-Plumr, and most store-brand products fall into this category. Their pH typically ranges from 11 to 14. That puts them in the strongly alkaline range similar to oven cleaner or industrial bleach. Why so alkaline? Because basic chemistry is very effective at breaking down the organic materials that cause most household clogs. Hair, soap scum, grease, and food particles are all organic matter. Strong bases attack these materials through a chemical reaction that breaks them apart. Is a drain cleaner an acid or base for everyday household use? In almost every case, it’s a base. The exceptions are specific products designed for very specific clog types. Common alkaline active ingredients in drain cleaners: Sodium hydroxide (lye) — The most common. Extremely caustic. Breaks down fats and proteins rapidly. Potassium hydroxide — Similar to sodium hydroxide. Found in some liquid formulas. Sodium hypochlorite (bleach) — Mildly alkaline. Found in some drain maintenance products. Sodium carbonate — Gentler alkaline option. Found in some “natural” or low-chemical drain cleaners. How Basic Drain Cleaners Work When you pour an alkaline drain cleaner into a clogged drain, several things happen fast. Step 1: Saponification. The sodium hydroxide reacts with fats and grease in the clog. It converts them into soap in a process called saponification. That soap dissolves in water and washes down the drain. Step 2: Hydrolysis. The base attacks protein-based materials like hair. It breaks the chemical bonds that hold hair fibers together. Hair that was once tangled and solid turns into a soft, water-soluble paste. Step 3: Heat generation. This is the part most people don’t know about. When sodium hydroxide mixes with water, it generates heat, sometimes significant heat. That warmth helps speed up the chemical reactions and can help dissolve grease that’s hardened in the pipe. Step 4: The clog clears. Once the clog material breaks down, the loosened debris washes through with water. Most basic drain cleaners take 15 to 30 minutes to work on minor clogs. This is why these products work well on hair, soap, and grease. But they’re less effective on non-organic blockages like dirt, sand, small objects, or tree root intrusions. You can read about: How Much pH Does Drain Cleaner Have Some Drain Cleaners Are Acidic So if most drain cleaners are basic, when does drain cleaner acid or base tip toward the acid side? Acidic drain cleaners exist but they’re less common in the average household and much more dangerous to handle. Sulfuric acid drain cleaners are the most powerful. They’re sold at plumbing supply stores and sometimes in hardware stores in limited quantities. pH is often below 1. These products work differently from alkaline cleaners; they dissolve blockages through oxidation and protonation rather than saponification. Sulfuric acid drain cleaners are effective against: Paper and tissue blockages Soap buildup Certain food clogs Grease (though alkaline cleaners often do this better) They’re also the product of choice for extremely stubborn clogs that alkaline cleaners can’t break through. But the trade-off is significant: sulfuric acid generates intense heat, can cause violent reactions with other chemicals, and can severely damage skin, eyes, and mucous membranes on contact. Hydrochloric acid (muriatic acid) is another acidic option, primarily used for dissolving mineral deposits and scale inside drains and toilets. It’s not a true “drain cleaner” in the clog-clearing sense, but it belongs to the acid or base drain cleaner conversation because it’s used in plumbing maintenance. Acidic Drain Cleaners vs. Basic Drain Cleaners Here’s a direct comparison to help you understand the difference: Feature Acidic Drain Cleaner Basic (Alkaline) Drain Cleaner pH range 0 – 3 11 – 14 Common chemicals Sulfuric acid, hydrochloric acid Sodium hydroxide, potassium hydroxide Best for Paper, severe clogs, scale Hair, grease, soap scum Found at Plumbing stores, hardware stores Supermarkets, hardware stores Risk level Extremely high High Pipe safety Risky for older pipes Risky for repeated use Fume danger Severe Moderate to severe Mixing risk Never mix with anything Never mix with acids or bleach Is drain cleaner a acid or base for the toughest jobs? Professionals sometimes reach for acidic options when alkaline products fail. But for everyday household clogs, alkaline is the standard and much safer for a non-professional to handle. What Is the pH of Common Drain Cleaners? It helps to see real products on the pH spectrum: Drano Max Gel: pH approximately 13 to 14 (strongly alkaline)

are copper pipes safe
Plumbing

Are Copper Pipes Safe? Risks, Benefits & Expert Tips

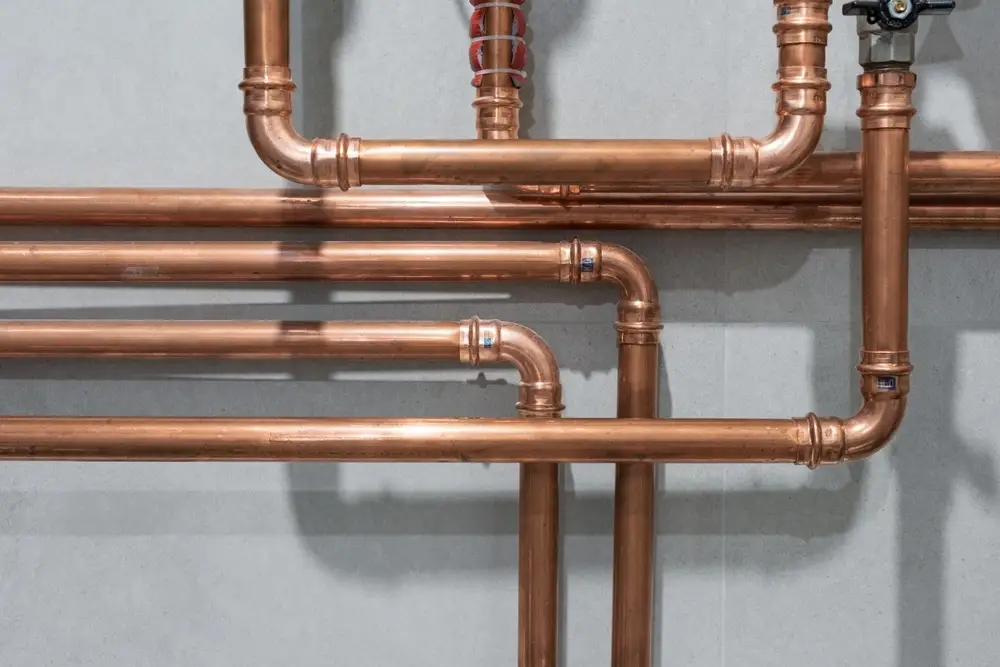
Copper pipes are generally safe for drinking water and remain the gold standard in plumbing. They naturally stop bacteria from growing and last for decades. However, safety depends on your water’s acidity and the age of your solder. If your water is balanced, copper is a very reliable and healthy choice. When asking are copper pipes safe, the answer is usually a strong yes. Most homes in the United States rely on them because they do not leach chemicals like some plastics. While there are specific risks like corrosion or lead in old joints, these are manageable. At Derks Plumbing, we help homeowners understand their systems to ensure every drop is clean. What Are Copper Pipes? Copper pipes are metal tubes used to carry water through your home’s plumbing system. They come in three types: Type K — Thick walls. Used for underground or outdoor lines. Type L — Medium thickness. The most common for home water supply. Type M — Thinner walls. Used for low-pressure indoor systems. Copper has been a go-to material for plumbers for decades. It’s durable, heat-resistant, and naturally fights bacteria growth. Most homes built before the 1990s still have copper plumbing running through the walls. Are Copper Pipes Safe for Drinking Water? Yes are copper pipes safe for drinking water is a question with a mostly reassuring answer. The EPA and WHO both recognize copper as a safe plumbing material when it’s properly installed and maintained. Copper pipes are approved for use in drinking water systems across the U.S. They don’t leach harmful chemicals the way some plastics can. In fact, copper has natural antimicrobial properties, which means bacteria have a harder time growing inside copper pipes compared to other materials. That said, is copper piping safe for drinking water in every situation? Not always. High levels of copper in drinking water can be a health concern especially for infants and people with certain conditions like Wilson’s disease. The EPA’s action level for copper in water is 1.3 mg/L. Above that, it can cause nausea, stomach cramps, and in long-term cases, liver or kidney damage. The good news is that copper levels this high are usually caused by corrosion not the pipe material itself. More on that below. Benefits of Copper Pipes There’s a reason copper has lasted this long in the plumbing world. Here’s what makes it a solid choice: Long lifespan. Copper pipes typically last 50 to 70 years. Well-maintained systems have lasted even longer. Safe for drinking water. When working correctly, is copper pipe safe for drinking water yes, fully. It doesn’t release harmful chemicals. Bacteria resistant. Copper ions naturally slow bacterial growth. This is a built-in safety feature many other materials lack. Heat tolerant. Copper handles both hot and cold water lines. It won’t warp or soften under high temperatures. Recyclable and eco-friendly. Copper is one of the most recycled materials in the world. It has a lower environmental impact over its full lifespan than many alternatives. Pressure resistant. Copper handles high water pressure without cracking or bursting under normal conditions. Potential Risks of Copper Pipes Copper pipes aren’t perfect. There are real risks worth knowing. Copper leaching. When water sits in pipes for long periods like overnight small amounts of copper can dissolve into the water. This is most common with new pipes (called “first draw” exposure) or older corroded ones. High copper consumption. Drinking water with elevated copper levels over time can affect the liver and kidneys. Children and infants are especially sensitive. Pinhole leaks. This is one of the biggest failure points. Tiny holes can develop over time due to corrosion or aggressive water chemistry. Cost. Copper is more expensive to install than plastic alternatives like PEX. Labor and material costs are higher. Freeze damage. Copper pipes can crack or burst if water freezes inside them. This is a risk in homes without proper insulation. What Causes Copper Pipe Corrosion? Corrosion is the main threat to copper pipes and to water safety. Here’s what triggers it: Acidic water (low pH). Water with a pH below 7 is acidic. It slowly eats away at copper pipe walls. The EPA recommends a pH of 6.5 to 8.5 for safe drinking water. High water velocity. Water moving too fast through pipes causes erosion corrosion. You’ll often see this at elbows and bends. Chloramines in treated water. Some water treatment plants use chloramines instead of chlorine. These can accelerate copper pipe corrosion over time. Flux residue. During installation, plumbers use flux to solder pipe joints. If it’s not fully flushed out, leftover flux can corrode the pipe from the inside. Stray electrical currents. In rare cases, electrical current running through the ground near pipes can cause what’s called electrolytic corrosion. Sediment buildup. Mineral deposits can collect inside pipes and create conditions that promote localized corrosion. You can read about: How to Install SharkBite on Copper Signs Your Copper Pipes May Be Failing Catch these warning signs early and you can avoid a bigger problem. Bluish-green stains around faucets or in your sink. This is oxidized copper a sign of corrosion or leaching. Metallic taste in water. If your water tastes like metal, elevated copper levels may be the cause. Low water pressure. Buildup inside pipes or pinhole leaks can reduce pressure noticeably. Visible green or white patches on exposed pipes. This is a sign of external corrosion. Water discoloration. Brown or rust-colored water could mean corrosion is actively shedding into your water supply. Damp walls or ceilings. Small leaks behind walls often start as pinhole corrosion before becoming visible. Frequent small leaks. If you’ve had two or more leaks in a short period, your pipes may be nearing the end of their life. Copper Pipes vs PEX Pipes PEX (cross-linked polyethylene) has become a popular alternative to copper. Here’s a straight comparison: Feature Copper PEX Lifespan 50–70 years 25–50 years Cost Higher Lower Installation Complex (soldering) Easy (flexible) Heat tolerance Excellent Good (not for outdoor use) Chemical leaching Minimal if in

Fast and Efficient Plumbing Services in Eagle Rock

Client Reviews

Posted on Google Google
Ryan Haden profile picture
Ryan Haden
Google star 1Google star 2Google star 3Google star 4Google star 5Trustindex verifies that the original source of the review is Google.
Could not have been happier with Alex! We was right on time, polite, fixed all my kitchen sink issues and have me good tips on how to best maintain. I will for sure be using him again and highly recommend anyone who needs a great plumber to use his services as well. Thank you!
Posted on Google Google
Lorena Marcoe profile picture
Lorena Marcoe
Google star 1Google star 2Google star 3Google star 4Google star 5Trustindex verifies that the original source of the review is Google.
Talk about a professional...yes, I am talking about Alex Derks, Derks Plumbing. He is by far the most knowledgeable plumber we have ever had the pleasure of hiring. He's been in the plumbing business for years and it shows. Any questions you have re: plumbing issues, install, etc., Alex is your man. So happy with his work and he has a great sense of humor as well... extremely easy to talk to...thank you Alex!!!
Posted on Google Google
Andrew Jalil profile picture
Andrew Jalil
Google star 1Google star 2Google star 3Google star 4Google star 5Trustindex verifies that the original source of the review is Google.
Alex did a great job installing my kitchen faucet and an under-sink Aquasana water filter. He also addressed a few other plumbing-related issues. He was friendly and helpful. Excellent work!
Posted on Google Google
Abigail Bigham profile picture
Abigail Bigham
Google star 1Google star 2Google star 3Google star 4Google star 5Trustindex verifies that the original source of the review is Google.
Alex does what other plumbers cannot do! He is our go to.
Posted on Google Google
Danielle Driver profile picture
Danielle Driver
Google star 1Google star 2Google star 3Google star 4Google star 5Trustindex verifies that the original source of the review is Google.
Alex is very friendly and responsive. What a pleasure to work with!
Posted on Google Google
Lawrence Isaacs profile picture
Lawrence Isaacs
Google star 1Google star 2Google star 3Google star 4Google star 5Trustindex verifies that the original source of the review is Google.
Very very happy with the work Alex did for us replacing the tanks in our Aquasana filtration system. From first contact over the phone through job completion Alex was a pleasure to work with. He explained what he was doing, and why, every step of the way, and made sure we understood what we needed to do to maintain the system. Strongly recommend Alex!
Posted on Google Google
Joey Aucoin profile picture
Joey Aucoin
Google star 1Google star 2Google star 3Google star 4Google star 5Trustindex verifies that the original source of the review is Google.
Alex Derks has been such a lifesaver for me. Anytime I'm in a pinch with the plumbing in my home, Alex is only a phone call away and I've only seen great results from his work. He's reliable, knowledgable, and entirely trustworthy. A must-have source when owning a home.
Posted on Google Google
Eric Gorman profile picture
Eric Gorman
Google star 1Google star 2Google star 3Google star 4Google star 5Trustindex verifies that the original source of the review is Google.
After working with dozens of plumbing services in the LA area, I can confidently say Derks is the best in the business. On time, reliable and capable of even the most difficult tasks, Derks goes above and beyond to make sure your water system is working correctly.
Posted on Google Google
Jason Gruenbaum profile picture
Jason Gruenbaum
Google star 1Google star 2Google star 3Google star 4Google star 5Trustindex verifies that the original source of the review is Google.
Excellent know-how and fast!! Reasonable pricing and super responsive!!
Posted on Google Google
Jonathan Hepfer profile picture
Jonathan Hepfer
Google star 1Google star 2Google star 3Google star 4Google star 5Trustindex verifies that the original source of the review is Google.
Alex is an expert plumber, and he always goes out of his way to educate me about how to prevent future issues. Highly recommended!

Derks Plumbing has been providing professional plumbing services to Eagle Rock residents for over 20 years. Our experience and strong reputation have allowed us to grow, and we are proud to serve customers in 15 nearby areas, including Venice, Santa Monica, Beverly Hills, and more.

Contact

Hours of Operation

Monday: Open 24 Hours
Tuesday: Open 24 Hours
Wednesday: Open 24 Hours
Thursday: Open 24 Hours
Friday: Open 24 Hours
Saturday: Open 24 Hours
Sunday: Open 24 Hours

© 2026 Created by Localpro1

Scroll to Top