We are Available 24/7

Plumbing

what does mold in shower look like
Plumbing

What Does Mold in Shower Look Like? | Easy Guide

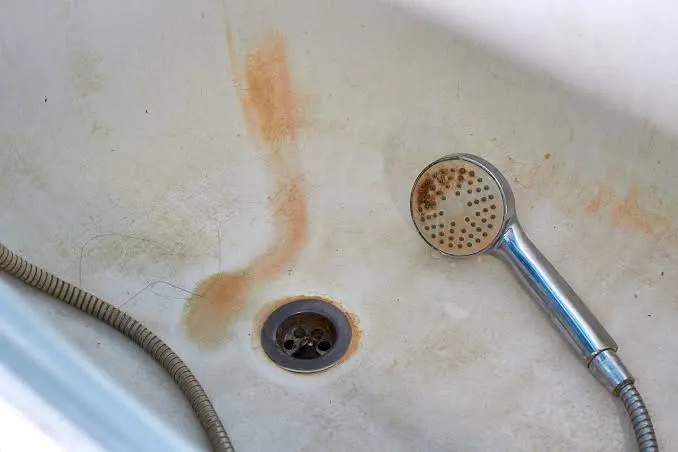
Mold in a shower can look like black, green, brown, gray, or white spots. It may appear as small dots, fuzzy patches, slimy stains, or dark lines around wet areas. Mold often grows where water stays for a long time. You may see it on grout, caulk, shower walls, ceilings, or around the drain. A musty smell can also be a warning sign. If you are wondering what does mold in shower look like, look for unusual spots that grow, spread, or return after cleaning. Mold color alone cannot tell you how harmful it is. Moisture is the main reason mold grows, so fixing the water problem is just as important as cleaning it. What Does Mold in a Shower Look Like? Mold in a shower does not always look the same. Its appearance depends on the type of mold, the surface, and how long it has been growing. Fresh mold may look like tiny black, green, or gray dots. As it grows, these spots can join together and form larger patches. Some mold looks fuzzy or powdery. Other growth may look slimy, especially when it stays wet for long periods. You may notice mold along grout lines first. It can also grow around the edges of the shower, behind bottles, under a soap dish, or around the drain. White or pink-looking growth can also appear in wet bathrooms. Not every colored spot is mold, though. Some stains come from soap, minerals, dirt, or bacteria. A key sign is change. If a spot keeps growing after normal cleaning, it deserves closer attention. Mold can grow on many materials when enough moisture is present. EPA guidance says moisture control is the key to controlling indoor mold. What Does Black Mold in a Shower Look Like? Black mold can appear as dark green, brown, or black spots and patches. It may look like pepper sprinkled across the surface or like dark stains spreading along grout. Some patches have a fuzzy texture. Others look flat and slimy. The term “black mold” can be misleading. Mold comes in many colors, and color alone does not tell you whether one type is more dangerous than another. CDC guidance also notes that mold color does not determine how harmful it is. This means you should not try to identify a mold species just by looking at it. Instead, focus on the source of moisture and the size of the growth. If mold keeps returning, there may be a leak, poor ventilation, or another moisture problem. Where Does Mold Usually Grow in a Shower? Mold grows best in areas that stay damp and have limited airflow. Common spots include: Shower grout Silicone caulk Corners of the shower Around the drain Under shampoo bottles Around shower doors Shower curtains Ceiling above the shower Wall joints Areas around plumbing fixtures Caulk is a common problem area because water can stay against it after every shower. Grout can also hold moisture. Small cracks or damaged grout can make it easier for water to remain trapped. Look closely at areas that are rarely wiped or dried. Mold may start in a small hidden corner and slowly spread. If you notice a shower with mold around one plumbing fixture, check for leaks as well. A small plumbing leak can keep a surface wet even when the shower is not running. What Causes Mold to Grow in a Shower? Moisture is the main reason mold grows in bathrooms. Every hot shower releases water vapor into the air. That moisture can settle on walls, ceilings, mirrors, grout, and other surfaces. Poor ventilation makes the problem worse. If moist air cannot escape, the bathroom may stay damp for hours. Other common causes include: Poor Bathroom Ventilation A bathroom fan helps remove moist air. Without proper ventilation, water vapor can remain inside the room. EPA recommends using bathroom exhaust fans or opening windows when showering to improve ventilation. Plumbing Leaks A hidden leak behind a wall can keep building materials damp. Mold can then grow where you cannot easily see it. Leaks around shower valves, pipes, and fittings should be repaired quickly. Wet Shower Surfaces Water left on walls and floors gives mold a better place to grow. A shower that stays wet for long periods is more likely to develop mold. Damaged Caulk Cracked or loose caulk can allow water behind the shower surface. Once moisture gets behind the caulk, cleaning the visible surface may not solve the problem. Poor Airflow A closed bathroom door and no working exhaust fan can trap moisture. Improving airflow after each shower can help the area dry faster. How Can You Tell If It Is Mold or Mildew? Mold and mildew are both types of fungal growth, but they can look different. Mildew often appears as a thin, flat coating on damp surfaces. It may look white, gray, or yellow. Mold can appear thicker and may spread into irregular patches. It can also appear black, green, brown, gray, or other colors. However, appearance alone is not a reliable way to identify the exact type. If you see mildew in the shower, clean the area and reduce moisture. If the growth returns quickly, look for an ongoing water problem. You should also avoid assuming that every dark shower stain is mold. Soap buildup, mineral deposits, and dirt can create similar marks. If you cannot determine the cause, a professional inspection may help. What Does Shower Mold Smell Like? Mold often has a musty or earthy smell. The odor may become stronger when the bathroom stays closed. You may notice it even before seeing visible growth. A musty smell does not prove that mold is present. Other damp materials can create similar odors. Still, a persistent smell deserves attention, especially when you also see dark spots or damp surfaces. CDC states that mold can smell musty and recommends removing mold and fixing the moisture problem when mold is present. If the smell comes from inside a wall or ceiling, there
how long for pipes to thaw naturally
Plumbing

How Long for Pipes to Thaw Naturally | Safe Tips

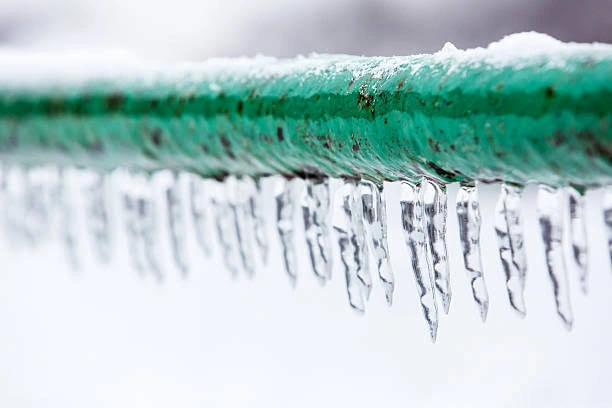
When subzero weather strikes, household plumbing becomes vulnerable to freezing. If you turn on your faucet and only a trickle comes out, you likely have ice blocking your lines. Most homeowners immediately ask the same question: how long for pipes to thaw naturally? Frozen pipes usually take between 2 to 6 hours to thaw naturally once the surrounding indoor temperature rises above 40 degrees Fahrenheit. However, if the frozen line sits inside an uninsulated exterior wall or crawl space, natural thawing can take up to 24 hours or longer. Knowing how long for pipes to thaw naturally helps you plan your next steps and prevent costly water damage. Will Frozen Pipes Fix Themselves? A frozen pipe will not simply fix itself without proper conditions. While ice inside the line will eventually melt when temperatures rise, waiting for passive thawing comes with major home risks. When water freezes into ice, it expands by roughly 9%. This physical expansion creates extreme internal pressure within metal or plastic lines. The ice block itself does not always break the pipe. Instead, the expanding ice forces trapped water toward closed faucets, building immense hydraulic pressure behind the blockage. If you leave lines to thaw naturally without taking action, that buildup can split your plumbing. A tiny hairline crack can release hundreds of gallons of water per hour once the ice plug melts completely. Leaving frozen lines unattended means gambling with potential structural flooding and mold growth. What Causes Water Pipes to Freeze? Plumbing systems freeze when exposed to freezing cold air without sufficient insulation or heat transfer. Understanding the primary causes helps you spot vulnerable spots in your layout before cold snaps hit: Sub-freezing Outside Temperatures: Pipes are at high risk whenever outside temperatures drop below 20 degrees Fahrenheit for several consecutive hours. Uninsulated Exposure: Supply lines running through unheated spaces like attics, basements, crawl spaces, and garages freeze rapidly because no warm air surrounds them. Cold Air Drafts: Small gaps around exterior vents, wall penetrations, or foundation cracks let freezing outdoor air blow directly onto copper, PEX, or PVC lines. Thermostat Drops: Turning your heating down too low at night or while away on vacation lowers indoor wall temperatures, allowing interior plumbing to freeze. Key Factors Influencing Natural Thaw Times Every home layout responds differently to cold weather. Several key variables dictate the exact timeframe for ice blockages to clear on their own: 1. Location of the Blockage Lines running through interior walls thaw rapidly because ambient home heat warms the surrounding drywall. In contrast, plumbing located inside exterior walls, under unheated floors, or beneath outdoor slabs takes much longer to warm up. 2. Pipe Material Copper and galvanized steel conduct ambient heat faster than plastic materials, slightly accelerating the melt time. PEX and PVC act as mild insulators, meaning heat transfers slower into the frozen core, though PEX is more flexible and resilient against bursting under pressure. 3. Surrounding Room Temperature A home kept at 70 degrees Fahrenheit transfers heat into wall cavities much faster than a room sitting at 55 degrees. Higher indoor heat significantly shortens the duration required for ice to clear. What Should You Do If a Frozen Pipe Bursts? If a line bursts while waiting for how long for pipes to thaw naturally, immediate action is critical to limit property damage: Shut Off the Main Water Supply: Locate your primary water shutoff valve immediately—usually found in the basement, utility room, or outdoor meter box—and turn it clockwise to stop all incoming flow. Open Low-Lying Faucets: Open sink taps in your basement or lower levels to relieve remaining pressure and allow residual water to drain safely. Turn Off Electrical Power: If leaking water approaches electrical outlets, breaker boxes, or appliances, shut off power to those zones at the main panel to prevent shocks. Call Professional Help: Contact a licensed plumber immediately to remove damaged sections and solder or crimp new fittings into place. Document and Dry: Take clear photographs of damaged property for insurance claims, then use wet vacuums, fans, and dehumidifiers to clean up standing water. How to Thaw Frozen Pipes Safely Waiting for natural thawing carries risk, but you can safely accelerate the process using controlled heat. Always keep faucets open while applying heat so melting water can flow out, relieving internal line pressure. Safe Thawing Methods Space Heaters: Place a portable space heater in unheated basements, garages, or rooms to raise the general air temperature near the blockage. Hair Dryers: Direct a hair dryer on medium heat back and forth along the exposed pipe, starting from the open faucet and working backward toward the frozen area. Warm Towels: Soak towels in hot water and wrap them directly around the frozen section, swapping them out as they cool down. Heating Tape: Apply UL-tested electrical heat tape around exposed plumbing to distribute gentle, continuous warmth along the line. Caution — Dangerous Methods to Avoid: Never use open flames, propane torches, blowtorches, or kerosene heaters to thaw frozen pipes. Extreme direct flame creates thermal shock, which snaps metal fittings instantly and poses a severe fire hazard to surrounding wood studs and insulation. How to Prevent Pipes From Freezing Preventing ice blockages is far safer and cheaper than dealing with emergency repairs or waiting on how long for pipes to thaw naturally. Short-Term Emergency Steps During Deep Freezes Drip Your Faucets: Allow a tiny trickle of water to run continuously from faucets served by exposed pipes. Moving water is far harder to freeze. Open Cabinet Doors: Keep kitchen and bathroom sink cabinet doors open to allow warm interior room air to circulate around under-sink plumbing. Maintain Steady Indoor Heat: Keep your thermostat set to the same temperature during both day and night. Never drop thermostat settings below 55 degrees Fahrenheit when traveling. Long-Term Winterization Upgrades Install Foam Pipe Insulation: Slip pre-slit tubular foam sleeve insulation over all accessible copper, PEX, and steel lines in unheated attics or crawl spaces. Seal Air Leaks: Use expanding foam spray or caulk to seal

what is septic safe toilet paper
Plumbing

What Is Septic Safe Toilet Paper? | Complete Guide

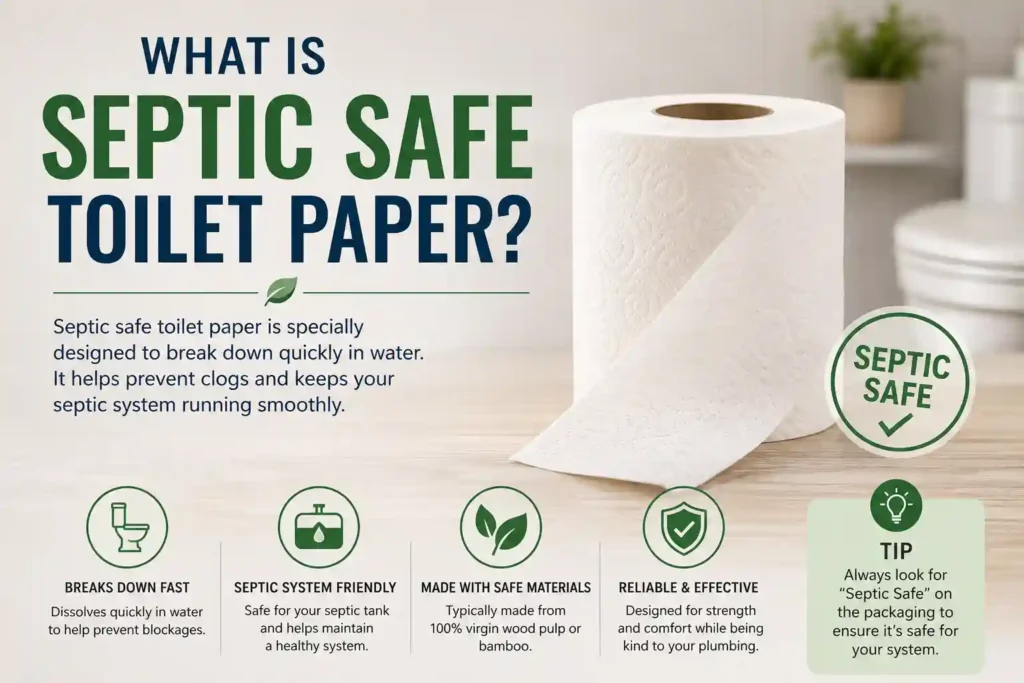
A septic system depends on bacteria and natural processes to break down waste. Toilet paper must break down easily after flushing. Paper that breaks apart well helps reduce the chance of buildup, slow drains, and clogs. The right paper is also less likely to add extra strain to your septic tank. If you are asking what is septic safe toilet paper, it is toilet paper designed to break apart quickly in water and move through a septic system. It should dissolve without leaving large, tough pieces behind. However, the label alone does not tell the whole story. What Is Septic Safe Toilet Paper? Septic safe toilet paper is made to break down in water more easily than some thicker papers. This matters because flushed paper enters your septic tank with household wastewater. Inside the tank, solids settle while liquid moves toward the drain field. Natural bacteria help break down organic waste. Toilet paper also starts breaking apart during this process. A good septic-safe paper should become soft and separate into smaller pieces after contact with water. This makes it easier for the paper to move through the plumbing and settle in the tank. The term “septic safe” is not a guarantee that every product will perform the same way. Paper can have different layers, fibers, binders, lotions, and other features. Your septic system also matters. A home with older pipes, heavy water use, or poor tank maintenance may have more problems with waste buildup. Choosing suitable toilet paper is one part of good septic care. How Does Septic Safe Toilet Paper Work? Toilet paper is designed to weaken when it gets wet. Septic-safe paper takes this a step further by breaking into smaller pieces during normal use and flushing. Think about what happens when dry toilet paper gets wet in a sink. It loses much of its strength and starts separating. This same basic process happens after flushing. Once the paper reaches the septic tank, bacteria and water continue to break down the material. Smaller paper pieces are easier to move and process than large, dense clumps. This does not mean toilet paper disappears instantly. It still becomes part of the solids inside the tank. Those solids must eventually be removed through regular septic pumping. For example, imagine a household that uses thick, strong paper several times each day. Large amounts of slow-breaking paper can add more solids to the tank over time. A lighter paper that breaks apart easily can reduce that burden. Still, excessive toilet paper use can create problems even when the product is labeled septic safe. What Makes Toilet Paper Septic Safe? Several features can make toilet paper a better choice for a septic system. Easy Breakdown in Water The most important feature is how easily the paper separates when wet. Paper that breaks into smaller pieces is generally a better choice. Fewer Heavy Layers Thick, multi-ply paper can be harder to break apart. Two-ply or one-ply paper may break down more easily, depending on how it is made. That does not mean every two-ply product is better than every three-ply product. The paper’s fiber and manufacturing process also matter. No Heavy Lotions or Coatings Some premium toilet papers contain lotions, fragrances, or other added materials. These features may affect how the paper behaves in water. For a septic system, simple paper with fewer added materials can be a practical choice. Clear Septic-Safe Label Look for packaging that says the product is suitable for septic systems. You can also check the manufacturer’s product information for breakdown claims. A useful rule is simple: choose paper that breaks apart easily rather than paper designed mainly for maximum strength. Why Is Septic Safe Toilet Paper Important? Your septic tank receives everything you flush down the toilet. That includes toilet paper, waste, and water. When paper breaks apart well, it is easier for the septic system to handle. When large amounts of slow-breaking material enter the tank, solids can build up faster. This does not mean the wrong toilet paper will immediately ruin your septic tank. Septic problems usually have several possible causes. For example, flushing wipes, paper towels, feminine hygiene products, or other non-flushable materials can cause much bigger problems than normal toilet paper. The bigger goal is to keep the material entering your septic system easy to break down and safe for your plumbing. Regular septic pumping still matters. Even the best toilet paper cannot prevent a tank from filling with solids. Is Regular Toilet Paper Safe for Septic Systems? Yes, many regular toilet papers can be safe for septic systems. The key issue is how the paper breaks down after it gets wet. You do not always need a product marketed as “septic safe.” Many standard toilet papers are made to break apart during flushing. However, some very thick, strong, or heavily treated products may break down more slowly. If you have a septic system, check the package and product details before buying. The best toilet paper for septic tanks is usually paper that breaks apart easily, uses fewer heavy layers, and does not contain unnecessary coatings. Your household’s habits also matter. Using a large amount of paper with every flush increases the amount of material entering your tank. How to Tell If Toilet Paper Is Septic Safe Start by checking the package. Look for a septic-safe statement or information from the manufacturer. You can also perform a simple home breakdown test. Place a few sheets of toilet paper in a clear container filled with water. Let it sit for several minutes. Gently stir the water and watch how the paper reacts. Paper that quickly separates into small pieces is generally more suitable for septic use. Paper that stays together in a strong sheet may break down more slowly. This is only a basic comparison. It does not replace laboratory testing or manufacturer information. You should also consider your plumbing. A paper that works well in one home may not solve problems caused by a damaged

how often clean septic tank
Plumbing

How Often Clean Septic Tank | Complete Guide

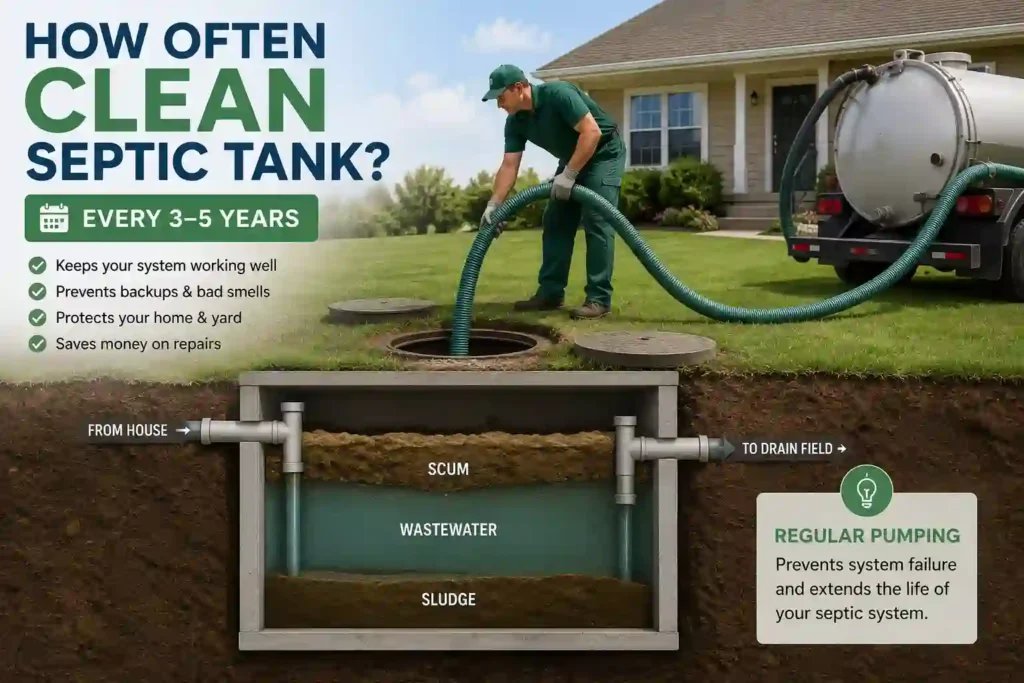
Most homeowners need to pump their septic system every three to five years. Skipping this simple task can cause heavy solids to clog your drain field and trigger nasty home backups. Regular maintenance keeps your system working smoothly and prevents thousands of dollars in sudden repair bills. Knowing how often clean septic tank systems require attention depends on your home size and daily water usage. Our guide covers everything you need to keep your system healthy and avoid costly plumbing headaches. How Often Should You Clean a Septic Tank? In general, most home systems need service every three to five years. This standard timeframe works well for average households with standard tank sizes. Smaller homes with fewer people can often wait five years between service visits. Larger families may need service every two or three years to avoid trouble. If you want to know how often clean septic tank units need deep service, check your tank volume. Heavy daily water use fills the tank with solid waste much faster. When solids build up near the outlet pipe, wastewater cannot flow properly. Asking a technician how often to get septic pumped is a smart first step. A routine check gives you an exact schedule based on your actual home habits. What Determines How Often a Septic Tank Needs Cleaning? Several daily factors change how fast your system fills up with solid waste. Tank size is one of the most critical elements in this math. A small tank reaches total capacity much faster than a large concrete container. Household size also plays a massive role in overall waste accumulation. More people living in the home means more daily toilet flushes and shower drain water. High water volume pushes solids through the tank before they can break down properly. Your daily appliance habits impact system health every single day. Using an in-sink garbage disposal adds thick food particles to your wastewater. These scraps do not break down fast and fill the tank bottom quickly. Understanding septic system pumping how often decisions require reviewing these habits closely. Heavy laundry schedules can also overload your system with excess water in a short time. Septic Tank Cleaning vs. Pumping: What’s the Difference? Many people use the terms cleaning and pumping like they mean the exact same thing. However, there is a clear distinction between these two common maintenance tasks. Pumping removes the liquid wastewater and the floating top scum layer from the tank. A technician uses a strong vacuum hose to pull out these upper layers. This process frees up space so wastewater can continue flowing safely into the drain field. Cleaning goes one step further by removing the thick, settled sludge from the tank bottom. The technician breaks up heavy solid buildup using high-pressure water tools. They wash down the tank walls and clean out interior baffles completely. Knowing how often clean septic tank components vs standard pumping is essential for long-term health. Simple pumping happens every few years, while deep tank cleaning happens during major maintenance routines. Septic Tank Pumping Schedule by Household and Tank Size Your service schedule changes based on your home size and total tank capacity. Understanding these basic numbers helps you plan routine maintenance before emergencies strike. A single person living in a home with a 1,000-gallon tank can wait up to nine years. Two people with that same tank should schedule service every five years. A family of four using a 1,000-gallon tank needs service every three years. Larger homes require bigger tanks to handle high daily water flow. A 1,500-gallon tank serving four people usually needs attention every four to five years. That same 1,500-gallon tank with six residents will need service every two or three years. When figuring out how often pump septic tank systems, always track your household changes. Adding new family members or guests increases total waste volume rapidly. Key Factors Affecting Your Wastewater Volume Every gallon of water that goes down your drain ends up inside your underground tank. High water usage shortens the time between needed service visits significantly. Leaky toilets can waste hundreds of gallons of clean water every single week. This constant flow floods the tank and prevents solids from settling to the bottom. Fixing simple plumbing leaks keeps your system working efficiently. Washing multiple loads of laundry on one day also causes major problems. Pushing too much water through the system at once stirs up settled sludge. Spreading laundry across the week gives your system time to process waste properly. Water efficient showerheads and toilets lower your overall daily water output. Reducing excess water flow extends the life of your entire system. What Are the Signs Your Septic Tank Needs Pumping? Your system gives clear warning signs long before a total breakdown occurs. Learning to spot these early red flags saves you time and money. Slow drains throughout your home are often the first sign of a full tank. If sinks, tubs, and toilets drain sluggishly at once, waste has nowhere to go. Foul sewage odors near the tank or inside your home signal serious trouble. Gases escape when the tank is full or when pipes become blocked. Gurgling sounds coming from your plumbing pipes are another common indicator. Bubbles trapped in full lines create strange noises after you flush the toilet. Standing water or unusually lush green grass over your drain field means wastewater is surfacing. This means your tank is overflowing and sending raw liquid to the lawn. When you see these signs, ask a professional how often pump septic service should be scheduled. Waiting longer will lead to raw sewage backing up into your home. What Happens If You Don’t Pump Your Septic Tank? Neglecting regular maintenance leads to serious property damage and dangerous health hazards. As waste collects, sludge builds up until it reaches the outlet baffle. Once sludge enters the drain field pipes, it clogs the surrounding soil. Soil cannot absorb liquid waste when thick sludge blocks tiny natural pores. Replacing a ruined drain

how to repair a leaky shower faucet
Plumbing

How to Repair a Leaky Shower Faucet | Step by Step

Fixing a leaking shower faucet usually comes down to replacing a worn-out rubber washer, O-ring, or cartridge inside the valve. You can fix most leaks in under an hour with basic hand tools for less than $20 in parts. If you want to know how to repair a leaky shower faucet, start by shutting off your main water supply, removing the handle, and swapping out the damaged internal seal. Why Is Your Shower Faucet Leaking? A shower faucet leaking problem rarely resolves on its own. Water pressure constantly pushes against internal seals, and normal wear degrades these components over time. Worn O-rings and washers: Rubber hardens, cracks, or shreds after years of exposure to water pressure and minerals. Corroded valve cartridge: Brass or plastic cartridges collect sediment, causing internal bypass leaks. Mineral buildup: Hard water deposits scratch plastic cartridges and ruin rubber seals. High water pressure: Household water pressure above 80 PSI wears out internal components prematurely. Damaged valve seat: Pitted brass seats shred new washers within weeks if not smoothed down. Knowing what type of valve you have makes buying replacement parts straightforward. Signs Your Shower Faucet Needs Repair A dripping shower faucet repair should be handled as soon as you notice early warning signs. Persistent dripping: Water drips from the spout or showerhead long after you turn the valve off. Stiff handle operation: The handle binds, squeaks, or requires extra force to turn. Leaking behind the wall: You hear running water inside the wall cavity or spot water stains on surrounding drywall. Inconsistent temperature: The mixing valve fails to balance hot and cold streams properly. Clunking noise: Loose stem washers create water hammer vibrations inside pipes when turned on. Addressing a shower tap leaking issue early prevents water damage, structural mold, and high utility bills. Understanding Your Shower Valve Type Before buying parts, identify the internal mechanism controlling your water flow: Cartridge Valves: Single-handle or dual-handle systems using a brass or plastic cylinder with internal channels. Compression Stem Valves: Older two-handle or three-handle setups that rely on rubber washers pressed against brass seats. Ball Valves: Single-handle assemblies using a rotating metallic or plastic ball with rubber seats and springs. Ceramic Disc Valves: Durable single-handle units using smooth ceramic discs to control volume and temperature. Tools and Materials You’ll Need Gather these plumbing tools before opening your shower valve: Phillips and flathead screwdrivers Adjustable wrench Channel lock pliers Hex key (Allen wrench) set Valve cartridge puller (for stubbed brass cartridges) Seat wrench and valve seat dresser tool Plumber’s silicone grease Replacement cartridge, O-rings, or seat washers Plumber’s tape (PTFE tape) Towel and cup hook or pick tool Turn Off the Water Supply Before You Start Never skip this critical safety step: Locate your main water shutoff valve (usually in the basement, utility room, or outdoor meter box) and turn it off completely. Open a sink faucet on the lowest level of your home to drain remaining pressure from the lines. Open the shower valve fully to make sure no water streams out. Cover your shower drain with a towel or plastic plug so small screws or clips do not drop down the pipe. How to Repair a Leaky Shower Faucet (Step-by-Step) A successful shower leaking repair depends on whether you have a single-handle or two-handle valve layout. How to Fix a Leaky Single-Handle Shower Faucet Single-handle valves use a single cartridge or ball mechanism to mix water. Remove the handle index button: Pry off the small plastic hot/cold cover cap using a flathead screwdriver to expose the handle screw. Unscrew and remove the handle: Unfasten the setscrew or center screw with an Allen wrench or screwdriver, then pull the handle straight off the stem. Remove the escutcheon plate: Unscrew the decorative cover plate against the wall and pull it away to expose the valve body. Remove the retaining clip or bonnet nut: Locate the metal retaining clip at the top of the valve body and pull it upward with needle-nose pliers, or unthread the outer collar nut. Extract the old cartridge: Attach a cartridge puller or use pliers to pull the cartridge straight out of the brass valve body. Clean internal valve chamber: Wipe out mineral scale, grit, and corrosion inside the brass chamber using a clean rag and vinegar. Lubricate and install the new cartridge: Apply plumber’s silicone grease to the new rubber seals, align the cartridge tabs, and press it firmly into the valve. Reassemble: Reinstall the retaining clip, escutcheon plate, and handle before testing. How to Fix a Leaky Two-Handle Shower Faucet Two-handle compression valves rely on individual stems with rubber seat washers for hot and cold sides. Remove handle caps and screws: Pop off the decorative caps on both handles and loosen the center attachment screws. Pull handles off stems: Slide both handles off their splined valve stems. Use a handle puller if stuck by corrosion. Remove the bonnet nut: Use an adjustable wrench to turn the packing nut counterclockwise and back out the stem assembly. Replace rubber washers and O-rings: Unscrew the bottom washer screw on the stem, replace the flattened rubber washer, and slide on a new stem O-ring. Inspect and replace brass seats: Use a flashlight to inspect the brass seats deep inside the valve body. Insert a seat wrench, turn counterclockwise, and swap out pitted seats. Reinstall stem assemblies: Coat threads with plumber’s grease, thread stems back into the valve body, tighten bonnet nuts gently, and reattach handles. You can read about: How to Repair Bathtub Faucet Diverter Common Mistakes to Avoid DIY plumbing works best when you avoid these simple errors: Overtightening connections: Over-torquing bonnet nuts or handles crushes new rubber washers and ruins seals instantly. Using petroleum jelly: Never use Vaseline on rubber gaskets; it breaks down rubber. Use 100% silicone plumber’s grease. Forgetting to flush lines: Always flush debris out of the open valve body for 5 seconds before seating a new plastic cartridge. Buying wrong replacement parts: Take your old cartridge or stem to the store

What is a Boiler Heater
Plumbing

What is a Boiler Heater? | Complete Home Heating Guide

A boiler heater is a specialized heating unit that warms water to heat your home. It uses gas, oil, or electricity to turn water into hot liquid or steam. The heat travels through pipes to radiators, baseboards, or underfloor tubes. Unlike forced-air furnaces, it provides quiet, even warmth without blowing dust around your rooms. Many homeowners ask what is a boiler heater when shopping for new home heating equipment. Understanding this system helps you choose the best equipment for your home comfort. It also ensures you save money on monthly utility bills. What Is Boiler Heater? A boiler heater is a closed vessel designed to heat water or create steam for space heating. It acts as the central engine for hydronic heating in residential buildings. Instead of heating air directly, it transfers thermal energy into water. When asking what is a heating boiler, think of it as a smart hydronic power plant. The system circulates hot water through a network of sealed pipes across your house. Radiators then release that heat gently into each room. Modern household boiler systems are clean and reliable. They keep room temperatures steady without sudden blasts of cold or hot air. People love them because they create cozy indoor warmth during cold winter months. How Does a Boiler Heater Work? Understanding how a boiler works is simpler than it seems. The process starts when your thermostat detects a temperature drop. It sends an electric signal to start the boiler unit. First, the fuel source ignites inside the combustion chamber. Natural gas, propane, or heating oil produces a controlled flame. Next, the flame warms a metal component called a heat exchanger. Water flows past the heat exchanger and absorbs thermal energy quickly. A circulator pump pushes this hot water through your home’s pipe network. Radiators or radiant floor tubes absorb the heat and warm up your living space. Once the water transfers its heat, it grows cooler. The cool water returns back to the boiler to start the cycle again. This closed loop makes heating with a boiler energy efficient and consistent. Main Parts of a Boiler Heating System A heater boiler system relies on several key components working together. Each part plays a vital role in safe and smooth operation. Burner and Combustion Chamber The burner mixes fuel with air and creates the heat flame. The combustion chamber holds this flame safely inside the unit. Heat Exchanger This metal container allows heat to move from the flame into the water safely. It keeps toxic exhaust fumes away from your indoor water supply. Circulator Pump The pump moves hot water out to your radiators and pulls cool water back in. It keeps water moving constantly through the pipes. Expansion Tank Water expands when it gets hot. The expansion tank accepts this extra volume so pipe pressure stays safe. Thermostat and Safety Valves The thermostat monitors room temperature and controls heating cycles. Pressure relief valves release excess pressure to protect your family and home. Types of Boiler Heaters Different homes require different boiler designs. Knowing these types helps you select the right model for your property. Combination Boilers Combines space heating and instant domestic hot water into one compact unit. They do not need separate storage tanks, which saves space in smaller houses. System Boilers These units require a separate cylinder to store hot water for taps. However, main components like the pump and expansion tank sit inside the boiler shell. Conventional Boilers Also called standard or regular boilers. They use a cold water tank in the attic plus a hot water storage cylinder. They work well in older homes with traditional pipe layouts. Steam Boilers Steam boilers heat water until it boils into steam. The steam rises through pipes under its own pressure without needing circulator pumps. Hot Water Boilers These systems heat water to around 180 degrees Fahrenheit without boiling it. Circulator pumps push the hot water through baseboards or floor pipes smoothly. Boiler Heater vs Water Heater Many people confuse these two appliances, but they perform different jobs. Clarifying this topic helps when learning what is a boiler heater for your home setup. A standard water heater heats domestic water for washing dishes, taking showers, and running laundry. It heats water and stores it in a tank until you turn on a tap. A boiler heater is built primarily to heat your entire house. It circulates hot water continuously through closed radiator loops to maintain indoor comfort. Some modern boiler models can perform both jobs. These dual systems heat your living space while supplying hot tap water on demand. What Is a Boiler Heater Used For? Homeowners use boiler systems for several practical heating application areas across their homes. Baseboard Radiators Hot water runs through metal baseboard units installed along room walls. The metal fins release steady warmth upward into the room air. Cast Iron Radiators Classic stand-alone radiators hold hot water or steam. They radiate soft heat into living rooms and bedrooms for long periods. Radiant Floor Heating Special plastic tubes run underneath your hardwood, tile, or carpet floors. The boiler pumps warm water through these pipes to warm your floors evenly. Snow Melting Systems Outer boiler loops push warm glycol fluid under driveways and walkways. This melts snow and ice automatically during heavy winter storms. Benefits of a Boiler Heater Homeowners enjoy several distinct advantages when heating with a boiler system. Quiet Operation: Boilers do not use loud blowers or noisy air ducts. You only hear quiet water flow through sealed pipes. Clean Air Quality: Forced-air systems can blow dust, pollen, and pet dander around rooms. Hydronic heat keeps indoor air clean and allergen free. Consistent Comfort: Water holds heat longer than air does. This provides draft-free, steady warmth across every room in your home. High Energy Efficiency: Water transfers thermal energy much better than air. Modern boilers convert almost all fuel directly into usable home heat. Zone Control: You can set separate temperatures for different rooms or floors. This saves

how much electricity does a hot water heater use
Plumbing

How much electricity does a hot water heater use | per month?

A standard electric water heater uses about 4,000 to 4,500 watts of power per hour when heating water actively. For a typical family of four, this translates to roughly 13 to 15 kilowatt-hours (kWh) per day, or around 400 to 450 kWh every month. When evaluating your monthly utility bills, understanding how much electricity does a hot water heater use helps you spot unnecessary energy waste. Running a water heater for three hours each day adds about 400 kWh to your monthly usage, making it the second-largest energy drain in most homes right after your central heating and air conditioning system. How Much Electricity Does a Hot Water Heater Use on Average? An average electric water heater consumes between 3,000 and 4,500 kilowatt-hours of electricity each year. How much power your home consumes depends heavily on household size, daily hot water demand, and the type of system installed in your utility room. Household Size Daily Usage (Gallons) Daily Electricity (kWh) Monthly Electricity (kWh) 1-2 People 30 – 40 Gallons 6 – 8 kWh 180 – 240 kWh 3-4 People 50 – 60 Gallons 12 – 15 kWh 360 – 450 kWh 5+ People 80+ Gallons 18 – 22 kWh 540 – 660 kWh The average household runs its water heater heating elements for roughly three hours every day. If your household relies on heavy daily laundry cycles, long showers, or frequent dishwasher runs, your daily electric water heater electricity usage can easily top 20 kWh. How Many Watts Does an Electric Water Heater Use? Most standard tank-style water heaters operate using two heating elements, each rated between 3,500 and 5,500 watts. However, these two elements rarely run at the exact same time. The upper element heats the top half of the tank first, then switches off so the lower element can heat the rest. Therefore, the water heater wattage consumption for a standard unit sits at 4,500 watts (4.5 kW) during active heating cycles. Tankless electric units operate differently. Because they must heat cold groundwater instantly as it flows through the pipes, their wattage demand is much higher during operation. Standard Storage Tank Unit: 3,500 W to 5,500 W (runs 3 hours per day on average) Whole-House Tankless Electric Unit: 18,000 W to 27,000 W (runs only while tap is open) Heat Pump (Hybrid) Water Heater: 500 W to 1,500 W (uses ambient air heat to drastically drop power draws) How Much Does It Cost to Run a Hot Water Heater? To convert kilowatt-hours into actual money, multiply your monthly kWh usage by your local electric rate. The standard rate across the United States sits around $0.16 per kWh, though rates vary significantly by region. If your household burns through 400 kWh of electricity each month for hot water: Daily Running Cost: $2.13 per day Monthly Running Cost: $64.00 per month Annual Running Cost: $768.00 per year If you live in an area with higher electricity rates (such as $0.28 per kWh), that exact same 400 kWh monthly usage will cost you $112 per month, or $1,344 every year. What Affects a Water Heater’s Electricity Usage? Not every home burns through power at the same rate. Five major factors dictate how much electricity does hot water use in your daily routine. 1. Daily Hot Water Usage Volume Taking high-flow showers, washing laundry in warm or hot water, and running the dishwasher twice a day forces your tank to constantly replenish its hot water supply with cold incoming water. 2. Thermostat Temperature Setting Factory settings usually park water heater thermostats at 140°F (60°C). Lowering your thermostat down to 120°F (49°C) keeps your water safe from harmful bacteria growth while dropping standby energy loss significantly. 3. Incoming Groundwater Temperature In colder climates or during winter months, incoming municipal water enters your home at 40°F to 50°F. The unit must work twice as hard to boost that water to 120°F compared to warm summer months when groundwater enters at 70°F. 4. Tank Sediment Buildup Over time, mineral deposits like calcium and magnesium settle at the bottom of electric tanks. This hard layer acts as an insulating blanket over the lower heating element. The element must run far longer to heat water through that solid layer of scale. 5. Age and Tank Insulation Older units feature thin insulation around the tank walls. As a result, heat escapes into your garage or basement rapidly, forcing the system to kick back on even when nobody is using water. Does a Water Heater Use Electricity When Not Heating? Yes, but the draw is minimal compared to active heating cycles. Standard tank water heaters lose heat through the outer shell day and night. This phenomenon is called standby loss. When no water tap is open, the internal water temperature gradually drops. Once the thermostat senses a temperature drop of a few degrees, the heating elements turn on for 5 to 10 minutes to bring the tank back up to the set target. Standby loss typically accounts for 10% to 20% of your total electric water heater power usage. That means you spend roughly $6 to $12 every month simply keeping hot water sitting idle inside an unused tank. How to Calculate Your Water Heater’s Electricity Usage You can easily calculate your system’s exact draw using three basic metrics: unit wattage, daily runtime, and your local power rate per kilowatt-hour. Follow this simple three-step formula: Find Kilowatts: Divide your unit’s wattage rating by 1,000. (Example: 4,500 Watts / 1,000 = 4.5 kW) Calculate Daily Usage: Multiply kilowatts by hours of daily operation. (Example: 4.5 kW x 3 hours = 13.5 kWh per day) Determine Monthly Cost: Multiply daily kWh by 30 days, then multiply by your electric rate. (Example: 13.5 kWh x 30 = 405 kWh per month. At $0.16 per kWh, 405 x 0.16 = $64.80 per month) Signs Your Water Heater Is Using Too Much Electricity If your utility bill spikes without an obvious explanation, your water heating system may be running inefficiently or failing internally.

is drain cleaner bad for pipes
Plumbing

Is Drain Cleaner Bad for Pipes? | Expert Guide

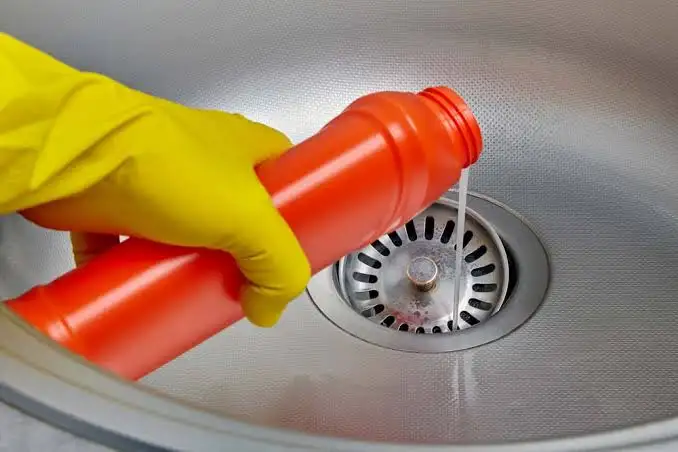
Chemical drain cleaners quickly clear stubborn blockages in sinks, tubs, and showers. However, these harsh store-bought liquid products generate intense heat and strong chemical reactions inside your plumbing system. Over time, that heat melts plastic joints, weakens glue, and eats away at metal pipes. Using store-bought products often leaves homeowners wondering if is drain cleaner bad for pipes when plumbing issues happen later. The short answer is yes, because chemical solutions burn through clogs while slowly destroying your home pipes. What Does ‘Is Drain Cleaner Bad for Pipes?’ Really Mean? When people ask if liquid cleaners harm plumbing, they usually focus on immediate results. A clogged sink drains fast after you pour liquid cleaner down the trap. The standing water disappears, so the product seems like a total success. However, the real damage happens out of sight inside your walls and floors. Chemical reactions keep working long after the main clog dissolves. Strong acids or lyes stay trapped in clogged areas and slowly break down plumbing walls. Understanding the true impact means looking at long-term pipe health. A quick fix today can easily cause hidden leaks, rusted joints, and costly home repairs tomorrow. How Does Drain Cleaner Work and Why Does That Matter for Pipe Safety? Store-bought drain products use three main types of chemical formulas to clear organic blockages: Caustic Cleaners: These products contain thick sodium hydroxide or potassium hydroxide. They turn grease, food scraps, and soap scum into a soft soap mixture that washes away. Acidic Cleaners: These heavy-duty formulas contain sulfuric acid or hydrochloric acid. They break down thick hair, paper products, and heavy organic matter very fast. Oxidizing Cleaners: These liquids use household bleach, nitrates, or peroxides. They burn through organic clogs and release heat and oxygen gas. All three formulas rely on exothermic chemical reactions. That chemical process creates intense heat right inside your dark drain pipe. When standing water stops the cleaner from moving, that trapped heat cooks the surrounding pipe. The harsh chemicals corrode metal and soften plastic while melting protective pipe linings. How Chemical Drain Cleaners Affect Each Pipe Type Plumbing systems use different materials, and each material responds differently to chemical stress. PVC and CPVC Plastic Pipes Plastic pipes are common in modern home construction because they resist rust and corrosion. However, plastic pipes remain very sensitive to high temperatures. Oxidizing and caustic cleaners generate extreme heat when touching thick clogs. That high heat warps plastic walls, softens fittings, and dissolves glue at pipe joints. If you wonder if liquid drain cleaner pvc safe labels are accurate, caution is key. Even products sold as drain cleaner safe for pipes can weaken plastic joints when standing water keeps chemicals in one spot. Cast Iron Pipes Older homes frequently feature thick cast iron drain lines. Cast iron is heavy and strong, but acidic drain products quickly strip away its protective inner coating. Repeated chemical exposure causes internal rusting and rough flaking along iron walls. That flaking creates rough spots where hair and debris catch easily, creating worse blockages. Copper and Galvanized Steel Pipes Galvanized steel and copper pipes react poorly to acidic or caustic drain products. Acids eat through metal walls and create tiny pinhole leaks behind walls and under floors. Over time, caustic chemicals corrode metal solder at pipe connections. That corrosion leads to sudden pipe bursts and expensive water damage inside walls. In short, when asking if do drain cleaners damage pipes, the answer for all metal plumbing materials remains a definite yes. You can read about: What is the Best Liquid Drain Cleaner Signs Drain Cleaner Has Already Damaged Your Pipes Chemical damage often stays hidden until major plumbing failures happen. Watching for early warning signs saves you money on emergency repairs. Frequent and Recurring Clogs If your drains keep backing up in the exact same spot, chemical cleaners may have roughened the inner pipe walls. Chemical etching creates sticky surfaces that trap grease and hair faster than smooth pipes. Discolored Water or Metal Flakes Dark brown or reddish water coming from lower drains indicates internal rust in cast iron pipes. Acidic products strip interior metal coatings and accelerate pipe rusting. Unpleasant Chemical Smells Persistent chemical odors coming from your sink drain mean harsh liquids are sitting in your pipe trap. Trapped chemicals continuously eat away at plastic traps and rubber seals. Unexplained Leaks and Water Stains Discolored spots on ceilings, damp drywall, or wet cabinets often point to small pinhole leaks caused by chemical corrosion inside walls. You can read about: How to Unclog a Drain Safe Alternatives to Drain Cleaners You do not need harsh liquid chemicals to clear tough drain blockages safely. Effective, non-chemical methods remove clogs without risking structural pipe damage. The Classic Plunger A standard cup plunger creates natural pressure that moves standing water and dislodges soft blockages. Form a tight seal directly over the drain opening. Cover overflow vents with a damp cloth to maintain suction. Plunge firmly up and down for 30 seconds to loosen debris. Manual Drain Snakes and Augers A manual plastic drain snake reaches deep into sink traps to pull out thick hair masses and soap build-up physically. Insert the flexible snake tool gently into the drain opening. Rotate the handle slowly to catch trapped hair and debris. Pull the tool out carefully and clean off the removed mass. Baking Soda and Vinegar Method For minor kitchen clogs and smelly drains, natural household items offer a safe cleaning option. Pour half a cup of baking soda straight down the drain. Follow with one cup of fresh white distilled vinegar. Cover the drain for 15 minutes while the fizzing action works. Flush thoroughly with a gallon of hot water. Chemical Drain Cleaner vs. Safe Alternatives Understanding your options helps you make smart choices for your home’s plumbing system. Chemical Cleaners Speed: Works in 15 to 30 minutes. Pipe Safety: High risk of corrosion, heat damage, and pinhole leaks. Effectiveness: Only melts soft organic matter, leaving mineral deposits behind. User Safety:

how much does a toilet weigh
Plumbing

How Much Does a Toilet Weigh | Total Weight Guide

A standard residential toilet weighs between 80 and 120 pounds when empty. Light models can weigh as little as 50 pounds, while heavy porcelain fixtures can reach 140 pounds. Wall-mounted models often weigh around 60 pounds, but their internal mounting frames add extra bulk behind the wall. Plumbers and homeowners often ask how much does a toilet weigh before starting a renovation. Knowing this exact bulk helps you pick the right tools, protect your back, and prevent expensive floor damage during a DIY replacement project. Average Weight of a Standard Toilet Most homes feature a traditional two-piece vitreous china fixture. The total weight of a toilet in this standard style usually sits right at 90 pounds. Vitreous china is dense ceramic clay coated with an enamel glaze. The clay density makes the ceramic strong, non-porous, and heavy. When asking how heavy is a toilet, you must consider the design. A basic round-front model weighs less than an elongated bowl model. Extra clay is used to stretch the front of an elongated bowl by two inches, adding about five to eight pounds to the total structure. Toilet Weight Breakdown List Different styles and materials change the total load on your floor. Here is a clear breakdown of average dry weights across popular categories: Standard Two-Piece Model: 80 to 100 pounds total One-Piece Model: 88 to 120 pounds total Smart Toilet: 100 to 160 pounds total Wall-Hung Model: 50 to 80 pounds (bowl only) Corner Unit: 90 to 115 pounds total Commercial Flushometer Model: 60 to 90 pounds (no tank) Lightweight RV Plastic Model: 10 to 25 pounds total What Affects the Weight of a Toilet? Several main factors dictate how heavy toilets are when you try to lift them. The primary factor is material composition. Vitreous china remains the industry standard because it resists stains and water absorption. However, thick ceramic walls add substantial mass. Design shape plays another major role. Compact round bowls require less material than extended oval designs. Trapway construction also adds ceramic material inside the base. Tank size contributes directly to total mass. Dual-flush tanks with thick internal walls weigh more than slim gravity tanks. Integrated electronic components, bidets, and water heaters inside high-tech fixtures boost total mass significantly. Average Weight by Toilet Type To understand how much do toilets weigh, it helps to examine specific design categories. Each style serves different room layouts and user needs. Gravity-fed two-piece fixtures stay near the lower end of the spectrum. Their split design distributes total bulk across two separate pieces, making shipping and handling easier for installers. Pressure-assisted units weigh more than regular gravity models. They contain a plastic pressure tank sealed inside the ceramic tank. That extra inner pressure vessel adds roughly 10 to 15 pounds of hardware mass. Commercial units often lack a ceramic tank entirely. They connect directly to high-pressure water supply pipes using a flushometer valve. These ceramic bowls weigh 60 to 80 pounds on their own. How Much Does a Toilet Bowl Weigh? The bottom section of a two-piece fixture is the bowl. A standard porcelain bowl weighs between 50 and 70 pounds on its own. It holds the internal trapway paths and the broad floor mounting base. The bowl carries most of the total structural mass because it supports user weight directly. Larger mounting bases and thick siphon jet channels add ceramic density near the bottom. When installing a two-piece unit, you carry the bowl to the bathroom flange first. Securing a 60-pound bowl onto wax rings requires steady hands to align the closet bolts accurately. How Much Does a Toilet Tank Weigh? The upper section of a two-piece fixture is the tank. An empty porcelain tank weighs between 30 and 50 pounds. This weight includes the ceramic lid, flush valve assembly, and fill valve hardware. The tank lid itself is surprisingly heavy. A standard ceramic tank lid accounts for 10 to 15 pounds of that total. Always remove the lid before lifting a tank to avoid accidental drops and cracks. Attaching an empty tank to an installed bowl is a quick job. Since you only lift 35 pounds at once, alignment is simple for one person working alone. How Much Does a Toilet Weigh With Water? Water adds significant operational weight to your plumbing setup. One gallon of water weighs exactly 8.34 pounds. Older fixtures hold 3.5 to 5 gallons in the tank, while modern high-efficiency units hold 1.28 to 1.6 gallons. A modern fixture with a 1.6-gallon tank holds about 13 pounds of water in the tank and bowl combined. When you add that liquid mass to a 90-pound frame, the operating weight reaches 103 pounds. Older models with 5-gallon tanks hold over 40 pounds of water. That brings the total operational weight of a toilet up to 140 pounds or more during daily household use. Does Toilet Weight Matter? Understanding fixture mass is critical for home safety and structurally sound installations. Porcelain is brittle and awkward to grip. Dropping a heavy ceramic piece can shatter the unit and slice through leather gloves or footwear. Floor strength is another key concern. Old subfloors damaged by past leaks might sag under continuous weight. Combining a 120-pound fixture with a 200-pound person requires strong floor joists underneath. Transporting fixtures upstairs requires proper planning. Carrying a heavy box up narrow staircases without help can lead to severe muscle strain or accidental falls. Can One Person Lift a Toilet? One adult can usually lift an empty two-piece fixture by separating the tank from the bowl. Carrying a single 50-pound bowl or a 35-pound tank is manageable for most healthy individuals. Lifting an assembled one-piece unit alone is much harder. One-piece models weigh up to 120 pounds and lack clean handholds. The awkward center of gravity makes solo lifting risky for your back. If you must move a fixture alone, always clear your walking path first. Bend your knees, keep your back straight, and hold the heavy ceramic close to your chest. How to Move

how to plunge toilet
Plumbing

How to Plunge Toilet Drains | The Right Way

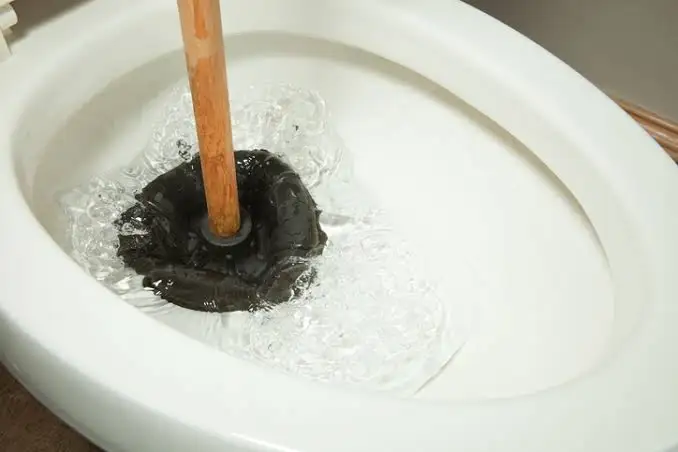
To clear a clogged drain quickly, form a tight seal over the drain hole with a flange plunger. Press down gently to force out trapped air, then push and pull firmly for 15 to 20 seconds. This push-pull movement creates water pressure that breaks apart the blockage and pushes it down the pipe. Knowing how to plunge toilet fixtures correctly keeps your bathroom clean and prevents messy water overflows. Homeowners can easily fix slow drains and stubborn blockages using the right technique and basic household tools. When Should You Plunge a Toilet? Plunging is the best first step whenever wastewater stays in the bowl or drains very slowly. Most household clogs happen when too much toilet paper, heavy wipes, or waste gets caught in the curved trap behind the bowl. You should act immediately if you notice the water level rising close to the rim after a flush. Waiting allows wastewater to spill over onto your floor. Do not flush a second time if the bowl fills up. Instead, remove the tank lid and press the flapper down to stop more water from entering the bowl. However, you should avoid plunging if hard objects like plastic toys, cell phones, or large metal items fall into the bowl. Plunging pushes hard items deeper into the drain pipe, where they become much harder to remove. In those cases, wearing rubber gloves to pull the item out by hand or calling a plumber is a safer choice. Tools You Need Before Plunging a Toilet Using the correct tools makes clearing a drain simple and hygienic. Not all plungers are built the same way, so picking the right style matters. Flange Plunger: This is the best plunger and toilet tool for bathroom drains. Unlike a flat cup plunger used for sinks, a flange plunger has a soft rubber fold or sleeve inside the cup. This extra fold extends outward to fit snugly into the rounded drain hole of the bowl. Heavy-Duty Rubber Gloves: Protect your hands and wrists from splashed wastewater and bacteria. Old Towels or Rag Cloths: Lay towels around the base of the fixture to soak up any accidental splashes. Bucket of Warm Water: Useful for rinsing the bowl or adding extra water if the level is too low. Choosing a quality toilet and plunger combination ensures you build maximum suction with minimal physical effort. How to Plunge a Toilet Step by Step Clearing a clogged drain requires proper suction and steady pressure. Follow these steps to clear the line safely without making a mess. Step 1: Prep the Bathroom Space Lay old towels around the base of the fixture. Put on your rubber gloves. If the bowl is full to the top rim, scoop out some water with a small cup into a bucket. If the bowl is empty, pour in a few cups of warm water. The rubber head of the tool must stay under water to create suction. Step 2: Form a Tight Seal Around the Drain Insert the rubber head into the bowl at an angle so the inner cup fills with water instead of trapped air. Place the extended flange directly inside the drain opening. Press down gently to squeeze out any remaining air pockets. A tight seal is essential when learning how to use a toilet plunger effectively. Step 3: Push and Pull Firmly Hold the handle straight with both hands. Push down firmly, then pull up without breaking the rubber seal against the drain. The pulling motion is just as important as the pushing motion because it loosens the clog. Continue this rhythmic movement for 15 to 20 seconds. Step 4: Break the Seal and Check the Flow Pull the tool back quickly to break the suction. If successful, the trapped water will rush down the drain with a distinct swooshing sound. Step 5: Test Flush the Line Remove the tank lid before testing. Flush the toilet while keeping your hand near the flapper valve inside the tank. If the water level rises again, shut the flapper to prevent an overflow and repeat the plunging steps. Knowing how do you plunge a toilet step by step helps you clear most organic blockages in under five minutes. You can read about: How to fix a leaky toilet Common Mistakes to Avoid When Plunging a Toilet Even simple tasks can go wrong if you use the wrong approach. Avoid these common errors to protect your plumbing: Using a Flat Sink Plunger: Flat rubber cups cannot form a seal inside a curved bowl drain. Always use a flanged tool. Plunging with an Empty Bowl: Water creates the hydraulic pressure needed to push clogs. Air compresses under pressure, making plunging ineffective. Pushing Too Hard on the First Stroke: Pushing hard right away splashes dirty water over the sides of the bowl. Make your first push gentle to remove air, then increase pressure. Flushing Repeatedly: Flushing a clogged line repeatedly causes dirty water to spill onto your bathroom floor. Using Chemical Drain Cleaners Before Plunging: Never plunge a bowl filled with chemical drain openers. The chemicals can splash onto your skin and eyes during plunging. Avoiding these simple mistakes teaches you how to unclog a toilet with a plunger cleanly and efficiently. What to Do If the Toilet Still Won’t Unclog If several minutes of steady plunging fail to clear the drain, the blockage rests deeper in the pipe line. You have a few safe options to clear stubborn clogs: Use Hot Water and Dish Soap Pour half a cup of liquid dish soap into the bowl and let it sit for ten minutes. The soap lubricates the heavy waste mass. Follow with a bucket of hot tap water poured from waist height. Never use boiling water, as extreme heat can crack porcelain bowls. Use a Toilet Auger (Plumbing Snake) A toilet auger features a long steel cable inside a protective rubber tube. Insert the auger cable into the drain and turn the crank handle clockwise. The cable hooks

Fast and Efficient Plumbing Services in Eagle Rock

Client Reviews

Posted on Google Google
Ryan Haden profile picture
Ryan Haden
Google star 1Google star 2Google star 3Google star 4Google star 5Trustindex verifies that the original source of the review is Google.
Could not have been happier with Alex! We was right on time, polite, fixed all my kitchen sink issues and have me good tips on how to best maintain. I will for sure be using him again and highly recommend anyone who needs a great plumber to use his services as well. Thank you!
Posted on Google Google
Lorena Marcoe profile picture
Lorena Marcoe
Google star 1Google star 2Google star 3Google star 4Google star 5Trustindex verifies that the original source of the review is Google.
Talk about a professional...yes, I am talking about Alex Derks, Derks Plumbing. He is by far the most knowledgeable plumber we have ever had the pleasure of hiring. He's been in the plumbing business for years and it shows. Any questions you have re: plumbing issues, install, etc., Alex is your man. So happy with his work and he has a great sense of humor as well... extremely easy to talk to...thank you Alex!!!
Posted on Google Google
Andrew Jalil profile picture
Andrew Jalil
Google star 1Google star 2Google star 3Google star 4Google star 5Trustindex verifies that the original source of the review is Google.
Alex did a great job installing my kitchen faucet and an under-sink Aquasana water filter. He also addressed a few other plumbing-related issues. He was friendly and helpful. Excellent work!
Posted on Google Google
Abigail Bigham profile picture
Abigail Bigham
Google star 1Google star 2Google star 3Google star 4Google star 5Trustindex verifies that the original source of the review is Google.
Alex does what other plumbers cannot do! He is our go to.
Posted on Google Google
Danielle Driver profile picture
Danielle Driver
Google star 1Google star 2Google star 3Google star 4Google star 5Trustindex verifies that the original source of the review is Google.
Alex is very friendly and responsive. What a pleasure to work with!
Posted on Google Google
Lawrence Isaacs profile picture
Lawrence Isaacs
Google star 1Google star 2Google star 3Google star 4Google star 5Trustindex verifies that the original source of the review is Google.
Very very happy with the work Alex did for us replacing the tanks in our Aquasana filtration system. From first contact over the phone through job completion Alex was a pleasure to work with. He explained what he was doing, and why, every step of the way, and made sure we understood what we needed to do to maintain the system. Strongly recommend Alex!
Posted on Google Google
Joey Aucoin profile picture
Joey Aucoin
Google star 1Google star 2Google star 3Google star 4Google star 5Trustindex verifies that the original source of the review is Google.
Alex Derks has been such a lifesaver for me. Anytime I'm in a pinch with the plumbing in my home, Alex is only a phone call away and I've only seen great results from his work. He's reliable, knowledgable, and entirely trustworthy. A must-have source when owning a home.
Posted on Google Google
Eric Gorman profile picture
Eric Gorman
Google star 1Google star 2Google star 3Google star 4Google star 5Trustindex verifies that the original source of the review is Google.
After working with dozens of plumbing services in the LA area, I can confidently say Derks is the best in the business. On time, reliable and capable of even the most difficult tasks, Derks goes above and beyond to make sure your water system is working correctly.
Posted on Google Google
Jason Gruenbaum profile picture
Jason Gruenbaum
Google star 1Google star 2Google star 3Google star 4Google star 5Trustindex verifies that the original source of the review is Google.
Excellent know-how and fast!! Reasonable pricing and super responsive!!
Posted on Google Google
Jonathan Hepfer profile picture
Jonathan Hepfer
Google star 1Google star 2Google star 3Google star 4Google star 5Trustindex verifies that the original source of the review is Google.
Alex is an expert plumber, and he always goes out of his way to educate me about how to prevent future issues. Highly recommended!

Derks Plumbing has been providing professional plumbing services to Eagle Rock residents for over 20 years. Our experience and strong reputation have allowed us to grow, and we are proud to serve customers in 15 nearby areas, including Venice, Santa Monica, Beverly Hills, and more.

Contact

Hours of Operation

Monday: Open 24 Hours
Tuesday: Open 24 Hours
Wednesday: Open 24 Hours
Thursday: Open 24 Hours
Friday: Open 24 Hours
Saturday: Open 24 Hours
Sunday: Open 24 Hours

© 2026 Created by Localpro1

Scroll to Top