We are Available 24/7

Plumbing

how to turn up water heater
Plumbing

How to Turn Up Water Heater: Step-by-Step Tips

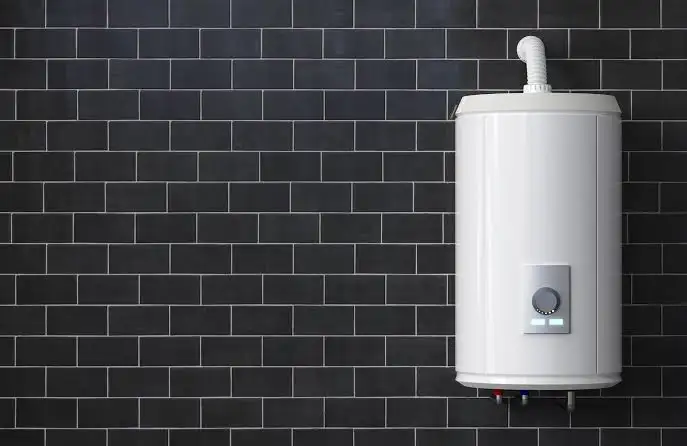
Lukewarm showers are frustrating, especially when your water heater should be doing its job. The fix is often simple. Most water heaters let you adjust the temperature in just a few minutes using basic tools you already own. If you want to know how to turn up water heater temperature safely, this guide covers every type, including gas, electric, and tankless units. You will also learn the right target temperature, common mistakes, and when to stop and call a plumber. Understanding Your Water Heater Temperature Settings Most water heaters ship from the factory set at 120°F. This is the standard recommendation from the U.S. Department of Energy. It balances energy savings with comfortable hot water output. Some homeowners need water hotter than 120°F. Households with older adults, newborns, or people with weakened immune systems may need 140°F to kill waterborne bacteria like Legionella. Going above 140°F raises the risk of scalding. It also increases your energy bill without a meaningful benefit for most households. Reasons You May Need to Turn Up Your Water Heater Here are the most common reasons people need to increase their water heater temperature: The water feels lukewarm even at full hot setting You run out of hot water quickly with a full household A doctor or health professional recommends higher temps for sanitation Your dishwasher does not pre-heat water and needs hotter input You recently moved in and the previous owner had it set too low If you are not sure whether your temperature needs adjusting, start by measuring your current hot water output with a kitchen thermometer. Run the tap for two minutes, then test it. Know Your Water Heater Type Before Adjusting It The method to adjust your water heater depends on what type you have. There are three main types: Gas water heater: Has a gas burner at the bottom and a dial on the outside of the unit. Electric water heater: Powered by electricity with one or two heating elements and thermostat panels behind access covers. Tankless water heater: Heats water on demand with a digital control panel on the front. Identify your type before starting. This prevents you from looking in the wrong place or adjusting the wrong control. Tools and Safety Precautions Before You Begin Never skip safety steps when working near a water heater. Gas and electricity are both involved depending on your unit type. Safety precautions: Turn off power to an electric heater at the breaker box before opening panels Never use open flames near a gas water heater Do not touch internal wires on an electric unit Keep a fire extinguisher nearby when working on gas appliances Wait for the tank to cool slightly before touching components If you smell gas at any point, stop immediately. Leave the home and call your gas company. Tools and Materials You Will Need Flathead screwdriver Phillips screwdriver Non-contact voltage tester (for electric units) Kitchen or meat thermometer (to verify output) Flashlight or headlamp Work gloves That is all you need for a basic temperature adjustment. No special plumbing tools are required. How to Turn Up Water Heater (Step-by-Step Guide) Here is the general process that applies to all water heater types before getting into the specifics below. Identify your water heater type. Locate the thermostat or temperature dial. Note the current setting before changing it. Adjust the temperature in small increments, around 10°F at a time. Wait one to two hours, then test your hot water output. Repeat if needed until you reach your target temperature. Going slowly prevents overshooting and reduces scalding risk. You can read about: How to Install a Thermocouple on a Water Heater How to Turn Up a Gas Water Heater Gas water heaters are the easiest to adjust. The thermostat dial sits on the front of the gas valve near the bottom of the tank. Locate the dial on the gas control valve. It usually shows settings like Warm, Hot, A, B, or C along with temperature numbers. Turn the dial clockwise to increase the temperature. The standard setting is between 120°F and 140°F. Set it, then wait about two hours for the tank to heat fully. Test your hot water at the tap using a thermometer. If your dial only shows letters or words like Warm and Hot, the middle position is usually around 120°F. Turn it one notch higher if you want more heat. How to Turn Up an Electric Water Heater Learning how to turn up heat on water heater with an electric unit takes a few more steps because the thermostat is inside a panel. Go to your breaker box and turn off the circuit for the water heater. Use a non-contact voltage tester to confirm the power is off before touching anything. Remove the access panel on the side of the tank. Most have one on the upper half and one on the lower half. Pull back the insulation to expose the thermostat. Use a flathead screwdriver to turn the thermostat dial to your target temperature. If your unit has two thermostats, set both to the same temperature. Replace the insulation and access panel. Turn the breaker back on and wait two hours before testing. This process answers how do you turn up heat on water heater with an electric model clearly and safely. How to Increase Temperature on a Tankless Water Heater Tankless units are the most straightforward. Most models have a digital display on the front panel. Find the control panel on the front of the unit. Press the temperature up button or use the dial to increase the setting. Most models adjust in 2°F or 5°F increments. Set it to your desired temperature, typically 120°F to 140°F. Run a hot tap for a minute and test the output. Some units require you to access a service menu for adjustments beyond the standard range. Check your manual if the button controls do not let you go high enough. Best Water Heater Temperature for Most Homes The
How Long Do Toilets Last
Plumbing

How Long Do Toilets Last? | Lifespan Guide

If you are wondering how long your home’s most essential plumbing fixture will keep working, the quick answer is that a standard porcelain toilet can easily last 30 to 50 years. In fact, many well-made porcelain bowls and tanks can technically last a lifetime if they do not experience any physical impacts or cracks. However, while the heavy porcelain shell survives for decades, the inner mechanical components tell a completely different story. To truly understand how long do toilets last, you must look past the porcelain exterior and examine the working parts inside, which usually require major repairs or replacement every 5 to 10 years. How Long Do Toilets Last? A Real Breakdown The porcelain bowl and tank can last 50 years or more. There’s no moving parts inside fired ceramic, so it doesn’t wear down from normal use the way rubber or plastic does. The internal components are a different story. Flappers, fill valves, and flush valves do the actual mechanical work every flush, and that means wear over time. These parts typically need replacing every 5 to 10 years. When people ask how long toilets last, they’re usually picturing the whole unit as one object. In reality, you’re dealing with two timelines. A toilet that’s 15 years old with a replaced flapper or two is in normal shape. A toilet still running on its original 1990s parts at 20-plus years is overdue for a check. Here’s a quick breakdown of toilet lifespan years by part: Porcelain bowl and tank: 50+ years Flapper: 3 to 5 years Fill valve: 4 to 8 years Flush valve: 5 to 10 years Wax ring seal: 20 to 30 years (if undisturbed) Tank bolts and gaskets: 10 to 15 years There’s also a water-use angle worth knowing. Federal law capped flush volume at 1.6 gallons starting in 1994. If your toilet predates that, you’re likely paying more on your water bill every month, even if it still flushes fine. You can read about: How Long Do Toilets Seals & Valves Last What Affects How Long a Toilet Lasts? The lifespan of toilets isn’t fixed. A few real factors push it up or down. Water quality. Hard water leaves mineral buildup inside the tank and around the flush valve. Over time, this affects how well the flapper seals, leading to slow leaks and constant running. Usage frequency. A toilet in a guest bathroom used a few times a week lasts longer than one in a busy family bathroom used daily, multiple times a day. Installation quality. A poorly seated wax ring or an unlevel install causes early problems, even if the porcelain itself is fine. Maintenance habits. Toilets that get occasional attention, like checking the flapper seal yearly, outlast ones that are ignored until something breaks. Brand quality. Higher-end brands use better materials and tighter tolerances. Budget models sometimes crack or fail years sooner. 5 Signs It’s Time to Replace Your Toilet While a simple valve swap can fix minor issues, certain symptoms point toward structural failure or unresolvable inefficiency. Here are five undeniable signs that your fixture has reached the end of its functional life. 1. Hairline Cracks in the Porcelain Porcelain can develop tiny hairline cracks over time due to shifting foundations, over-tightened bolts, or accidental impacts. Check both the exterior and interior of the tank and bowl regularly. Even a microscopic fracture can expand without warning, causing sudden, catastrophic flooding that can ruin your bathroom flooring and subfloor. 2. Chronic, Expensive Clogs Older models often suffer from outdated trapway designs. If you find yourself reaching for the plunger multiple times a week, the internal porcelain glazing inside the trapway has likely worn away. Once the smooth glaze degrades, waste scratches the raw porcelain and catches easily, creating recurring blockages that no amount of clearing can permanently fix. 3. A Constantly Running Tank If you constantly hear water trickling or hissing from the bathroom, your internal components are failing. While replacing a fill valve is simple, older toilet models often feature proprietary configurations that modern replacement parts cannot match. If multiple repair attempts fail to stop the constant water flow, a complete replacement is the most practical solution. 4. Poor Flush Power and High Water Consumption Toilets manufactured before 1994 use anywhere from 3.5 to 5.0 gallons per flush (gpf). Modern fixtures are legally mandated to use 1.6 gpf or less, with High-Efficiency Toilets (HET) utilizing just 1.28 gpf. If your old unit requires multiple flushes just to clear the bowl, you are wasting thousands of gallons of water each year. 5. Unstable, Rocking Base A toilet should sit perfectly flush against the bathroom floor. If it wobbles or rocks when you sit down, the floorboards beneath the base may have softened due to a long-term, hidden leak from the wax ring. This structural instability requires immediate professional attention to inspect the subfloor and replace the entire unit. Repairing vs. Replacing Repair makes sense when: The toilet is under 15 years old The issue is one isolated part, like a flapper or fill valve There’s no crack anywhere in the porcelain The toilet sits level and stable Repair cost stays under $150 Replacement makes sense when: The toilet is over 20 years old You’ve replaced internal parts more than twice recently There’s any crack in the porcelain It uses more than 1.6 gallons per flush You’re already renovating the bathroom A simple rule: if repair cost gets close to half the price of a new toilet, replacement is the smarter move. Most quality toilets run $150 to $400 installed, so a $200 repair on an old unit rarely pays off. Water savings matter too. Switching from an older 3.5 or 5 gallon-per-flush toilet to a modern 1.28 gallon model can save thousands of gallons a year, which adds up fast on your water bill. Choosing a New Toilet Flush type. Gravity-fed toilets are quieter and cheaper. Pressure-assisted models flush harder and resist clogs, but cost more and run louder. Bowl shape.

how to repair slab leak
Plumbing

How to Repair Slab Leak | Without Major Damage

A slab leak is repaired by finding the damaged pipe, stopping the water, and fixing or replacing the affected section. The right method depends on the pipe location, damage, and plumbing layout. How to Repair Slab Leak starts with accurate leak detection. A plumber may use pressure testing, acoustic tools, thermal imaging, or other methods before opening the concrete. Some leaks need a small access opening, while others can be fixed by rerouting the pipe or using a suitable trenchless method. Acting early helps limit water damage and avoids unnecessary concrete removal. What Is a Slab Leak? A slab leak is a water leak in a pipe located beneath or inside a concrete foundation slab. Many homes have water supply lines running below the floor. If one of these lines cracks, corrodes, or develops a failed connection, water can escape under the home. Slab leaks can affect hot or cold water lines. Hot water leaks may create warm spots on the floor. Cold water leaks can be harder to notice because they may not change the floor temperature. The water does not always come straight to the surface. It can move through soil beneath the slab before becoming visible somewhere else. This makes slab leaks different from an exposed pipe leak. You may see the damage far from the actual break. Common Signs of a Slab Leak Watch for these warning signs: A sudden increase in your water bill A water meter that moves when water is not being used Warm spots on the floor Damp flooring or unexplained moisture The sound of running water Low water pressure Cracks in flooring or walls Mold or mildew near the floor Water collecting around the foundation Repeated plumbing problems in the same area The EPA recommends checking water use and the water meter when looking for hidden leaks. A meter that changes during a period when no water is being used can point to a leak. How Is a Slab Leak Diagnosed? Before repairing a slab leak, the exact location should be confirmed. Breaking concrete based on a guess can create unnecessary damage. A professional plumber first tries to narrow down the leak location. Pressure Testing Pressure testing checks whether the plumbing system can hold water pressure. If pressure drops when fixtures are closed, there may be a leak somewhere in the system. Further testing helps narrow down the location. Acoustic Leak Detection Water escaping from a pressurized pipe can create sound. Professional listening equipment can help detect that sound beneath concrete. This can reduce the need for random concrete removal. Thermal Imaging A thermal camera can sometimes identify temperature changes caused by a hot water leak. This can be useful when a hot water line is suspected beneath flooring. Thermal imaging does not replace other tests. It works best as part of a complete leak detection process. Water Meter Testing Homeowners can also watch the water meter. Turn off faucets, washing machines, toilets, and other water-using fixtures. Check the meter, wait for a set period, and check it again. If the reading changes while no water is being used, further investigation may be needed. How to Repair Slab Leak To Repair Slab Leak depends on what the plumber finds during leak detection. There is no single repair method for every home. A small damaged section may need a spot repair. A badly deteriorated line may need replacement or rerouting. The basic repair process usually includes: Confirm the leak location. Shut off the water supply. Determine the damaged pipe section. Choose the least disruptive suitable repair method. Access the pipe if needed. Repair, replace, or reroute the damaged line. Test the plumbing system. Restore the concrete and flooring as needed. The goal is not just to stop visible water. The repair should address the failed pipe and reduce the chance of another leak. You can read about: How Much Does It Cost to Repair a Slab Leak What Are the Main Slab Leak Repair Methods? The best slab leak repair method depends on the pipe material, location, age, and overall condition. Spot Pipe Repair A spot repair focuses on the damaged section. The plumber opens a small area of concrete to reach the pipe. The failed section is removed and replaced with an approved connection. This can be a good option when one section has failed and the rest of the plumbing is in good condition. Pipe Replacement If the pipe has extensive corrosion, several damaged sections, or repeated leaks, replacing more of the line may make sense. Replacing the affected line can provide a better long-term solution than repeatedly repairing the same aging pipe. Pipe Rerouting Rerouting moves the water line away from the slab. Instead of repairing a difficult pipe beneath the concrete, a plumber may install a new route through an accessible part of the home. The new route depends on the home’s design. It may run through walls, ceilings, an attic, or another suitable area. Rerouting can reduce concrete removal and may make future repairs easier. Can Epoxy Pipe Lining Fix a Slab Leak? Epoxy pipe lining can repair some damaged pipes, but it is not suitable for every slab leak. The process uses a lining material inside an existing pipe. The pipe must be in suitable condition for the lining system. Before choosing this method, a plumber may need to consider: Pipe material Pipe size Internal condition Number of leaks Pipe access Existing corrosion Water pressure The lining manufacturer’s requirements A severely damaged or collapsed pipe may not be a good candidate. Homeowners should also understand that pipe lining is not simply a coating that can be used on every leaking pipe. Proper inspection and preparation matter. Can a Slab Leak Be Repaired Without Breaking the Concrete? Yes, some slab leaks repair methods can reduce or avoid major concrete removal. Pipe rerouting is one common option. Instead of reaching the damaged pipe beneath the slab, a new water line can be installed through another accessible route.

Is Tankless Water Heater Better
Plumbing

Is Tankless Water Heater Better? | Pros & Cons Explained

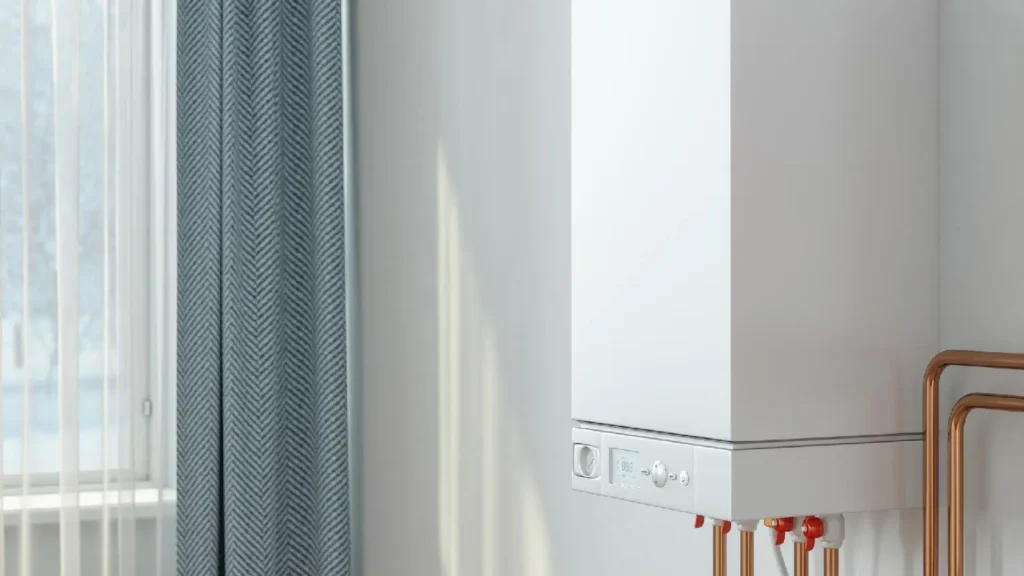
Unlike conventional tanks, on-call for water heater warmth water most effective while needed, offering warm water with out the constraints of a garage tank. Available in gas tankless configurations which includes natural gas and propane options those compact gadgets supply non-stop warm water primarily based totally for your home`s waft charge requirements, measured in gallons in keeping with minute (GPM).   How does a tankless water heater works?  Tankless water heater can run on gas or electricity. They warmth water on call for and do now no longer hold water in a tank 24-7. There`s no power use for stroage or standby power while you don`t want warm water. Depending in your home`s warm water usage, electric powered tankless water heaters are commonly much less pricey to function than traditional tank water heaters due to the fact they operating on call for.   Electric tankless water heaters are extra power green than gas-powered tankless water warmers. Electric tankless water heaters may be extra than 98% green at the same time as excessive performance gas fashions top simply underneath that. Both electric powered and gas tankless water heaters have ordinary lifespans of twenty years or extra.  Advantages of a Tankless Water Heater  Here`s why extra owners are switching to tankless warm water structures:  1. Longer Lifespan & Lower Operating Costs  Built with long lasting materials, like chrome steel warmness exchangers, tankless water heater generally have an extended existence expectancy. Many fashions additionally have replaceable parts, assisting to lessen long-time period environmental impact. Renting from Reliance additionally way you don`t must fear approximately upkeep at some point of your contract.  2. On Demand Hot Water Supply  No extra walking out of warm water! A tankless gadget heats water as needed, so you`ll usually have warm showers even throughout busy mornings. These structures offer limitless warm water with immediately temperature manage and adjustable settings, making sure non-stop delivery.  3. Greater Energy Efficiency  Traditional water heater continuously warmness saved water, losing electricity. Tankless fashions warmness water handiest whilst needed, with electricity performance rankings as excessive as with as much as a 0.98% UEF. This way $0.98 out of every $1 you spend on gasoline is used to warmness the water. Many excessive-performance, green fashions qualify for application rebates – ask us if there are any rebates to be had to your location proper now.  4. Space-Saving Design  Unlike cumbersome 40- or 60-gallon tanks, a tankless water heater is wall-mounted, releasing up precious area to your home, cottage, or basement. A tankless water heater hangs on a wall up and out of the way, presenting extra usable area at the floor than a traditional warm water tank.  5. Reduced Environmental Impact  Tankless warmers use much less electricity and feature replaceable parts, in contrast to conventional tanks that regularly want complete replacement. By lowering your carbon footprint with Energy Star rated generation and condensing generation that maximizes performance, those green structures assist owners optimize their environmental impact.  You can read about: How to Install Tankless Water Heater Is Tankless Water Heater Better for Energy Efficiency?  One of the most powerful arguments in desire of tankless era is power efficiency.  Traditional water heaters constantly eat power to hold the temperature of saved water, even if nobody is the use of warm water. This process, referred to as standby warmth loss, contributes to ongoing power intake for the duration of the day.  Tankless gadgets take away maximum standby losses due to the fact water is heated simplest while required. As a result, many owners revel in decrease software payments after switching to a tankless device.  The power financial savings may be in particular considerable in families with slight warm water usage. Over time, those financial savings might also additionally assist offset the better prematurely set up value of a tankless unit.  Traditional vs Tankless Water Heater: Hot Water Supply  One of the main variations withinside the conventional vs tankless water heater debate is how every device supplies warm water.  Traditional water heater offer a constrained quantity of warm water primarily based totally on tank size. Once the saved deliver is depleted, customers ought to watch for the tank to reheat earlier than extra warm water turns into available.  Tankless systems, on the alternativ hand, can offer a non-stop deliver of warm water so long as the unit`s go with the drift capability isn’t exceeded. This method owners are much less probably to expire of warm water throughout back-to- back showers or prolonged equipment use.  However, it’s miles essential to apprehend that tankless gadgets have go with the drift charge limitations. In large families with simultaneous warm water demands, sizing the device successfully turns into essential element.  Common Myths About Tankless Water Heaters  Some house owners agree with tankless structures offer immediate warm water at the home. In reality, water nevertheless ought to journey through the plumbing machine earlier than attaining fixtures.  Another false impression is that tankless gadgets require no maintenance. While they regularly closing longer than conventional models, ordinary servicing stays vital for ideal performance.  Understanding those realities facilitates house owners set practical expectancies while comparing alternative options.  Call to Action  Considering a water heater Installation? Contact Derks Plumbing for professional advice, expert set up, and custom designed water heater alternative alternatives designed to enhance comfort, efficiency, and reliability all through your home.  Conclusion  So, is tankless water heater better? For many homeowners, the solution is yes specifically while strength efficiency, lengthy-time period savings, limitless warm water, and prolonged lifespan are priorities. However, conventional structures stay a dependable and cost-powerful choice for families with decreased warm water needs or tighter budgets. Carefully comparing your family`s needs and wants and consulting with a plumbing expert permit you to select the answer that offers the best price for your home.  Frequently Asked Questions  Is tankless water heater higher than a conventional water heater?  Tankless water heater are typically extra strength-efficient, offer non-stop warm water, and closing longer. However, conventional structures frequently have decrease in upfront cost.  What is the

can i install a tankless water heater myself
Plumbing

Can I Install a Tankless Water Heater Myself? | DIY Tips

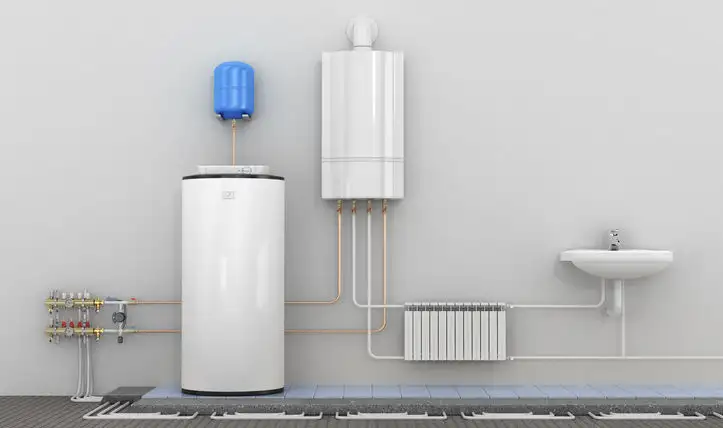
You can technically install a tankless water heater yourself if you have advanced plumbing, electrical, and gas fitting skills. However, for most homeowners, the job is too complex and risky because it requires working with gas lines, high-voltage wiring, and specific venting codes. If you make a mistake, you risk fires, gas leaks, and carbon monoxide poisoning. You also need to ask, can I install a tankless water heater myself without voiding the manufacturer warranty? In almost all cases, the answer is no, as companies require professional installation to keep the warranty active. What is a Tankless Water Heater? A tankless water heater does not store hot water. Traditional heaters keep 40 to 50 gallons of water hot all day in a large tank. This wastes energy when you are not using it. Tankless models heat water only when you turn on a tap. Cold water flows into the unit through a pipe. A gas burner or electric element heats the water instantly. Because they heat water on demand, these units offer a continuous supply of hot water. They take up very little space and mount directly to a wall. They also last up to 20 years, which is twice as long as a standard tank heater. What Does a Tankless Installation Actually Involve? Replacing an old tank with a tankless unit is not a simple swap. The process requires several distinct trades. You must run new pipes, upgrade utility lines, and create safe exhaust paths. As seen in the diagram above, a proper setup requires connecting water inlet and outlet pipes, gas lines, shut-off valves, and specialized venting. If you choose a gas unit, you must run a dedicated gas line from your meter. Gas tankless heaters need more fuel than old tank models. You also need to install a special venting system. These units produce hot exhaust that can corrode standard chimneys. You must use category three or four stainless steel or PVC pipes depending on the model. For electric models, the power needs are very high. A typical electric tankless unit requires up to four 40-amp circuit breakers. This means you will likely need to upgrade your home electrical panel to handle the load. The Big Question: Can You Install It Yourself? Many handy homeowners wonder if they can tackle a do it yourself tankless water heater project to save money. The short answer is that it depends entirely on your local laws and your personal skill level. In many cities, local building codes strictly forbid unlicensed people from working on gas lines. You must pull a permit before starting the work. If you live in an area that allows DIY work, you still must pass a rigorous city inspection. If you are asking if you can install a hot water heater yourself, you must realize that tankless units are much harder than tank units. A tank unit connects to existing pipes easily. A tankless unit requires retrofitting your entire utility infrastructure. If you lack experience with black iron gas pipes or heavy electrical wiring, you should not try it. The Real Risks of a DIY Installation Taking on a diy install tankless water heater project brings major risks that go beyond a simple water leak. You must weigh these dangers before buying any equipment. Fire and Explosion Risks Working with natural gas or propane is dangerous. A small mistake while sealing a gas pipe joint can cause a slow leak. Gas can build up in your walls over time and trigger a major explosion from a simple spark. Carbon Monoxide Poisoning Gas units create carbon monoxide as they burn fuel. If your vent pipes are not sealed perfectly or use the wrong material, this odorless gas can leak into your home. Carbon monoxide poisoning can be fatal within hours. Water Damage Tankless units handle high water pressure. A poor solder joint or a loose fitting can pop open when you are away from home. This can flood your basement or garage and cause thousands of dollars in mold and drywall damage. A Step-by-Step Look at the Tankless Water Heater Installation Process Here’s an honest walkthrough of what the job actually involves. This is not a guide to do it yourself, it’s meant to show you the full scope of the work. Step 1: Turn off all utilities Shut off the main gas supply and cut power to the old water heater. Drain the existing unit completely. Step 2: Remove the old water heater Disconnect gas lines, water supply, and existing venting. Safely dispose of the old unit many cities have specific rules about this. Step 3: Run new gas or electrical infrastructure This is where most DIY projects run into trouble. Gas lines often need to be upsized. Electric models may require new breaker panels or dedicated circuits. Step 4: Install the new venting system Gas models need concentric vent pipes routed through an exterior wall. They must be sealed properly and angled correctly to prevent condensation and backdrafting. Step 5: Mount and connect the unit Secure the unit to the wall using manufacturer specs. Connect water inlet and outlet lines with isolation valves and a pressure-relief valve. Step 6: Test everything before use Pressure test the gas lines. Check for leaks at every connection. Power on the unit and verify temperature settings. Run all hot water fixtures and test under peak load. A licensed plumber typically completes this in 4 to 8 hours. A DIYer without the right tools or experience could spend a full weekend and still have issues. You can read about: Can Tankless Water Heater Be Installed Outside Common (and Costly) DIY Tankless Water Heater Installation Mistakes Plumbers see these same mistakes repeatedly when called in to fix DIY jobs. Undersized gas line: The existing gas line can’t supply enough BTUs. The unit runs weak or shuts off under heavy use. Wrong vent pipe material: Using PVC instead of stainless steel for high-temp exhaust is a fire hazard. Missing isolation valves:

how to install a thermocouple on a water heater​
Plumbing

How to Install a Thermocouple on a Water Heater | Complete Guide (2026)

To install a thermocouple on a water heater, you must turn off the gas, disconnect the burner assembly, swap out the old line, and hook up the new part. Doing this fix yourself takes about 45 minutes and saves a costly repair bill. If your pilot light keeps going out, this guide shows you how to install a thermocouple on a water heater safely. Using our real-world experience at Derks Plumbing, we will walk you through the process step by step so you can get your hot water back today. What Is a Thermocouple? A thermocouple is a small metal safety sensor located right next to your pilot light flame. It converts heat from the flame into a tiny bit of electric current. This electrical signal tells the gas valve that a flame is burning. As long as the valve receives this signal, it keeps the gas line open. If the pilot flame goes out, the sensor cools down instantly. The electric current stops, and the valve shuts off the main gas supply. This simple mechanism stops raw gas from leaking into your home. Signs You Need to Replace a Water Heater Thermocouple Before pulling the unit apart, confirm the thermocouple is actually the problem. Pilot lights but goes out when you release the button. This is the clearest sign. You hold the pilot button, the flame appears, but the moment you let go, it dies. A functioning thermocouple holds the valve open after you release. No hot water and the pilot is out. If the pilot won’t relight at all, the thermocouple might be the issue — but so could the gas supply or the control valve. Confirm gas is flowing to other appliances first. Pilot flame is weak or yellow instead of blue. A properly positioned thermocouple sits in a strong blue flame. A weak or yellow flame doesn’t generate enough heat to produce the required voltage. The thermocouple tip looks black or coated. Carbon buildup on the thermocouple tip insulates it from the heat of the pilot flame. This is a sign the part needs to be replaced or at minimum cleaned. Before replacing, it’s worth trying to clean a thermocouple first if the unit is relatively new. Use fine steel wool or emery cloth to lightly buff the tip. Sometimes carbon buildup is the entire problem, and cleaning restores full function without any parts cost. Tools and Materials Needed Gather everything before starting. Having to stop mid-job to find a tool wastes time and leaves the gas system partially disassembled. Tools: Adjustable wrench or open-end wrenches (5/16 inch and 3/8 inch are most common) Needle-nose pliers Flathead and Phillips screwdrivers Fine steel wool or emery cloth (for cleaning the tip if needed) Flashlight or headlamp Gas leak detection solution or spray (soapy water works) Materials: Replacement thermocouple match the length to the original, or use a universal thermocouple kit A note on universal thermocouples: These are widely available at hardware stores and online for $10 to $25. They include multiple adapter fittings and work on most residential gas water heaters regardless of brand. If you can’t find the exact OEM part for your unit, a universal thermocouple is a reliable substitute. Confirm the length matches most residential units use a 24-inch thermocouple, but 18-inch and 30-inch versions also exist. Safety Precautions Working with gas appliances requires total focus on safety. Gas leaks can cause major household hazards. Always make sure your workspace is clear of clutter and well-ventilated. If you smell gas at any point during this project, stop immediately, leave the house, and call emergency services. Step-by-Step Guide: How to Install a Thermocouple on a Water Heater Follow these specific steps in order to ensure your hot water heater is fixed safely and properly. Step 1: Turn Off the Gas Supply Locate the gas control valve on the front of the tank. Turn the dial on top from “ON” to the “OFF” position. Next, find the manual gas shut-off valve on the incoming metal pipe next to the water heater. Turn the handle 90 degrees so it runs crosswise to the pipe. This shuts off all gas flowing to the appliance. Wait at least 10 minutes for any trapped gas to clear out completely before moving to the next step. Step 2: Remove the Access Panels Look at the very bottom of the water heater tank. Remove the outer metal door by sliding it up or taking out the small screws holding it in place. Behind it, you will see an inner burner door. This inner shield usually has two tabs or clips. Remove it carefully to reveal the inner burner chamber where the actual flame sits. Step 3: Disconnect the Burner Assembly Three separate tubes connect the bottom of the gas control valve to the burner inside the tank: the main gas supply tube, the small pilot line, and the copper thermocouple line. Use an open-ended wrench to loosen the nuts holding these three lines to the bottom of the valve. Turn them counter-clockwise. Label each line if you worry about forgetting where they go. Once disconnected, slide the entire burner assembly out of the bottom chamber. Step 4: Remove the Old Thermocouple With the burner assembly out on the floor, trace the copper line to the bracket next to the pilot burner. The tip is held in place by a small clip or friction fit bracket. Gently pull or unscrew the old part out of its mounting slot. Be careful not to bend the bracket. Take note of how deep the tip sat in the bracket so you can match it with the new part. Step 5: Install the New Thermocouple Take your new part out of the package. If you bought universal thermocouples, uncoil the copper line carefully. Do not kink or sharply bend the wire, as this can break the internal mechanism. Push the tip of the new piece up into the mounting bracket until it snaps into place. The

how to clean a garbage disposal
Plumbing

How to Clean a Garbage Disposal | Step by Step

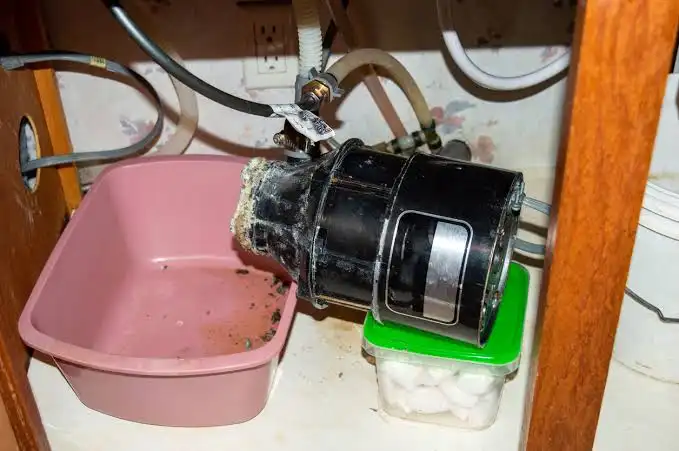
A garbage disposal is one of the hardest-working fixtures in any kitchen. It handles food scraps every day  and if you’re not cleaning it regularly, it builds up grease, food residue, and bacteria that cause bad smells and eventually affect performance. Most people clean the sink around it but forget the disposal itself. How to clean a garbage disposal properly takes about 10 minutes and keeps the unit running fresh and odor-free. This guide walks through every method from a quick weekly clean to a full deep clean so your disposal stays in good shape year-round. What Causes a Garbage Disposal to Get Dirty? Understanding what causes the buildup helps you prevent it more effectively. Food residue accumulation. Every time food goes through the disposal, small particles stick to the grinding chamber, the splash guard, and the underside of the rubber flap at the drain opening. Over time, these particles decompose. Grease and fat. Cooking grease coats the interior walls of the disposal. It doesn’t wash away with cold water it sticks, traps other food particles, and goes rancid over time. Hard water mineral deposits. In areas with hard water, calcium and magnesium leave deposits inside the unit. These create a rough surface that traps more food debris than a clean smooth surface would. Bacterial growth. Dark, warm, and moist the inside of a disposal is a perfect environment for bacteria. Without regular cleaning, bacterial colonies grow on every surface inside the unit. Stagnant water. Water that pools in the grinding chamber between uses allows odor-causing bacteria to multiply overnight. Most of the smell that comes from a disposal isn’t from the grinder, it’s from the rubber splash guard and the underside of the drain flap, which rarely get cleaned directly. Signs Your Garbage Disposal Needs Cleaning A disposal that needs cleaning usually makes itself obvious: Bad smell from the drain. A sour, rotten, or sewage-like smell coming from the kitchen sink is the clearest sign. If the smell is worse when the disposal runs, the unit is the source. Smell that lingers after running water. If running the disposal and cold water doesn’t clear the odor, residue is stuck on surfaces the water doesn’t reach well, especially the splash guard. Visible buildup on the rubber flap. Lift the black rubber splash guard and look underneath. Dark slime, food debris, or mold visible on the underside means it’s past time for a clean. Slower drainage. Buildup inside the grinding chamber narrows the drain opening slightly. If the sink drains slower than usual with no obvious clog, cleaning the disposal may restore normal flow. Film on the grinding blades. Grease and food film on the impellers reduces grinding efficiency over time. The motor works harder for the same output. Safety Precautions Before Cleaning a Garbage Disposal This is not optional; skipping safety steps puts your hands at serious risk. Turn the disposal off at the wall switch. Never assume the switch position is safe. Turn it off before putting anything inside the unit. Unplug the disposal if possible. Many disposals plug into an outlet under the sink. Unplugging it removes all chance of accidental activation. Never put your hand directly into the grinding chamber. The impellers aren’t sharp blades, but they can cause injury if the unit activates unexpectedly. Use a long-handled brush for any interior cleaning. Never use bleach as a primary cleaner. Bleach can corrode the rubber components inside the disposal and damage the drain line if used repeatedly. Small amounts for sanitizing are acceptable — don’t pour large quantities. Tools and Supplies You’ll Need Most of what you need is already in the kitchen or bathroom: Long-handled dish brush or disposal cleaning brush Old toothbrush Dish soap Baking soda White vinegar Kosher salt or coarse salt Ice cubes Lemon, lime, or orange peels (optional) Rubber gloves Flashlight (for inspecting inside) No specialty products needed for routine cleaning. Commercial disposal cleaners and deodorizing tablets are optional and work well, but the household items above are just as effective. How to Clean a Garbage Disposal (Step-by-Step) This routine clean takes about 10 minutes and should be done at least once a week. Step 1: Turn Off the Power Switch the disposal off at the wall. If the outlet is accessible under the sink, unplug the unit. Put on rubber gloves. Step 2: Clean the Splash Guard (Rubber Flap) The black rubber splash guard the flap you push food through is where most of the odor-causing buildup lives. It almost never gets cleaned directly. Lift the flap and look underneath. Use an old toothbrush or the long-handled brush dipped in dish soap to scrub the underside thoroughly. Work around the entire edge where the rubber meets the drain rim. This one step eliminates the majority of garbage disposal odor in most kitchens. Step 3: Flush with Hot Water and Dish Soap Restore power or plug the unit back in. Turn on the hot water tap and let it run. Add a squirt of dish soap directly into the drain opening while the disposal is off. Then turn the disposal on for 30 to 60 seconds. The soapy water runs through the grinding chamber and flushes loose debris into the drain line. Step 4: Baking Soda and Vinegar Flush Turn the disposal off. Pour half a cup of baking soda directly into the drain opening. Follow immediately with half a cup of white vinegar. You’ll see and hear a fizzing reaction. This is normal; it’s a mild chemical reaction that loosens food residue and deodorizes the interior surfaces. Let it sit for 10 to 15 minutes. Then turn the disposal on and run cold water for 60 seconds to flush everything through. This is one of the most effective garbage disposal cleaning tips for routine maintenance safe for all disposal types and drain lines. Step 5: Run Cold Water for 30 Seconds Always finish any cleaning cycle by running cold water through the disposal for 30 seconds. This flushes any loosened

what does an anode rod do
Plumbing

What Does an Anode Rod Do? | Full 2026 Guide

Your water heater has a part inside it that most homeowners have never heard of but it’s the reason the tank doesn’t rust through in three years. It’s called an anode rod, and it does a quiet but critical job every single day the heater runs. When it wears out and nobody replaces it, the tank corrodes from the inside and fails early. So what does an anode rod do exactly? It sacrifices itself to protect the steel tank. The rod corrodes so the tank doesn’t have to. This guide explains how it works, what types exist, when to replace it, and what happens if you ignore it. Understanding an Anode Rod Before getting into the science, here’s the simple version. A water heater tank is made of steel. Steel and water together create rust fast. To slow that down, manufacturers coat the inside of the tank with a layer of glass. But that lining develops microscopic cracks over time. Water gets in through those cracks and starts attacking the steel underneath. That’s where the anode rod comes in. What is an anode rod in a water heater? It’s a long metal rod typically 3 to 5 feet long and about an inch in diameter suspended inside the tank. It screws into the top of the heater and sits submerged in the stored water. The rod is made from a metal that corrodes more easily than steel. So when water attacks, it attacks the rod first, not the tank. The tank stays protected as long as the rod has material left. Once the rod is depleted, the tank is on its own. What Does an Anode Rod Do in a Water Heater? The anode rod purpose is to act as a sacrificial protector. This isn’t a marketing term, it’s exactly how chemistry works. Every metal has what’s called an electrochemical potential. Some metals corrode faster than others when submerged in water. Manufacturers make anode rods from metals that sit higher on the corrosion scale than steel. When the rod and the tank are both submerged in water, the rod corrodes first pulling the corrosive activity away from the tank walls. This process is called galvanic protection or cathodic protection. The rod is the “anode” in an electrochemical reaction; it gives up electrons to the water and the surrounding metal, neutralizing the corrosive forces that would otherwise attack the tank. What does an anode rod do in simple terms: it takes the hit so your $1,500 water heater doesn’t have to. Without it, a steel tank would typically fail within 3 to 5 years from internal corrosion. With a healthy rod and regular replacement, the same tank lasts 10 to 15 years or longer. You can read about: What Does a Water Hammer Arrestor Do How Does an Anode Rod Work? The chemistry is straightforward once you understand the basics. Water, especially hard water contains dissolved minerals and gases. These create a mildly corrosive environment inside the tank. Left unchecked, this environment breaks down metal surfaces through oxidation. The anode rod works because of a property called electrode potential. Magnesium, aluminum, and zinc, the metals used in anode rods, all have a higher electrode potential than steel. That means they oxidize (corrode) more readily in the same water environment. When the rod is submerged alongside the steel tank, the corrosive forces in the water target the rod instead. The rod slowly dissolves over months and years, releasing electrons that stabilize the surrounding steel. The tank walls stay chemically protected. This reaction continues until the rod material is consumed. A fully depleted rod looks like a thin wire covered in calcium deposits with nothing left but the steel core. At that point, the protection stops. The tank is now exposed to the same corrosive water that the rod absorbed for years. Types of Anode Rods What is a water heater anode made of? Most rods use one of three metals. Each has different performance characteristics. Magnesium Anode Rods Magnesium is the most reactive of the three. It offers the strongest protection and works best in soft water or water with low mineral content. In hard water, magnesium rods deplete faster sometimes within 2 to 3 years. They’re also the most common type found in new water heaters from the factory. Best for: Soft water areas, households that want maximum protection. Aluminum Anode Rods Aluminum rods are more durable than magnesium. They last longer in hard water environments and are less expensive to replace. The downside: aluminum is a softer metal that can develop a coating of aluminum hydroxide over time. This white gel coating can slow the protective reaction if it builds up heavily. Best for: Hard water areas, households looking for longer service intervals. Zinc Anode Rods Zinc rods are typically aluminum rods with a small percentage of zinc added, usually about 10%. The zinc addition helps control sulfur-related odors that some water heaters develop. If your hot water smells like rotten eggs, a zinc/aluminum rod is worth trying. Pure zinc rods are rare. Most “zinc” rods are aluminum-zinc alloys. Best for: Households with sulfur smell in hot water, well water systems. Powered (Impressed Current) Anode Rods These are a newer option. Instead of using a sacrificial metal, powered rods use a small electrical current to create the same protective effect. They don’t deplete, they last indefinitely as long as the power source works. What is an anode rod of this type worth? Powered rods cost $50 to $150 upfront but eliminate the need for periodic replacement. They’re a good option for hard-to-access water heaters where rod replacement is difficult. Signs Your Anode Rod Needs Replacement Most homeowners never check the anode rod until there’s already a problem. These are the signs the rod is depleted or close to it: Rotten egg smell from hot water. Sulfur bacteria thrive when there’s no active anode rod controlling the water chemistry. A strong sulfur smell in hot water but not cold is

how to unclog plumbing vent
Plumbing

How to Unclog Plumbing Vent | Step-by-Step

A gurgling toilet, slow drains, and a sewer smell inside the house usually point to one thing: a blocked plumbing vent. Most homeowners don’t know this system exists until something goes wrong. The vent is not visible inside the house, but when it gets blocked, your entire drain system suffers. Knowing how to unclog plumbing vent can save you from bad odors, slow drains, and a costly service call. In most cases, you can clear the blockage yourself in an afternoon with basic tools. This guide covers every step. What Is a Plumbing Vent and Why Is It Important? Every drain in your home toilet, sink, shower, bathtub connects to a drain pipe. Those drain pipes need air to flow properly. Without air, water can’t drain freely. It creates a vacuum that slows or completely stops drainage. That’s what the plumbing vent system solves. The vent pipe runs vertically through your walls and exits through a pipe on the roof commonly called the plumbing vent on roof. It does two things: Allows air into the drain system so water flows freely and at the right speed. Vents sewer gases outside so methane, hydrogen sulfide, and other gases from the sewer don’t build up inside your home. A properly working vent system is invisible. You never think about it. But when that pipe on the roof gets blocked by leaves, a bird nest, ice, or debris your entire drain system starts to show symptoms. Signs and Symptoms of a Clogged Plumbing Vent A clogged plumbing vent doesn’t always announce itself with one dramatic sign. It usually builds slowly. Here’s what to watch for: Gurgling or bubbling drains. This is the most common sign. When a toilet gurgles after flushing, or a sink makes bubbling sounds as it drains, the vent isn’t supplying enough air to the system. The drain pulls air from the water trap instead creating that distinct gurgling sound. Slow drains across multiple fixtures. One slow drain is usually a local clog. Multiple slow drains throughout the house kitchen sink, bathroom sink, and shower all draining slowly at the same time often point to a vent problem rather than individual pipe blockages. Sewer smell inside the house. This is a serious warning sign. When sewer gases can’t escape through the roof vent, they push back into the house through drain openings. A persistent smell of sulfur or sewage in bathrooms or the kitchen means the vent system is not working. Water backing up in unexpected places. Flushing a toilet and seeing water rise in the shower drain, or running the washing machine and watching the kitchen sink bubble these are signs of negative pressure caused by a blocked vent. Dry P-traps. Every drain has a water-filled P-trap that blocks sewer gas from entering the home. A blocked vent creates suction that pulls water out of these traps. Once the trap is dry, nothing stops sewer gas from coming in. What Causes a Plumbing Vent to Get Blocked? Before you start the fix, it helps to know what you’re dealing with. The most common causes of a roof plumbing vent clogged situation are: Leaves, twigs, and organic debris. The pipe opening sits on the roof. Over time, leaves fall in and pack down inside the pipe. In wooded areas, this is the most frequent cause. Bird or animal nests. Birds often build nests directly over vent pipe openings. Small animals like squirrels or rodents sometimes fall in and get stuck. Both block airflow completely. Ice and snow. In cold climates, moisture inside the vent pipe can freeze at the opening. Ice builds up around the pipe edge and eventually seals it shut. This is a common cause of gurgling toilets in winter. Debris buildup from roof work. Roofing materials, gravel, or sealant from a repair job sometimes falls or washes into the vent opening. Corroded or damaged vent pipe. An older pipe can collapse partially or rust through. This is also where a fix leaking roof vent situation can overlap with a blockage rust damage that creates gaps also creates spots where debris collects and blocks flow. Step-by-Step Guide: How to Unclog Plumbing Vent Here is the full process for how to unclog plumbing vent safely and effectively. What You Need Ladder (tall enough to reach the roof safely) Garden hose with good water pressure Plumber’s snake or drain auger at least 20 feet long Flashlight or headlamp Rubber gloves Safety rope or roof harness (for steep roofs) A helper on the ground Step 1: Safety First Roof work carries real fall risk. Before you climb: Check that the ladder is on stable ground and extends at least three feet above the roof edge Wear non-slip shoes On steep roofs, use a roof harness or hire a professional Have someone on the ground to steady the ladder and assist Never work on a wet roof. Wait for dry conditions. Step 2: Locate the Vent Pipe Opening Most homes have one or two vent pipes on the roof. They look like short black or white pipes — typically 3 to 4 inches in diameter sticking up above the roofline. They’re usually located above bathrooms or in the center of the roof. Walk the roof carefully and identify all vent openings. Step 3: Inspect the Opening Shine a flashlight directly down the pipe. Look for obvious blockages near the top — leaves packed in, a bird nest, ice, or visible debris. If you can see and reach the blockage with your hand (with a glove on), remove it manually. For deeper blockages, move to the next step. Step 4: Flush With a Garden Hose Insert the garden hose into the vent pipe opening. Turn the water on fully. The water pressure often dislodges leaves, debris, and soft organic matter. Watch and listen from the roof — you may hear the blockage clear and water start flowing freely down the pipe. If water backs up toward you instead of flowing down, the

best plumbing maintenance for homes
Plumbing

Best Plumbing Maintenance for Homes That Works

Most homeowners don’t think about plumbing until something breaks. By then, a small drip has become water damaged, or a slow drain has turned into a full blockage. The truth is, a little attention each month saves you hundreds, sometimes thousands in repair bills. The best plumbing maintenance for homes isn’t complicated. It’s a set of simple habits done consistently. This guide covers every step you need to keep your pipes, drains, and fixtures in good shape all year long. Why Plumbing Maintenance Matters Plumbing problems are the second most common home insurance claim in the United States. Water damage from burst pipes, slow leaks, and sewer backups costs homeowners an average of $11,000 per incident according to 2026 insurance industry data. The good news: most of those problems are preventable. Routine plumbing maintenance catches issues early before they become expensive. A $5 pipe fitting fixes a drip. Ignoring that drip for six months can rot a subfloor that costs $3,000 to replace. Here’s what consistent home plumbing maintenance protects: Your walls, floors, and ceilings from water damage Your water heater from sediment buildup and early failure Your drains from slow buildup that leads to full blockages Your water bill from hidden leaks running 24/7 Your home’s resale value buyers notice plumbing problems Think of plumbing maintenance the same way you think of an oil change. You don’t wait until the engine fails. Inspect for Leaks Regularly Leaks are sneaky. Most of them start small and stay hidden for months. By the time you notice a water stain on the ceiling or a soft spot on the floor, significant damage has already happened. Where to check every month: Under every sink (kitchen and bathrooms) Around the base of toilets Behind the washing machine Around the water heater At exposed pipe joints in the basement or utility room Around the dishwasher connection What to look for: Water stains or discoloration on walls and ceilings Soft or swollen wood under cabinets Mold or mildew smell near pipes Rust or mineral deposits on pipe joints A water meter that keeps moving when no water is in use That last one is important. Turn off every water source in the house. Go check the water meter. If the dial is still moving, you have a leak somewhere. This test takes two minutes and costs nothing. You can read about: What Is Considered a Plumbing Emergency Keep Drains Clean A clogged drain doesn’t happen overnight. It builds up over weeks and months from hair, grease, soap scum, and debris. Keeping drains clear is one of the easiest plumbing maintenance tips to follow. Kitchen sink: Grease and food particles are the main culprits here. Never pour cooking oil or grease down the drain. Wipe pans with a paper towel before washing. Run hot water after every use to push residue through the line. Bathroom drains: Hair is the number one cause of bathroom drain clogs. Install a simple drain strainer in every shower and tub. Clean it out after each use it takes five seconds. Monthly drain cleaning routine: Pour half a cup of baking soda into each drain followed by one cup of white vinegar. Let it fizz for 15–20 minutes. Flush with hot water. This breaks down organic buildup before it becomes a blockage. Avoid chemical drain cleaners like Drano for regular maintenance. They work short-term but corrode pipes over time, especially in older homes. Test Water Pressure High water pressure feels great in the shower. But it’s hard on your pipes, fittings, fixtures, and appliances. Pressure above 80 PSI accelerates wear on every connection in your home. The ideal water pressure for a home is 40 to 60 PSI. How to test it: Buy a water pressure gauge at any hardware store for $10–$15. Attach it to an outdoor hose bib or washing machine connection. Turn the water on and read the dial. If pressure is above 80 PSI, install a pressure-reducing valve (PRV). A licensed plumber can install one in about an hour. It protects your entire plumbing system going forward. If pressure is below 40 PSI, you may have a partially closed main valve, a failing pressure regulator, or buildup inside the pipes. Maintain Your Water Heater Your water heater works every single day. Without basic care, sediment builds up at the bottom of the tank, reducing efficiency and shortening its life. Annual water heater maintenance checklist: Flush the tank. Sediment settles at the bottom of the tank and hardens over time. Once a year, attach a garden hose to the drain valve and flush out the tank until the water runs clear. This takes about 20–30 minutes. Test the pressure relief valve. This safety valve releases pressure if the tank gets too hot. Lift the lever briefly to make sure it releases water. If nothing comes out or it leaks constantly after testing, replace it. A faulty pressure relief valve is a serious safety risk. Check the anode rod. This rod attracts corrosive minerals inside the tank to protect the steel walls. It needs to be replaced every 3–5 years. When it’s depleted, the tank itself starts to corrode from the inside. Check the temperature setting. The recommended setting is 120°F. Higher temperatures waste energy and increase the risk of scalding. Lower than 120°F risks bacterial growth in the tank. A water heater that’s well maintained lasts 10–15 years. One that’s ignored often fails in 6–8 years. Check Toilets for Hidden Leaks A toilet that runs quietly can waste 200 gallons of water per day. That’s $70–$100 added to your water bill every month and most homeowners never notice until they see the bill. The food coloring test: Drop a few drops of food coloring into the toilet tank. Wait 10 minutes without flushing. If color appears in the bowl, the flapper valve is leaking and needs to be replaced. A new flapper costs $5–$10 at any hardware store. Other things to check: Listen for a hissing sound after

Fast and Efficient Plumbing Services in Eagle Rock

Client Reviews

Posted on Google Google
Ryan Haden profile picture
Ryan Haden
Google star 1Google star 2Google star 3Google star 4Google star 5Trustindex verifies that the original source of the review is Google.
Could not have been happier with Alex! We was right on time, polite, fixed all my kitchen sink issues and have me good tips on how to best maintain. I will for sure be using him again and highly recommend anyone who needs a great plumber to use his services as well. Thank you!
Posted on Google Google
Lorena Marcoe profile picture
Lorena Marcoe
Google star 1Google star 2Google star 3Google star 4Google star 5Trustindex verifies that the original source of the review is Google.
Talk about a professional...yes, I am talking about Alex Derks, Derks Plumbing. He is by far the most knowledgeable plumber we have ever had the pleasure of hiring. He's been in the plumbing business for years and it shows. Any questions you have re: plumbing issues, install, etc., Alex is your man. So happy with his work and he has a great sense of humor as well... extremely easy to talk to...thank you Alex!!!
Posted on Google Google
Andrew Jalil profile picture
Andrew Jalil
Google star 1Google star 2Google star 3Google star 4Google star 5Trustindex verifies that the original source of the review is Google.
Alex did a great job installing my kitchen faucet and an under-sink Aquasana water filter. He also addressed a few other plumbing-related issues. He was friendly and helpful. Excellent work!
Posted on Google Google
Abigail Bigham profile picture
Abigail Bigham
Google star 1Google star 2Google star 3Google star 4Google star 5Trustindex verifies that the original source of the review is Google.
Alex does what other plumbers cannot do! He is our go to.
Posted on Google Google
Danielle Driver profile picture
Danielle Driver
Google star 1Google star 2Google star 3Google star 4Google star 5Trustindex verifies that the original source of the review is Google.
Alex is very friendly and responsive. What a pleasure to work with!
Posted on Google Google
Lawrence Isaacs profile picture
Lawrence Isaacs
Google star 1Google star 2Google star 3Google star 4Google star 5Trustindex verifies that the original source of the review is Google.
Very very happy with the work Alex did for us replacing the tanks in our Aquasana filtration system. From first contact over the phone through job completion Alex was a pleasure to work with. He explained what he was doing, and why, every step of the way, and made sure we understood what we needed to do to maintain the system. Strongly recommend Alex!
Posted on Google Google
Joey Aucoin profile picture
Joey Aucoin
Google star 1Google star 2Google star 3Google star 4Google star 5Trustindex verifies that the original source of the review is Google.
Alex Derks has been such a lifesaver for me. Anytime I'm in a pinch with the plumbing in my home, Alex is only a phone call away and I've only seen great results from his work. He's reliable, knowledgable, and entirely trustworthy. A must-have source when owning a home.
Posted on Google Google
Eric Gorman profile picture
Eric Gorman
Google star 1Google star 2Google star 3Google star 4Google star 5Trustindex verifies that the original source of the review is Google.
After working with dozens of plumbing services in the LA area, I can confidently say Derks is the best in the business. On time, reliable and capable of even the most difficult tasks, Derks goes above and beyond to make sure your water system is working correctly.
Posted on Google Google
Jason Gruenbaum profile picture
Jason Gruenbaum
Google star 1Google star 2Google star 3Google star 4Google star 5Trustindex verifies that the original source of the review is Google.
Excellent know-how and fast!! Reasonable pricing and super responsive!!
Posted on Google Google
Jonathan Hepfer profile picture
Jonathan Hepfer
Google star 1Google star 2Google star 3Google star 4Google star 5Trustindex verifies that the original source of the review is Google.
Alex is an expert plumber, and he always goes out of his way to educate me about how to prevent future issues. Highly recommended!

Derks Plumbing has been providing professional plumbing services to Eagle Rock residents for over 20 years. Our experience and strong reputation have allowed us to grow, and we are proud to serve customers in 15 nearby areas, including Venice, Santa Monica, Beverly Hills, and more.

Contact

Hours of Operation

Monday: Open 24 Hours
Tuesday: Open 24 Hours
Wednesday: Open 24 Hours
Thursday: Open 24 Hours
Friday: Open 24 Hours
Saturday: Open 24 Hours
Sunday: Open 24 Hours

© 2026 Created by Localpro1

Scroll to Top