We are Available 24/7

Plumbing

How to Remove Anode Rod from Water Heater
Plumbing

How to Remove Anode Rod from Water Heater | Step by Step

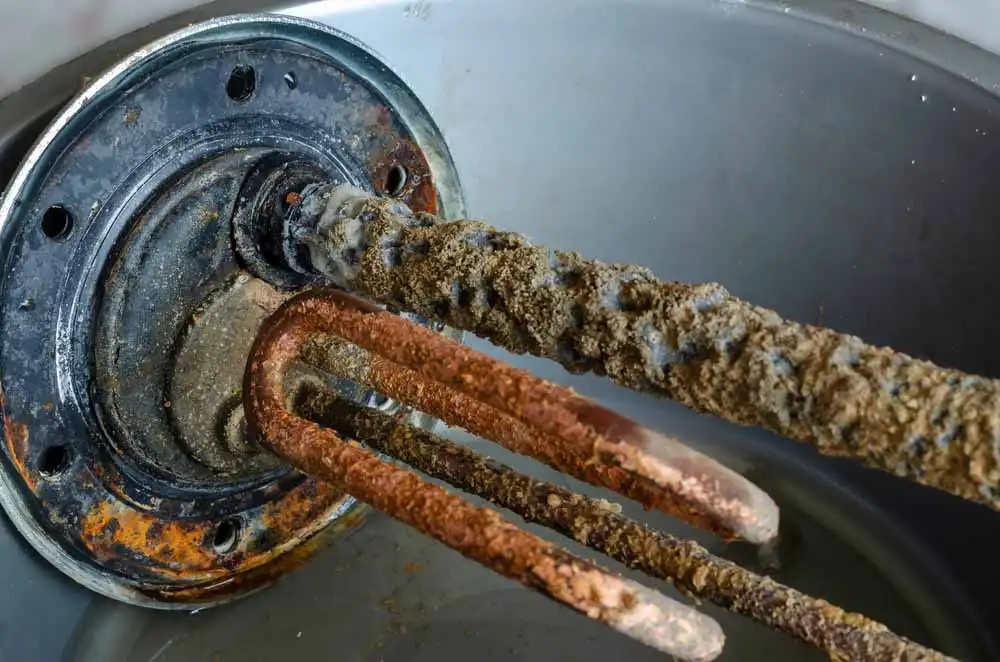
To remove an anode rod from a water heater, turn off the power or gas supply first. Shut the main cold water valve and drain three to five gallons of water from the tank. Use a 1-1/16 inch socket with a breaker bar to turn the top hex bolt counterclockwise until it loosens. Once the bolt spins freely, pull the old rod straight up and out of the tank top. Learning how to remove anode rod from water heater tanks keeps your unit working safely and prevents premature rust damage. What Is an Anode Rod in a Water Heater? An anode rod is a metallic core wire wrapped in aluminum, magnesium, or zinc that hangs inside your water heater tank. Plumbers often call it the “sacrificial rod” because its sole purpose is to corrode in place of the steel tank lining. Water contains naturally occurring dissolved minerals and oxygen. Over time, these elements trigger an electrochemical reaction called electrolysis that eats away at metal. Because magnesium and aluminum are chemically more reactive than steel, the corrosive elements attack the anode rod first. When the rod dissolves completely, those corrosive elements turn their focus to the inner steel wall of your water heater. Once the steel rusts through, the tank bursts, creating an expensive flood. Replacing a minor part every few years shields your tank interior and adds years to your system’s lifespan. You can read about: What Does an Anode Rod Do Signs It’s Time to Remove or Replace the Anode Rod You do not need to pull the rod out every month just to check on it. Your plumbing system will give you clear warning signals when the rod stops protecting your tank: Smelly Hot Water: A persistent rotten egg odor coming only from your hot water taps indicates sulfur-reducing bacteria reacting with a degrading magnesium rod. Rusty or Discolored Water: Brown, red, or yellowish tint in your hot water means the sacrificial metal is gone, and the water is now rusting the steel tank wall. Metallic Taste: A strong iron or metal taste when using hot water for cooking or drinking signals heavy corrosion inside the vessel. Popping or Rumbling Noises: As the sacrificial rod decomposes, bits of metal scale drop to the bottom of the tank. Mineral sediment bakes on the lower heating element or gas burner floor, creating loud popping sounds. Small Leaks Around the Hex Head: Discoloration or moisture around the top plug on the upper jacket indicates the threads have rusted through or loosened. Tools You’ll Need to Remove an Anode Rod Gather your tools before starting so you do not get stuck halfway through the job with a partially drained heater: 1-1/16 Inch Deep Socket: Almost all residential water heater hex head plugs require this specific socket size. 1/2-Inch Drive Breaker Bar: A standard ratchet usually will not provide enough leverage to break factory-tightened threads loose. 1/2-Inch Impact Wrench (Optional): An cordless impact wrench breaks stubborn factory seals instantly without spinning the entire tank. Garden Hose: Needed to hook up to the drain valve at the bottom of the tank. Flathead Screwdriver: Helpful for prying off plastic top caps or scraping away spray-foam insulation covering the hex plug. Teflon Thread Tape: Required to seal the threads of your replacement rod to prevent future leaks. Cheater Pipe: A 2-foot steel pipe slid over your breaker bar for extra physical leverage. Safety Steps Before Removing the Anode Rod Working around pressurized hot water and electricity requires strict safety precautions. Skip one step and you risk personal injury or a flooded floor. Cut the Power Source: For an electric unit, flip the dedicated breaker switch to OFF at your main circuit panel. For a gas unit, turn the gas control valve knob on the front to PILOT or OFF. Shut Off the Cold Water Supply: Turn the cold water lever valve on the top inlet pipe clockwise until it stops completely. Relieve Internal Tank Pressure: Open any hot water faucet inside your home (like a bathroom sink) and leave it open. Alternatively, lift the lever on the Temperature and Pressure (T&P) relief valve on the side of the tank. Cool the Water: Allow the tank to sit for at least 1 to 2 hours, or run the hot water until it turns lukewarm so you do not burn your hands during removal. How to Remove an Anode Rod from a Water Heater (Step-by-Step) Follow this precise sequence for removing anode rod from water heater setups safely and efficiently: Step 1: Drain a Small Amount of Water Do not drain the entire vessel yet. Keeping the tank full of water adds heavy weight (around 300 to 400 pounds), which prevents the heater from twisting on the floor when you apply heavy torque to the top hex plug. Attach your garden hose to the bottom drain valve and run the open end outside or into a bucket. Open the drain valve and let out 3 to 5 gallons of water. This lowers the internal water line below the top cover so water does not spill out when the rod is unthreaded. Step 2: Locate the Hex Plug Look at the top plate of your water heater. On most models, you will see an exposed 1-1/16 inch hex head bolt sitting flush against the metal shell. If you do not see it, check under the plastic caps on top of the unit or beneath the top layer of foam insulation. Step 3: Break the Thread Seal Fit your 1-1/16 inch deep socket securely onto the hex head. Attach your breaker bar. Hold the bar steady and turn it counterclockwise. Apply firm, steady pressure. If the plug refuses to budge, do not panic—factory threads are tightly torqued and often sealed with thread compound. Step 4: Extract the Rod Once the initial tight seal breaks open, switch from your breaker bar to a standard hand ratchet. Turn the hex head until the threads spin freely. Carefully lift the bolt head
Water Heater Smells Like Burning
Plumbing

Water Heater Smells Like Burning | Causes and Solutions

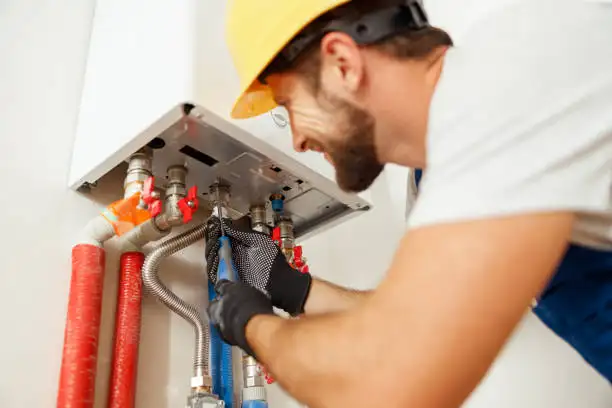
When a water heater smells like burning, it can be a sign of dust buildup, overheating electrical components, damaged wiring, or a problem with the gas burner. Although some odors may have a simple explanation, a strong or persistent burning smell should never be ignored. Identifying the source early can help prevent equipment damage and reduce potential safety risks. Homeowners and tenants may notice different odors, including burning plastic, rubber, or hot electrical insulation. Each smell can point to a different issue, so it is important to recognize the warning signs and know when professional help is necessary. This guide explains the common causes, immediate safety steps, and ways to prevent the problem from returning. What to Do When Your Water Heater Smells Like Burning Before trying to identify the cause, take steps to protect yourself and your home. A burning odor may indicate overheating or an electrical fault that requires immediate attention. Stop using the heater: If the smell is strong, persistent, or resembles burning plastic or electrical insulation, stop operating the unit. Check for visible warning signs: Look for smoke, sparks, melted materials, or discoloration from a safe distance. Do not touch hot or damaged components. Disconnect power only when safe: If an electric water heater appears to be overheating, switch off its breaker only if you can do so safely without approaching water, smoke, or exposed wiring. Treat gas odors as an emergency: If you smell gas or rotten eggs, leave the building immediately. Avoid operating electrical switches or appliances, and contact the gas utility or emergency services from a safe location. Arrange a professional inspection: Do not remove electrical covers, dismantle the burner, or restart the unit just to see whether the smell returns. Taking these precautions can help prevent an existing problem from becoming more serious. Common Causes of a Water Heater Burning Smell A water heater burning smell can develop for several reasons. The type of heater, the location of the odor, and any additional warning signs can help a professional determine the likely source. Dust Burning Off During Initial Use Dust can accumulate on the exterior of a water heater and nearby surfaces. When the equipment starts operating after a long period of inactivity, heated dust may create a temporary dusty or hot smell. This explanation is more likely when the odor is mild and disappears quickly. However, a persistent smell should not automatically be blamed on dust, particularly if it resembles burning plastic or electrical insulation. What to do: If the odor returns, becomes stronger, or occurs alongside unusual noises or heating problems, stop using the unit and arrange an inspection. Overheating Electrical Wiring Electric water heaters depend on wiring, thermostats, heating elements, and electrical connections. Damaged insulation, loose connections, or a failing component can generate excessive heat and produce an acrid burning odor. Other warning signs may include a repeatedly tripping circuit breaker, buzzing sounds, or discoloration around the electrical access area. Electrical overheating can create a fire hazard. Repeatedly resetting a tripped breaker without identifying the cause can make the situation more dangerous. What to do: Stop using the heater and contact a qualified electrician or water-heater technician. Avoid opening electrical panels or attempting repairs yourself. Faulty Heating Elements or Thermostats An electric water heater uses heating elements to warm the water and thermostats to regulate its temperature. If a heating element or thermostat malfunctions, the unit may heat inconsistently or develop an overheating problem. You may notice unusually hot water, fluctuating temperatures, or an odor coming from the equipment. However, these symptoms do not prove that a particular component has failed. What to do: Have a professional inspect the heating elements, thermostat, wiring, and safety controls. If the water becomes dangerously hot or an electrical burning smell develops, stop using the unit until it has been checked. Hot Water Heater Smells Like Burning Plastic When a hot water heater smells like burning plastic, the cause may be an overheating electrical component, damaged wire insulation, or plastic material exposed to excessive heat. The smell may be strongest near the side or top of the heater, but odors can travel through a room, making the exact source difficult to identify. Look for warning signs such as melted material, dark marks, a persistent chemical-like odor, or changes in the heater’s operation. Do not touch melted plastic or reach behind the equipment to investigate. What to do: Stop using the heater if the source is unclear or the odor persists. Arrange a professional inspection before putting the equipment back into service. Gas Burner or Combustion Problems Gas water heaters use a burner to heat the water. Problems with the burner, combustion process, or other components may cause unusual odors or indicate that servicing is needed. Soot, scorching, unusual burner behavior, and repeated shutdowns are signs that the unit should be inspected. A burning odor alone cannot confirm a combustion problem. Carbon monoxide is another important safety concern with fuel-burning appliances. It has no smell, so a normal-looking burner or the absence of an unusual odor does not prove that the appliance is safe. What to do: Stop using a malfunctioning gas water heater and contact a qualified technician. If a carbon monoxide alarm sounds or anyone experiences symptoms such as dizziness, headache, nausea, or confusion, leave the building and contact emergency services. Overheating Materials Around the Heater Sometimes the smell comes from something near the water heater rather than from the unit itself. Nearby plastic items, cardboard, insulation, wiring, or other materials exposed to heat can produce a burning odor. This is one reason a proper inspection should consider both the heater and its surrounding area. What to do: Keep the area clear of combustible materials and follow the manufacturer’s clearance requirements. Do not move anything that is hot, smoking, or potentially electrically dangerous. Electric vs. Gas Water Heater Burning Smells The potential causes of a burning smell differ depending on the type of water heater installed in your home. Water heater

what does a sump pump do
Plumbing

what does a sump pump do? | Basement Protection Tips

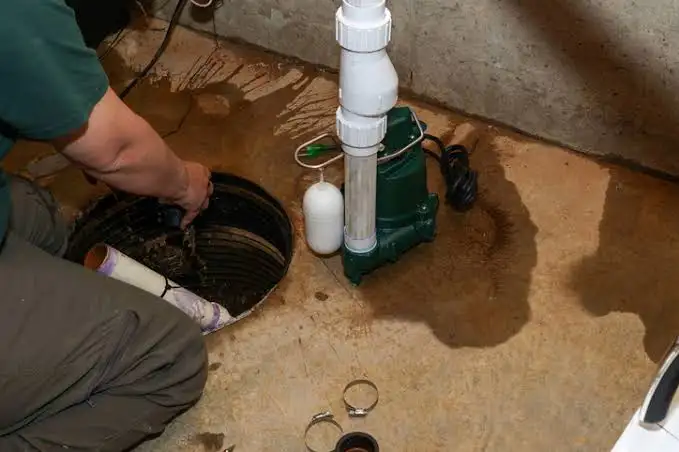
A sump pump protects your basement or crawl space from water damage by pumping out excess groundwater. It sits in a special pit called a sump basin. When water fills the basin, the device automatically turns on and sends the water far away from your foundation. Groundwater often builds up during heavy rain, storm surges, or melting snow. If you want to know what does a sump pump do for your home, it acts as a silent guard that stops flooding before it starts. This simple device saves homeowners thousands of dollars in water damage repairs. What Is a Sump Pump? A sump pump is a small electrical appliance installed in the lowest point of a home. Plumbers place it inside a dug-out hole called a sump pit. The pump stays quiet until water collects inside the basin. Once the water level rises to a set mark, the equipment activates. Most units run on your main home electricity. Many property owners also install battery backup systems. This setup keeps the equipment running during severe storms when local power goes out. What Does a Sump Pump Do? The main job of this equipment is to keep your lower living spaces dry. It collects rising water from around your foundation and pushes it outside. If you wonder what is a sump pump used for, think of it as a relief valve for groundwater pressure. Without it, water pushes through tiny cracks in your concrete floor or walls. Understanding what do sump pumps do helps you appreciate home waterproofing. The device moves water through discharge pipes to a safe drain zone far from your foundation walls. You can read about: How Does a PRV Valve Work How Does a Sump Pump Work? The system relies on gravity, pressure, and basic mechanical parts. Drain tiles around your foundation gather rising water and direct it into the pit. If you want to know how do sump pumps work, the process is straightforward: Water enters the pit from underneath or through side drain pipes. A floating switch rises as the water level increases inside the basin. The float switch triggers the motor once it reaches a preset height. The motor spins an impeller to create centrifugal force. Water rushes up through a plastic or metal discharge pipe. A check valve stops water from flowing back down into the basin when the motor turns off. Why Do Homes Need a Sump Pump? Water always takes the path of least resistance. Heavy rain creates pressure in the soil around your foundation. Plumbers call this hydrostatic pressure. When hydrostatic pressure builds up, water forces its way through solid concrete. Knowing what does a sump pump do to protect your foundation makes the investment obvious. It releases that pressure by giving water a clear pathway out. Homes built on low-lying ground or clay soil need extra protection. Clay traps water against basement walls instead of letting it drain naturally. Common Signs You Need a Sump Pump You do not need to wait for a major flood to upgrade your basement protection. Watch for these clear warning signs around your property: Water pools in your basement after light rain. Musty odors or visible mold growth appear near floor walls. Wall plaster or paint peels near the foundation base. Your home sits in a low flat area or at the bottom of a hill. You notice white powdery stains on concrete walls called efflorescence. Sump pits in your neighborhood stay filled with water year round. Types of Sump Pumps Homeowners can choose between two main primary pump designs. Both style choices serve the same basic goal, but they operate differently inside the pit. Submersible Sump Pumps A submersible unit rests completely inside the water basin. The motor stays sealed inside a waterproof casing to prevent electrical short circuits. Submersible units run quietly because surrounding water muffles operational noise. They handle larger water volumes and last longer under heavy use, making them ideal for living spaces. Pedestal Sump Pumps A pedestal unit keeps its motor elevated on a tall post above the pit. Only the lower hose and impeller sit in the basin water. Pedestal pumps cost less and last longer because the motor stays dry. However, they make more noise during operation and take up space above the floor level. You can read about: What Is Rooter Service Primary Power vs. Backup Systems Relying on a single electric pump leaves your home vulnerable during severe weather. High winds often knock out local power grids right when heavy rain falls. Plumbers recommend adding a battery backup pump alongside your main unit. Battery backup systems run on heavy duty marine batteries. They turn on automatically if power fails or if your primary pump breaks down under heavy strain. Water powered backup units offer another option. They use your city water pressure to pull water out of the pit without needing electrical power. Where Is a Sump Pump Installed? Installation takes place at the lowest point of your basement or crawl space. Water naturally flows toward this spot first. Plumbers dig a hole roughly two feet deep and eighteen inches wide. They line this hole with a sturdy plastic or metal liner to form the basin. The discharge line runs up the wall and exits through your rim joist. Outdoors, the pipe extends several feet away from your home so water drains downhill away from the foundation. Benefits of Installing a Sump Pump Adding a reliable water removal system transforms your indoor air quality and property value. Prevents costly flooding: Stops unexpected water accumulation from ruining drywall, flooring, and furniture. Reduces mold growth: Damp basements breed harmful mold spores. Keeping the pit dry protects indoor air quality. Protects foundation integrity: Relieves soil pressure that causes concrete walls to crack or tilt. Lowers humidity levels: Keeps lower floors dry, making your heating and cooling systems run more efficiently. Inhibits insect infestations: Termites, roaches, and silverfish thrive in damp basements. Dry floors keep pests away. When

who to call for frozen pipes
Plumbing

Who to Call for Frozen Pipes | Emergency Plumbers

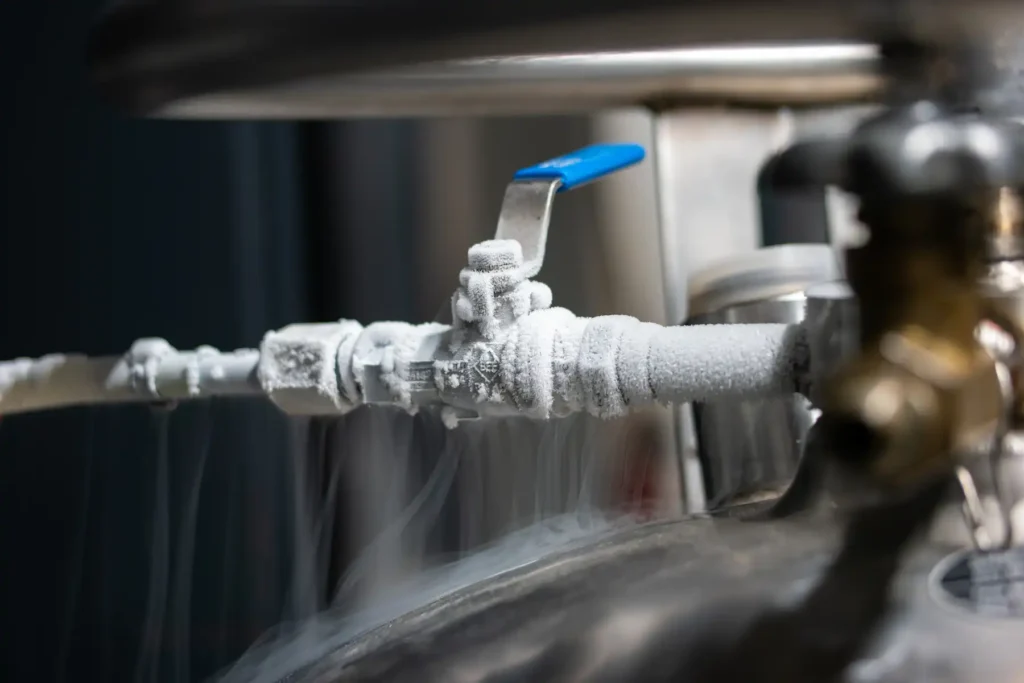
Call a licensed plumber immediately if your pipes freeze. A professional plumber has the exact machinery and experience needed to thaw your lines without causing a catastrophic burst. When sub-zero temperatures hit, you need to know who to call for frozen pipes before minor ice turns into a massive, expensive flood. Acting quickly and contacting a licensed local professional like Derks Plumbing will protect your home from severe water damage. What Happens When Pipes Freeze? When water freezes, it does something unusual: it expands. Inside a copper, PEX, or galvanized steel pipe, this expansion creates immense hydraulic pressure. The ice blockage itself is not what typically ruptures the pipe. Instead, the ice pushes water toward closed faucets or bends in the plumbing, trapping it. This trapped water gets compressed by the growing ice. The pressure climbs until the metal or plastic pipe wall splits open. When the temperature rises and the ice block thaws, water rushes out of the split at full household pressure, flooding your crawl spaces, ceilings, and floors. You can read about: What Temperature Freezes Pipes Who Should You Call for Frozen Pipes? A licensed plumber is who fixes frozen pipes safely and correctly. Here’s why that matters more than trying a DIY approach. Plumbers carry tools designed to thaw pipes without damaging them. They also know how to check for hidden cracks before you turn the water back on. A crack you can’t see can flood your home once water starts flowing again. If you’re searching for plumber frozen pipes services, look for a company with emergency availability. Frozen pipes often happen during nights, weekends, or holidays when temperatures drop fastest. A plumber who answers calls around the clock can prevent a small freeze from turning into major water damage. Some homeowners also call their water utility company first, especially if the frozen section is part of the main line rather than interior plumbing. But for pipes inside your home, a plumber is almost always the right first call. Signs Your Pipes Are Frozen Catching a frozen pipe early can prevent a burst. Watch for these warning signs. No water or a weak trickle from a faucet that normally runs fine Frost visible on exposed pipes, especially in basements or crawl spaces Strange smells coming from a drain or faucet, which can mean a blockage from ice Bulging or swollen sections of visible pipe Unusual banging or clanking noises in your plumbing system If you notice any of these signs, don’t wait. Call a plumber before the pressure builds high enough to crack the pipe. What to Do Before the Plumber Arrives While you wait for your professional to pull up to your property, take these protective steps to minimize damage: Shut Off the Main Water: Locate your main water shut-off valve (usually in the basement, utility closet, or near the street) and close it completely. Open Faucets: Turn on the taps connected to the frozen lines. This relieves the hydraulic pressure as the ice begins to melt. Clear the Area: Move furniture, electronics, and valuables away from walls or ceilings where you suspect frozen pipes are located. Document Everything: Take photos of any visible frost, bulging areas, or active leaks for insurance purposes. What a Plumber Does to Fix Frozen Pipes Professional plumbing repair for frozen pipes usually follows a clear process. Step 1: Locate the Frozen Section Plumbers use moisture meters, thermal cameras, or a process of elimination based on where water flow has stopped. Step 2: Thaw the Pipe Safely Plumbers use tools like heat tape, hot water wraps, or specialized heat guns designed for gradual, even thawing. This prevents the rapid temperature change that can crack already-stressed pipe walls. Step 3: Inspect for Damage Once thawed, the plumber checks the full length of the pipe for cracks, splits, or weak spots that might fail later. Step 4: Repair or Replace Damaged Sections If damage is found, the plumber repairs the specific section rather than replacing the entire line, which keeps repair costs lower in most cases. Step 5: Test Water Flow and Pressure Before finishing the job, the plumber restores water flow and checks for leaks at every joint and connection near the repair. Can You Thaw Frozen Pipes Yourself? You can attempt to thaw a pipe yourself only if the line is fully exposed, easily accessible, and has no visible cracks. Never use an open flame, propane torch, or space heater. These tools pose extreme fire risks and can cause the water inside the pipe to boil rapidly, triggering a violent explosion. Instead, use a handheld hair dryer on a low setting or wrap the pipe in towels soaked in hot water. Always start warming from the faucet side and work your way back toward the frozen blockage to let steam escape safely. What If a Frozen Pipe Bursts? If a pipe has already split, you are dealing with an urgent plumbing emergency. Follow these steps immediately: Cut the Water and Power: Shut off the main water valve instantly. If water is near electrical outlets or your breaker box, safely turn off the electricity to those zones. Call for Emergency Repairs: Contact an emergency plumbing repair for frozen pipes specialist right away. Remove Standalone Water: Use a wet-dry vacuum, mop, and towels to extract as much standing water as possible to prevent mold growth. Call Your Insurer: Report the burst pipe to your homeowner’s insurance company to start the remediation claim. How Much Does It Cost to Repair Frozen Pipes? The cost to resolve frozen plumbing varies depending on whether the line is simply frozen or has already burst. On average, professional thawing services range from $200 to $600. If the pipe has burst and requires structural drywall removal, line replacement, and water damage restoration, the cost can quickly climb to $1,500 or more. Investing in timely professional plumbing frozen pipes services prevents these expensive complications. How Long Does It Take to Fix Frozen Pipes? For standard, accessible lines, a

What Is a Dual Flush Toilet
Plumbing

What Is a Dual Flush Toilet? | Complete Guide by Plumbers

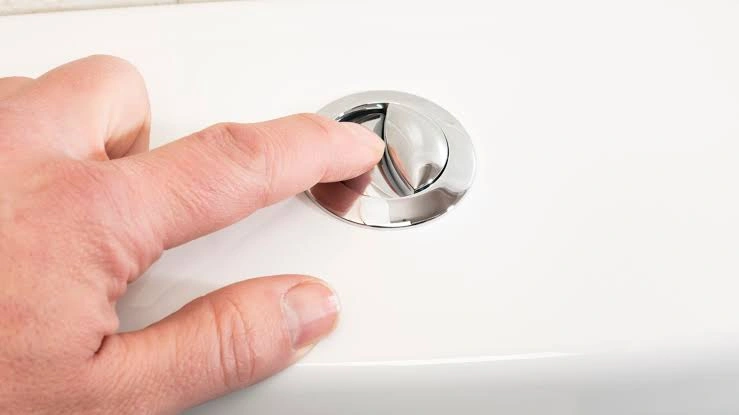
Are you tired of watching your water bill climb while wasting gallons of clean water with every single flush? You are not alone, as standard toilets are one of the biggest water wasters in modern homes.A dual flush toilet is a smart plumbing fixture that gives you two options: a half flush for liquid waste and a full flush for solid waste.  This simple design can cut your bathroom water use by more than half, saving both your money and the environment. But what is a dual flush toilet, and how does it actually fit into your home? Let us dive into how these systems work, what they cost, and whether they are the right choice for your next bathroom upgrade. What Is a Dual Flush Toilet? A what is a dual flush toilet search often leads to a simple answer: it is a high-efficiency toilet designed with a dual-stage flush mechanism. Instead of using the same large amount of water for every flush, this system lets you choose how much water you need based on the type of waste you are clearing. Most models are easy to spot because they feature toilets with two buttons on the top of the tank lid, rather than a single side lever. The smaller button releases a low-volume flush for liquid waste, while the larger button releases a high-volume flush to clear solid waste. By matching the water volume to the job, this design bridges the gap between high performance and environmental conservation.  How Does a Dual Flush Toilet Work? Standard toilets rely on a siphoning action. When you pull the handle on a single-flush toilet, water rushes from the tank into the bowl, filling the trapway to create a siphon that pulls waste down the drain. This process requires a large volume of water to build up enough pressure to start and complete the siphon. A dual flush toilet system works differently by using a larger trapway and gravity-fed pressure. The Trapway Design: The exit pipe, or trapway, at the bottom of the bowl is usually wider than a standard trapway. It has a simpler, more direct path down to the sewer line. Gravity Over Siphoning: Because the trapway is larger, waste can fall through easily with less water pressure. Instead of pulling waste down through a siphon, the system pushes waste down using the sheer force of gravity. The Dual-Valve Mechanism: Inside the tank, a specialized dual-flush valve replaces the classic rubber flapper. When you press the small button, the valve opens briefly to let out about 0.8 to 1.0 gallon of water. Pressing the large button opens the valve fully, releasing 1.28 to 1.6 gallons of water. Because the system pushes rather than pulls, it needs far less water to clear the bowl completely. Types of Dual Flush Toilets When shopping for a toilet dual flush model, you will run into several structural designs. Selecting the right one depends on your space, budget, and design style. Two-Piece Toilets This is the most common and budget-friendly option. The tank and the bowl are separate pieces that are bolted together during installation. If either the tank or bowl cracks over time, you can often replace just that single part. One-Piece Toilets In a one-piece model, the tank and bowl are molded together as a single seamless unit of ceramic. They have a sleek, modern look and are incredibly easy to clean because there are no crevices where dirt and bacteria can hide. They are heavier and usually cost more than two-piece models. Wall-Hung Toilets For a truly modern bathroom, wall-hung models mount directly to the wall studs, leaving the floor beneath completely clear. The tank is hidden behind the drywall inside a metal carrier frame. The two button flush toilet plate is mounted on the wall above the bowl. These are excellent for saving space in small bathrooms but require professional installation and wall modification. You can read about: How to Fix a Phantom Flush Dual Flush Toilet vs. Single Flush Toilet To understand why so many homeowners are making the switch, it helps to compare these two systems side-by-side. Standard single-flush toilets are simple and cheap to buy. However, they use the same maximum amount of water (typically 1.6 gallons per flush, and older models can use up to 3.5 to 5.0 gallons) regardless of what you are flushing. A toilet dual flush model uses an average of only 1.28 gallons for a full flush and as little as 0.8 gallons for a half flush. The gravity-assist design also means fewer clogs because the trapway is wider and less winding than the trapway of a single-flush model. While a single-flush model has simpler internal parts that are cheaper to replace, it cannot compete with the long-term water savings of a dual-flush design. Benefits of a Dual Flush Toilet Installing a dual flush toilet system offers several long-term benefits for your household. Massive Water Savings: Because most flushes in a typical home are for liquid waste, using the half-flush button saves thousands of gallons of water every single year. Lower Utility Bills: Less water used means a lower monthly water bill. For large families, the savings can pay for the price of the toilet within just a couple of years. Fewer Clogs: The larger, direct trapway is less prone to clogging because it does not rely on a narrow siphon bend to move waste out of the bowl. Eco-Friendly Footprint: Reducing your household water footprint helps protect local water supplies and reduces the load on community wastewater treatment plants. Meets Strict Standards: Almost all dual-flush toilets carry the EPA WaterSense label, meaning they meet strict water-efficiency and performance criteria. Drawbacks of a Dual Flush Toilet While the benefits are significant, there are a few drawbacks to keep in mind before you buy. Higher Upfront Cost: These units generally cost more to purchase than basic single-flush models. More Frequent Cleaning: Because gravity toilets use less water, the water level in the bowl

What Is Backflow Testing
Plumbing

What Is Backflow Testing?

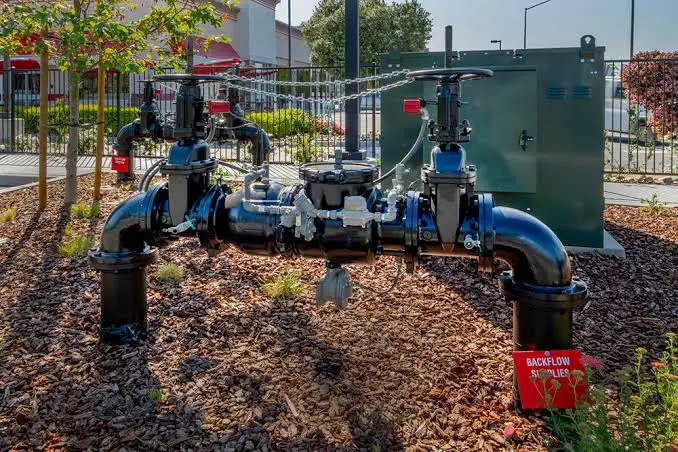
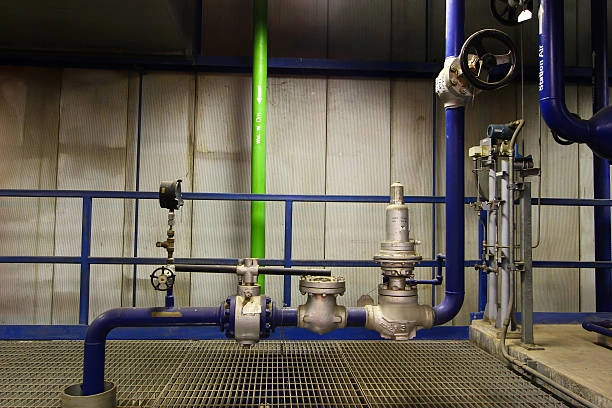
Backflow testing is the process of checking a backflow prevention assembly to make sure it can stop unwanted reverse water flow. Normally, water moves from the drinking water supply toward your plumbing fixtures. Backflow happens when water moves in the opposite direction because of pressure changes. The concern is that water flowing backward can carry substances from a non-potable source into the potable water supply.  The U.S. Environmental Protection Agency describes backflow as unwanted flow of used or non-potable water or other substances into a potable water distribution system.A backflow test does not simply look at the outside of a device. It checks how the internal components respond under controlled pressure conditions. Quick Answer Backflow testing checks whether a backflow prevention device is working properly and protecting the potable water supply. A qualified tester examines the device and measures its operation under controlled conditions. The goal is to confirm that contaminated or non-potable water cannot flow backward into the drinking water system. Testing requirements and schedules vary by local authority. Why Is Backflow Testing Important? Backflow testing helps verify that a prevention device is providing the protection it was designed to provide. A plumbing system can contain connections where drinking water comes into contact with water or substances that should not enter the potable supply. These are known as cross-connections. Examples can include: Irrigation systems Commercial plumbing equipment Boilers Fire protection systems Hose connections Chemical handling equipment Swimming pool-related plumbing Not every property has the same backflow risk. The type of plumbing system and possible source of contamination determine what protection may be needed. EPA guidance recommends continued inspection and testing of backflow prevention devices according to applicable state and local requirements. You can read about: How Does a PRV Valve Work  How Does Backflow Happen? Backflow generally occurs because of a change in water pressure. There are two common ways it can happen. What Is Backpressure? Backpressure occurs when pressure in a connected system becomes greater than the pressure in the potable water supply. For example, a commercial plumbing system may contain equipment that operates under pressure. If the pressure on that side becomes higher than the drinking water supply pressure, water can potentially move backward. What Is Backsiphonage? Backsiphonage occurs when pressure in the potable water system drops and creates a vacuum-like condition. A sudden water main break or other pressure loss can create conditions where water from a connected source is pulled toward the potable supply. Both situations can create a backflow risk when an appropriate protection method is not in place. What Is a Backflow Preventer? A backflow preventer is a device or assembly designed to prevent unwanted reverse flow into the potable water system. Different plumbing situations require different types of protection. Examples include: Reduced pressure principle assemblies Double check valve assemblies Pressure vacuum breakers Atmospheric vacuum breakers Other approved backflow prevention devices The correct device depends on the type of hazard, plumbing arrangement, and applicable requirements. A backflow preventer is not something you should select based only on pipe size. The potential hazard and local requirements also matter. What Happens During a Backflow Test? A backflow test follows a controlled procedure designed to determine whether the prevention assembly is operating correctly. The exact procedure depends on the type of device. In general, a tester may: Identify the backflow prevention assembly. Check the device and its connections. Confirm the direction of water flow. Connect testing equipment to the appropriate test ports. Take pressure measurements. Evaluate the operation of internal components. Compare the results with the applicable requirements. Record the test results. Identify whether repair or further service is needed. EPA’s Cross-Connection Control Manual notes that testers should identify the type of device and flow direction before testing. The manual also describes testing under controlled no-flow conditions. The tester may need to temporarily shut off water during the procedure. Property owners should follow the tester’s instructions during this period. What Is the Difference Between Backflow Testing and Backflow Inspection? Backflow inspection and backflow testing are related, but they are not exactly the same. A backflow inspection generally focuses on examining the installation, condition, accessibility, and surrounding plumbing setup. Backflow testing checks whether a testable backflow prevention assembly is actually operating within the required parameters. For example, an inspection may identify a damaged valve, poor installation, or accessibility problem. A test provides performance information about the prevention assembly. Some backflow programs may require both inspection and testing as part of their cross-connection control process. Requirements depend on the applicable authority. Who Needs Backflow Testing? Not every home or building will have the same testing requirements. Backflow testing may be required or recommended for properties with certain plumbing systems or potential cross-connections. These can include: Commercial properties Industrial facilities Apartment buildings Irrigation systems Restaurants Medical facilities Manufacturing facilities Properties with specialized plumbing equipment Buildings with designated backflow prevention assemblies A homeowner may also have a testable backflow prevention device depending on the property’s plumbing configuration and local requirements. Your water supplier or local plumbing authority can tell you whether testing is required for your property. How Often Should a Backflow Preventer Be Tested? There is no single testing schedule that applies to every property in every location. Testing frequency can depend on the state, local water supplier, plumbing authority, type of assembly, and level of risk. Some cross-connection control programs require annual testing, while other situations can have different schedules. EPA materials note that testing frequencies may be established by state or local requirements and can vary based on the program. For this reason, do not rely on a generic yearly schedule without checking the requirements that apply to your property. What Happens If a Backflow Preventer Fails? A failed test does not necessarily mean the entire plumbing system needs to be replaced. The next step depends on why the assembly failed. A qualified professional may need to: Inspect the internal components Clean the assembly Replace worn components Repair the device Replace the assembly Retest the device

Plumbing

Cast Iron Plumbing Repair | How to Fix Old Drain Pipes

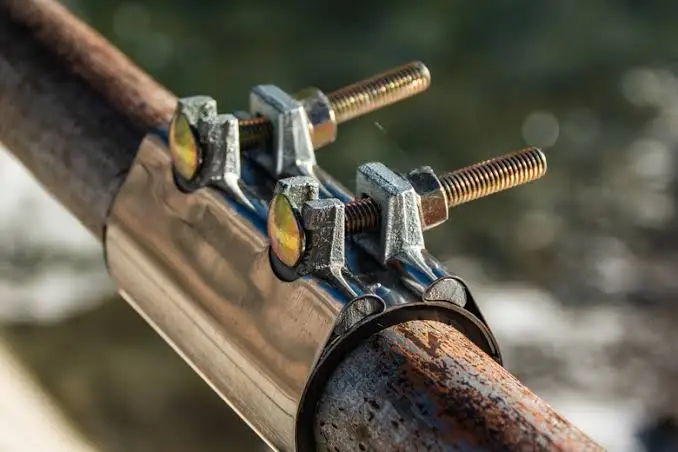
Cast iron lines are very strong but they do not last forever. When these thick pipes crack or rust they cause major leaks and water damage inside your home. You can fix them using modern options like trenchless pipe lining or quick section swapping instead of destroying your walls completely. If your home sewer system shows signs of heavy rust you must act fast. Choosing the right path for cast iron plumbing repair will save your property, stop nasty smells, and protect your family budget. What Is Cast Iron Plumbing? Cast iron plumbing is a classic system made from thick gray metal. Builders used it heavily before the year 1980. It was the main choice for waste lines and drain lines in old homes. This metal is incredibly strong and can last for decades. It handles high water pressure well. It also keeps your home quiet because the thick walls muffle the sound of rushing water. You usually find these pipes under your concrete slab floor. They run through your walls and go out to the city main line. The metal is poured into molds to create long tubes. Then workers connect them using oakum packings and molten lead or rubber bands with steel clamps. While it looks tough on the outside, the inside can change over the years. Water and waste slow down as the metal ages. Understanding this material helps you see why specialized work is needed when it starts to break down. The History and Lifespan of Cast Iron Waste Lines Most old neighborhoods rely on these heavy metal lines. They were the gold standard for residential waste systems for nearly a century. A typical cast iron pipe can last between 50 and 100 years. If your home was built in the 1950s or 1960s your pipes are reaching the end of their natural life. The environment around the pipe alters how long it lasts. Soil with high acid levels eats the metal from the outside. Inside the pipe household chemicals speed up the wear. Many systems look fine on top but are paper thin on the bottom. When they reach this stage they crack easily under the weight of the dirt above them. Knowing the age of your home gives you a big clue about the state of your waste system. Signs Your Cast Iron Plumbing Needs Repair You do not always see a leak right away when pipes sit under a concrete floor. The signs often show up in other parts of your home. You need to keep a watchful eye out for these red flags. Slow Drains: If your sinks and toilets drain slowly the pipe might have a rough interior. Rust catches hair and waste. Bad Smells: Cracked pipes let sewer gas escape. If you smell rotten eggs in your yard or bathroom you have a break. Pest Problems: Rats and bugs enter small cracks in underground pipes. A sudden pest issue can mean your sewer line has a hole. Slab Leaks: Water pooling on your floor or mysterious wet spots on carpets point to a broken pipe below. Green Grass: If one spot in your lawn is very green and grows fast water is leaking underneath it. Discolored Water: Water coming from old lines might look brown or yellow from loose rust pieces. What Causes Cast Iron Pipes to Fail? Cast iron pipes fail from the inside out in most cases. Wastewater and gases slowly corrode the interior surface, thinning the pipe wall until it develops cracks, holes, or full breaks. A few specific factors speed up this process: Age. Most cast iron pipe reaches the end of its useful life between 50 and 75 years, though some last longer with proper care. Scale buildup. Mineral and waste buildup narrows the interior, trapping moisture against the pipe wall. Soil shifting. Ground movement can crack pipes buried underground, especially in areas with expansive clay soil. Root intrusion. Tree roots seek out moisture and can crack joints or work through weakened sections. Improper original installation. Poorly sealed joints from decades ago often become the first failure point. Homes near mature trees or built on shifting soil tend to see failures earlier than the typical timeline, since those conditions add extra stress the pipe wasn’t originally designed to handle. Cast Iron Plumbing Repair Methods There are several ways to fix your system depending on the damage level. Plumbers match the fix to the specific type of pipe failure. Pipe Patching If the line has only one small hole or crack a localized patch works well. The plumber cleans the outer metal area first. Then they apply a special epoxy putty or a rubber sleeve with steel bands. This stops the immediate leak without replacing the whole run. It works best on pipes that are still structurally strong. Section Replacement When a single section is completely broken, plumbers cut it out. They use a special saw or snap cutters to remove the bad piece. Then they fill the gap with modern PVC plastic pipe. They connect the plastic to the old metal using heavy duty rubber couplings with stainless steel shields. This method is highly effective for localized cast iron pipe repair jobs. Trenchless Lining This modern method fixes the line from the inside. Plumbers pull a cloth tube soaked in epoxy resin through the old pipe. They inflate the tube and let it cure. This creates a brand new plastic pipe inside the old metal shell. Can Cast Iron Plumbing Be Repaired Without Replacement? Yes you can fix these lines without digging them out of the ground. This is done through advanced trenchless technology. It is a fantastic option for homeowners who want to save their beautiful landscaping or expensive indoor flooring. The most common option is called cured in place pipe lining. The plumber uses a single access point to slide the lining material inside. The resin cures within a few hours. Once it hardens it seals all cracks and holes perfectly. This

how does a prv valve work
Plumbing

How Does a PRV Valve Work? | Home Water Pressure Guide

High city water pressure can hurt your home pipes and cause scary leaks. A pressure reducing valve slows down the fast water coming from the city main line into your private building. This simple tool protects your appliances and keeps your plumbing safe every single day. You might wonder how does a prv valve work to protect your property. The valve uses an adjustable internal spring and a rubber piece to compress the water path. This method keeps your main water flow at a steady and safe level. What Is a PRV Valve? A PRV valve is a small brass plumbing device. PRV stands for pressure reducing valve. This tool sits on your main water line. It acts like a speed limit for your water. City water mains carry water at very high pressure. This pressure is often too high for a normal home. The valve takes that high pressure and lowers it to a safe level. Without it, your pipes could burst from the stress. Many modern homes have these valves installed by law. They are tough devices made of heavy metal. Inside the metal body, there are a few moving parts. These parts work together without any electricity. The tool uses basic physics to keep your home safe from water damage. It is a quiet guardian for your home plumbing system. How Does a PRV Valve Work? To understand how a pressure reducing valve works, you have to look inside the brass body. The valve has two main parts inside. These parts are a tight steel spring and a flexible rubber diaphragm. The spring pushes down from the top of the valve. The water coming into the valve pushes up against the rubber diaphragm. When city water enters the valve, it hits the rubber piece. If the water pressure is too high, it pushes the rubber piece upward. This action forces the spring to compress. When the spring compresses, it moves a tiny valve plug closer to the water opening. This shrinks the space that water can flow through. A smaller opening means less water can pass through at one time. This slow down reduces the pressure instantly. When you turn on a faucet, the pressure drops on the home side. The spring then pushes back down to open the path a bit more. This constant balance keeps your water pressure level at all times. This is exactly how does a prv valve work under normal conditions. You can read about: How to Test a Pressure Switch on a Well What Does a PRV Valve Do in a Plumbing System? You might ask your friends what does a pressure reducing valve do for your daily life. Its main job is to save your pipes from high pressure spikes. City water pressure can change during the night when few people use water. These sudden spikes can shock your water heater and washing machine. The valve keeps the pressure smooth and steady. It also saves a lot of water. Slowing down the water flow means you use less water each minute. This change lowers your monthly utility bills. It also stops that loud banging noise in your walls known as water hammer. The valve acts as a cushion for your entire living space. Where Is a PRV Valve Located? Finding your valve is easy if you know where to look. It is always located on the main water line. This line enters your home before any branches split off. Check your basement or your crawl space first. The valve is usually right next to the main shutoff valve. In warmer areas, the valve might be outside your home. Look inside a plastic box buried in the ground near the street. It will be near your water meter. It looks like a small brass dome with a bolt on top. Knowing its location is important for quick checks and sudden repairs. What Is the Ideal Water Pressure for a House? Every home needs the right balance of water flow. Low pressure makes showers weak and slow. High pressure destroys your home pipes. The ideal range for most homes is between 40 and 60 pounds per square inch. This measurement is called PSI. Most plumbers look for a sweet spot right around 50 PSI. Anything above 80 PSI can cause heavy damage over time. High pressure voids the warranty on many appliances. It causes toilets to run constantly and stresses hose connections. Keeping your home within the safe range keeps your system happy. Signs a PRV Valve Is Working Properly A healthy PRV valve keeps pressure steady across every fixture in your home. You’ll notice even water flow whether you’re running one faucet or three at once. Other signs of a properly working valve include: No banging or knocking sounds in the pipes Consistent pressure at both the highest and lowest fixtures in the house No sudden pressure spikes when other water use in the house stops Signs a PRV Valve Is Bad or Failing A failing valve usually shows up as a pressure problem somewhere in the house. Watch for these warning signs: Water pressure that’s suddenly too high or too low Banging pipes, also called water hammer Leaks around the valve body itself Pressure that changes throughout the day without an obvious reason A humming or vibrating sound coming from the valve If you’re noticing any of these, don’t ignore it. A bad valve left alone can lead to burst pipes or damaged appliances over time. Common Causes of PRV Valve Problems Why do these sturdy valves stop working? The biggest enemy of a water valve is dirt and mineral buildup. Hard water contains tiny rocks and minerals like calcium. These minerals coat the internal spring and plug over time. This coating makes the parts stiff and slow to move. The rubber diaphragm can also dry out and crack after years of use. When the rubber tears, water leaks into the spring chamber. This leak ruins the pressure balance

what does mip stand for in plumbing
Plumbing

What Does Mip Stand For in Plumbing? Full Guide

In plumbing, MIP stands for Male Iron Pipe. It refers to a specific type of threaded pipe fitting with external threads that screw into a female fitting. Plumbers use MIP connections to create tight, secure seals in water, gas, and drain lines across residential and commercial buildings. If you are working on a home repair project, knowing what does mip stand for in plumbing helps you buy the right parts. It prevents costly leaks and saves you extra trips to the hardware store. Let us look at how MIP works and why it matters for your pipes. What Does MIP Stand for in Plumbing? When you ask about mip plumbing stands for, the direct answer is Male Iron Pipe. The word male means the threads sit on the outside of the pipe or fitting. The word iron comes from older trade history when black iron and galvanized iron were the primary materials for pipe systems. Understanding the basic mip meaning is vital for any DIY plumbing task. Today, MIP does not limit you to iron alone. The name describes the thread style, cut, and shape rather than just the metal itself. Modern MIP fittings come in brass, copper, stainless steel, and PVC plastic. When you see an MIP label on a package, it tells you that the piece has external standardized pipe threads. What Is an MIP Fitting? An MIP fitting is any pipe component designed with external male threads cut into its outer surface. These threads screw directly into matching female threads on another pipe, valve, or fixture. To grasp the full mip plumbing meaning, you need to look at how fittings connect components. An MIP fitting acts as the connector that joins two sections of a piping system. Common MIP fittings include nipples, adapters, street elbows, and plug caps. For example, a water heater flex line often has a female end. To attach that hose to your home water supply line, you need a fitting with an MIP end. The male threads insert into the female receiver, creating a tight physical joint that holds pressure without pulling apart. Why Is It Called Male Iron Pipe? You might wonder what does mip mean when modern pipes are rarely made of heavy cast iron. The name is a classic industry holdover from the nineteenth and early twentieth centuries. Back then, plumbers installed thick iron pipes for gas and water supply. They cut threads directly onto the iron pipe ends using hand dies. They called external threads Male Iron Pipe and internal threads Female Iron Pipe. As plumbing materials changed to copper, brass, and plastic, the thread pattern stayed the same. The trade kept the term MIP so workers could quickly identify thread compatibility across different brands and materials. Today, the name reflects the standardized male thread system rather than the raw metal ingredient. How Do MIP Threads Work? MIP threads work by using a tapered design. Unlike standard machine screws that have straight parallel sides, MIP threads get slightly wider as they move further back from the tip of the pipe. This tapered angle is built to standard National Pipe Tapered (NPT) specifications. As you screw an MIP fitting into a female connection, the outer diameter of the male threads wedges tightly against the inner walls of the female threads. This wedging action creates a mechanical seal. The metal or plastic forces itself together as you turn the fitting with a wrench. Because small gaps remain between the thread roots and crests, plumbers add sealants like Teflon tape or pipe joint compound to make the joint watertight. MIP vs FIP: What’s the Difference? The main difference between MIP and FIP comes down to thread location. MIP stands for Male Iron Pipe, which has external threads. FIP stands for Female Iron Pipe, which has internal threads. When reviewing what does mip stand for in plumbing, remember that MIP and FIP are designed as matching pairs. You cannot connect an MIP fitting to another MIP fitting directly. You must join an MIP thread to an FIP thread. Think of it like an electric plug and a wall socket. The MIP fitting is the plug with prongs on the outside. The FIP fitting is the socket with holes on the inside. When screwed together, the external ridges of the MIP piece interlock into the internal grooves of the FIP piece. MIP vs MPT vs NPT: Are They the Same? Plumbing labels can confuse even experienced homeowners. You will often see terms like MIP, MPT, and NPT printed on parts bags at your local supply store. Understanding what does mip stand for helps clear up this naming confusion. In practical residential plumbing, MIP, MPT, and NPT refer to the exact same thread style and shape. MIP stands for Male Iron Pipe. MPT stands for Male Pipe Thread. NPT stands for National Pipe Tapered. NPT is the official American National Standard technical specification for tapered pipe threads. MPT and MIP are common trade terms used by manufacturers to show that a fitting has male NPT threads. An MIP fitting will screw directly into an MPT or NPT female port without any issues. Common Uses of MIP Fittings in Plumbing You will find mip plumbing parts throughout your home. They are essential components in high-pressure lines, gas systems, and fixture connections. Here are the most common places MIP fittings are installed: Water Heater Connections: Flexible supply lines screw onto MIP nipples sticking out of the top of the water tank. Gas Appliance Lines: Gas ranges, clothes dryers, and outdoor grills use MIP adapters to connect flexible metal gas hoses to gas shut-off valves. Outdoor Hose Bibbs: Many garden spigots feature an MIP threaded inlet that screws into your home water main pipe inside the wall. Shower Heads and Arms: The wall pipe that holds your shower head typically features an MIP thread on both ends. Main Shut-off Valves: Ball valves and gate valves often have FIP ports that require MIP pipe ends for installation. How

what size hex wrench for garbage disposal
Plumbing

What Size Hex Wrench for Garbage Disposal: The Complete Guide

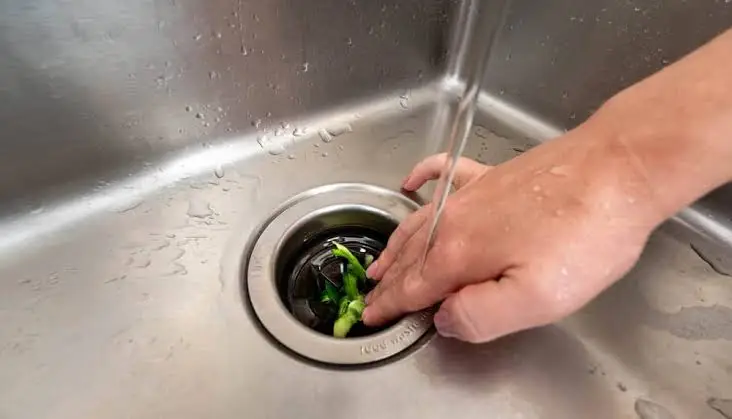
Your garbage disposal just hummed, buzzed, or went dead quiet. Before you call a plumber, grab a wrench. Most jams happen because the flywheel gets stuck, and a hand crank clears it in under two minutes. So what size hex wrench for garbage disposal units do you actually need? Almost every residential unit takes a 1/4-inch hex wrench, and most brands tape one to the disposal when it ships. Quick Answer: What Size Hex Wrench Does a Garbage Disposal Use? A standard 1/4-inch hex wrench fits the manual reset hole on nearly every residential disposal, including InSinkErator, Waste King, Moen, and GE models. Manufacturers build the flywheel’s center hole to match this size, which is why it’s become the industry standard. You’ll usually find this garbage disposal wrench taped to the unit, included in the original box, or sold separately at any hardware store for a few dollars. If yours didn’t come with one, any 1/4-inch hex key from a standard Allen wrench set works fine. You don’t need a brand-specific tool. Where Does the Hex Wrench Go on a Garbage Disposal? Look at the bottom center of the unit under your sink. You’ll see a small six-sided hole. That’s the manual reset port, and it connects straight to the flywheel inside the grinding chamber. Turn off power at the switch and breaker, then use a flashlight to check the bottom center of the unit for the hex-shaped hole. A few newer or compact models hide this port slightly differently, so check your manual if you don’t spot it right away. Once you find it, the what size hex wrench for garbage disposal question answers itself: if the hole measures a quarter inch across, you’re set. Why a Garbage Disposal Needs a Hex or Allen Wrench A disposal grinds food with a spinning flywheel and two small steel impellers. When something hard or fibrous gets caught between the flywheel and the grinding ring, the motor stalls. The motor alone can’t force past a jam without risking burnout, so manufacturers built in a manual backup: the hex wrench lets you rotate the flywheel by hand and work the jam loose without power. That hole isn’t an afterthought. It’s the built-in emergency release, which is why knowing what size hex wrench for garbage disposal jams matters before you need it. How to Use a Hex Wrench to Unjam a Garbage Disposal Follow these steps in order. Skipping the power-off step is the most common mistake, and it’s a dangerous one. Cut the power completely. Flip the wall switch off, then shut off the breaker feeding the disposal. Locate the hex hole at the bottom center of the unit. Insert the 1/4-inch hex wrench until it seats fully. Turn it back and forth, applying steady pressure to work the flywheel loose. Keep turning until it spins freely through a full rotation. Check the drain for debris like bone fragments, fruit pits, or dropped utensils. Restore power and press the red reset button on the bottom of the unit. Run cold water and test the disposal on a low switch setting. If the flywheel spins freely but the disposal still won’t start, the problem is likely electrical rather than mechanical. What If the 1/4-Inch Hex Wrench Does Not Fit? A 1/4-inch wrench covers most disposals, but a few models use a different size or tool. If yours feels loose or won’t seat, check these before assuming something’s broken: Confirm the size. Wrench sets mix up sizes that look alike, like 3/16 inch or 5/16 inch. Check your model number against the manufacturer’s manual. Some older or commercial units use different hex sizes. Look for a jam-buster wrench. Certain InSinkErator models use a specialized offset wrench instead. Inspect the hole for debris. Ground food or grease buildup can partially block the port. If none of that solves it, a plumber can identify the exact garbage disposal hex wrench size your model needs in a few minutes. Allen Wrench vs Jam-Buster Wrench: What’s the Difference? People often use “Allen wrench” and “jam-buster wrench” interchangeably, but they aren’t quite the same tool. An Allen wrench, or hex key, is a straight, six-sided rod bent into an L-shape. It’s a generic hardware tool used for everything from furniture to bicycle repair. A jam-buster wrench is purpose-built for disposal. It has a hex tip on one end and a handle shaped for better leverage, often with a curved design that’s easier to use in tight cabinet spaces. For most homeowners, a standard hex wrench for garbage disposal jams does the job fine. A jam-buster wrench is a nice upgrade if you deal with frequent jams. Signs Your Garbage Disposal Is Jammed Instead of Burned Out Not every problem is a jam, and using a wrench on a burned-out motor won’t help. A humming sound with no blade movement, especially right after grinding something hard, usually means a jam. Complete silence with no hum, a burning smell, or a reset button that won’t stay in usually means the motor is dead. A hum points to a mechanical fix; dead silence points to an electrical one. Common Reasons a Garbage Disposal Gets Stuck Fibrous vegetables like celery, corn husks, and onion skins Hard items such as fruit pits, bones, or glass Grease and fat that solidify inside the chamber Large amounts of coffee grounds Dropped utensils Overloading the unit with too much food at once Running cold water before, during, and after grinding flushes debris through the trap instead of letting it settle around the flywheel. Garbage Disposal Reset Button vs Hex Wrench These two tools solve different problems. The reset button, a small red button on the bottom of the unit, trips like a circuit breaker when the motor overheats. If the disposal goes silent, press it first. The hex wrench manually frees a stuck flywheel. Use it when the motor hums but the blades don’t turn. In most real jams, you’ll need both: the wrench to clear the

Fast and Efficient Plumbing Services in Eagle Rock

Client Reviews

Posted on Google Google
Ryan Haden profile picture
Ryan Haden
Google star 1Google star 2Google star 3Google star 4Google star 5Trustindex verifies that the original source of the review is Google.
Could not have been happier with Alex! We was right on time, polite, fixed all my kitchen sink issues and have me good tips on how to best maintain. I will for sure be using him again and highly recommend anyone who needs a great plumber to use his services as well. Thank you!
Posted on Google Google
Lorena Marcoe profile picture
Lorena Marcoe
Google star 1Google star 2Google star 3Google star 4Google star 5Trustindex verifies that the original source of the review is Google.
Talk about a professional...yes, I am talking about Alex Derks, Derks Plumbing. He is by far the most knowledgeable plumber we have ever had the pleasure of hiring. He's been in the plumbing business for years and it shows. Any questions you have re: plumbing issues, install, etc., Alex is your man. So happy with his work and he has a great sense of humor as well... extremely easy to talk to...thank you Alex!!!
Posted on Google Google
Andrew Jalil profile picture
Andrew Jalil
Google star 1Google star 2Google star 3Google star 4Google star 5Trustindex verifies that the original source of the review is Google.
Alex did a great job installing my kitchen faucet and an under-sink Aquasana water filter. He also addressed a few other plumbing-related issues. He was friendly and helpful. Excellent work!
Posted on Google Google
Abigail Bigham profile picture
Abigail Bigham
Google star 1Google star 2Google star 3Google star 4Google star 5Trustindex verifies that the original source of the review is Google.
Alex does what other plumbers cannot do! He is our go to.
Posted on Google Google
Danielle Driver profile picture
Danielle Driver
Google star 1Google star 2Google star 3Google star 4Google star 5Trustindex verifies that the original source of the review is Google.
Alex is very friendly and responsive. What a pleasure to work with!
Posted on Google Google
Lawrence Isaacs profile picture
Lawrence Isaacs
Google star 1Google star 2Google star 3Google star 4Google star 5Trustindex verifies that the original source of the review is Google.
Very very happy with the work Alex did for us replacing the tanks in our Aquasana filtration system. From first contact over the phone through job completion Alex was a pleasure to work with. He explained what he was doing, and why, every step of the way, and made sure we understood what we needed to do to maintain the system. Strongly recommend Alex!
Posted on Google Google
Joey Aucoin profile picture
Joey Aucoin
Google star 1Google star 2Google star 3Google star 4Google star 5Trustindex verifies that the original source of the review is Google.
Alex Derks has been such a lifesaver for me. Anytime I'm in a pinch with the plumbing in my home, Alex is only a phone call away and I've only seen great results from his work. He's reliable, knowledgable, and entirely trustworthy. A must-have source when owning a home.
Posted on Google Google
Eric Gorman profile picture
Eric Gorman
Google star 1Google star 2Google star 3Google star 4Google star 5Trustindex verifies that the original source of the review is Google.
After working with dozens of plumbing services in the LA area, I can confidently say Derks is the best in the business. On time, reliable and capable of even the most difficult tasks, Derks goes above and beyond to make sure your water system is working correctly.
Posted on Google Google
Jason Gruenbaum profile picture
Jason Gruenbaum
Google star 1Google star 2Google star 3Google star 4Google star 5Trustindex verifies that the original source of the review is Google.
Excellent know-how and fast!! Reasonable pricing and super responsive!!
Posted on Google Google
Jonathan Hepfer profile picture
Jonathan Hepfer
Google star 1Google star 2Google star 3Google star 4Google star 5Trustindex verifies that the original source of the review is Google.
Alex is an expert plumber, and he always goes out of his way to educate me about how to prevent future issues. Highly recommended!

Derks Plumbing has been providing professional plumbing services to Eagle Rock residents for over 20 years. Our experience and strong reputation have allowed us to grow, and we are proud to serve customers in 15 nearby areas, including Venice, Santa Monica, Beverly Hills, and more.

Contact

Hours of Operation

Monday: Open 24 Hours
Tuesday: Open 24 Hours
Wednesday: Open 24 Hours
Thursday: Open 24 Hours
Friday: Open 24 Hours
Saturday: Open 24 Hours
Sunday: Open 24 Hours

© 2026 Created by Localpro1

Scroll to Top