A water heater replacement sounds intimidating, but it’s one of the more manageable home projects when you know the steps and respect the safety rules. Most standard tank replacements are done in a few hours. Get the type, size, and connections right, and the unit runs reliably for a decade or more.
Knowing how to install a water heater properly protects your home, your family, and your investment. This guide covers every step from choosing the right unit to testing the finished install so nothing gets missed.
What to Know Before Water Heater Installation
A new water heater installation requires a clear, strategic plan before you buy any equipment. You must first match your home’s existing power source, whether it uses natural gas, propane, or electricity. Changing fuel types requires major modifications to your utility lines, venting systems, and electrical panels, which can greatly increase your project costs.
Check your local code requirements and zoning laws before purchasing a new unit. Many cities require specific safety upgrades during a replacement, such as adding an expansion tank, installing specific sediment traps on gas lines, or securing the unit with heavy-duty seismic straps. If you feel unsure about working with live gas lines, complex venting configurations, or high-voltage electrical wiring, it is always best to call a licensed professional to ensure your home remains safe and compliant.
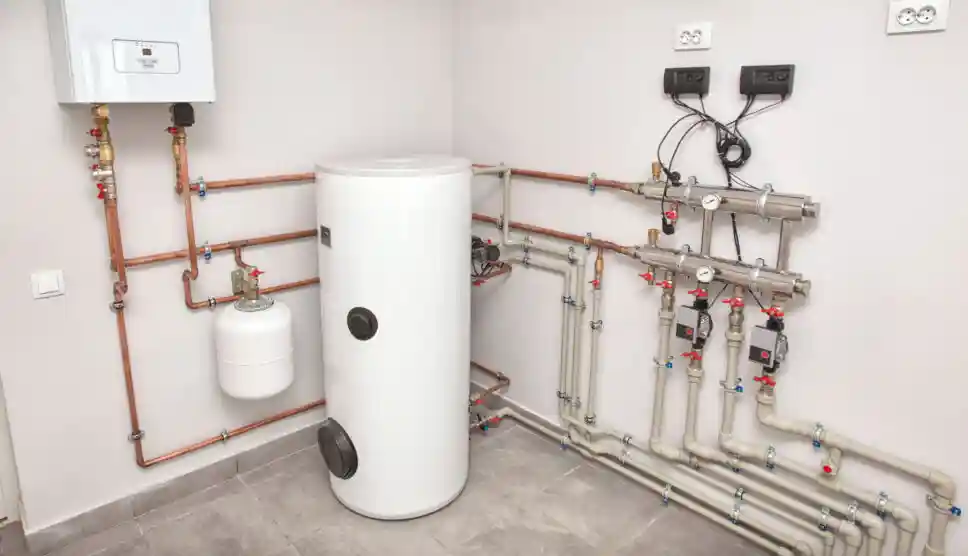
Types of Water Heaters for Your Home

Choosing the right heating system changes how much energy you use every day, your upfront expenses, and how long your equipment lasts. Here are the three main options available for modern homes:
Standard Storage Tank Units
These systems store a large volume of hot water constantly in an insulated tank. They cost less upfront and are simple to replace, but they use energy throughout the day and night to keep the stored water hot.
Tankless Systems
Often called demand-type units, these heat water instantly as it flows through the heat exchanger. They cost more to buy and often require larger gas lines or upgraded electrical breakers, but they save significant money over time because they completely eliminate standby heat loss.
Heat Pump Hybrid Systems
These advanced units pull heat from the surrounding air to warm the water inside an attached storage tank. They use very little electricity compared to standard electric models, but they require a large installation space with plenty of air clearance and warm ambient room temperatures to work efficiently.
How to Choose the Right Water Heater
Look at your primary fuel source first to narrow down your choices. If your home has an existing, active gas line, choosing a gas water heater installation keeps your recovery times fast and ensures you still have hot water during unexpected electrical power outages. If your home does not have gas access and only utilizes heavy-duty 240-volt electrical wiring, an electric water heater installation is a much more direct and simpler setup to execute.
Think about your long-term household needs and daily routines. Tankless units are an excellent investment if you have a large family that takes back-to-back showers or if you want to save physical floor space in your closet or utility room. Traditional tank models remain ideal if you want a budget-friendly, straightforward replacement without altering your home’s underlying plumbing or utility infrastructure.
Water Heater Size Guide: What Size Do You Need?
Tank size is measured in gallons, and choosing correctly avoids running out of hot water or overpaying for unused capacity.
- 1 to 2 people: 30 to 40 gallon tank
- 2 to 3 people: 40 to 50 gallon tank
- 3 to 4 people: 50 gallon tank
- 5 or more people: 50 to 80 gallon tank, or consider a tankless system
For tankless units, sizing is based on flow rate in gallons per minute rather than storage volume, so matching your household’s simultaneous hot water use is the key calculation.
Tools and Materials Needed for Water Heater Installation
Gather your supplies and spread them out before you turn off your home’s main water supply. Having everything ready keeps your project moving smoothly and prevents frantic trips to the local hardware store mid-project.
Required Tools
- Pipe wrench (two are preferred for leveraging joints)
- Adjustable open-ended wrench
- Copper pipe cutter or tubing coring tool
- Screwdrivers (both flathead and Phillips)
- Non-contact electrical voltage tester
- Channel locks, tongue-and-groove pliers, and wire strippers
Required Materials
- New water heater unit (gas or electric)
- Flexible corrugated water supply lines (stainless steel or copper)
- Temperature and Pressure (T&P) discharge pipe
- Thread sealing tape (PTFE plumbing tape)
- Gas flex line kit with new shutoff valve (for gas models)
- Dielectric unions (if connecting copper directly to steel galvanized pipes)
Important Safety Tips Before Installing a Water Heater
Safety is the absolute most important part of this entire plumbing project. Always turn off the main electrical power at your home’s main breaker panel before touching or opening any electrical model. Use your non-contact voltage tester directly on the wires inside the unit’s junction box to verify the wires are completely dead before proceeding.
For gas units, turn off the dedicated gas valve completely. Smell carefully for leaks around the room before you start working with any tools. Never, under any circumstances, dry-fire your new water heater. The storage tank must be completely full of water before you turn the electrical breaker back on or light the gas pilot light. Turning on the heating elements without water in the tank will permanently destroy them in just a few seconds.
Do You Need a Permit to Install a Water Heater?
Yes, almost every single municipality requires a formal building permit for a hot water heater installation. Local building codes ensure that your pressure relief valves, exhaust vents, and gas lines meet strict safety standards to protect your household from fire, explosions, or carbon monoxide poisoning.
Skipping a permit can cause major trouble for you later on. It can instantly void your manufacturer equipment warranty, complicate your homeowner’s insurance claims if an accidental leak or water damage occurs, and cause major issues when you try to sell your house in the future. Check directly with your local building department online or over the phone to get the specific rules and fees for your neighborhood.
How to Install a Water Heater Step by Step
Follow these chronological steps carefully to ensure a safe, leak-free, and successful system setup.
Step 1: Shut Off Utilities and Drain the Old Tank
Turn off the cold water inlet valve located directly above the tank. Next, turn off the gas supply line valve or flip the dedicated electrical breaker in your main panel. Attach a standard garden hose to the brass or plastic drain valve at the bottom of the old tank and run the other end of the hose to a trusted floor drain or your driveway. Open a hot water faucet on an upper floor of your house to break the vacuum seal inside the plumbing lines, then open the drain valve to let the old water empty out completely.
Step 2: Disconnect the Water, Gas, or Electrical Lines
Use a heavy-duty pipe wrench to disconnect the cold and hot water supply lines from the top of the old unit. For a gas water heater installation, carefully unscrew the gas flex line from the control valve and remove the sheet metal draft hood from the top exhaust flue. For an electric water heater installation, unscrew the metal junction box cover plate, disconnect the electrical wire nuts, and slide the supply conduit out of the frame. Once disconnected, slide the old tank out of the way.
Step 3: Position, Level, and Align the New Tank
Wipe down the floor area or clear out the drain pan. Set your new water heater carefully into place, making sure the control panel and plumbing ports face forward for easy access. Use heavy plastic shims underneath the base if your concrete floor is uneven. Ensure there is plenty of physical clearance around the service panels and vent pipes according to the specific instructions found in your manufacturer manual.
Step 4: Install the T&P Valve and Supply Lines
Wrap high-quality thread sealing tape clockwise around the threads of the Temperature and Pressure (T&P) relief valve, then screw it tightly into the dedicated side port of the tank. Connect a dedicated copper or CPVC discharge pipe to this valve, running it straight down so it ends within 6 inches of the floor or drains into a proper collection pan. Connect your new flexible hot and cold water supply hoses to the top water ports, using thread tape on all male iron pipe threads.
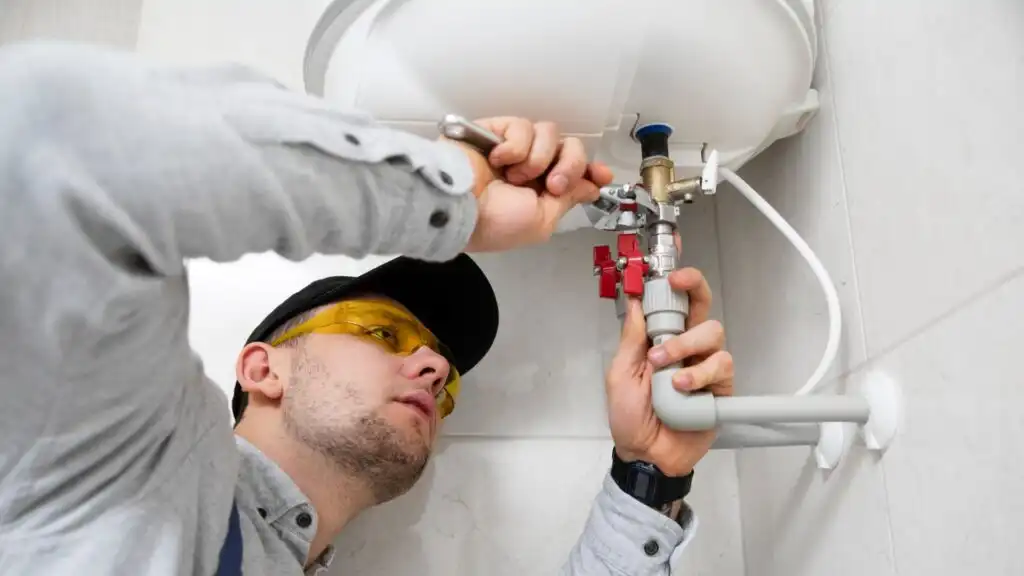
Step 5: Connect Your Gas Line or Electrical Wiring
For gas models, hook up a brand-new gas flex line from the gas shutoff valve to the new water heater controller box, using gas-rated yellow thread tape. Reattach the sheet metal exhaust vent hood securely to the flue pipe using sheet metal screws. For electric models, feed the power lines through the conduit clamp, wire black to black and white to white using heavy-duty wire nuts, attach the copper ground wire to the green ground screw, and secure the junction box cover plate.
Step 6: Fill the System and Test for Leaks
Remove the mesh aerator screen from a nearby indoor hot water faucet and turn the faucet handle completely to the hot side. Open the main cold water supply valve leading into the water heater tank. Let the tank fill up completely until water flows in a steady, unbroken stream from the open indoor faucet without sputtering air pockets. Check every single new plumbing joint, gas connection, and threaded fitting for signs of water or gas leaks before you finally turn the electrical power back on or light the gas pilot flame.
You can read about: How to Install Tankless Water Heater
Common Water Heater Installation Mistakes to Avoid
The most frequent error made by homeowners is mixing copper pipes and galvanized steel pipes directly together. This mistake triggers galvanic corrosion, an electrical chemical reaction that makes metal joints rust out and leak within just a few years. Always use specialized dielectric unions to safely separate different types of metals.
Another serious error is forgetting to install a proper, unblocked discharge tube on your T&P safety valve. Without this specific drop pipe, scalding water can spray straight out at eye level if the system ever overheats or over-pressurizes. Finally, never reuse old gas flex lines or worn water supply hoses; always buy brand-new installation kits to ensure a fresh, reliable seal that protects your home.
How Long Does Water Heater Installation Take?
A straightforward, like-for-like tank swap takes an experienced homeowner around 4 to 6 hours to finish from start to finish. This timeframe includes the time it takes to drain the old tank completely, which can be quite slow if the bottom of the unit is filled with thick sediment or sand buildup.
A professional plumbing team can usually finish the exact same job in 2 to 3 hours because they use specialized high-speed pumps to drain the water fast. If you are switching your home from a standard storage tank to an on-demand tankless system, the project can easily take a full day or more due to extensive wall pipe changes, gas line upgrades, and new exterior venting requirements.
How Much Does Water Heater Installation Cost?
The total financial side of this project depends heavily on your choice of system type, tank size, and local labor rates. Doing it yourself saves you money on labor costs but requires purchasing specific tools, materials, and municipal permits.
Tank Systems
A standard storage tank unit costs between $500 and $1,500 for the physical equipment and materials. Hiring professional labor adds another $500 to $1,500 to the total bill depending on your location.
Tankless Systems
These advanced units cost between $1,000 and $2,500 just for the hardware. Professional installation runs from $1,500 to $3,500 because of the extra modifications required for gas lines, electrical supplies, and high-temperature exhaust flues.
DIY vs Professional Water Heater Installation
Taking on this project yourself saves you money on upfront labor costs. It gives you complete control over your home project schedule and helps you learn exactly how your home’s infrastructure and plumbing systems operate.
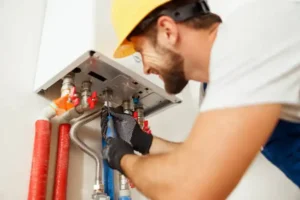
Hiring an expert brings immense peace of mind and long-term protection. Licensed plumbing professionals know the local safety codes perfectly, carry robust liability insurance, and handle all the heavy physical lifting, transport, and old tank disposal for you. Most importantly, they ensure your gas lines, gas valves, and exhaust vents are sealed tightly to prevent dangerous, invisible carbon monoxide leaks from entering your living spaces.
Water Heater Maintenance Tips After Installation
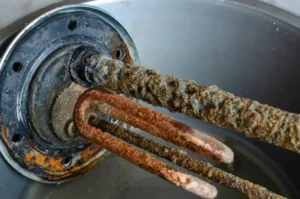
Keep your new heating system working efficiently for years by draining and flushing your water tank once every single year. This simple chore flushes out heavy calcium and sediment buildup that settles at the bottom of the tank, which slows down heat transfer and makes your system work harder.
Test your T&P safety valve twice a year by lifting the metal lever briefly to ensure water flows out of the discharge pipe and shuts off completely when released. Check your tank’s sacrificial anode rod every three years. Replacing a worn-down anode rod costs very little but prevents your tank from rusting inside out, effectively doubling the lifespan of your system.
Need Professional Water Heater Installation in Eagle Rock?
If you want a safe, code-compliant, and perfect installation without the weekend hassle and heavy lifting, our local team is here to help. We provide expert, trusted plumbing care to keep your home running smoothly and comfortably. Get in touch with Derks Plumbing today for professional, licensed Water Heater Installation in Eagle Rock.

Final Thoughts
Knowing how to install a water heater helps you understand the full scope of the job, whether you’re tackling it yourself or hiring a professional. From choosing the right size and fuel type to handling gas, electrical, and venting connections safely, each step matters for a system that lasts. If you’d rather have it done right the first time, Derks Plumbing provides trusted Water Heater Installation in Eagle Rock, backed by proper permitting and a workmanship warranty.
FAQs
Can I install a water heater myself?
Yes, you can do it if your local municipality allows DIY plumbing permits for homeowners. You must be completely comfortable working with pipe fittings, water shutoff valves, electrical connections, or gas supply lines safely.
Do I need to drain my old water heater before removing it?
Yes, a full water heater holds hundreds of pounds of water and is incredibly heavy and dangerous to move. Draining the water completely through a garden hose makes the steel tank light enough to carry out of your home safely.
How long does a standard water heater last?
Most standard tank water heaters last between 8 and 12 years before the internal metal tank begins to corrode. Tankless systems can last 20 years or more with proper maintenance, regular flushing, and scale removal.
What happens if I do not install an expansion tank?
Without an expansion tank, the water pressure inside your closed plumbing pipes builds up to dangerous levels every time the water heats up. This constant thermal expansion stress can damage your plumbing fixtures, cause pipe joints to leak, and significantly shorten the life of your new heater.