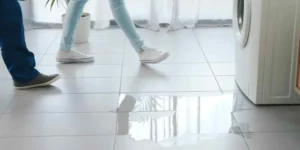
A wobbly toilet or a bad smell near the base usually means one thing. The wax seal underneath has failed.
Knowing how to install a toilet wax ring is one of the most useful skills for any homeowner, since it’s a common repair that doesn’t require a plumber’s toolbox. With the right prep and a bit of patience, most people can finish this job in under an hour.
What Is a Toilet Wax Ring?
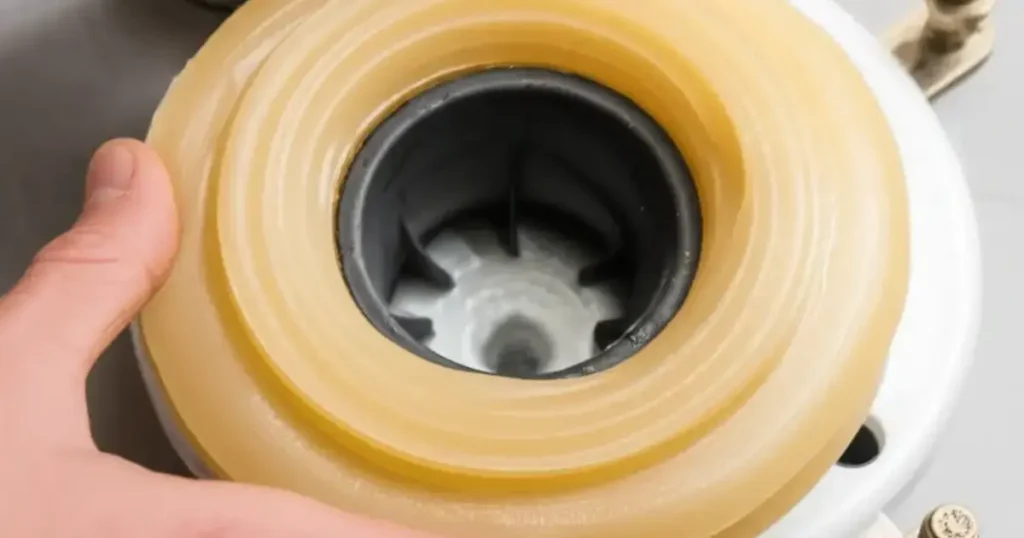
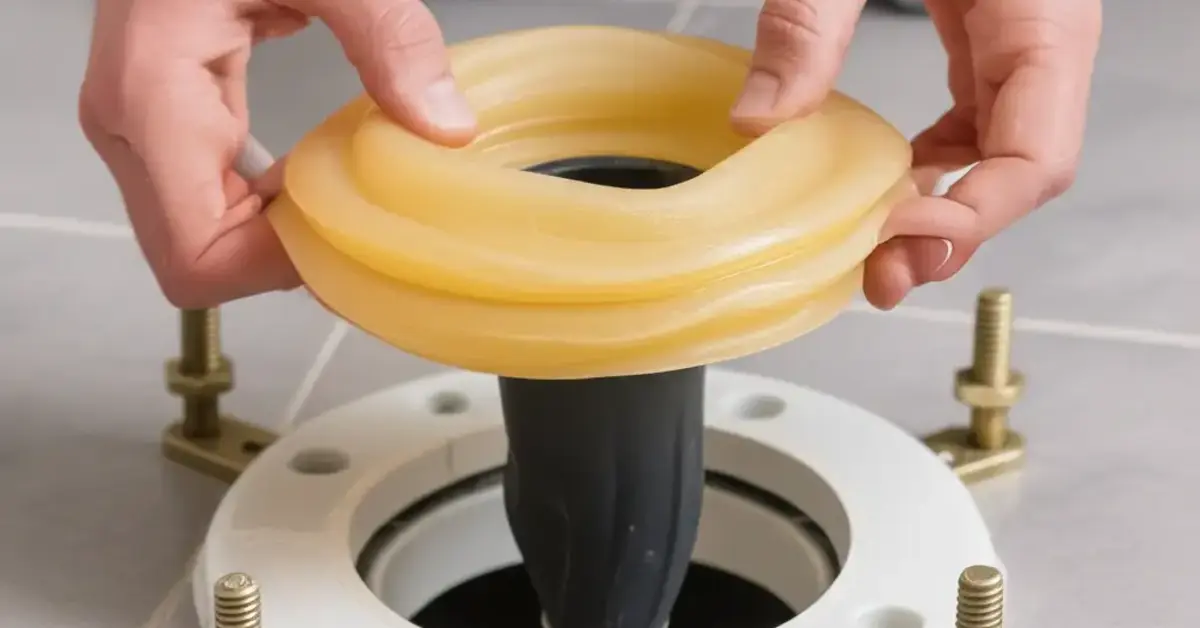
A wax ring is a donut-shaped seal that sits between the base of your toilet and the drain flange in the floor. It creates a watertight, airtight connection so waste flows straight down into the pipe instead of leaking out around the base.
The wax compresses slightly when the toilet is set on top of it, filling small gaps between the flange and the toilet’s horn, the short pipe on the bottom of the bowl. Without a good seal here, water and sewer gas can escape every time you flush. This is exactly why learning how to install a toilet wax ring correctly matters more than most people expect.
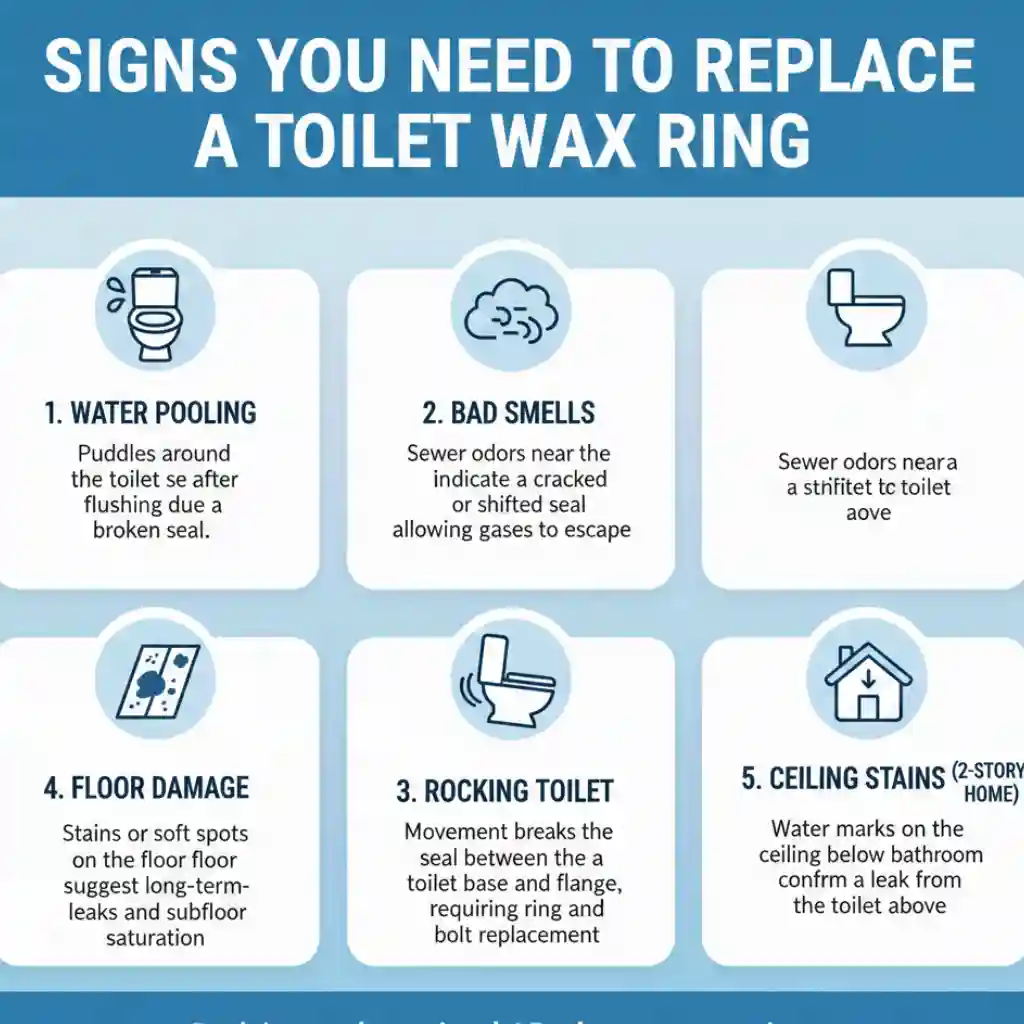
Signs You Need to Replace a Toilet Wax Ring
A few clear signs point to a failed wax seal:
- Rocking or wobbling toilet, even after tightening the bolts
- Water pooling around the base after a flush
- A persistent sewer smell in the bathroom that air freshener doesn’t fix
- Water stains or soft flooring near the toilet base
- Visible wax residue where the toilet meets the floor
Any one of these is reason enough to check the seal. Left alone, a bad wax ring can lead to water damage in the subfloor, which turns a simple fix into a much bigger repair.
Tools and Materials You'll Need
Before you start, gather everything so you’re not searching mid-project with the toilet off its base.
- New wax ring (standard or wax-free with a flange)
- Adjustable wrench
- Putty knife or scraper
- Rags or old towels
- Bucket
- New toilet bolts and a wax ring kit with washers
- Work gloves
- A sponge for the last bit of water in the tank and bowl
How to Choose the Right Toilet Wax Ring
Not every wax ring fits every setup. A few things determine which one you need.
Standard wax rings work for most installations where the flange sits level with or slightly below the finished floor. Extra-thick wax rings are better if your flange sits lower than the floor, which is common after a new tile or flooring installation raises the floor height.
Wax-free rings, usually made of rubber or foam with a built-in flange, are a solid option if you’ve had wax ring issues before, or if you want a mess-free installation. They cost a bit more but seal just as well in most cases.
Check your flange height before buying. A ring that’s too thin won’t seal properly, and one that’s too thick can lift the toilet unevenly.
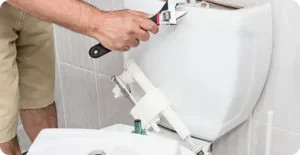
How to Install a Toilet Wax Ring: Step-by-Step Guide
Follow these steps in order for a clean, leak-free install.
- Turn off the water supply at the shutoff valve behind the toilet, then flush to drain the tank.
- Disconnect the water line and sponge out any remaining water in the tank and bowl.
- Remove the bolt caps and nuts at the base of the toilet using your wrench.
- Lift the toilet straight up and set it aside on old towels to protect your floor.
- Scrape off the old wax from the flange and the toilet horn using a putty knife.
- Inspect the flange for cracks or damage. A cracked flange needs repair before you continue.
- Stuff a rag into the drain opening temporarily to block sewer gas while you work.
- Set new bolts into the flange slots so they stand straight up and stay in place.
- Remove the rag, then press the new wax ring onto the toilet horn or directly onto the flange, following the product’s instructions.
- Lower the toilet straight down onto the flange, lining up the bolt holes with the bolts.
- Press down firmly and evenly to compress the wax and seat the toilet fully.
- Add washers and nuts to the bolts and tighten by hand, then finish with a wrench, alternating sides so the toilet sits level.
- Reconnect the water line and turn the supply back on.
- Flush and check for leaks around the base, and rock the toilet gently to confirm it’s stable.
This process works whether you’re doing a full toilet wax ring install for a repair or setting up a brand-new toilet for the first time.
You can read about: How to Install a Toilet
Common Mistakes to Avoid
A few missteps cause most wax ring failures:
- Overtightening the bolts, which can crack the porcelain base
- Rocking the toilet after it’s set, which breaks the wax seal before it’s had time to hold
- Skipping the flange inspection, missing a crack that will leak no matter how good the new wax ring is
- Using the wrong thickness, leading to a seal that’s too thin or a toilet that sits unevenly
- Reusing old bolts, which are often corroded and prone to snapping
Knowing how to install toilet wax ring correctly means slowing down at each step instead of rushing to get the toilet back in place.
Toilet Wax Ring Problems After Installation
Even a careful install can run into trouble. If you notice leaking after the job is done, check these first:
- The toilet may not have been pressed down firmly enough to compress the wax fully.
- The flange bolts might be loose, letting the toilet shift slightly with use.
- The wax ring size may not match your flange height.
- The flange itself could be cracked or sitting at the wrong height for your floor.
Most of these issues show up within the first few flushes, so test the toilet thoroughly before considering the job finished.
How Long Does a Toilet Wax Ring Last?
A properly installed wax ring typically lasts 20 to 30 years under normal use. It usually only fails early if the toilet gets rocked or bumped repeatedly, if the flange was already damaged, or if the wrong ring size was used from the start.
If you’re replacing a toilet or noticing wobble and odor, there’s a good chance the original seal has simply reached the end of its life. That’s the most common reason homeowners search for how to set toilet on wax ring instructions in the first place.
When to Call a Professional
Some situations go beyond a DIY wax ring swap. Call a plumber if you find a cracked or rotted flange, soft or damaged subflooring under the toilet, a toilet that keeps leaking after two attempts, or a sewer line issue causing recurring odor even with a fresh seal.
A damaged flange especially isn’t something to patch temporarily. It needs a proper repair or flange extender kit installed by someone who can confirm the fix will hold.
Professional Toilet Installation and Repair in Eagle Rock
If your wax ring keeps failing, your flange is damaged, or you’d rather leave the job to someone experienced, Derks Plumbing offers reliable Toilet Installation in Eagle Rock with same-day availability for most repairs. Our technicians handle everything from a simple wax seal replacement to a full toilet swap, including flange repair when the subfloor or drain connection needs attention.
A properly installed toilet, set correctly on a matched wax ring, should give you decades without another leak.

Conclusion
Learning how to install a toilet wax ring saves you money and solves one of the most common bathroom problems homeowners run into. Turn off the water, work through each step carefully, and don’t rush the part where you press the toilet down onto the new seal. Once you’ve done it once, how to install a toilet wax ring stops feeling like a mystery and becomes a five-tool job you can handle in under an hour. If you run into a cracked flange or repeated leaks after trying it yourself, that’s the signal to bring in a professional instead of guessing again.
FAQs
How to install a toilet wax ring without making a mess?
Keep the old wax ring’s cardboard backing in place until you’re ready to set it, and work with rags nearby to catch any wax that squeezes out during installation.
How to install wax seal on toilet if the flange is below floor level?
Use an extra-thick or double wax ring, or add a flange extender kit to bring the connection point up to the right height.
Can I reuse a wax ring if I remove the toilet and put it back?
No. Once a wax ring is compressed, it won’t reseal properly. Always use a new one anytime the toilet comes off its base.
How to set toilet on wax ring correctly the first time?
Lower the toilet straight down without shifting it side to side, then press firmly and evenly across the base to compress the wax fully.
How long can I wait after removing a toilet before installing a new wax ring for toilet installation?
It’s best to complete the job the same day. Leaving the flange exposed too long increases the chance of sewer gas smell and debris getting into the opening.