To install a thermocouple on a water heater, you must turn off the gas, disconnect the burner assembly, swap out the old line, and hook up the new part. Doing this fix yourself takes about 45 minutes and saves a costly repair bill.
If your pilot light keeps going out, this guide shows you how to install a thermocouple on a water heater safely. Using our real-world experience at Derks Plumbing, we will walk you through the process step by step so you can get your hot water back today.
What Is a Thermocouple?
A thermocouple is a small metal safety sensor located right next to your pilot light flame. It converts heat from the flame into a tiny bit of electric current. This electrical signal tells the gas valve that a flame is burning.
As long as the valve receives this signal, it keeps the gas line open. If the pilot flame goes out, the sensor cools down instantly. The electric current stops, and the valve shuts off the main gas supply. This simple mechanism stops raw gas from leaking into your home.
Signs You Need to Replace a Water Heater Thermocouple
Before pulling the unit apart, confirm the thermocouple is actually the problem.
Pilot lights but goes out when you release the button. This is the clearest sign. You hold the pilot button, the flame appears, but the moment you let go, it dies. A functioning thermocouple holds the valve open after you release.
No hot water and the pilot is out. If the pilot won’t relight at all, the thermocouple might be the issue — but so could the gas supply or the control valve. Confirm gas is flowing to other appliances first.
Pilot flame is weak or yellow instead of blue. A properly positioned thermocouple sits in a strong blue flame. A weak or yellow flame doesn’t generate enough heat to produce the required voltage.
The thermocouple tip looks black or coated. Carbon buildup on the thermocouple tip insulates it from the heat of the pilot flame. This is a sign the part needs to be replaced or at minimum cleaned.
Before replacing, it’s worth trying to clean a thermocouple first if the unit is relatively new. Use fine steel wool or emery cloth to lightly buff the tip. Sometimes carbon buildup is the entire problem, and cleaning restores full function without any parts cost.
Tools and Materials Needed
Gather everything before starting. Having to stop mid-job to find a tool wastes time and leaves the gas system partially disassembled.
Tools:
- Adjustable wrench or open-end wrenches (5/16 inch and 3/8 inch are most common)
- Needle-nose pliers
- Flathead and Phillips screwdrivers
- Fine steel wool or emery cloth (for cleaning the tip if needed)
- Flashlight or headlamp
- Gas leak detection solution or spray (soapy water works)
Materials:
- Replacement thermocouple match the length to the original, or use a universal thermocouple kit
A note on universal thermocouples: These are widely available at hardware stores and online for $10 to $25. They include multiple adapter fittings and work on most residential gas water heaters regardless of brand. If you can’t find the exact OEM part for your unit, a universal thermocouple is a reliable substitute. Confirm the length matches most residential units use a 24-inch thermocouple, but 18-inch and 30-inch versions also exist.
Safety Precautions
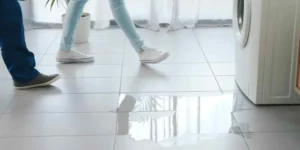
Working with gas appliances requires total focus on safety. Gas leaks can cause major household hazards. Always make sure your workspace is clear of clutter and well-ventilated. If you smell gas at any point during this project, stop immediately, leave the house, and call emergency services.
Step-by-Step Guide: How to Install a Thermocouple on a Water Heater
Follow these specific steps in order to ensure your hot water heater is fixed safely and properly.
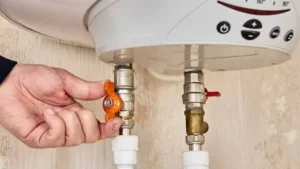
Step 1: Turn Off the Gas Supply
Locate the gas control valve on the front of the tank. Turn the dial on top from “ON” to the “OFF” position. Next, find the manual gas shut-off valve on the incoming metal pipe next to the water heater. Turn the handle 90 degrees so it runs crosswise to the pipe. This shuts off all gas flowing to the appliance. Wait at least 10 minutes for any trapped gas to clear out completely before moving to the next step.
Step 2: Remove the Access Panels
Look at the very bottom of the water heater tank. Remove the outer metal door by sliding it up or taking out the small screws holding it in place. Behind it, you will see an inner burner door. This inner shield usually has two tabs or clips. Remove it carefully to reveal the inner burner chamber where the actual flame sits.
Step 3: Disconnect the Burner Assembly
Three separate tubes connect the bottom of the gas control valve to the burner inside the tank: the main gas supply tube, the small pilot line, and the copper thermocouple line.
Use an open-ended wrench to loosen the nuts holding these three lines to the bottom of the valve. Turn them counter-clockwise. Label each line if you worry about forgetting where they go. Once disconnected, slide the entire burner assembly out of the bottom chamber.
Step 4: Remove the Old Thermocouple
With the burner assembly out on the floor, trace the copper line to the bracket next to the pilot burner. The tip is held in place by a small clip or friction fit bracket.
Gently pull or unscrew the old part out of its mounting slot. Be careful not to bend the bracket. Take note of how deep the tip sat in the bracket so you can match it with the new part.
Step 5: Install the New Thermocouple
Take your new part out of the package. If you bought universal thermocouples, uncoil the copper line carefully. Do not kink or sharply bend the wire, as this can break the internal mechanism.
Push the tip of the new piece up into the mounting bracket until it snaps into place. The top 3/8 of an inch of the tip must sit exactly where the pilot flame will hit it.
Step 6: Reinstall the Burner Assembly
Slide the complete burner assembly back into the bottom of the water heater tank. Make sure the burner sits flat and hooks into its rear anchor slot inside the chamber.
Line up the three tubes with the bottom of the gas control valve. Start threading the nuts by hand to avoid cross-threading. Use your wrench to tighten them up firmly, but do not over-tighten them, or you might crack the brass connections.
Step 7: Restore Gas Supply
Turn the manual gas valve handle back so it aligns with the pipe. This lets gas flow to the control valve again. Before lighting the unit, mix a few drops of dish soap with water in a small cup. Wipe the soapy water onto the connections you just tightened. If you see growing bubbles, you have a leak. Tighten the nut slightly more until the bubbles stop completely.
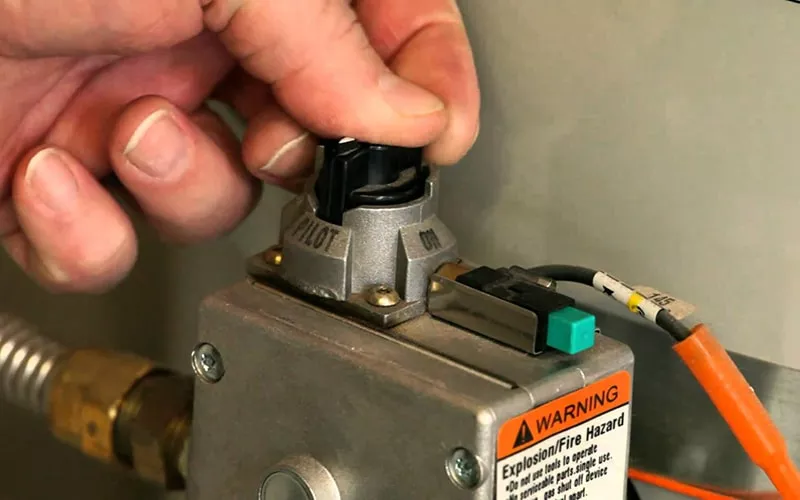
Step 8: Test the Water Heater
Turn the gas control valve knob to the “PILOT” position. Press down firmly on the knob to start the gas flow through the pilot line. While holding it down, use a long lighter to light the pilot flame at the burner tip, or click the built-in spark igniter button if your unit has one.
Keep holding the knob down for 60 seconds. This gives the new copper sensor enough time to heat up and send the electric signal. Release the knob slowly. The pilot flame should stay burning. Finally, turn the main knob to “ON” and set your desired temperature. The main burner will ignite with a smooth roar.
You can read about: Can Tankless Water Heater Be Installed Outside
Can You Clean a Thermocouple Instead of Replacing It?
Yes and it’s always worth trying before buying a new part.
A thermocouple tip covered in carbon buildup can’t absorb heat effectively. Cleaning it sometimes restores full function.
How to clean a thermocouple:
Turn off the gas and wait 10 minutes. Remove the thermocouple tip from the pilot bracket — no need to disconnect the other end. Lightly buff the tip with fine steel wool or 400-grit emery cloth. Remove the dark carbon layer until the copper tip is clean and bright. Reinstall and test.
This takes five minutes and costs nothing. If cleaning restores pilot function, the thermocouple still has service life left. If it fails again within a few weeks, the part is worn and needs full replacement.
Common Mistakes to Avoid
Bending the thermocouple sharply. A kinked rod restricts the thermocouple’s ability to expand with heat. It also weakens the rod at the bend and can cause premature failure.
Positioning the tip beside the pilot flame instead of in it. The tip must be directly in the flame to reach operating temperature. Off-center positioning produces low voltage the pilot lights but won’t hold.
Overtightening the connection at the gas control valve. Brass threads strip easily. Snug is enough. If you strip the valve fitting, you’ve turned a $15 repair into a $200 control valve replacement.
Skipping the leak test. Every gas connection must be tested after reassembly. Skipping this step because “everything feels tight” is how gas leaks happen.
Using the wrong length thermocouple. A thermocouple that’s too short won’t reach the pilot assembly correctly. One that’s too long creates excess slack that can shift the tip out of position. Match the length to the original.
Not holding the pilot button long enough. The thermocouple needs 30 to 60 seconds of direct flame contact to generate enough voltage. Releasing the button at 10 or 15 seconds almost always results in the pilot going out not because the installation failed, but because the part hasn’t warmed up yet.
How to Install a Thermocouple on Different Water Heater Brands
The process for how to install a thermocouple on a water heater is consistent across most brands but minor differences exist.
Bradford White and Rheem: Standard three-connection burner assembly. Thermocouple tip held by a compression fitting at the pilot bracket. Universal thermocouples fit these with standard adapters.
A.O. Smith: Similar setup to Bradford White. Some models have a slightly different pilot bracket clip design — confirm the tip seats fully before reassembly.
State and American: Often identical internally to A.O. Smith products. The same process applies.
Older units with a standing pilot (no electronic ignition): Require a match or lighter to light the pilot rather than an ignitor button. The thermocouple installation process is identical.
Power vent or direct vent models: Thermocouple installation is the same. The venting system is separate from the thermocouple circuit.
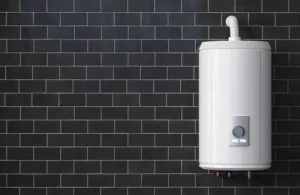
How Long Does a Water Heater Thermocouple Last?
A thermocouple in normal operation lasts 6 to 10 years. Several factors affect that range:
Pilot flame quality. A weak or incorrectly adjusted pilot flame that doesn’t fully engulf the thermocouple tip shortens its life. The tip runs cooler than intended and the cycling causes stress.
Gas supply quality. Contaminated or inconsistent gas supply can affect pilot combustion and thermocouple performance over time.
Hard water and humidity. In high-humidity environments, corrosion on the tip builds faster. Annual inspection of the tip and cleaning if needed extends service life.
Water heater age. On a unit that’s 10 or more years old, the thermocouple failing is often the first of several component failures. If the unit is past 10 years, evaluate whether a full replacement makes more sense than parts replacement.
When to Call a Professional
If you complete these steps and your pilot still goes out, the issue might be a broken gas control valve or a clogged burner port. If you feel unsure about handling gas lines, it is always best to let an expert take over.
For reliable assistance, you can schedule a professional Water Heater Installation in Eagle Rock through our licensed team at Derks Plumbing. We will diagnose the issue and ensure your system runs safely.

Final Thoughts
A failing thermocouple is one of the simplest gas water heater repairs you can do yourself. The parts are inexpensive, the tools are basic, and the steps are clear when you take them one at a time. How to install a thermocouple on a water heater comes down to safe gas handling, correct tip positioning, proper connections, and a thorough leak test before relighting.
Do it right and the repair lasts years. Skip the safety steps and you create a problem that’s much bigger than a pilot that won’t stay lit.
FAQs
Q: How long does it take to install a thermocouple on a water heater?
Most homeowners complete the job in 30 to 45 minutes. A plumber familiar with the process does it in under 20 minutes. The longest part is usually waiting for gas to dissipate after shutoff.
Q: Can I use a universal thermocouple on my water heater?
Yes. Universal thermocouples include multiple adapter fittings and work on most residential gas water heaters. Match the length to your original thermocouple and select the correct adapter for your gas control valve type.
Q: Why does my pilot light go out when I release the button even after replacing the thermocouple?
The most common reason is the thermocouple tip not being positioned directly in the pilot flame, or not holding the pilot button long enough during lighting. The tip needs 30 to 60 seconds of direct flame contact to generate sufficient voltage. If the tip position is correct and it still fails, the gas control valve may be the actual problem.
Q: How do I know if I need to clean or replace my thermocouple?
Try cleaning first. Buff the tip with fine steel wool and retest. If the pilot holds after cleaning, cleaning was enough. If it fails again within a few weeks, replace the thermocouple.
Q: Is it safe to install a thermocouple on a water heater myself?
Yes, for most homeowners provided you turn off the gas supply fully, wait for residual gas to clear, test all connections for leaks after reassembly, and don’t proceed if you smell gas at any point during the job.