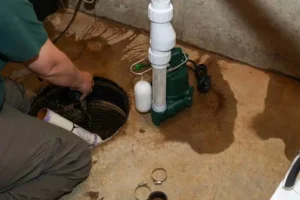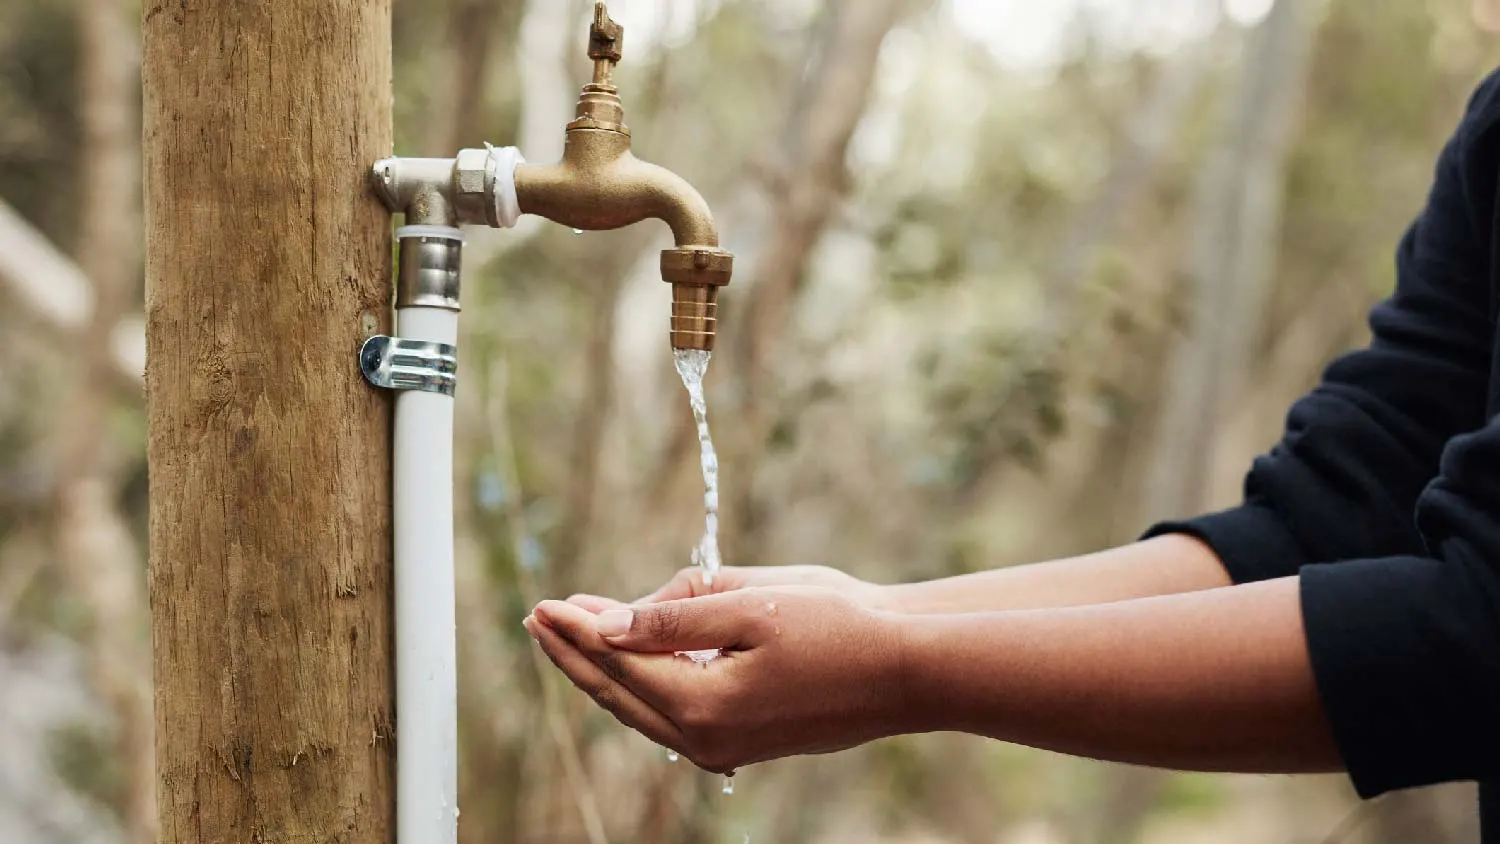
Your outdoor faucet is dripping and winter is coming. That small drip is not just wasting water. It is a warning sign that something inside the faucet has worn out. Most frost free faucet problems are caused by a bad washer, worn packing, or a failed vacuum breaker. Each one costs under $15 to fix with basic tools.
Knowing how to repair a frost free faucet correctly saves you from frozen pipes, water damage inside your wall, and an emergency plumber bill. This guide covers every problem, every repair step, and every situation where a pro makes more sense than DIY.
What Is a Frost Free Faucet?
A frost free faucet is a special outdoor spigot built to prevent freezing in cold weather.
A standard outdoor faucet shuts off water right at the spout. When temperatures drop, that water in the spout freezes and expands. Pipes crack. Water floods inside the wall. That is an expensive problem.
A frost free faucet works differently. It has a long stem, usually 8 to 12 inches, that extends deep into the wall. The actual water shutoff happens inside the warm part of your home. When you turn the faucet off, water drains out of the cold outdoor section through the spout. No water sits in the cold zone. No freezing.
It is also called a frost proof faucet, a sillcock, or an anti-siphon faucet. All of these names describe the same basic design. The anti-siphon feature, handled by a vacuum breaker at the top of the faucet, prevents contaminated water from being pulled back into your home’s water supply.
Understanding this design is important. When something goes wrong, the fault almost always traces back to one of three parts: the seat washer, the packing, or the vacuum breaker. Knowing which one failed tells you exactly what to buy and what to fix.
Common Problems With Frost Free Faucets
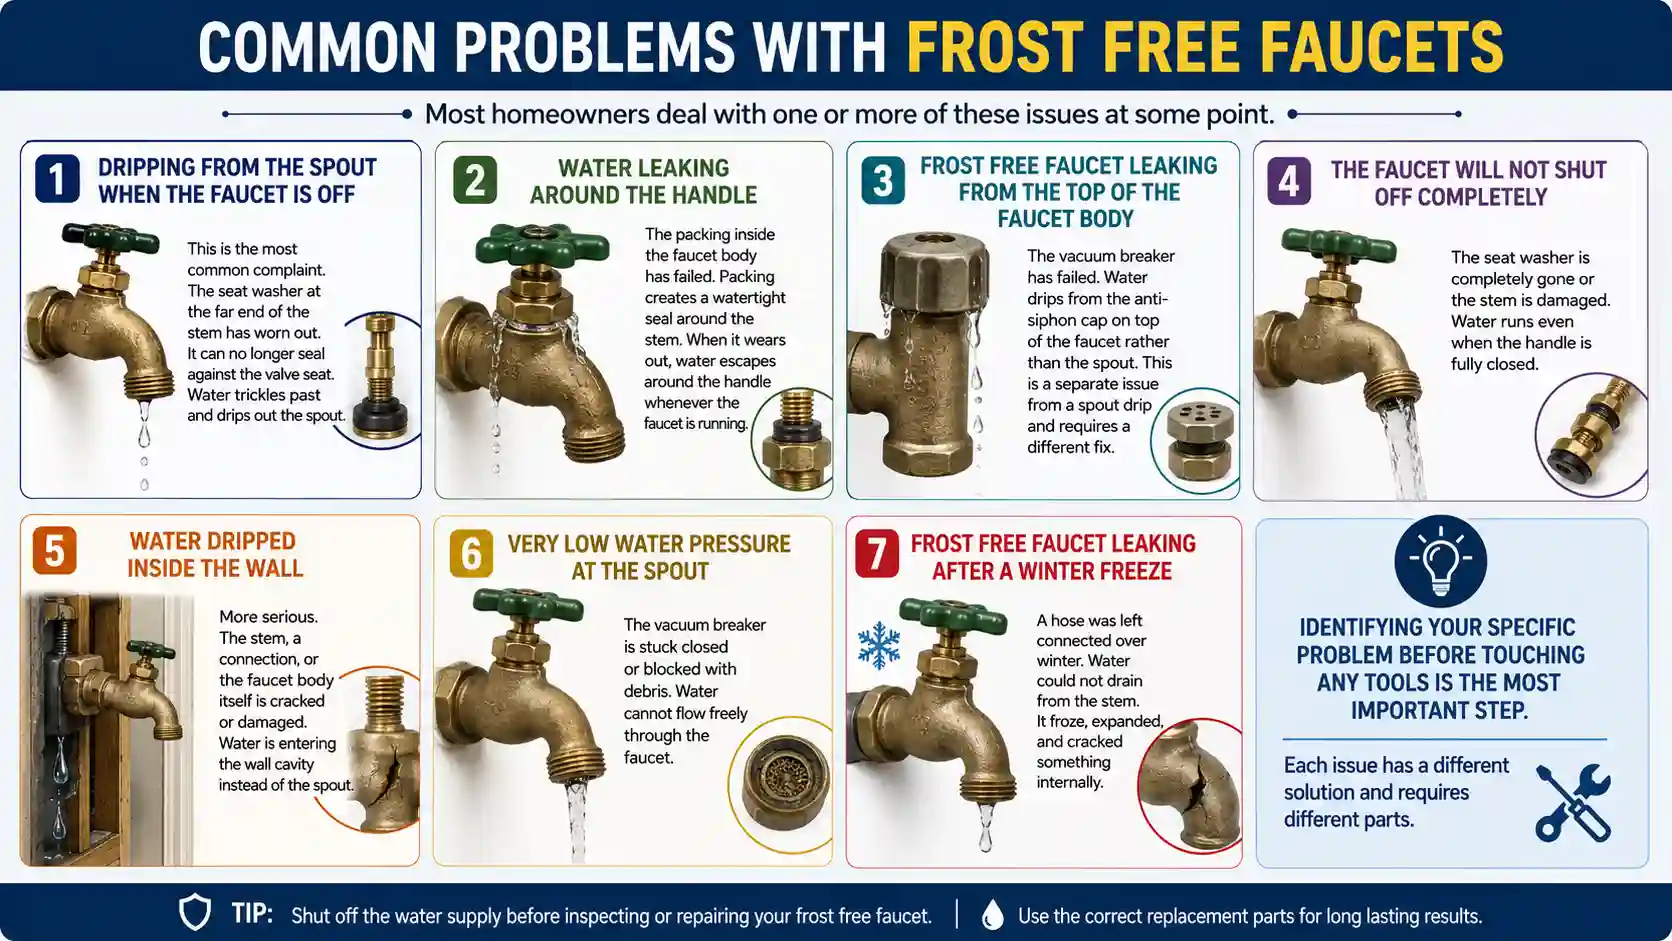
Most homeowners deal with one or more of these issues at some point.
Dripping from the spout when the faucet is off. This is the most common complaint. The seat washer at the far end of the stem has worn out. It can no longer seal against the valve seat. Water trickles past and drips out the spout.
Water leaking around the handle. The packing inside the faucet body has failed. Packing creates a watertight seal around the stem. When it wears out, water escapes around the handle whenever the faucet is running.
Frost free faucet leaking from the top of the faucet body. The vacuum breaker has failed. Water drips from the anti-siphon cap on top of the faucet rather than the spout. This is a separate issue from a spout drip and requires a different fix.
The faucet will not shut off completely. The seat washer is completely gone or the stem is damaged. Water runs even when the handle is fully closed.
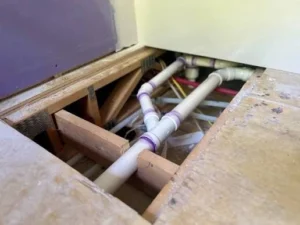
Water dripped inside the wall. More serious. The stem, a connection, or the faucet body itself is cracked or damaged. Water is entering the wall cavity instead of the spout.
Very low water pressure at the spout. The vacuum breaker is stuck closed or blocked with debris. Water cannot flow freely through the faucet.
Frost free faucet leaking after a winter freeze. A hose was left connected over winter. Water could not drain from the stem. It froze, expanded, and cracked something internally.
Identifying your specific problem before touching any tools is the most important step. Each issue has a different solution and requires different parts.
Tools and Materials Needed
You do not need special plumbing experience or an expensive toolkit. Here is what you actually need.
Tools:
- Adjustable wrench or channel-lock pliers
- Phillips head screwdriver
- Flathead screwdriver
- Needle-nose pliers
- Utility knife
- Bucket or old towel
Materials:
- Replacement seat washer (bring the old one to match)
- Replacement packing washer or graphite packing string
- Vacuum breaker repair kit (if that is the problem)
- Plumber’s grease or petroleum jelly
- Teflon tape
- Hose bib repair kit (optional but covers most parts in one purchase)
A hose bib repair kit from any hardware store costs $8 to $15 and typically includes washers, O-rings, and packing material for standard faucet sizes. If your faucet is a common brand like Woodford, BrassCraft, or Mueller, these kits are widely available. For older or less common faucets, bring the old parts to the store to match them.
Buy materials after you diagnose the problem, not before. Guessing and buying the wrong parts wastes time and money.
Step-by-Step Guide on How to Repair a Frost Free Faucet
Follow these steps in order. Do not skip any step to save time.
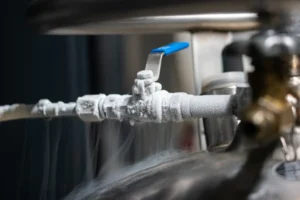
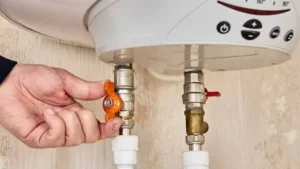
Step 1: Turn Off the Indoor Water Supply
Find the shutoff valve for your outdoor faucet. It is usually in the basement, utility room, or crawl space on the pipe that runs to the outdoor spigot. Turn it fully clockwise.
Go outside and open the faucet. This releases pressure in the line and drains remaining water from the stem. Water will flow briefly and then stop. Have your towel or bucket ready.
If you cannot find the individual shutoff valve, turn off the main water supply to the home. Do not attempt any disassembly with water pressure on the line.
Step 2: Remove the Handle
Look at the faucet handle. Most frost free faucets have a screw securing the handle to the stem. That screw is either visible on the front, on top, or hidden under a plastic cap.
Pry off any decorative cap with a flathead screwdriver. Remove the screw with the appropriate driver. Pull the handle straight off. If it does not come easily, wiggle it gently while pulling. Do not force it.
Set the handle and screw somewhere you will not lose them.
Step 3: Loosen and Remove the Packing Nut
With the handle off, you will see a large hexagonal nut directly behind the handle position. This is the packing nut. It holds the entire stem assembly inside the faucet body.
Use your adjustable wrench to turn it counterclockwise. On older faucets, this nut can be very tight. Apply firm, steady pressure. Once loose, remove it by hand and set it aside.
Step 4: Pull Out the Stem Assembly
Grip the exposed stem and pull it straight out. On a frost free faucet, the stem is long. It extends 8 to 12 inches back into the wall. Pull it out completely.
Lay the stem on a flat surface. You will now inspect two specific areas: the washer at the far end and the packing near the nut end.
Step 5: Replace the Seat Washer
Look at the rubber washer at the far tip of the stem. This is the seat washer. It presses against the valve seat inside the faucet body to shut off water flow.
A worn washer looks flattened, cracked, grooved, or hard. A good washer is soft, flat, and has clean defined edges. If it looks worn at all, replace it.
Remove the brass screw holding the washer in place. Take the old washer to the hardware store and match it by diameter, thickness, and shape. An exact match is important. A washer that is even slightly wrong will not seal correctly.
Install the new washer. Tighten the brass screw firmly but carefully. Apply a thin coat of plumber’s grease to the new washer. This helps it seal better and extends its life.
Step 6: Replace the Packing
Inspect the packing material near the nut end of the stem. Packing is either a rubber O-ring, a graphite packing washer, or packing string wrapped around the stem.
Worn or compressed packing is what causes water to leak around the handle when the faucet runs. If the packing looks flat, cracked, or has visible gaps, replace it.
For O-ring style packing: use needle-nose pliers to remove the old O-ring from its groove. Roll the new one into place. Apply plumber’s grease to the new O-ring before reassembly.
For packing string: remove all old material from around the stem. Wrap the new packing string clockwise around the stem several times at the packing point. Use enough material to fill the inside of the packing nut when snugged down.
Step 7: Inspect the Vacuum Breaker
The vacuum breaker sits on top of the faucet body, usually as a small threaded cap. It is an anti-siphon device that prevents backflow.
Unscrew the cap counterclockwise. Inside you will find a small rubber disk, a spring, and sometimes a small plastic piece. These components prevent water from being siphoned back into your supply line.
Inspect the rubber disk carefully. If it is cracked, deformed, or stiff, it needs replacement. Clean any debris from inside the housing with a small brush and water. Install a replacement vacuum breaker kit if any components are damaged. These kits cost $3 to $10 at any hardware store.
If water was dripping from the top of the faucet rather than the spout, this is almost certainly what caused it.
Step 8: Reassemble Everything
Slide the stem back into the faucet body carefully. Make sure it goes in straight. Thread the packing nut onto the faucet body by hand first. Then tighten with your wrench. Snug and firm is correct. Do not overtighten. The threads on frost free faucets are often plastic or soft brass. Overtightening cracks them.
Reinstall the handle. Tighten the handle screw. Replace the decorative cap if there was one.
Step 9: Turn the Water On and Test
Open the indoor shutoff valve slowly. Go outside and turn the faucet on. Let it run for 30 seconds. Then shut it off.
Check the spout. Is it dripping after a minute? Check around the handle while the water runs. Any moisture? Check the vacuum breaker cap for drips.
If everything is dry and the faucet shuts off cleanly, the repair is complete. You now know how to repair a frost free faucet from start to finish.
You can read about: How to Repair Bathtub Faucet Diverter
How to Repair a Frost Free Faucet That Won’t Shut Off
A faucet that will not shut off fully is a specific problem that needs its own diagnosis.
The washer is completely gone. When a seat washer deteriorates fully, there is nothing left to press against the valve seat. Water flows freely regardless of handle position. The fix is straightforward: replace the washer following the steps above.
The valve seat is damaged. Even a new washer cannot seal against a pitted or corroded valve seat. If replacing the washer does not stop the flow, the seat is the problem. Use a seat dressing tool or seat grinder, available at hardware stores for $15 to $25. Insert it into the faucet body, turn it a few times, and the hardened steel grinder smooths the brass seat surface. After resurfacing, install a new washer and test again.
The stem threads are stripped. If the handle turns endlessly without any resistance, the stem threads inside the faucet body have stripped. The stem cannot advance or retract to close the washer against the seat. This requires full faucet replacement. The body cannot be repaired once threads are stripped.
The handle mechanism is broken. On some older faucets, the connection between the handle and the stem breaks. The handle turns freely but does not move the stem. Inspect the connection point. A replacement handle with the correct stem connection fixes this in most cases.
A frost free faucet repair for a faucet that will not shut off usually takes 30 to 60 minutes total. Getting the diagnosis right before buying parts is the key to fixing it on the first try.
How to Do Frost Proof Faucet Repair for a Leaking Vacuum Breaker
This specific repair is worth covering in detail because many homeowners do not know the vacuum breaker exists until it fails.
Symptoms of vacuum breaker failure include water dripping from the top of the faucet body rather than the spout, water running continuously even after the handle is closed, and reduced water pressure at the spout.
The vacuum breaker on most frost free faucets is accessed by unscrewing the cap on top of the faucet assembly. It is separate from the handle and packing nut.
Remove the cap. Inside you will find a rubber disk, a spring, and a plastic insert on some models. The rubber disk seals against the housing. When it wears out or cracks, water bypasses the seal and leaks out the cap area.
Clean the housing interior with a small brush and clean water. Remove all debris and mineral deposits. Insert the replacement components from a vacuum breaker repair kit. Thread the cap back on and tighten snugly.
Turn the water on and test. If the drip from the top stops and pressure is normal, the repair works. If the housing itself is cracked, the entire faucet needs replacement. No repair kit fixes a cracked housing.
How to Repair a Frost Free Faucet With a Freeze Damaged Stem
This is the most serious DIY repair and the one most often caused by leaving a hose connected in winter.
When a hose is left connected, the anti-freeze design cannot work. Water stays trapped in the stem. It freezes, expands, and either cracks the stem, cracks the vacuum breaker housing, or damages the washer seat area.
To assess freeze damage: remove the stem following the steps above. Inspect it visually. Look for cracks, splits, or kinks in the metal tube. Run your finger along the inside of the faucet body to feel for roughness or damage that was not caused by normal wear.
A cracked or bent stem needs full replacement. Take the old stem to a plumbing supply store. Match the length, diameter, and thread pattern exactly. Install the new stem following the reassembly steps above.
If the faucet body itself is cracked, replacement is the only fix. A cracked body cannot be repaired reliably. Water will continue finding its way through any crack under pressure.
Full faucet replacement is not a difficult job. Shut off the water, remove the old unit, wrap the threads with Teflon tape, and install the new one. It takes about 45 minutes for most homeowners.
Preventing Future Frost Free Faucet Problems
The best repair frost free faucet situation is the one you prevent entirely. These habits stop most problems before they start.
Disconnect hoses every fall. This is the most important habit. A hose left connected blocks the self-draining design of the faucet. Water stays in the stem. One overnight freeze is all it takes to crack something. Make this a fall routine without exception.
Turn off the indoor shutoff valve during extreme cold. If temperatures are expected to drop well below freezing for extended periods, shut off the supply to the outdoor faucet entirely. Open the spout to drain all remaining water.
Inspect the vacuum breaker each spring. Turn the faucet on and check that water flows with normal pressure. If pressure seems lower than the year before, the vacuum breaker is likely clogging or failing. Catch it early before it causes a drip.
Check for drips seasonally. A small drip caught in fall means a $10 washer before winter. The same drip ignored through winter can mean a cracked stem and a wall full of water in spring. Quarterly checks take 5 minutes.
Do not force the handle closed. When the faucet is fully shut, stop turning. Applying extra force to a closed faucet compresses the washer beyond its design. It flattens and hardens faster. Turn until it stops. Nothing more.
Use a faucet cover in extreme climates. Foam insulating covers for outdoor faucets cost $3 to $8. They add a layer of insulation around the faucet body for extreme cold. They do not replace disconnecting hoses but add protection for very cold nights.
Signs You Should Replace Instead of Repair
Some situations make replacement smarter than continued repair.
The faucet body is visibly cracked. Any crack in the main body under water pressure will continue leaking. No sealant or patch holds reliably against constant water pressure. Replace the unit.
The same washer keeps failing. If you replace the seat washer and it fails again within a few months, the valve seat is damaged. Attempt seat resurfacing. If the seat cannot be repaired, replace the faucet.
The stem threads inside the body are stripped. No parts fix this. The faucet cannot be reassembled with a reliable shutoff. Replace it.
The faucet is more than 20 years old with multiple failures. At a certain point, the cost of repeated repairs exceeds the cost of a new $35 to $60 faucet. If you are on your third or fourth repair of the same unit, replace it.
Parts for your model are no longer available. Older discontinued faucet brands sometimes have no available replacement parts. If you cannot find a matching stem, washer, or vacuum breaker, install a new unit. Modern frost free faucets are better designed and longer lasting anyway.
Why Professional Plumbing Help May Be Necessary
Repair a frost free faucet yourself works well for most homeowners. But some situations genuinely need a licensed plumber.
Water inside the wall. If you see water stains, soft drywall, or mold on the interior wall near the faucet location, the leak has been running into the wall cavity for some time. A plumber needs to open the wall, find the source, repair or replace affected pipe sections, and assess any mold damage. This is not a DIY repair.
The indoor shutoff valve does not work. A corroded or seized shutoff valve cannot be replaced without turning off the main supply and working with live plumbing. If your shutoff valve is stuck or leaking, have a plumber replace it properly.
Freeze damage to the pipe behind the wall. If the stem froze and cracked, the pipe section it connects to may also be cracked. A plumber needs to access and inspect the interior pipe section before you can safely use the faucet again. Running water through a cracked pipe floods the wall.
The faucet is in an unusual location. Some outdoor faucets are in tight crawl spaces, inside finished walls, or in other locations that make safe DIY work difficult. A professional has the tools and experience for confined space plumbing.
You are not comfortable with the repair. There is no shame in calling a professional. A bad repair on an outdoor faucet causes water damage that costs 10 to 100 times more to fix than the original plumbing call.
For Faucet Repair Services in Eagle Rock, the team at Derks Plumbing handles everything from simple washer replacement to full frost free faucet replacement. Our licensed plumbers diagnose the problem correctly the first time, fix it properly, and leave no mess behind. We serve Eagle Rock homeowners with transparent pricing and quality work you can count on. Do not let a small drip turn into a big repair bill. Call Derks Plumbing before winter arrives.

Final Thoughts
A dripping, leaking, or broken frost free faucet is one of the most fixable plumbing problems a homeowner faces. Most repairs take under 45 minutes and cost $5 to $20 in parts. The key is diagnosing the right problem before buying anything.
Now that you know how to repair a frost free faucet step by step, you have everything you need. Shut off the water, pull the stem, replace what is worn, reassemble carefully, and test thoroughly. Disconnect your hose every fall and you will rarely face this problem twice.
When the job is beyond basic repair, Derks Plumbing is ready to help.
Frequently Asked Questions
How to repair a frost free faucet that is dripping from the spout?
A spout drip almost always means a worn seat washer. Shut off the water, remove the stem, replace the rubber washer at the far end, reassemble, and test. The entire job takes 20 to 30 minutes for most homeowners with basic tools.
What causes frost free faucet leaking around the handle?
Handle leaks mean the packing has failed. The packing creates a watertight seal where the stem exits the faucet body. Replace the packing washer or wrap fresh packing string around the stem at the packing point. Tighten the packing nut snugly and test.
Can I do frost proof faucet repair without turning off the main water?
Only if you have a working individual shutoff valve for that faucet. Never disassemble a pressurized faucet. Water will spray immediately and cannot be controlled. Always confirm the water is off before removing any parts.
Why does my frost free faucet keep leaking after I replaced the washer?
The valve seat inside the faucet body is damaged. A worn or pitted seat prevents any washer from sealing. Use a seat dressing tool to resurface the seat. If the seat cannot be restored, replace the faucet body entirely.
How long does a frost free faucet repair take?
A simple washer or packing replacement takes 20 to 45 minutes. A vacuum breaker repair takes 15 to 30 minutes. A full stem replacement takes 45 to 60 minutes. Full faucet replacement takes 45 to 90 minutes depending on access.
Is frost free faucet repair a DIY job?
Yes for most common repairs. Washer replacement, packing replacement, and vacuum breaker repair are all beginner-friendly. Call a plumber if you see water damage inside the wall or if the indoor shutoff valve is also failing.
What happens if I leave a hose connected to a frost free faucet in winter?
The anti-freeze design stops working. Water cannot drain from the stem. It freezes, expands, and cracks the stem, vacuum breaker, or faucet body. This turns a $10 washer repair into a $200 to $500 repair. Disconnect hoses every fall without exception.