

When you pull the little lever on your tub spout, the water is supposed to stop running into the tub and start flowing out of the showerhead. If water keeps trickling or pouring out of the spout while you try to take a shower, you are dealing with a faulty diverter mechanism. It is a common household annoyance that wastes water and ruins your water pressure.
The good news is that learning how to repair bathtub faucet diverter systems is a straightforward DIY project that does not require a call to an expensive professional plumber. Most of the time, the issue comes down to a worn-out rubber gasket, mineral buildup, or a corroded internal valve that simply needs a quick cleaning or a cheap replacement part.
What Is a Bathtub Faucet Diverter and How Does It Work?
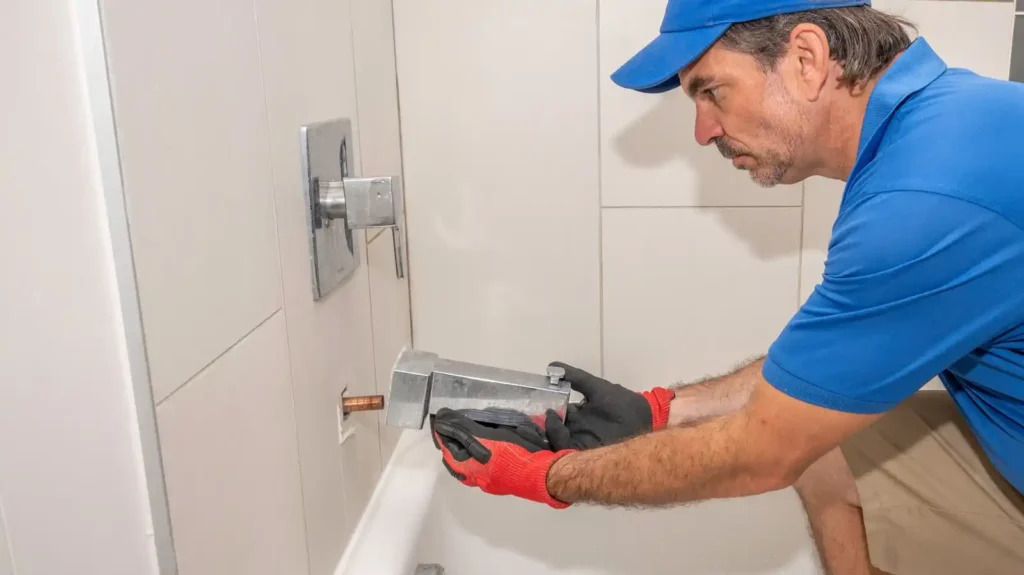
A bathtub faucet diverter redirects water flow between the tub spout and the showerhead. Pull up a small knob on the spout, or turn a third handle between the hot and cold controls, and water shifts from filling the tub to spraying overhead.
Inside, the diverter relies on a small gate, stem, or cartridge that blocks one path while opening another. Over time, mineral buildup, worn rubber seals, or a stripped mechanism can prevent that gate from sealing properly, which sends water leaking out the tub spout even when you want it flowing through the shower. Understanding this mechanism is the first real step in how to repair bathtub faucet diverter problems correctly, since knowing what’s inside tells you what to check first.
Bathtub Spout Diverter vs. Valve Diverter: What’s the Difference?
Before you pick up a tool, you need to look at your setup. Bathtub diverters come in a few distinct configurations, and knowing which one you have changes how you fix it.
1. Single-Valve Spout Diverter
This is the most common setup in standard homes. The diverter mechanism lives right inside the tub spout itself. It features a small gate attached to a pull-up pin on the top of the spout. When you pull the pin up, the gate blocks the spout opening.
2. Two-Valve Diverter System
Found in older homes or custom showers, this system features two separate handles on the wall: one for hot water and one for cold water. The diverter mechanism is housed in a central handle or lever between the hot and cold knobs. Turning this central handle moves an internal stem assembly that opens or closes the pathway to the showerhead.
3. Three-Valve Diverter System
This design features a hot water knob, a cold water knob, and a completely dedicated third handle right in the center. Turning that middle handle turns an internal cartridge that mechanically blocks the tub spout and opens the shower line.
Signs Your Bathtub Faucet Diverter Needs Repair
Watch for these common indicators:
- Water dribbling from the spout while the shower is running
- A diverter knob that won’t stay up or falls back down on its own
- Weak shower pressure even though the tub fills normally
- A diverter handle that feels loose or spins freely without engaging anything
- Visible mineral buildup around the spout or diverter knob
Any of these point to a shower diverter not working the way it should, and most are fixable without replacing the entire faucet.
Common Problems with a Bathtub Shower Diverter
A few recurring issues show up again and again in bathtub shower diverter repairs:
- Worn rubber seals or washers that no longer block water flow completely
- Mineral deposits restricting the gate or stem from moving freely
- A stripped or broken pull-up mechanism inside the spout
- A worn cartridge in valve-style diverters, similar to what causes a dripping faucet
- Corrosion on older metal components, especially in homes with hard water
Common Causes of a Faulty Bathtub Faucet Diverter
Most diverter failures trace back to normal wear combined with water quality. Hard water accelerates mineral buildup inside the mechanism, while age alone wears down rubber seals and gaskets over years of daily use.
Rough handling also plays a role. Forcing a stuck diverter knob or handle can crack internal components that would have otherwise lasted years longer with gentler use.
Tools and Materials Needed to Repair a Bathtub Faucet Diverter
Gather these before starting so you’re not stopping mid-repair:
- Adjustable wrench or pliers
- Screwdriver (flathead and Phillips)
- Replacement diverter stem, cartridge, or spout, depending on your type
- Plumber’s tape
- White vinegar for soaking mineral deposits
- A rag or towel
- Allen wrench (for some spout-style diverters)
Before You Start: Turn Off the Water and Identify the Diverter Type
Warning: Never attempt to disassemble a plumbing valve while your water lines are fully pressurized. Doing so can cause immediate flooding or send small metal parts flying across your bathroom.
Locate your home’s main water shut-off valve, or use the dedicated bathroom isolation valves if your home has an access panel behind the tub. Turn the valves clockwise until they stop. Once turned off, open the tub handles completely to drain any residual water trapped inside the vertical wall pipes.
Next, inspect the bottom of your tub spout near the wall. If you see a small notch with a tiny hex screw inside, you have a slip-on spout. If there is no screw and the spout spins when you turn it counterclockwise, you have a threaded spout.
How to Repair a Bathtub Faucet Diverter Handle in Two- or Three-Valve Systems
If your diverter is controlled by a middle handle on the wall rather than a pin on the spout, follow these steps to service the internal stem.
Step 1: Remove the Handle Cap and Screw
Pry off the decorative plastic cap in the center of the diverter handle using a small flathead screwdriver. This reveals the internal handle screw. Remove this screw with a Phillips screwdriver and pull the handle straight off the wall stem.
Step 2: Remove the Escutcheon Trim Plate
Unscrew or unlatch the metal trim plate (the escutcheon) that sits flush against your tile wall. This gives you a clear view into the wall cavity where the valve body links to your pipes.
Step 3: Extract the Diverter Stem
Use a deep plumbing socket wrench to fit over the hex nut of the exposed diverter stem. Turn the stem counterclockwise to unthread it completely from the rough-in valve body inside the wall. Pull the long metal stem straight out.
Step 4: Inspect and Replace the Washers
Look at the very end of the stem assembly. You will find a small rubber washer held in place by a brass screw, along with one or two rubber O-rings around the brass body. If they look flattened or torn, unscrew them, coat your new matching rubber seals in plumber’s grease, and pop them onto the stem. If the metal threads on the stem are severely corroded, replace the entire stem cartridge with an identical match from your local hardware store.
Step 5: Reassemble the System
Thread the serviced stem back into the wall by hand to avoid cross-threading. Tighten it securely with your wrench. Slide the trim plate back on, reattach the handle, and tighten the center screw.
Step-by-Step Guide: How to Repair a Bathtub Spout Diverter
If your issue is a leaky pull-up pin directly on your tub spout, this walkthrough will guide you through fixing or swapping out the component safely.
Step 1: Loosen the Set Screw or Unthread the Spout
For a slip-on spout, use your Allen wrench to loosen the small hidden screw on the underside of the pipe near the tile wall. Slide the spout straight off the copper pipe. For a threaded spout, wrap a cloth around the metal body to protect the finish, grip it firmly with channel lock pliers, and turn the entire spout counterclockwise until it detaches from the wall nipple.
Step 2: Clean and Soak the Gate Mechanism
Often, the pull-pin is just choked with hard water crust. Submerge the entire spout in a bowl filled with warm white vinegar for 30 to 45 minutes. Take an old toothbrush and scrub away the white mineral scales around the internal plastic gate and vertical track. Test the pin to see if it glides up and down smoothly.
Step 3: Install a New Gate Kit or Replace the Spout
If the internal plastic gate is physically broken or the vinegar soak does not stop the leaking, you have two choices. You can buy a cheap universal front-gate repair kit, slide out the old spring and plastic flapper, and snap the new ones into the front path of the spout. However, since standard tub spouts are highly affordable, it is often faster and more reliable to simply buy a brand-new tub spout entirely.
Step 4: Prep the Pipe Threads
Clean off any old, crusty tape from the copper pipe or threaded nipple extending from your wall. Wrap two to three tight wraps of clean plumber’s tape clockwise around the male threads of the pipe. This ensures a watertight connection when you install the piece.
Step 5: Mount and Secure the Spout
Slide your cleaned or brand-new spout back over the wall pipe. For threaded types, spin it on clockwise by hand until snug, making sure the opening points straight down. For slip-on types, push it flush against the wall and tighten the bottom Allen screw firmly.
You can read about: How Do I Repair a Leaky Bathtub Faucet
When to Repair vs. Replace a Bathtub Faucet Diverter
Repair makes sense when the issue is isolated to worn seals, mineral buildup, or a single damaged part that’s still available for purchase. Replacement becomes the better option when the spout or valve body itself is cracked, the mechanism is stripped beyond repair, or replacement parts for an older model are hard to find.
Cost is also worth weighing. A full spout typically costs less than the time spent trying to source parts for a decades-old internal mechanism. In general, how to repair bathtub faucet diverter decisions come down to age, part availability, and how much the fixture matters to your bathroom’s overall look and function.
How to Test the Diverter After Repair
Once everything is reassembled, run the tub faucet first to confirm normal flow. Then engage the diverter and check that water switches fully to the showerhead with little to no leaking from the spout.
Let it run for a minute or two, since a repair that seems to work initially can reveal a slow leak once water pressure has been flowing steadily. If dribbling continues, double-check the seal or consider whether a full spout diverter repair replacement is needed instead of a partial fix.
How to Prevent Future Diverter Problems
A little routine care extends the life of any bathtub faucet diverter, whether it’s spout-style or valve-style.
- Avoid forcing a stuck knob or handle. If it resists, stop and check for buildup rather than pushing harder.
- Clean mineral deposits periodically, especially in hard water areas, using a vinegar soak every few months.
- Don’t hang towels or robes on the spout, since added weight can stress the internal mechanism over time.
- Address small leaks early. A minor drip is far easier to fix than a fully seized diverter.
These habits won’t eliminate the need for repair forever, but they slow down wear significantly and reduce how often you’ll need to revisit how to repair bathtub faucet diverter issues in the first place.
Conclusion
Knowing how to repair bathtub faucet diverter problems saves you a service call for what’s usually a straightforward fix. Identify your diverter type, gather the right tools, and work through the steps methodically rather than forcing stuck parts. If you’ve tried the repair and the shower diverter repair still isn’t holding, or if you’re dealing with a cracked valve body, Derks Plumbing offers reliable Faucet Repair in Eagle Rock to get your tub and shower working correctly again.

FAQs
How to repair bathtub faucet diverter issues without replacing the whole spout?
If the internal mechanism is intact and only seals or O-rings are worn, cleaning and replacing those parts often solves the problem without a full spout swap.
How to fix bathtub faucet diverter problems caused by hard water?
Soak the affected parts in white vinegar to dissolve mineral deposits, then scrub gently before reassembling.
Why is my shower diverter not working even after cleaning it?
The internal gate or stem may be cracked or stripped, which usually means the part needs full replacement rather than cleaning alone.
Can I fix shower diverter problems myself, or do I need a plumber?
Most diverter repairs are manageable with basic tools and about thirty minutes. A plumber becomes necessary if the valve body is damaged or access requires opening a wall.
How often do bathtub diverters typically need repair?
With normal use, a well-maintained diverter can last many years. Hard water areas often see repairs needed sooner due to mineral buildup.




