Copper lines are often used in plumbing systems because they last a long time and don’t rust. But accidents, getting old, or damage from the outside can cut a copper pipe, which can cause leaks that can cause a lot of water damage if they are not fixed quickly. If this is happening to you, don’t worry there are several good ways to fix a copper water pipe and get your plumbing working again.
Do-it-yourself solutions can help for a short time, but if you want a long-lasting and skilled solution, you might want to hire a company like Derks Plumbing Company Inc. We are experts at fixing copper pipes and will make sure that your whole plumbing system works perfectly.
This detailed guide will show you several ways to fix a copper pipe, making sure you have all the information, tools, and skills you need to get the job done quickly and correctly
Understanding Copper Pipe Damage
Common Causes of Copper Pipe Damage
Before diving into repairs, it’s essential to understand what causes a cut in a copper pipe. Common reasons include:
Accidental Drilling or Sawing – Home renovations or installations may accidentally puncture a pipe.
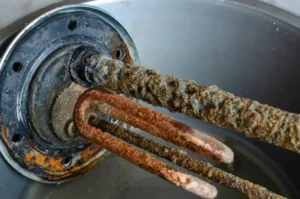
Corrosion Over Time – Chemical reactions inside the pipe can weaken its structure.
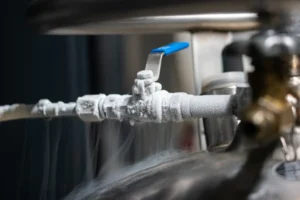
Freezing Temperatures – Water expands when frozen, causing the pipe to burst.
Excessive Water Pressure – Too much pressure can stress the pipe and lead to leaks.
Physical Damage – External forces, such as construction work, can result in a cracked or cut pipe.
Identifying the cause helps determine the best copper pipe clamp repair or alternative solution.
Tools and Materials Needed for Copper Pipe Repair
Basic Tools:
- Pipe cutter or hacksaw
- Emery cloth or sandpaper
- Flux brush and flux paste
- Propane torch
- Adjustable wrench
- Measuring tape
- Deburring tool or file
- Pipe wrench
Repair Materials:
- Copper pipe and couplings
- Solder and flux (for soldering repairs)
- Copper pipe clamp repair kits
- Compression couplings
- SharkBite slip fittings
- Epoxy putty
- Pipe repair tape
- Pipe repair clamps
8 Methods for Repairing Copper Piping
1. Soldering Two Couplings & Piece of Pipe (Code Approved / Permanent)
Soldering is the most traditional and reliable way to repair copper pipes. It involves removing the damaged section of the pipe and installing a new piece of copper pipe with couplings. This method is ideal for homeowners or professionals looking for a long-term, permanent solution.
Steps:
Turn Off the Water Supply: Before you start, locate your main water shut-off valve and turn it off to stop water flow.
Drain the Pipe: Open the nearest faucet to ensure all water is drained from the pipe.
Cut Out the Damaged Section: Use a pipe cutter to remove the section with the cut or crack. If you’re using a hacksaw, make sure the cut is straight to avoid uneven connections.
Clean the Pipe Ends: Use emery cloth to clean the ends of the copper pipe where you’ll be applying the flux. Clean the insides of the couplings as well. This will remove any oxidation or rough edges that could interfere with the soldering process.
Apply Flux: Use a flux brush to coat the ends of the pipe and the inside of the coupling with flux. This is a crucial step, as flux helps the solder flow and ensures a secure seal.
Insert a New Copper Pipe Section: Place the new copper pipe between the two couplings.
Heat and Solder the Joints: Use a propane torch to heat the pipe and the coupling evenly. The flux will melt and allow the solder to flow into the joint. Once the solder begins to melt, apply it around the joint until it forms a strong seal.
Let it Cool and Test: Allow the soldered joints to cool for a few minutes before turning the water back on. Check for leaks at the repair site by turning on the water slowly and inspecting the joint.
✔ Advantages:
- Provides a strong, permanent seal
- Code-approved method for repairs
- Durable and reliable solution
❌ Disadvantages:
- Requires soldering skills and proper equipment
- Can be difficult for beginners
2. Compression Couplings (Code Approved / Permanent)
Compression couplings offer a solder-free solution to copper pipe repairs. They’re a great option for DIYers or those looking for a quicker repair. Compression couplings create a tight seal by using a rubber ring inside the coupling that compresses when tightened.
Steps:
Shut Off the Water: As with all repairs, turn off the water supply and drain any water left in the pipe.
Cut Out the Damaged Section: Use a pipe cutter to remove the damaged section of pipe.
Deburr and Clean the Pipe Ends: After cutting, use a deburring tool to remove any sharp edges from the cut ends. Clean the pipe with an emery cloth to ensure a smooth surface for the compression coupling.
Install the Compression Nuts and Rings: Slide the compression nuts and rings onto the pipe.
Install the Compression Coupling: Place the compression coupling over the pipe ends and align it with the seals inside the coupling.
Tighten the Nuts: Using a wrench, tighten the compression nuts to create a tight seal around the rubber ring. Be careful not to overtighten, as this could damage the pipe.
Test for Leaks: Turn the water supply back on and check for any leaks at the repair site.
✔ Advantages:
- Easy to install, no soldering required
- Code-approved method
- Ideal for DIY repairs
- Works well in tight spaces
❌ Disadvantages:
- The fitting may be bulkier than a soldered joint
- Requires careful tightening to avoid leaks
3. SharkBite Slip Coupling (Code Approved if Done Correctly / Permanent)
SharkBite fittings are a modern, tool-free solution for copper pipe repairs. These fittings use a push-to-connect mechanism that doesn’t require soldering or special tools, making them a favorite for fast repairs.
Steps:
Turn Off the Water and Drain the Pipe: Shut off the water and drain the pipe to eliminate excess water.
Cut Out the Damaged Section: Use a pipe cutter to remove the damaged portion of the pipe.
Prepare the Pipe Ends: Clean the ends of the pipe using an emery cloth to remove any oxidation or rough spots.
Insert the SharkBite Coupling: Simply slide the SharkBite slip coupling over the pipe ends, ensuring that the pipe is fully inserted into the fitting.
Push to Connect: With the coupling in place, push the pipe firmly into the fitting. The SharkBite fitting will automatically seal the pipe and create a tight connection.
Turn the Water Back On and Test: Once installed, turn the water supply back on and check for leaks.
✔ Advantages:
- Quick and easy installation, no tools or soldering required
- Code-approved if installed correctly
- Ideal for emergencies or hard-to-reach areas
❌ Disadvantages:
- More expensive than traditional fittings
- Fitting may need to be replaced in the future if the pipe material is changed
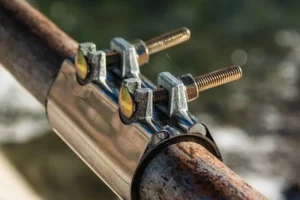
4. Repair Clamp (Not Code Approved / Temporary)
A copper pipe repair clamp is a quick and temporary solution to stop leaks in copper pipes. It’s best used for emergencies until a permanent solution can be made.
Steps:
Turn Off the Water: Always start by shutting off the water supply.
Clean the Area Around the Leak: Clean the pipe around the cut or crack to ensure the repair clamp will adhere properly.
Place the Clamp Over the Damage: Position the repair clamp over the leak or cut, ensuring that it covers the damaged area completely.
Tighten the Clamp: Use a wrench to tighten the bolts on the clamp until it forms a tight seal.
Check for Leaks: Once the clamp is in place, slowly turn the water back on and check for any further leaks.
✔ Advantages:
- Fast and easy to install
- Effective for stopping leaks temporarily
❌ Disadvantages:
- Not a code-approved method
- Only a temporary solution, as the clamp may weaken over time
5. Soldering Hole Shut (Not Code Approved / Temporary)
This method involves using solder to seal a small hole in a copper pipe. While it’s not recommended for long-term repairs, it can be useful in emergency situations.
Steps:
Shut Off the Water and Drain the Pipe: As always, turn off the water supply before beginning the repair.
Clean the Area Around the Hole: Use emery cloth to clean the area around the hole, ensuring it’s smooth and free from corrosion.
Melt Solder Over the Hole: Use a propane torch to melt solder directly over the hole. Allow the solder to cool and form a seal.
Turn on the Water and Check for Leaks: After the solder has cooled, turn on the water and inspect the pipe for leaks.
❌ Disadvantages:
- Not code-approved for repairs
- Only effective for very small leaks or holes
6. Copper Wire Fix (Not Code Approved / Temporary)
This method uses copper wire to wrap around the hole in the pipe and then solder it in place. While it’s a quick fix, it’s not reliable for long-term use.
Steps:
Turn Off the Water and Drain the Pipe: Always shut off the water first.
Wrap the Copper Wire Around the Leak: Wrap a small piece of copper wire around the leak and secure it tightly.
Solder the Wire: Use a torch to solder the wire in place.
Check for Leaks: Turn on the water to test for any leaks.
❌ Disadvantages:
- Not a durable or long-term solution
- Not code-approved
7. Alfa Tape (Not Code Approved / Very Temporary)
Alfa tape is a self-adhesive, rubber-based tape that wraps around the leak to form a temporary seal. This method is best for emergency repairs but should be replaced with a more permanent solution as soon as possible.
Steps:
Turn Off the Water and Clean the Pipe: Ensure the pipe is dry and free of any debris.
Wrap the Tape Around the Leak: Tightly wrap the Alfa tape around the leak, ensuring full coverage.
Check for Leaks: Turn the water back on to check the effectiveness of the tape.
❌ Disadvantages:
- Only effective for a short period
- Not a code-approved repair
8. Freeze Fix Epoxy Compound (Not Code Approved / Temporary)
This compound is applied to the leak to seal it temporarily. However, the chemicals used in the compound can be harmful, especially for potable water systems.
Steps:
Turn Off the Water and Clean the Pipe: Clean the pipe and dry the affected area.
Apply the Epoxy: Mix and apply the epoxy compound to the hole, following the manufacturer’s instructions.
Let it Set: Allow the epoxy to cure as per the product’s instructions.
Check for Leaks: Once the epoxy has set, turn the water back on and check for leaks.
❌ Disadvantages:
- Not safe for potable water systems
- Temporary and unreliable
Preventing Future Copper Pipe Damage
Tips for Maintaining Copper Pipes:
Monitor Water Pressure – Install a pressure regulator to avoid excessive pressure.
Insulate Pipes – Prevent freezing damage by insulating exposed pipes.
Use Water Softeners – Reduce mineral buildup that leads to corrosion.
Schedule Regular Inspections – Professional inspections can catch small issues before they turn into major problems.
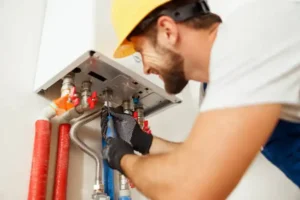
Why Choose Professional Copper Pipe Repair?
While some DIY methods can work, they don’t always provide a long-term solution. Hiring professionals ensures:
Code-compliant repairs
Permanent solutions
Reduced risk of future leaks
Expert handling of complex plumbing systems
For expert copper pipe repair, trust Derks Plumbing Company Inc.. Our team ensures durable and efficient plumbing solutions.
Conclusion
Anyone who is a renter or a do-it-yourself plumber needs to know how to fix a cut in a copper pipe. There are pros and cons to each way of fixing copper pipes. Some of the best are soldering, compression coupling, SharkBite fitting, copper pipe clamp repair, and epoxy filling.
For professional, code-compliant, and long-lasting copper pipe repair, trust Derks Plumbing Company Inc. Our experienced plumbers provide top-notch services to keep your plumbing system in perfect shape.
FAQ's
how to repair cut in copper pipe?
To repair a cut in a copper pipe, you can choose from various methods such as soldering two couplings and a new section of pipe, using compression couplings, or installing a copper pipe clamp repair. Each method has its own advantages depending on whether you’re looking for a temporary fix or a long-term solution. For professional and permanent results, consider consulting an expert.
Can I use a copper pipe clamp repair to fix a leak?
Yes, a copper pipe clamp repair can be used to temporarily stop a leak. It’s an easy and quick solution, especially if you’re in need of an urgent fix. However, it is not code-approved and should not be used as a long-term solution. It’s a good option for buying time until a more permanent fix, such as soldering, can be made.
What’s the best method for repairing copper pipes?
The best method for repairing copper pipes depends on the nature of the damage. For long-term, code-compliant repairs, soldering two couplings with a new section of pipe is the most reliable solution. Alternatively, compression couplings or SharkBite slip fittings provide simpler, solder-free options that are also code-approved.
How long does a copper water pipe fix last?
A copper water pipe fix can last for years when done correctly. For permanent solutions, methods like soldering or using compression couplings provide a long-lasting seal. Temporary fixes, such as copper pipe clamp repair, should only be used for short periods until a permanent solution can be applied.
Can I patch a copper pipe myself?
Yes, you can try patching a copper pipe yourself, especially if it’s a minor leak. Some DIY methods include using epoxy compounds or Alfa tape. However, these are not code-approved and should only serve as temporary fixes. For a permanent patch, consider professional repair methods like soldering or compression fittings.
What is the most effective temporary solution for a copper pipe clamp repair?
If you’re looking for a temporary fix, a copper pipe clamp repair is one of the easiest and quickest methods. It can stop leaks until you can implement a more permanent repair, such as soldering or using a SharkBite slip coupling. Remember, this is not a code-approved solution, so it’s not ideal for long-term use.