Putting in a window air conditioner (AC) can be a simple and effective way to cool down a room without having to hire a professional. You can save time and money by setting up your window AC unit yourself if you have the right tools, plan ahead, and pay close attention to the details. In this detailed guide, we will show you how to install a window AC unit from start to finish, including how to fix problems and stay safe.
Introduction to Window AC Units
What is a Window AC Unit?
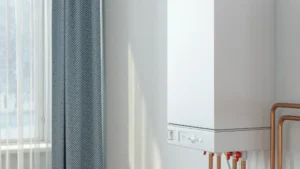
A window AC unit is a small air conditioner that is made to fit right into the frame of a window. The mechanism cools the air inside a room and sends the heat outside. Most of the time, these units are cheaper and use less energy than central air conditioning systems. This makes them a popular choice for people who live in apartments or want to cool off individual rooms.
Why Choose a Window AC Over Other Types of ACs?
Window air conditioners are easy to set up, don’t need complicated piping, and can be taken out of the window when not in use. Also, compared to movable units or central air systems, they tend to use less energy to cool down small spaces.
Tools and Materials You’ll Need
Before you begin, gather the necessary tools and materials to ensure a smooth installation. Here’s a list of essential items you’ll need:
Essential Tools for Installation
-
Screwdriver: To secure the unit into the window frame.
-
Measuring Tape: To measure the window dimensions and the AC unit.
-
Drill: For drilling holes to secure the brackets.
-
Level: To ensure the AC unit is straight and level in the window.
-
Window Kit: This usually comes with the AC unit and helps fill any gaps.
-
Weather Sealing Tape: To ensure the unit is properly insulated.
Safety Equipment to Consider
-
Gloves: For protecting your hands while handling the unit.
-
Safety Goggles: To protect your eyes from dust or debris during installation.
-
Ladder: If you’re installing the unit on a higher window.
Preparing for Installation
Measuring Your Window Space

Get the exact measurements of the window where you want to put the AC unit before you buy or install one. It’s important to make sure that your window is big enough for the AC, even though most window AC units are made to fit normal window sizes. To avoid extra stress, make sure you also measure how much weight the window frame can hold.
Checking the Electrical Requirements
Ensure your window AC unit will be installed near a dedicated electrical outlet. Check the unit’s power requirements (usually listed on the label) to ensure that the outlet can provide the necessary voltage. Most window AC units require a 115V or 230V outlet.
Step by Step Guide to Install Window AC

Step 1: Unboxing and Inspecting the Window AC Unit
First, carefully take your window AC unit out of its box. Make sure that all of the parts are included, such as the fitting kit and, if needed, the remote control. Check the unit for any flaws or damage. Before you start the download, it’s better to make sure there are no problems.
Step 2: Setting Up the AC Unit on a Stable Surface
Set the air conditioner down on a stable surface, like a table or a clean floor. Check to see if the unit is level and that nothing is blocking the movement. This step is very important for the AC unit to work well.
Step 3: Assembling the Window Kit
Most window AC units come with a kit that helps seal the space between the unit and the window frame. Usually, this kit comes with side walls and sealing strips. Follow the manufacturer’s directions for attaching the side panels to the unit.
Step 4: Installing the AC Unit into the Window
Take care to lift the AC unit and put it in the window frame. The unit should be put where the exhaust side faces the outside. Make sure the air conditioner is sitting flat on the window sill, and then use the clips or screws that came with it to hold it in place.
Step 5: Sealing the Gaps and Ensuring Proper Insulation
Once the unit is in place, fix any gaps around the window with the weather-sealing tape or foam strips that came with it. Having the right insulation keeps warm air out of the room, which makes your AC work better.
Step 6: Plugging In and Testing the AC Unit
Finally, connect the unit to a power source and turn it on. Check the cooling feature and listen for any strange sounds or problems. Make sure the unit is working at full speed and that nothing is blocking the movement.
Troubleshooting Common Installation Issues
AC Unit Not Fitting Properly?
If your AC unit doesn’t fit right in the window, it might be because the measures are off or the window is too small. You could try adjusting the side pieces or adding more sealing tape to close the space.
Unit Not Powering On?
Check the electrical link again if the unit won’t turn on. Please check that the outlet works and that the unit is safely plugged in. Check the fuse or circuit breaker if the AC still won’t work.
Air Leaks or Gaps Around the Unit?
If your window AC unit has air leaks, it may not work as well. Make sure that all the gaps in the seal around the unit are covered with weatherproof tape or foam. Make sure the window is also firmly locked so that it can’t be opened or closed.
Maintenance Tips After Installation
Cleaning the AC Filters
To keep the AC working at its best, clean the air filter on a regular basis. The filter can get clogged with dust and other particles, which stops movement and makes cooling less effective. The filter should be cleaned once a month or as directed by the maker.
Inspecting and Cleaning the Unit Regularly
Check your window AC unit once a month to make sure it doesn’t have any dust, dirt, or mold on it. Regularly cleaning the unit keeps it working well and makes it last longer.
Safety Tips for Installing a Window AC Unit
Using Proper Lifting Techniques
Window AC units can be heavy, so always lift with your legs, not your back. Consider asking a friend for help if you’re lifting a particularly large unit.
Avoiding Electrical Hazards
Before you connect anything electronic, make sure the unit is not plugged in. To avoid any safety risks, it’s best to talk to a professional electrician about the wiring if you don’t understand it.
Conclusion
Putting in a window air conditioner the right way can make it much cooler and save you money over hiring a professional to do it. If you follow these steps, make sure everyone is safe, and keep your unit in good shape, you’ll have a cool, comfy place to live all summer.
If you need help in installation or repair of AC. Kindly Contact our AC installtion and repairs professionals
Frequently Asked Questions (FAQs)
How long does it take to install a window AC unit?
Installing a window AC unit usually takes around 1-2 hours, depending on your experience and the type of window.
Can I install a window AC unit myself?
Yes, with the proper tools and preparation, most people can install a window AC unit on their own. However, always follow safety instructions and check your window size before starting.
How do I secure a window AC unit properly?
Ensure the AC unit is level and well-supported by securing it with the provided brackets or screws. Seal any gaps around the unit with foam or weather tape to prevent air leakage.
What if my window is not standard size?
If your window doesn’t fit the standard dimensions, you can buy an adjustable window kit or build a custom frame to accommodate the unit.
How do I know if my window AC unit is installed correctly?
Check that the unit is level and firmly secured in place. Make sure there are no gaps around the unit, and that it powers on without any issues.
Is there any special care needed for winter storage?
In winter, it’s best to remove the window AC unit and store it in a cool, dry place. If it cannot be removed, cover it with a protective cover to prevent debris from entering the unit.