One of the most useful kitchen appliances you can add is a garbage disposal. It keeps your kitchen clean, cuts down on food waste, and keeps your plumbing from getting clogged. Putting in a garbage disposal may look like a job for a professional, but many homeowners can do it themselves with the right help. We’ll show you how to install a garbage disposal unit in this article, whether you’re replacing an old one or putting one in for the first time.
Gathering the Tools and Materials
Before you begin, make sure you have the following:
Tools:
-
Flat-head screwdriver
-
Phillips screwdriver
-
Adjustable wrench
-
Plumber’s putty
-
Hammer or mallet
-
Bucket and towels
-
Wire connectors
-
Wire stripper (if connecting wiring manually)
Materials:
-
Garbage disposal unit
-
Disposer flange and mounting ring
-
Discharge tube
-
Electrical cable (if not pre-wired)
-
Dishwasher connector kit (if needed)
Turning Off Power and Removing the Old Unit
If you’re replacing an old garbage disposal, turn off the power at the circuit breaker first. If the old unit is a plug-in type, unplug it. If it’s hardwired, disconnect the wiring. Place a towel or bucket under the sink to catch any water that is still there. Then, if there are any, disconnect the drain pipes and the dishwasher hose. Grab the old garbage disposal with a wrench and carefully pull it out from under the sink. Loosen the mounting ring. Before you go any further, make sure you’re working in a dry area and that the power is off.
Removing the Existing Sink Flange
The sink flange is what connects the garbage disposal to the sink drain. You’ll need to take it off once the old unit is out of the way. Get under the sink and loosen the mounting assembly. Then, take out any screws or clamps that are holding it in place. Lift out the flange on the top of the sink and clean the sink opening really well. Before you put in the new unit, make sure there is no old plumber’s putty or dirt on the seal. If there is, the new unit might not fit properly and leak.
Installing the New Sink Flange
Make a rope out of a small amount of plumber’s putty and wrap it around the bottom of the new flange to install it. Place the flange over the drain hole in the sink’s top. Put the rubber gasket, backup ring, and mounting ring on from the bottom. Evenly tighten the screws to make a seal that won’t let water in. Get rid of any extra putty that comes out from around the flange. This part of the installation is necessary to keep leaks from happening again.
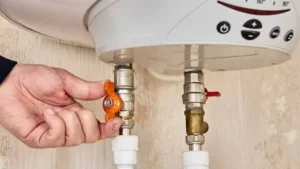
Wiring the Garbage Disposal Unit
If your new garbage disposal doesn’t have a power cord already attached, you’ll have to connect the wires by hand. First, take off the unit’s bottom electrical cover plate. There are hot (black), neutral (white), and ground (green or bare copper) wires inside. Take off about 0.5 inches of insulation from each wire, and then use wire connectors to make sure the wires are well-matched and connected. Put the cover plate back on and use a clamp to hold the cable in place. If your unit comes with a plug that is already wired in, all you have to do is plug it in when the time comes.
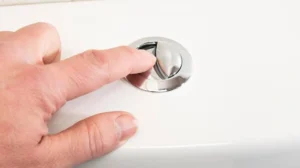
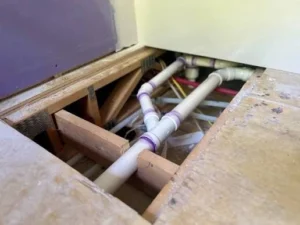
Mounting the Disposal Under the Sink
The new garbage disposal needs to be put in place now. Put the disposal in the mounting ring and make sure it lines up with the sink flange. Turn the garbage disposal counterclockwise until it locks firmly in place. It might need a wrench to be really tight and keep it from moving. Take your time with this step, because if you don’t do it right, vibrations and leaks could happen later. If you’re also connecting a dishwasher, now is the time to put the dishwasher drain hose into the disposal’s opening and clamp it down.
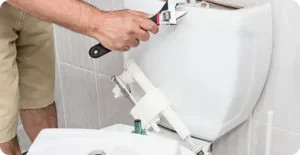
Connecting the Discharge Tube
Step two is to connect the drain tube to the disposal. This makes the disposal work with your drain system. Using the flange and gasket that come with the unit, connect the tube to the outlet on the disposal. Next, connect the tube’s other end to the P-trap or sink drain pipe. Tighten all of the connections with your wrench, but don’t do it too much or the plastic parts or threads will break. To avoid future drainage problems, it’s important to make sure that all of the connections are lined up correctly.
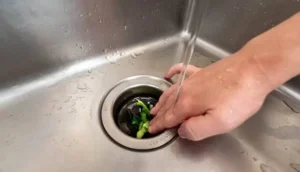
Testing the Unit for Leaks and Performance
When everything is ready, turn the power back on at the circuit breaker. Run cold water through the sink after you turn on the water. Then turn on the garbage disposal to see how it works. If you hear any strange sounds, like grinding or rattling, it could mean that something is not lined up right. Check for leaks around the flange, discharge tube, and drain pipe under the sink while the water is running. Your installation is done if everything stays dry and the garbage disposal works well.
You can read about: How to Unjam a Garbage Disposal
Avoiding Common Installation Mistakes
When putting in a garbage disposal, a lot of people make a few common mistakes. People often make the mistake of not using plumber’s putty when they install the sink flange, which can cause leaks that are very annoying. Another mistake is not taking out the plug inside the disposal’s dishwasher inlet when connecting a dishwasher. This can make water back up or not drain properly. It’s also easy to damage parts and start leaks by overtightening the mounting ring or the plastic connections.
When You Should Call a Professional
It’s possible to install a garbage disposal on your own, but not everyone should do it. It might be best to call a professional if you don’t know how to work with electrical wiring, don’t have the right tools, or are putting in a garbage disposal for the first time in a kitchen that doesn’t have one. Older homes with plumbing that isn’t up to code or under-sink spaces that are too small can also be a problem.
Conclusion
Learning how to install a garbage disposal unit is a valuable skill for any homeowner. With the right tools, some patience, and this detailed guide, you can handle the job yourself and enjoy a more functional kitchen. However, if the process feels overwhelming or you run into unexpected issues, don’t hesitate to bring in the pros. For reliable garbage disposal installation and repair in Eagle rock and surrounding areas, contact today we’re here to make your kitchen upgrades stress free.