

Fixing a leaking shower faucet usually comes down to replacing a worn-out rubber washer, O-ring, or cartridge inside the valve. You can fix most leaks in under an hour with basic hand tools for less than $20 in parts.
If you want to know how to repair a leaky shower faucet, start by shutting off your main water supply, removing the handle, and swapping out the damaged internal seal.
Why Is Your Shower Faucet Leaking?
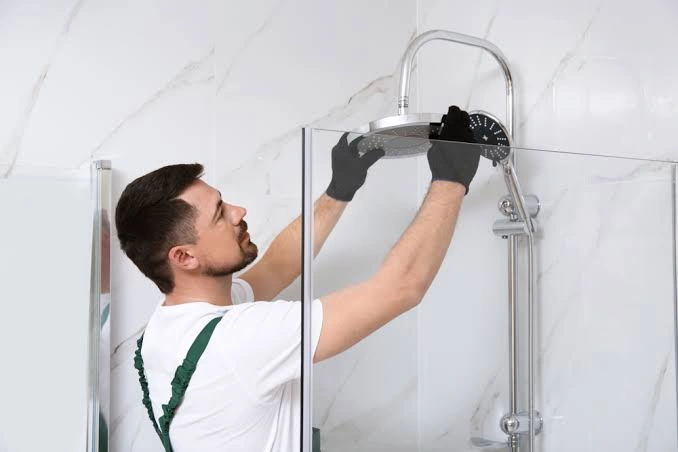
A shower faucet leaking problem rarely resolves on its own. Water pressure constantly pushes against internal seals, and normal wear degrades these components over time.
Worn O-rings and washers: Rubber hardens, cracks, or shreds after years of exposure to water pressure and minerals.
Corroded valve cartridge: Brass or plastic cartridges collect sediment, causing internal bypass leaks.
Mineral buildup: Hard water deposits scratch plastic cartridges and ruin rubber seals.
High water pressure: Household water pressure above 80 PSI wears out internal components prematurely.
Damaged valve seat: Pitted brass seats shred new washers within weeks if not smoothed down.
Knowing what type of valve you have makes buying replacement parts straightforward.
Signs Your Shower Faucet Needs Repair
A dripping shower faucet repair should be handled as soon as you notice early warning signs.
Persistent dripping: Water drips from the spout or showerhead long after you turn the valve off.
Stiff handle operation: The handle binds, squeaks, or requires extra force to turn.
Leaking behind the wall: You hear running water inside the wall cavity or spot water stains on surrounding drywall.
Inconsistent temperature: The mixing valve fails to balance hot and cold streams properly.
Clunking noise: Loose stem washers create water hammer vibrations inside pipes when turned on.
Addressing a shower tap leaking issue early prevents water damage, structural mold, and high utility bills.
Understanding Your Shower Valve Type
Before buying parts, identify the internal mechanism controlling your water flow:
Cartridge Valves: Single-handle or dual-handle systems using a brass or plastic cylinder with internal channels.
Compression Stem Valves: Older two-handle or three-handle setups that rely on rubber washers pressed against brass seats.
Ball Valves: Single-handle assemblies using a rotating metallic or plastic ball with rubber seats and springs.
Ceramic Disc Valves: Durable single-handle units using smooth ceramic discs to control volume and temperature.
Tools and Materials You’ll Need
Gather these plumbing tools before opening your shower valve:
- Phillips and flathead screwdrivers
- Adjustable wrench
- Channel lock pliers
- Hex key (Allen wrench) set
- Valve cartridge puller (for stubbed brass cartridges)
- Seat wrench and valve seat dresser tool
- Plumber’s silicone grease
- Replacement cartridge, O-rings, or seat washers
- Plumber’s tape (PTFE tape)
- Towel and cup hook or pick tool
Turn Off the Water Supply Before You Start
Never skip this critical safety step:
- Locate your main water shutoff valve (usually in the basement, utility room, or outdoor meter box) and turn it off completely.
- Open a sink faucet on the lowest level of your home to drain remaining pressure from the lines.
- Open the shower valve fully to make sure no water streams out.
- Cover your shower drain with a towel or plastic plug so small screws or clips do not drop down the pipe.
How to Repair a Leaky Shower Faucet (Step-by-Step)
A successful shower leaking repair depends on whether you have a single-handle or two-handle valve layout.
How to Fix a Leaky Single-Handle Shower Faucet
Single-handle valves use a single cartridge or ball mechanism to mix water.
Remove the handle index button: Pry off the small plastic hot/cold cover cap using a flathead screwdriver to expose the handle screw.
Unscrew and remove the handle: Unfasten the setscrew or center screw with an Allen wrench or screwdriver, then pull the handle straight off the stem.
Remove the escutcheon plate: Unscrew the decorative cover plate against the wall and pull it away to expose the valve body.
Remove the retaining clip or bonnet nut: Locate the metal retaining clip at the top of the valve body and pull it upward with needle-nose pliers, or unthread the outer collar nut.
Extract the old cartridge: Attach a cartridge puller or use pliers to pull the cartridge straight out of the brass valve body.
Clean internal valve chamber: Wipe out mineral scale, grit, and corrosion inside the brass chamber using a clean rag and vinegar.
Lubricate and install the new cartridge: Apply plumber’s silicone grease to the new rubber seals, align the cartridge tabs, and press it firmly into the valve.
Reassemble: Reinstall the retaining clip, escutcheon plate, and handle before testing.
How to Fix a Leaky Two-Handle Shower Faucet
Two-handle compression valves rely on individual stems with rubber seat washers for hot and cold sides.
Remove handle caps and screws: Pop off the decorative caps on both handles and loosen the center attachment screws.
Pull handles off stems: Slide both handles off their splined valve stems. Use a handle puller if stuck by corrosion.
Remove the bonnet nut: Use an adjustable wrench to turn the packing nut counterclockwise and back out the stem assembly.
Replace rubber washers and O-rings: Unscrew the bottom washer screw on the stem, replace the flattened rubber washer, and slide on a new stem O-ring.
Inspect and replace brass seats: Use a flashlight to inspect the brass seats deep inside the valve body. Insert a seat wrench, turn counterclockwise, and swap out pitted seats.
Reinstall stem assemblies: Coat threads with plumber’s grease, thread stems back into the valve body, tighten bonnet nuts gently, and reattach handles.
You can read about: How to Repair Bathtub Faucet Diverter
Common Mistakes to Avoid
DIY plumbing works best when you avoid these simple errors:
Overtightening connections: Over-torquing bonnet nuts or handles crushes new rubber washers and ruins seals instantly.
Using petroleum jelly: Never use Vaseline on rubber gaskets; it breaks down rubber. Use 100% silicone plumber’s grease.
Forgetting to flush lines: Always flush debris out of the open valve body for 5 seconds before seating a new plastic cartridge.
Buying wrong replacement parts: Take your old cartridge or stem to the store to match the exact size, length, and brand pattern.
Ignoring internal seat damage: Installing new washers on rough brass seats causes leaks to return within days.
How to Diagnose Hidden Leakage Behind the Wall
Not all faucet leaks drip out of the spout. Some escape through the shower arm connection or internal mixing valve seals behind the wall tiles.
Inspect tile grout lines: Look for crumbling grout, discolored tiles, or peeling caulk directly below the valve handle assembly.
Check the lower floor ceiling: Look for soft drywall, brown water rings, or dampness on ceilings located under the bathroom.
Perform a pressure check: Leave the shower turned off while main water pressure is on, then inspect the wall cavity through an access panel for moisture.
When You Should Replace the Entire Shower Faucet
Sometimes repairing individual seals is not enough. You should replace the entire valve fixture if:
- The internal brass valve body shows severe pitting, cracks, or mineral rot.
- Replacement cartridges or stems for older vintage valves are discontinued.
- You are remodeling and want pressure-balancing anti-scald protection.
- The shower valve body leaks continuously from soldered brass joints.
When to Call a Professional Plumber
While fixing a leaky shower faucet is manageable for most DIYers, call a licensed plumber if:
- The brass cartridge breaks off inside the wall valve.
- Water continues leaking from behind the wall after replacing all seals.
- Shutoff valves fail to stop main water flow completely.
- Copper pipes behind the wall show corrosion or sweat solder joint cracks.
- You need to cut tile or drywall to replace an old three-handle valve with a modern pressure-balance valve.
How to Prevent Shower Faucet Leaks
Extend the life of your shower valves with basic maintenance:
- Install a home water softener if you have hard mineralized water.
- Check home water pressure with a pressure gauge and install a regulator if pressure exceeds 75 PSI.
- Avoid turning shower handles with excessive force once water flow stops.
- Clean aerators and showerheads periodically to prevent backpressure against internal valve seals.
- Inspect rubber seals and valve handles every few years during routine bathroom cleanings.
Conclusion
Fixing a drip saves water, prevents structural rot, and keeps your utility bills manageable. Understanding valve mechanics makes this project approachable with standard hand tools.
If your home plumbing system needs comprehensive inspections, valve upgrades, or professional pipe maintenance, rely on Eagle Rock Faucet Repair & Installation Services by Derks Plumbing to ensure your system runs smoothly and reliably.

Frequently Asked Questions
Why is my shower faucet still leaking after replacing the cartridge?
The internal brass valve seat may be pitted with mineral buildup, or the replacement cartridge rubber seals were twisted during installation.
How much water does a leaking shower faucet waste?
A steady drip of 10 drops per minute wastes over 500 gallons of water per year, raising your monthly water bill.
Can I fix a shower leak without turning off the main water line?
No. Shower valves rarely have dedicated local shutoff valves behind the wall. Always shut off the main water line first.
How long do shower valve cartridges last?
Most shower cartridges last 8 to 15 years depending on local water hardness and household usage.
What causes a shower head to leak only when turned off?
This usually indicates a failing valve cartridge or worn stem washer that allows water to seep through the main valve body.




