We are Available 24/7

Plumbing

How to unjam a garbage disposal
Plumbing

How to Unjam a Garbage Disposal

In today’s modern kitchen, garbage disposal has become essential. If it works, everybody ignores it, but when it gets jammed or stuck, that’s when problems begin. Wondering how to unjam a garbage disposal? Then you are in the right place. This 5 step guide will guide you on everything you need to know in case your garbage disposal stops working. How do you know if your garbage disposal is stuck? Before jumping directly to a solution, let’s confirm the issue. There are some signs that show something stuck in garbage disposal. For example, when you come into the kitchen and turn on your food disposal, it starts humming but not grinding; also if you notice that water is flowing back or there is smoke or smell, these are the signs of your garburator stuck. Moreover, during winter, your frozen food items might be the cause of your frozen garbage disposal. You can read about: How to Install a Garbage Disposal Unit Causes of garbage disposal jam The following are the reasons why your garbage disposal was seized Wiry food items such as celery, artichokes, and corn husks Raw materials like bones and pits of fruits Grease and fat can also make your garbage disposal jammed Excess quantity of food that overloads the motor can make your food disposal stuck Accidental falling of objects such as caps inside the garburator Safety precautions before starting any fixes Do not put your hand directly into the garbage disposal Always cut off the power supply before applying any procedure Make sure to have a tool kit that contains an Allen wrench, tongs or wooden spoon handle Use a flashlight to see any object stuck, such as a spoon, bone, husk or other solid item How to Unjam a Garbage Disposal Step by step In order to fix food waste disposer, follow these easy steps to make it work again. 1. Use an Allen or disposal wrench Garburators usually have a tiny hex-shaped hole connected to the disposal base. Put an Allen wrench in it and rotate it side-by-side. This movement would help release the stuck impellers located inside the garbage disposal, and they would start moving freely. 2. Press the Reset Button Search for a tiny red or black button at the base of the disposal unit. It is the reset knob. Press this button to reset your device. If your garbage disposal seized due to overheating or overloading, this reset trial would fix it. 3. Manually clear stuck objects  Turn on the flashlight to locate objects. Clean out any obstructions within the unit using pliers or tongs. 4. Use a wooden spoon handle Use a wooden spoon handle to manually rotate the impeller through the drain opening. It is quite an old but useful solution to move the stuck food waste disposer. 5. Test the disposal Please turn on the switch at your disposal and run cold water through it. If the water starts moving freely with the usual grind sounds, do thank me because your disposer is fixed. What If Your Garbage Disposal Is Still Jammed? Despite applying the above procedure, if your disposal is still stuck, follow deep fixes such as Disassemble garbage disposal if you are confident enough to open the unit easily and move the impeller or are good at electricity Call a professional if your motor is completely dead Tips to prevent future jams Do not put any tough objects such as bones, eggshells, and fibrous food items into the disposal  After using the disposer, make sure to run cold water through it  Do not overload your disposal and prefer small pieces of food  Clean out the impellers by using ground ice cubes and lemon peel at least once a month Conclusion Don’t let your garbage disposal ruin your mood. Follow the easy steps with the simple tools mentioned above and unjam your disposal in no time. After applying all DIY and the problem is still present, call a professional garbage disposal plumber for timely repair. FAQs Why is my garbage disposal humming but not grinding? Usually a humming sound is produced when your garbage disposal has something stuck in it, and its flywheels are not moving. Humming means your disposal is jam not broken. Can I use hot water for frozen disposal? Never use boiling water for cleaning as it damages your old PVC lines. However, you can use warm water to clean your garbage disposal. Can I use another tool instead of an Allen wrench? If you don’t have a wrench, you can gently move the flywheel with a wooden stick or pliers.  Can I use a drain cleaner to unjam garbage disposal? Avoid chemical-based cleaners because they can destroy your plumbing and corrode internal parts of your disposal. Use natural remedies or mechanical tools to clean them. What to do when my garbage disposal isn’t turned on at all? First, check the power supply and circuit breaker. If it is fine then press the reset button at the base of your unit.

Plumbing

What Size Tankless Water Heater Do I Need | Guide

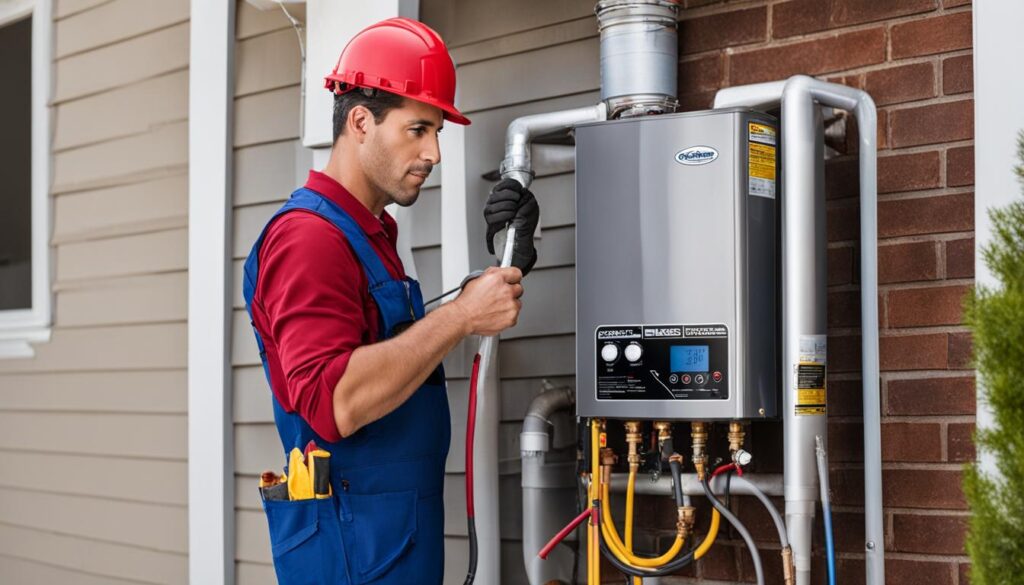
Running out of hot water is frustrating. A tankless water heater fixes that but only if you pick the right size. Most homeowners skip the math and end up with a unit that’s too weak for their home. Get it wrong and you’ll have lukewarm showers every morning. So, what size tankless water heater do I need? The short answer: you need a unit that can handle your peak flow rate and raise your cold water to the temperature you want. This guide walks you through every step, with real numbers and clear examples. Understanding How Tankless Water Heaters Are Sized Tankless water heater sizing is not about physical size. It’s about performance, specifically two numbers: flow rate and temperature rise. Flow rate is how many gallons per minute (GPM) the unit can heat. Temperature rise is how many degrees it needs to warm the incoming cold water. For example, if your groundwater comes in at 50°F and you want 120°F hot water, the unit must raise the temperature by 70°F. If you’re running a shower and a dishwasher at the same time, it needs to heat maybe 3–4 GPM at that temperature rise. That combination GPM plus temperature rise determines everything about tankless water heater size. Step 1: Calculate Your Household’s Flow Rate Start by listing every hot water fixture you might use at the same time. This is called your peak demand. Here are average flow rates for common fixtures: Fixture Average GPM Shower 1.5 – 2.5 GPM Bathroom faucet 0.5 – 1.5 GPM Kitchen faucet 1.0 – 1.5 GPM Dishwasher 1.0 – 2.0 GPM Clothes washer 1.5 – 3.0 GPM Bathtub 3.0 – 4.0 GPM Example for a family of four: Two showers running at once = 2.0 + 2.0 = 4.0 GPM Add a kitchen faucet = 5.0 GPM total That’s your target. Your unit must be rated to handle at least 5.0 GPM at your required temperature rise. Pro tip: Don’t add up every single fixture in the house. Think realistically about what runs during your busiest morning hour. Step 2: Determine the Required Temperature Rise Groundwater temperature changes by region. This matters a lot for sizing an on-demand water heater. Southern states (Texas, Florida, Arizona): Groundwater averages 65–70°F Northern states (Minnesota, Michigan, New York): Groundwater averages 37–50°F Mid-Atlantic and Midwest: Typically 50–60°F Set your target output temperature. Most homes use 120°F. Some prefer 110°F for safety with young children. Formula: Temperature Rise = Desired Output Temp − Incoming Groundwater Temp Example (Northern home): 120°F − 45°F = 75°F temperature rise needed Example (Southern home): 120°F − 68°F = 52°F temperature rise needed A home in Minnesota needs a much more powerful unit than a home in Florida even if both have the same number of fixtures. This is the most overlooked part of tankless water heater sizing. Step 3: Match Your Needs with the Right Unit Size Now combine your GPM and temperature rise to find the right unit. Most manufacturers publish performance charts. You look up your required temperature rise, then find the GPM the unit produces at that rise. Example: You need 4.0 GPM at a 75°F rise. You find a gas unit rated at 6.5 GPM at 75°F rise. That works with room to spare. A unit rated at 3.0 GPM at 75°F rise? Too small you’ll get cold showers. Always size up slightly. You’d rather have a unit with a little extra capacity than one that maxes out every morning. Gas vs. Electric Tankless Water Heaters This choice matters for sizing because gas and electric units handle temperature rise very differently. Gas Tankless Water Heaters Gas units are more powerful. A typical whole-home gas unit runs between 150,000 and 200,000 BTUs. They can handle high GPM at large temperature rises, ideal for cold climates or large families. Good for: Homes with natural gas or propane lines, large households, cold regions. Electric Tankless Water Heaters Electric units are measured in kilowatts (kW). Whole-home electric units typically range from 18 kW to 36 kW. They’re better for smaller homes or climates where groundwater is already warm. A 36 kW electric unit can manage about 3–4 GPM at a 70°F rise. For colder climates, that may not be enough for two simultaneous showers. Good for: Smaller homes, point-of-use applications, warm climates, homes without gas lines. Bottom line: If you live somewhere cold and have a large family, gas is almost always the better fit for whole-home sizing. You can read about: How Can a Tankless Heater Pump More GPM? Sizing Chart Based on Simultaneous Usage Use this chart as a starting point. It assumes an average temperature rise of 70°F, which fits most of the US. Simultaneous Fixtures Flow Rate Needed Recommended Unit Size 1 shower 2.0 GPM 6–8 GPM gas / 18 kW electric 1 shower + kitchen faucet 3.5 GPM 7–9 GPM gas / 24 kW electric 2 showers 4.0 GPM 8–10 GPM gas / 27 kW electric 2 showers + dishwasher 5.0 GPM 9–11 GPM gas / 36 kW electric 3+ showers or full household 6.0+ GPM 10+ GPM gas / 36+ kW electric For colder climates (groundwater below 50°F), go one tier higher than the chart shows. Recommended Tankless Water Heater Sizes by Home Type Here’s a practical breakdown based on what we see most often. Small Home or Apartment (1–2 people) You likely run one shower and maybe a faucet at the same time. Look for a unit rated at 6–7 GPM (gas) or 18–24 kW (electric). Point-of-use electric units work well here too. Medium Home (3–4 people) This is the most common scenario. Two showers may run at once, plus kitchen use. Target 8–10 GPM gas or 27–36 kW electric. Large Home (5+ people, multiple bathrooms) Peak demand can hit 5–7 GPM easily. You need a 10+ GPM gas unit or may need two tankless units working in parallel. Some plumbers recommend a cascading setup where two units share the load. Vacation Home or Cabin Usually

What size of water heater do i need?
Plumbing

What Size Of Water Heater Do I Need?

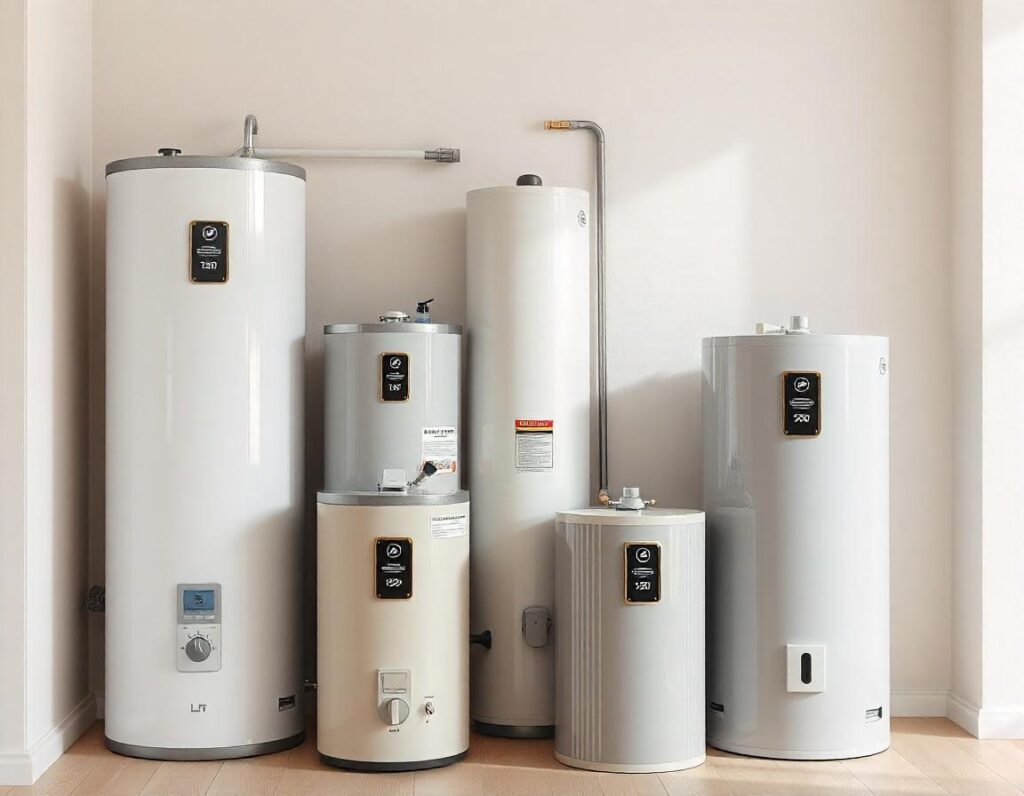
When it comes to buying a brand new water heater, one of the maximum not common questions homeowners ask is: “What size water heater do I want?” Choosing the ideal length is critical due to the fact a unit that`s too small will leave you with bloodless showers, even as an outsized one will waste electricity and boom your application bills. In this manual, we`ll stroll you thru the entirety you want to recognize approximately water heater sizing, inclusive of tank vs tankless water heater size, the way to calculate water heater size, and suggestions for making the proper decision. Why Water Heater Size Matters Your water heater performs a crucial function in your home, making sure warm water is to be had for showers, laundry, dishwashing, and more. If you pick the incorrect size, Too Small: You`ll run out of warm water all through the height times. Too Large: You`ll spend more money heating water you don`t use. The intention is to pick out the right size of water heater that meets your household`s warm water needs without losing electricity. This is where a water heater sizing manual is available in handy. You can read about: How to Install a Water Heater Factors That Affect Water Heater Size Before leaping into numbers, understand what determines the proper water heater size: Household Size The wide variety of humans residing in your own home substantially influences warm water demand. More humans suggest better utilization. Peak Hour Demand The busiest hour for decent water utilization (typically mornings) dictates how plenty warm water your heater need to deliver. Appliance Usage Showers, dishwashers, and washing machines all devour warm water. Estimate utilization for each. Type of Water Heater Tank Water Heater: Stores warm water in a tank; measured in gallons. Tankless Water Heater: Heats water on demand; measured in gallons in keeping with minute (GPM). Water Heater Sizing Guide for Tank Models For garage tank water heaters, size is measured in gallons. The rule of thumb: 30–50 gallons for maximum households, however let`s damage it down: Household Size      Recommended Tank Size 1–2 people                         30–40gallons 2–3 people                        40–50 gallons 3–4 people                        50–60 gallons 5+ people                          60–80 gallons Example: A own circle of relatives of 4 ought to pick a 50–60-gallon tank for most advantageous performance. How to Calculate Water Heater Size for Tanks The key component is First Hour Rating (FHR)—the variety of gallons the unit can deliver in an hour. To calculate: Estimate height hour usage: Showers (in keeping with person): 10 gallonsDishwasher: 6 gallonsWashing Machine: 7 gallons Add them up for the busiest hour. Example: 2 showers = 20 gallonsDishwasher = 6 gallonsWasher = 7 gallonsTotal = 33 gallons Choose a water heater with an FHR near 33 gallons. This step is crucial in water heater sizing guide. Tank vs Tankless Water Heater Size: Which is Better? When asking “What size of water heater do I need?”, you ought to additionally determine among tank and tankless water heater size option. Tank Water Heater Stores preheated waterBest for a constant warm water supplyRequires extra spaceLower preliminary cost Tankless Water Heater Heats water on demandNever runs out of warm waterCompact and energy-efficientHigher premature cost Understanding the difference between tank and tankless water heater sizes helps you to make the best decision for your home Sizing a Tankless Water Heater Tankless water heater are measured in GPM (gallons in keeping with minute). To get size of it: Add GPM for all furniture used simultaneously: Shower: 2.5 GPMKitchen faucet: 1.5 GPMDishwasher: 1.0 GPM Total the GPM for height use. Example: If  showers (five GPM) and a dishwasher (1 GPM) run together, you want 6 GPM capacity. Also, take into account the temperature rise (distinction among incoming water temperature and favored temperature). Common Mistakes to Avoid Ignoring Peak Demand: Always calculate in your busiest hour. Choosing Based on Price Alone: A inexpensive heater might cost a little extra in electricity payments later. Not Considering Future Needs: If your own circle of relatives might also additionally grow, plan ahead. Avoid these types of mistakes when you have to decide what size of water heater you need. Energy Efficiency and Water Heater Size Choosing the proper length isn`t pretty much comfort—it influences electricity payments. Oversized devices waste electricity heating unused water. For efficiency: Look for ENERGY STAR®-rated models.Consider tankless devices for long-time period savings.Use water heater sizing guide help ensure both energy saving and cost saving. FAQs: What Size of Water Heater Do I Need? Q1: Is a 40-gallon water heater sufficient for a own circle of relatives of four? Generally, no. A 40-gallon tank works excellent for 2–three people. For four, pick 50–60 gallons. Q2: How do I calculate water heater length for my home? Use top hour call for and healthy it with the FHR for tank warmers or GPM for tankless warmers. Q3: Which is better—tank or tankless water heater? Tankless devices shop area and electricity however fee extra upfront. Tanks are inexpensive however might also additionally run out of warm water. Q4: Can a water heater be too big? Yes. Oversized devices waste electricity and money. Always length is primarily based on family desires. Final Thoughts The solution to “What size of water heater do I want?” relies upon on family length, water utilization patterns, and whether or not you pick a tank or tankless system. Use this water heater sizing manual to calculate your desired size of water heater accurately. Remember: the proper length guarantees comfort, electricity efficiency, and long-term savings. For expert water heater installation, trust Derks Plumbing Company Inc. to help you choose the perfect size and ensure a flawless setup for years of reliable hot water. Visit Derks Plumbing today to schedule your installation

How Does a Toilet Work? A Best Guide For Everyone
Plumbing

How Does a Toilet Work? A Best Guide For Everyone

How Does a Toilet Work? A Best Guide For Everyone Toilets are essential to every home, but have you ever wondered how they work? Understanding the flushing mechanism, tank components, and the role of water pressure can help you maintain your toilet and troubleshoot common issues. At Derks Plumbing in Los Angeles, CA, we’ve been providing expert plumbing services for over 16 years, and we’re here to explain how toilets work in simple terms. If you are wondering how to install a toilet, we also provide the best services that keep you in touch with us. Parts of a Toilet: What’s Inside?Before explaining how a toilet works, it’s essential to know its main parts and their functions. 1. The Toilet Bowl Siphon (or Bowl Siphon): The U-shaped pipe inside the toilet bowl creates suction that carries waste into the sewer system. Water in the Bowl: Acts as a barrier to prevent foul odors from escaping. 2. The Tank Flush Handle: The part you press to flush the toilet. It’s connected to the lever arm inside the tank. Lever Arm: Pulls on the chain attached to the flapper when you press the handle. Rubber Flapper: A seal at the bottom of the tank lifts to release water into the bowl. Flush Valve: Allows tank water to flow into the bowl during a flush. Fill Valve: Refill the tank with water after flushing. Overflow Tube: Prevents the tank from overfilling by directing excess water into the bowl. Float Ball: Controls the water level in the tank by signaling the fill valve to stop refilling. 3. Water Supply System Supply Line: Connects the toilet to your home’s water supply. Refill Tube: Ensures the toilet bowl is refilled with water after a flush. How Does a Toilet Work? A toilet relies on gravity, water pressure, and suction to flush away waste. Here’s a simple explanation of the flushing process. Step 1: Pressing the Flush Handle A lever arm within the toilet tank is activated when the flush handle is pressed. This lever pulls a chain connected to a rubber flapper. As the flapper rises, it opens the flush valve, allowing water from the tank to flow into the toilet bowl, effectively clearing waste and refilling it for subsequent use. Step 2: Water Rushes into the Bowl Flush toilets are designed to efficiently remove waste using a combination of water flow, gravity, and suction. When you flush, water from the tank rushes into the bowl, creating a powerful force that ensures effective waste disposal. This process is crucial for maintaining hygiene and cleanliness in your bathroom. Here are some key points about how flush toilets work: Rapid Influx of Water: The tank water flows quickly into the toilet bowl, generating a solid force that initiates the flushing process. Effective Waste Movement: This powerful flow pushes waste through the bowl siphon, ensuring that it is efficiently transported away. Suction Mechanism: The swift movement of water creates suction, which helps pull waste into the sewer line, enhancing the flushing efficiency. Gravity Assistance: Flush toilets leverage gravity alongside suction to guarantee that all waste is effectively flushed away, contributing to a clean and hygienic bathroom environment. Understanding these mechanisms can help you appreciate the engineering behind modern toilets and their role in sanitation. When installing or replacing your toilet, contact our emergency plumbers. We’re available 24/7 to restore your toilet and bring a smile to your face. Step 3: The Flapper Closes Once the majority of the water from the tank has been emptied, the flapper gently settles back into its original position. This action effectively seals the flush valve, meaning water will no longer flow into the bowl. It’s a simple yet crucial part of how your toilet works, ensuring everything is ready for the next flush! Step 4: Refilling the Tank and Bowl The fill valve opens, allowing water from the supply line to refill the tank. The float ball rises with the water level, and when the tank is complete, it signals the fill valve to stop. Some of the water from the refill tube flows into the toilet bowl, ensuring it has enough water for the next flush. You can read about: Why Is My Toilet Water Yellow? How Does Air Pressure Help? Air pressure is an essential factor in a toilet’s flushing process. The movement creates a pressure difference when tank water rushes into the bowl. The atmospheric air above the bowl pushes downward, helping to force the water and waste into the siphon. This downward force works with the siphon’s suction and the natural pull of gravity to move waste efficiently through the curved pipe and into the sewer system. Together, these forces ensure a robust and complete flush. Common Toilet Problems and Solutions 1. Weak Flush Cause: Low water level in the tank or a clogged siphon. Solution: Adjust the float ball to ensure the tank fills appropriately. Clean the siphon to remove any clogs. 2. Leaking Toilet Cause: A worn-out rubber flapper or cracked tank components. Solution: Replace the flapper or damaged parts to stop the leak. 3. Tank Not Refilling Cause: A problem with the fill valve or supply line. Solution: Inspect the fill valve and supply line for blockages or damage. Replace if necessary. 4. Running Toilet Cause: A misaligned flapper or faulty fill valve. Solution: Realign the flapper or replace the fill valve to stop water from constantly running. Why Understanding Toilets Matters Learning how a toilet works can help you: Save Water: Fixing leaks, old toilets, and running toilets prevents water wastage. Reduce Repairs: Address minor issues before they become costly. Communicate with Plumbers: Knowing the parts of a toilet makes it easier to explain problems to professionals like Derks Plumbing. How Derks Plumbing Can Help At Derks Plumbing, we provide the best toilet installation services and specialize in repairing, installing, and maintaining toilets across Los Angeles, CA. Our licensed, insured, and bonded plumbers have over 16 years of experience serving areas like Burbank, Glendale,

How to Remove an Old Toilet and Install a New One?
Plumbing

How to Remove an Old Toilet and Install a New One?

How to Remove an Old Toilet and Install a New One? How to Remove an old toilet and install a new one? Might seem challenging, but with the right tools and guidance, it’s easier than you think. Whether you’re upgrading to a modern, efficient model or replacing a broken toilet, this step-by-step guide simplifies the process. From disconnecting the water supply to installing the new toilet, we’ll cover each step to help you complete the project efficiently. We are licensed and professional team and having over 16 years of experience in plumbing if your toilet gets old and not woprking or whether you are planning for installing a new toilet we are here to provide expert toilet installation services to meet yopur diverse needs.  By following these instructions, you can save on professional installation costs while giving your bathroom a functional and updated look. Let’s dive into removing your old toilet and installing a new one with ease! Why Replace Your Old Toilet with a New One? Upgrading your old toilet offers more than just a fresh look for your bathroom; it’s a practical and cost-effective decision. Modern toilets are designed with improved efficiency, using less water to help you save on utility bills while being environmentally friendly. Older models often suffer from worn-out parts or inefficient flushing systems, leading to frequent repairs and frustrations. By installing a new toilet, you gain better functionality, enhanced comfort, and features like ergonomic seat designs or powerful flush systems. Before you dive into installing a new toiletor removing a old toilet it is also necessary to know about how to install at toilet. Additionally, replacing your outdated toilet with a modern one can elevate your bathroom’s aesthetics, giving it a clean, updated appearance. Beyond style and functionality, a new toilet helps you avoid costly future repairs or potential water damage often caused by aging models. With improved efficiency, comfort, and reliability, upgrading your toilet is a smart, long-term investment for your home. Essential Tools and Materials You’ll Need Before you dive into installing your new toilet, make sure you have all the right tools and materials. Here’s a list of what you’ll need: Putty Knife: For scraping away old wax seal remnants. Wrenches: To disconnect the water supply and remove bolts. Screwdriver: To remove screws and bolts securing the toilet. Bucket: To catch any residual water left in the tank or bowl. Wax Seal: This will be used to create a watertight seal between the toilet and the floor. Plumber’s Tape: To ensure tight seals around water connections. New Toilet: The replacement model, complete with a new toilet seat and necessary installation parts. Bucket or Towels: To soak up water during the removal process. How to Remove and Replace a New Toilet This section provides a step-by-step guide on how to remove an old toilet and install a new one. It’s important to approach the process carefully to avoid water damage and ensure proper installation. Step 1: Disconnect the Water Supply  Before starting, turn off the water supply valve behind the toilet to prevent leaks. Flush the toilet to empty most of the water from the tank and bowl. Use a sponge or towel to remove any remaining water from the tank to ensure it’s completely dry. Step 2: Remove the Toilet Bolts Now that the water supply is off, it’s time to remove the toilet. Locate the bolts that hold the toilet to the floor. You may need to remove the toilet tank lid to access these bolts. Use a wrench to loosen and remove the nuts from the bolts. If the bolts are rusted or stuck, you may need to apply some WD-40 or a similar lubricant to loosen them. Step 3: Detach the Toilet from the Floor Once the bolts are removed, carefully lift the toilet off the floor. It may be stuck due to the old wax seal. Use a putty knife to gently break the seal and lift the toilet away from the floor. Be cautious of any water left in the tank or bowl. Place a towel or bucket to catch any leftover water. Step 4: Clean the Area and Remove the Old Wax Seal After removing the old toilet, thoroughly clean the area where the new toilet will sit. Scrape off any remnants of the old wax seal using the putty knife. Ensure the floor is clean and dry before proceeding. Step 5: Install the New Wax Seal Place the new wax seal onto the floor flange, ensuring it is centered and properly aligned. This step is crucial to prevent leaks after installing the new toilet. Step 6: Set the New Toilet in Place Carefully lower the new toilet onto the wax seal. Align the bolts with the holes in the base of the toilet. Press down firmly to set the toilet in place and compress the wax seal. Tighten the bolts to secure the toilet to the floor. Be careful not to overtighten, as this can crack the toilet base. Step 7: Connect the Water Supply  Once the toilet is secured, reconnect the water supply line. Use plumber’s tape around the connection to ensure a tight seal and avoid leaks. Tighten the water supply valve, then turn the water back on. Step 8: Test the Toilet Finally, flush the toilet to test its function. Check for any leaks around the base or water supply line. If everything is functioning properly, you’re done! How Much Does It Cost to Install a New Toilet? The cost of installing a new toilet can vary based on several key factors. First, the type of toilet you choose plays a significant role in the price. High-end models, like smart toilets or luxury designs, can be more expensive than standard models. Additionally, plumbing requirements may impact the cost. If your existing plumbing system requires modifications or repairs, this can add to the total expense. Labor costs are another factor, with professional installation typically ranging from $150 to $300. On average,

How To Reset a Garbage Disposal?
Plumbing

How To Reset a Garbage Disposal?

A malfunctioning garbage disposal can disrupt your kitchen routine, but resetting it is often a simple fix that saves you time and money on repairs. These incredible appliances simplify kitchen cleanup by grinding food waste into tiny particles. Still, they can occasionally encounter issues like jams, overloads, or shutdowns due to improper use or mechanical wear. Knowing how to reset a garbage disposal can restore its functionality quickly and keep your kitchen running smoothly. In this guide, we’ll talk about how to reset a garbage disposal step-by-step, share troubleshooting tips for common problems like clogs and blockages, and provide maintenance advice to ensure optimal performance. With some know-how and care, you can extend the life of your garbage disposal and avoid costly plumbing calls. How to Reset a Clogged Garbage Disposal? When your garbage disposal gets clogged or stops working, it can be frustrating, but the good news is that fixing it is usually straightforward. A clogged disposal can result from food debris, fibrous materials, foreign objects like coffee grounds, or small utensils jammed in the blades. This can cause the motor to overheat or shut down automatically to prevent damage. Resetting the unit often resolves the issue, and with a few simple steps, you can restore your disposal to working order. Here’s how to handle the problem: Turn Off the Power: Unplug the garbage disposal from the electrical outlet or switch off the circuit breaker, controlling the unit for your safety. Locate the Reset Button: Look underneath the disposal for a small red or black button—the reset button designed to restore functionality after an overload or jam. Check for Clogs: Using a wooden spoon handle or an Allen wrench, manually rotate the impeller or flywheel through the access hole to dislodge jammed debris such as food particles, bones, or fibrous waste. Avoid using your hands to ensure safety. Press the Reset Button: After clearing the clog, firmly press the reset button. You may hear a click indicating the reset process is complete. Restore Power and Test: Please reconnect the power supply or flip the circuit breaker back on. Then, turn on the faucet and activate the disposal to confirm its proper functioning. If your garbage disposal remains unresponsive after these steps, further troubleshooting may be required, such as inspecting for electrical issues or consulting a professional plumber. You can read about: How to Replace a Garbage Disposal?  Tips to Prevent Garbage Disposal Jams Clogs and jams are among homeowners’ most common problems with garbage disposals. These issues disrupt the smooth functioning of your kitchen and can lead to unpleasant odors and costly repairs if addressed. Fortunately, maintaining garbage disposal and avoiding such issues is simpler. With proper usage and regular care, you can ensure your disposal runs efficiently for years. Here are some practical tips to keep your unit in top condition: Run cold water while the disposal is in use: Always let cold water flow during and for a few seconds after using the disposal. This helps flush food particles through the system and prevents grease from solidifying in the pipes. Avoid grinding hard materials: Hard items like bones, fruit pits, or shells can dull or damage the blades and cause the motor to overheat. Dispose of these items in the trash instead. Feed small amounts of food waste gradually: Overloading the disposal can strain the motor and lead to clogs. Feed food scraps in small increments rather than dumping them all at once. Clean the unit regularly: Clean your disposal weekly to prevent buildup and odors. To break down residue, use a combination of vinegar and baking soda or a mild cleaning product designed for garbage disposals. By incorporating these simple habits into your kitchen routine, you can avoid standard disposal issues, improve performance, and significantly extend lifespan. Explore these helpful resources for more guidance! If your garbage disposal is not working, you’ll find helpful tips and troubleshooting steps to get it back in action. Additionally, if you’re curious about what garbage disposals are used for, we provide detailed explanations of their benefits and how they help keep your kitchen running smoothly. These resources will offer you the answers and solutions you need! Avoid Putting Down the Drain What you put into your garbage disposal plays a significant role in its performance and longevity. Some everyday items may seem harmless but can cause severe damage or clogs when disposed of improperly. For example, coffee grounds, often disposed of in the disposal with little thought, can create stubborn clogs over time. Once ground up, they compact into a paste-like consistency that doesn’t break down quickly, causing blockages in the pipes. Similarly, feminine hygiene products, cotton balls, and other non-biodegradable materials should never be flushed down the disposal. These items don’t break down in the system and can easily obstruct pipes, leading to serious plumbing issues. Although liquid, when poured into the disposal, grease and oil can solidify once they cool, creating a sticky residue that coats the pipes and blocks the water flow. Even small amounts of these substances can accumulate over time and cause major blockages. To avoid these issues and ensure your disposal runs smoothly, it’s essential to use the appliance correctly, only putting in food waste that is safe to process. We also offer expert plumbing repair services. Contact us and discuss your issues. We will properly repair your garbage disposal. Doing so will prevent plumbing issues, maintain a properly functioning garbage disposal, and avoid costly repairs. How to Resolve Motor Problems in a Garbage Disposal? Motor issues are one of the most common reasons garbage disposals stop working, and overheating or mechanical blockages can often cause them. If your disposal’s motor isn’t functioning, here’s how to troubleshoot the problem: Unplug and Inspect: Always start by ensuring safety—unplug the garbage disposal from its power source to avoid electrical shock. Inspect the unit for any visible damage, wear, or loose parts. It’s also good to check the power cord for fraying or breakage. Check the Circuit Breaker:

Why is my Garbage disposal not working?
Plumbing

Why is My Garbage Disposal Not Working?

Why is My Garbage Disposal Not Working It can be frustrating if you’re facing issues with your garbage disposal. If you ara being tried of saying this Why is My Garbage Disposal Not Working so this is for you read all and get the garbage disposal issues and make your garbage disposal healthy and make it recover perfectly. Garbage disposals help keep your kitchen clean by grinding up food waste, but when they stop working, you’ll want to figure out what’s wrong. Derks Plumbing is here to help! Some common reasons for a malfunction include power issues, clogs, or jams. First, check the power and reset button, then clear any clogs or debris. If these steps don’t resolve the problem, it might be time to call a professional plumbing repair service. Follow this guide, and your garbage disposal will run smoothly in no time. Common Garbage Disposal Problems In this section, we’ll go over the most common reasons for garbage disposal malfunctions and what you can do about them. 1. Garbage Disposal Won’t Turn On If your garbage disposal doesn’t make any noise when you turn it on, the issue might be related to power or the reset button. This could happen if the disposal is unplugged or if the circuit breaker has tripped. To fix this, first check that the disposal is securely plugged in. Then, try pressing the reset button located on the bottom of the unit. Finally, take a look at your circuit breaker and reset it if necessary. 2. Humming Sound But Not Working If your garbage disposal hums but doesn’t grind, it’s likely due to a jam or motor issue. This can happen if something is stuck in the grinding chamber or if the motor is overloaded. To fix it, first turn off and unplug the disposal. Insert an Allen wrench into the slot on the bottom of the unit and turn it to free any jammed objects. If needed, press the reset button to restart the motor. We also offer 24-hour emergency plumbing services to help you anytime whenever the plumbing issues occur. 3. Clogs and Slow Draining A clogged garbage disposal can cause slow draining or even a complete blockage. This often happens due to built-up food waste or when fibrous and starchy foods, like celery and potato peels, clog the system. To fix it, run cold water through the disposal to help clear out the blockage, and try to avoid putting fibrous foods down the disposal in the future. Troubleshooting Guide Step 1: Check for Power Issues If your garbage disposal isn’t working at all, the problem might be electrical. Start by checking the power connections: Verify the Outlet and Cord Make sure the garbage disposal’s power cord is securely plugged into the outlet. Test the outlet by plugging in another small appliance to see if it’s working properly. Check the Circuit Breaker Sometimes, a power surge can trip the circuit breaker connected to the disposal. Locate your circuit breaker panel and flip the breaker switch connected to the kitchen or disposal to reset it. Press the Reset Button Locate the reset button, usually found at the bottom of the garbage disposal unit. If the button has popped out, press it back in to reset the disposal’s motor. Step 2: Examine for Jams When a garbage disposal jams, it often makes a low humming noise but doesn’t grind. This usually means the motor is trying to work, but something is blocking the blades. Here’s what you can do to fix it: Turn Off and Unplug the Disposal Always ensure the disposal is powered off before attempting any repairs. Inspect the Chamber with a Flashlight Use a flashlight to look inside the disposal for any visible obstructions, like a utensil, small objects, or food debris. Use an Allen Wrench to Free the Jam Insert an Allen wrench into the hole at the bottom of the unit. Turn the wrench clockwise to dislodge any blockages in the grinding chamber. Once the obstruction is cleared, press the reset button and plug the disposal back in to see if it works properly again. Step 3: Clear Clogs in the Disposal or Sink If water is draining slowly, the issue might be a clog in the garbage disposal or the nearby pipes. Here’s how you can address the problem: Use a Plunger Gently plunge the sink to help loosen any blockages that may be causing slow drainage. Make sure to cover the drain tightly to create a good seal. Disassemble the P-Trap For more stubborn clogs, you may need to remove the P-trap, which is the curved pipe under the sink. Place a bucket underneath to catch any water, then unscrew the P-trap to clear out any buildup or debris inside. By doing this, you should be able to clear the clog and restore proper drainage. Preventative Tips for a Healthy Garbage Disposal Why is my garbage disposal not working Maintaining your garbage disposal can extend its lifespan and prevent costly repairs. We recommend always using cold water during operation to help solidify any grease, making it easier for the disposal to break it down. Avoid placing hard items like bones, coffee grounds, and fibrous vegetables, as these can damage the blades or cause jams. Regular cleaning is essential, too; using a small brush or grinding ice cubes and citrus peels helps remove buildup and neutralizes odors. Simple, regular care will keep your disposal functioning smoothly. When to Call a Professional While DIY fixes may resolve minor garbage disposal issues, certain situations require professional expertise. Suppose you’ve tried searching on the Internet. Why is my garbage disposal not working Or basic troubleshooting like checking the reset button, removing small blockages, or clearing out food residue, yet the disposal still won’t function correctly. In that case, it’s time to bring in a specialist like us. Persistent clogs, unusual noises, or garbage disposal leaks can indicate deeper issues that require trained skills and tools to prevent further damage. By calling a professional,

Why Is My Garbage Disposal Leaking?
Plumbing

Why is My Garbage Disposal Leaking?

Why is My Garbage Disposal Leaking? Garbage disposals are essential kitchen appliances that make it easy to handle food waste. However, if you’re asking, “Why is my garbage disposal leaking?”, it could indicate a problem that needs immediate attention. If you notice water pooling under the sink or dripping from the disposal, it’s important to take action immediately. In this guide, we’ll discuss the main causes of garbage disposal leaks, how to fix them, tips for avoiding leaks, and when it’s best to replace your unit. If you’re facing garbage disposal issues, Derks Plumbing is here to provide expert advice and reliable repairs. What’s Behind Water Leaks from Garbage Disposals? Identifying the cause of a water leak is the first step toward resolving the issue. Leaks in garbage disposals can arise from various problems, and understanding the root cause is essential for ensuring an effective repair. Below are the most common reasons why garbage disposals leak: 1. Loose Connections Garbage disposals connect to other pipes, including the sink drain, dishwasher, and the drain line leading out. These connections can come loose due to vibrations from regular use or simply from age and wear. If the connections aren’t secure, they allow water to escape. Where to Look: Check all connections where the disposal attaches to pipes, including the drainpipe and dishwasher hose. If you spot a loose connection, tighten it with a wrench. Make sure all fittings and screws are secure. 2. Worn-out seals or Gaskets Seals and gaskets keep water inside the disposal system. Over time, these rubber parts can wear out, crack, or lose their flexibility. The main gasket is located between the disposal and the sink drain flange, a common spot for leaks if the gasket becomes damaged. Signs of Worn Seals: If you see water dripping from the area where the disposal meets the sink or from other joints in the plumbing, it could be due to worn seals. Look for wear on the rubber gasket, especially near the sink flange. 3. Cracks or Damage in the Disposal Unit A cracked disposal unit can let water seep out. Even though garbage disposals are built to withstand wear, they can develop cracks over time. Cracks are more likely if the disposal is old, if it’s taken a hard impact, or if foreign objects have caused damage. How to Spot Cracks: Use a flashlight to examine the body of the disposal for any visible cracks. Look closely at the seams, bottom, and sides of the disposal unit. 4. Clogs and Blockages Clogs within the disposal or drain line can back up water, causing leaks. Clogs may form from items that don’t grind well, like potato peels, fibrous vegetables, or grease. When the water can’t flow freely, it builds up pressure that forces water out from weak points. Regular drain cleaning can help prevent such blockages and keep the system running smoothly. Symptoms of Clogs: Water draining slowly or pooling in the sink. Gurgling sounds from the disposal or strange odors indicate food waste stuck in the pipes. 5. Incorrect Installation Improper installation can lead to leaks almost immediately or shortly after use. This can happen when pipes aren’t lined up, screws are too loose, or the disposal isn’t secured to the sink flange. Common Installation Issues: If leaks start soon after a new installation, review each connection and check for alignment issues. Ensure that the unit is mounted firmly on the sink flange and all connections are properly aligned. How to Spot Leaks in Your Garbage Disposal Garbage disposals are essential appliances in the kitchen, helping to eliminate food waste quickly and efficiently. However, leaks can develop around the unit over time, leading to water damage and other issues. Identifying the source of the leak early can help prevent costly repairs. Follow these simple steps to locate the leak: Check the Area Under the Sink: Inspect the area beneath the sink for any visible signs of water pooling or dripping around the garbage disposal unit, which could indicate a leak or other plumbing issue. Examine the Rubber Gasket: The rubber gasket that seals the seams of the disposal unit is a common leaky culprit. If it’s worn, cracked, or missing, it can cause water to leak. Replacing the gasket may solve the problem. Inspect Pipes and Drain Lines: Look for leaks along the pipes and drain lines connected to the garbage disposal. Check for cracks, loose connections, or damage to the pipes. Additionally, ensure that the pipes are not clogged or kinked, which can also contribute to leaks. Check for Leaks from the Top of the Disposal: If you notice a leak coming from the top of the garbage disposal, this could indicate a more severe issue with the unit. Addressing this immediately is essential, as it could lead to more significant problems later. Call Us to Fix Your Garbage Disposal Leaks Dealing with a garbage disposal leak can be challenging, especially if you’re not sure of the cause. Whether it’s a loose connection, a worn gasket, or something more complex, Derks Plumbing has the experience to handle it all. Our team can repair or replace your garbage disposal to keep your kitchen running smoothly. Call us today to schedule a service and say goodbye to garbage disposal leaks! How to Fix a Leaking Garbage Disposal: Common Causes and Repairs Once you know what’s causing the leak, you can take steps to fix it. Here’s a guide to addressing the most common disposal leaks. 1. Tightening Connections If loose connections are the issue, tightening them can often stop the leak. Turn off power: Before making any adjustments, turn off the disposal’s power at the circuit breaker for safety. Locate and tighten connections: Use a wrench to tighten loose connections, especially where the disposal connects to the sink drain, dishwasher hose, or main drainpipe. Run water to test: Once tightened, run water to check for any remaining drips. 2. Replacing Seals or Gaskets If the seal or gasket is

What Is A Garbage Disposal Used For
Plumbing

What Is a Garbage Disposal Used For?

What Is A Garbage Disposal Used For ? A garbage disposal is a handy kitchen appliance designed to grind food scraps into tiny particles, which are then flushed down the drain. This device makes kitchen cleanup easier, reduces food waste, and keeps odors at bay. But what exactly is a garbage disposal used for, and how does it benefit your home? In this guide, we’ll explore its uses, the pros and cons of garbage disposals, and tips for effective garbage disposal usage. We’ll also touch on the average life garbage disposal units have and how to maintain them for long-lasting performance. Understanding What Is A Garbage Disposal Used For Garbage disposals, also known as kitchen garbage crushers, are installed under the kitchen sink and connected to the drain. They help manage food waste by grinding it into small particles that easily flow through your plumbing system. This appliance is designed for food scraps like: Fruit and vegetable peels Small bones and eggshells Leftover grains and soft foods By using a garbage disposal, you minimize the amount of waste going to landfills, making it an eco-friendly choice. Moreover, this reduces the chance of smelly trash bins attracting pests. How Does Garbage Disposal Usage Work? To use a garbage disposal effectively: Turn on the cold water. Start the garbage disposal. Feed food scraps slowly into the unit. Let the water run for a few seconds after turning off the disposal to flush out any remaining particles. This process ensures that waste is properly ground and flushed away, reducing the risk of clogs. The kitchen garbage crusher also helps maintain a clean and odor-free kitchen by preventing food scraps from rotting in the trash can. Pros and Cons of Garbage Disposals Pros: Convenience: Quick and easy cleanup after meals. Hygiene: Reduces kitchen odors and pest attractions. Environmental Impact: Less food waste ends up in landfills. Cons: Clogs and Jams: Improper use can lead to blockages. Maintenance Needs: Requires regular cleaning to prevent odors. Not for All Foods: Items like grease, fibrous vegetables, and large bones can damage the unit. Understanding the pros and cons of garbage disposals can help you decide if it’s the right fit for your kitchen. Average Life Garbage Disposal Units The average life garbage disposal units typically range from 8 to 15 years, depending on usage and maintenance. High-quality models made of stainless steel last longer than cheaper alternatives. To extend the lifespan of your garbage disposal: Avoid grinding fibrous foods, grease, or hard items like bones. Clean it regularly using ice cubes and citrus peels for freshness. Run cold water before and after use to flush out food particles. Proper care and usage can maximize the average life garbage disposal units offer, ensuring long-term efficiency. Choosing the Right Kitchen Garbage Crusher When selecting a kitchen garbage crusher, consider: Motor Power: Higher horsepower handles tougher waste. Material: Stainless steel components resist rust and last longer. Noise Level: Modern units offer noise reduction features. Additionally, some models have advanced features like anti-jamming mechanisms and easy installation systems, making them convenient and efficient for any kitchen setup. Effective Garbage Disposal Usage Tips To ensure optimal garbage disposal usage: Cut large scraps into smaller pieces before grinding. Feed food gradually to avoid overloading the unit. Use cold water to solidify fats and flush them through the drain. Avoid putting fibrous foods, grease, and non-food items in the disposal. These practices keep the disposal running smoothly and prevent common issues like jams and clogs. Pros and Cons of Garbage Disposals for Environmental Impact While garbage disposals are convenient, they also impact the environment. On the positive side, they reduce food waste going to landfills, thus lowering methane emissions. However, they increase water usage and put extra strain on wastewater systems. It’s essential to balance usage and be mindful of what goes down the drain. Professional Garbage Disposal Installation and Repair in Los Angeles If you’re looking to install or repair a garbage disposal in Los Angeles, Derks Plumbing Company Inc. is here to help. We offer professional Garbage Disposal Installation and Repair Los Angeles services. Our expert technicians ensure correct installation to avoid plumbing issues, leaks, and other potential problems. Whether you need a new unit or maintenance on your existing garbage disposal, our team provides reliable and efficient services tailored to your needs. With years of experience serving Los Angeles homeowners, we guarantee quality workmanship and customer satisfaction. Why Choose Derks Plumbing for Your Garbage Disposal Needs? Choosing the right plumbing company matters when installing or repairing garbage disposals. At Derks Plumbing Company Inc., we prioritize: Expert Technicians: Experienced and certified professionals. Quality Service: Prompt and reliable installations and repairs. Customer Satisfaction: Dedicated to providing top-notch service. Our team understands the importance of a functional kitchen, and we’re committed to keeping yours running smoothly. If you’re considering installing a kitchen garbage crusher or need repairs, contact us today! Conclusion So, what is a garbage disposal used for? It’s more than just a waste management tool; it keeps your kitchen clean, reduces landfill waste, and protects your plumbing system. While there are pros and cons of garbage disposals, proper use and maintenance can maximize their benefits. If you’re in Los Angeles and need professional Garbage Disposal Installation and Repair, trust Derks Plumbing to get the job done right. Our skilled team is ready to assist with all your plumbing needs, ensuring efficient and long-lasting solutions. Ready to upgrade your kitchen’s functionality? Contact Derks Plumbing today for expert service and reliable solutions! FAQ’s Can I put all food scraps in a kitchen garbage crusher? No, not all food scraps are suitable for a kitchen garbage crusher. Avoid putting fibrous foods (like celery and corn husks), grease, coffee grounds, and large bones down the disposal. These can cause clogs, jams, or damage to the unit. How long does the average life garbage disposal last? The average life garbage disposal typically lasts between 8 to 15 years. The lifespan depends on usage, maintenance, and the

Fast and Efficient Plumbing Services in Eagle Rock

Client Reviews

Posted on Google Google
Ryan Haden profile picture
Ryan Haden
Google star 1Google star 2Google star 3Google star 4Google star 5Trustindex verifies that the original source of the review is Google.
Could not have been happier with Alex! We was right on time, polite, fixed all my kitchen sink issues and have me good tips on how to best maintain. I will for sure be using him again and highly recommend anyone who needs a great plumber to use his services as well. Thank you!
Posted on Google Google
Lorena Marcoe profile picture
Lorena Marcoe
Google star 1Google star 2Google star 3Google star 4Google star 5Trustindex verifies that the original source of the review is Google.
Talk about a professional...yes, I am talking about Alex Derks, Derks Plumbing. He is by far the most knowledgeable plumber we have ever had the pleasure of hiring. He's been in the plumbing business for years and it shows. Any questions you have re: plumbing issues, install, etc., Alex is your man. So happy with his work and he has a great sense of humor as well... extremely easy to talk to...thank you Alex!!!
Posted on Google Google
Andrew Jalil profile picture
Andrew Jalil
Google star 1Google star 2Google star 3Google star 4Google star 5Trustindex verifies that the original source of the review is Google.
Alex did a great job installing my kitchen faucet and an under-sink Aquasana water filter. He also addressed a few other plumbing-related issues. He was friendly and helpful. Excellent work!
Posted on Google Google
Abigail Bigham profile picture
Abigail Bigham
Google star 1Google star 2Google star 3Google star 4Google star 5Trustindex verifies that the original source of the review is Google.
Alex does what other plumbers cannot do! He is our go to.
Posted on Google Google
Danielle Driver profile picture
Danielle Driver
Google star 1Google star 2Google star 3Google star 4Google star 5Trustindex verifies that the original source of the review is Google.
Alex is very friendly and responsive. What a pleasure to work with!
Posted on Google Google
Lawrence Isaacs profile picture
Lawrence Isaacs
Google star 1Google star 2Google star 3Google star 4Google star 5Trustindex verifies that the original source of the review is Google.
Very very happy with the work Alex did for us replacing the tanks in our Aquasana filtration system. From first contact over the phone through job completion Alex was a pleasure to work with. He explained what he was doing, and why, every step of the way, and made sure we understood what we needed to do to maintain the system. Strongly recommend Alex!
Posted on Google Google
Joey Aucoin profile picture
Joey Aucoin
Google star 1Google star 2Google star 3Google star 4Google star 5Trustindex verifies that the original source of the review is Google.
Alex Derks has been such a lifesaver for me. Anytime I'm in a pinch with the plumbing in my home, Alex is only a phone call away and I've only seen great results from his work. He's reliable, knowledgable, and entirely trustworthy. A must-have source when owning a home.
Posted on Google Google
Eric Gorman profile picture
Eric Gorman
Google star 1Google star 2Google star 3Google star 4Google star 5Trustindex verifies that the original source of the review is Google.
After working with dozens of plumbing services in the LA area, I can confidently say Derks is the best in the business. On time, reliable and capable of even the most difficult tasks, Derks goes above and beyond to make sure your water system is working correctly.
Posted on Google Google
Jason Gruenbaum profile picture
Jason Gruenbaum
Google star 1Google star 2Google star 3Google star 4Google star 5Trustindex verifies that the original source of the review is Google.
Excellent know-how and fast!! Reasonable pricing and super responsive!!
Posted on Google Google
Jonathan Hepfer profile picture
Jonathan Hepfer
Google star 1Google star 2Google star 3Google star 4Google star 5Trustindex verifies that the original source of the review is Google.
Alex is an expert plumber, and he always goes out of his way to educate me about how to prevent future issues. Highly recommended!

Derks Plumbing has been providing professional plumbing services to Eagle Rock residents for over 20 years. Our experience and strong reputation have allowed us to grow, and we are proud to serve customers in 15 nearby areas, including Venice, Santa Monica, Beverly Hills, and more.

Contact

Hours of Operation

Monday: Open 24 Hours
Tuesday: Open 24 Hours
Wednesday: Open 24 Hours
Thursday: Open 24 Hours
Friday: Open 24 Hours
Saturday: Open 24 Hours
Sunday: Open 24 Hours

© 2026 Created by Localpro1

Scroll to Top