We are Available 24/7

Plumbing

Why is my water heater leaking
Plumbing

Why Is My Water Heater Leaking | Quick Solutions

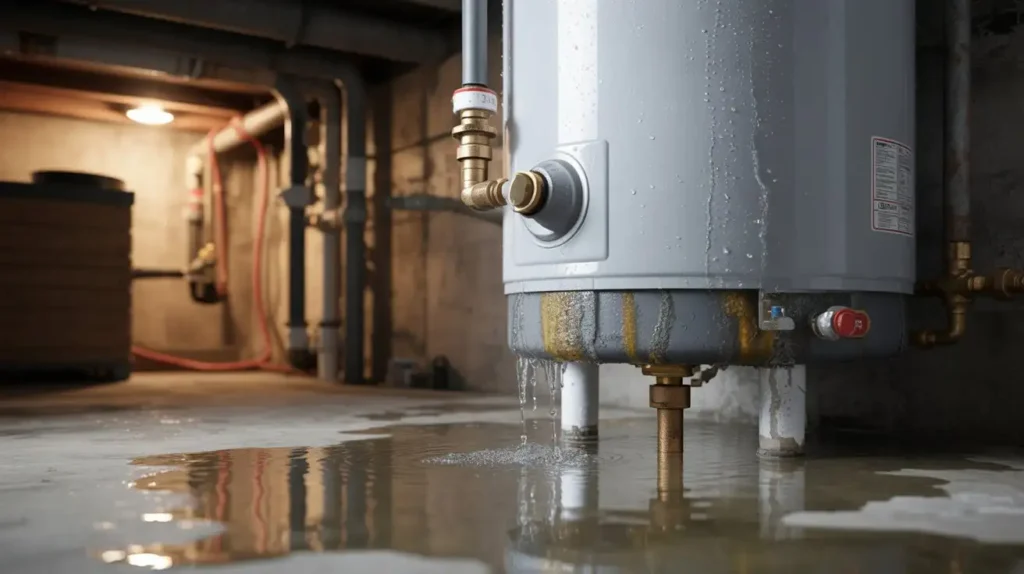
A puddle around your hot water heater is never a good sign it often signals trouble that can lead to costly repairs or loss of hot water. If you’re asking yourself why is my water heater leaking, the cause is usually a faulty valve, loose pipe connection, or a corroded tank. Over time, wear and tear or mineral buildup can damage internal components, allowing water to escape. Identifying the source of the leak quickly is crucial to prevent water damage and higher repair costs. Whether it’s a small drip or a major leak, addressing the problem early ensures your system runs safely and efficiently. What Causes Water Heater Leaks? Understanding the cause of your leaking water heater helps you figure out the best course of action. Water heaters contain several parts that handle water pressure, heat, and flow, and over time, any of them can fail. Age and Corrosion Water heaters typically last 8-12 years. Over time, sediment builds up inside the tank. This sediment speeds up corrosion, which eats through the metal and creates holes. If your unit is over 10 years old and leaking, age is likely the main issue. Faulty Pressure Relief Valve The pressure relief valve is a safety device that releases pressure when it gets too high inside the tank. A faulty valve can leak water or fail to work properly. Sometimes mineral deposits clog the valve, causing it to drip constantly. Loose Drain Valve The drain valve sits near the bottom of your tank. It’s used to flush sediment during maintenance. If this valve isn’t tight or the washer inside wears out, you’ll notice leaking water pooling below your heater. Cracked or Damaged Tank The inner tank can crack from corrosion or manufacturing defects. When the tank itself is damaged, water seeps through the outer shell. This type of water heater leak usually means you need a replacement. High Water Pressure Your home’s water supply pressure should stay between 50-80 PSI. When pressure climbs too high, it stresses your tank and valves. This extra pressure can cause leaks at weak points and shorten your heater’s life. Loose or Damaged Inlet/Outlet Connections Cold water enters through the inlet pipe, and hot water exits through the outlet. These connections can loosen over time or develop worn washers. Either problem creates a water heater leak at the top of the unit. Temperature Settings Too High Setting your thermostat above 130°F creates excessive pressure inside the tank. This pressure forces water out through the pressure relief valve. It also accelerates corrosion and wastes energy. Signs Your Water Heater Is Leaking It is important to catch a leak early to prevent serious water damage. The signs of a hot water heater is leaking are often quite noticeable. Visible Water Pooling Check around your water heater regularly. Any puddles, moisture, or damp spots mean you have a leak. Even small amounts of water signal a problem that needs attention. Rust-Colored Water Brown or rust-colored water from your hot taps indicates corrosion inside your tank. This rust often comes with leaks or will lead to them soon. Strange Noises Popping, banging, or rumbling sounds point to sediment buildup. This sediment traps water underneath, which boils and causes noise. The same sediment that makes noise also causes leaks. Reduced Hot Water Supply A heater leaking slowly loses water volume. You might notice shorter showers or running out of hot water faster than normal. Higher Water Bills Unexplained increases in your water bill can mean your water heater is leaking. Even small drips waste hundreds of gallons over time. Moisture on Tank Surface Run your hand along the tank’s sides. Any dampness, even without visible puddles, means water is escaping somewhere. What Do Water Heater Leaks from Top, Bottom, or Side Mean? The location of the drip gives you a major clue about why my water heater leaking and the severity of the problem. Leaks from the Top Top leaks usually come from loose inlet or outlet connections. These pipes bring cold water in and send hot water out. The connections can work loose or the washers can fail. You might also see leaks from the temperature and pressure relief valve mounted near the top.These leaks are typically easier to fix. Tighten the connections or replace worn washers. If the pressure relief valve leaks constantly, you may need a new valve or have a pressure problem. Leaks from the Bottom Bottom leaks often signal more serious issues. The drain valve might be loose or damaged. Sediment buildup at the tank bottom can cause corrosion and tiny holes. In worse cases, the tank itself has rusted through.Drain valve problems are fixable. Tank corrosion at the bottom usually means replacement time. Leaks from the Side Side leaks are less common but concerning. They typically indicate tank corrosion or a crack in the tank wall. When you see water seeping from the side, the inner tank has likely failed. This damage can’t be repaired you’ll need a new water heater. How to Fix a Leaking Water Heater Safety comes first. Turn off the power (circuit breaker for electric, gas valve for gas units) before working on your heater. Step 1: Identify the Leak Source Dry the area completely. Watch carefully to see exactly where water appears first. Use a flashlight to check all connections, valves, and the tank surface. Step 2: Fix Common Problems For loose connections: Turn off the water supply. Use a pipe wrench to carefully tighten inlet and outlet connections. Don’t overtighten you can crack the fittings. For drain valve leaks: Try tightening the valve first. If it still leaks, replace it. Most drain valves are inexpensive and easy to swap out. For pressure relief valve issues: Test the valve by lifting the lever. Water should flow and stop cleanly. If the valve drips constantly or won’t seal, replace it. This is a $15-30 part that takes 20 minutes to change. Step 3: Reduce Water Pressure Install a pressure-reducing valve on your
how to install a toilet wax ring
Plumbing

How to Install a Toilet Wax Ring | Step by Step

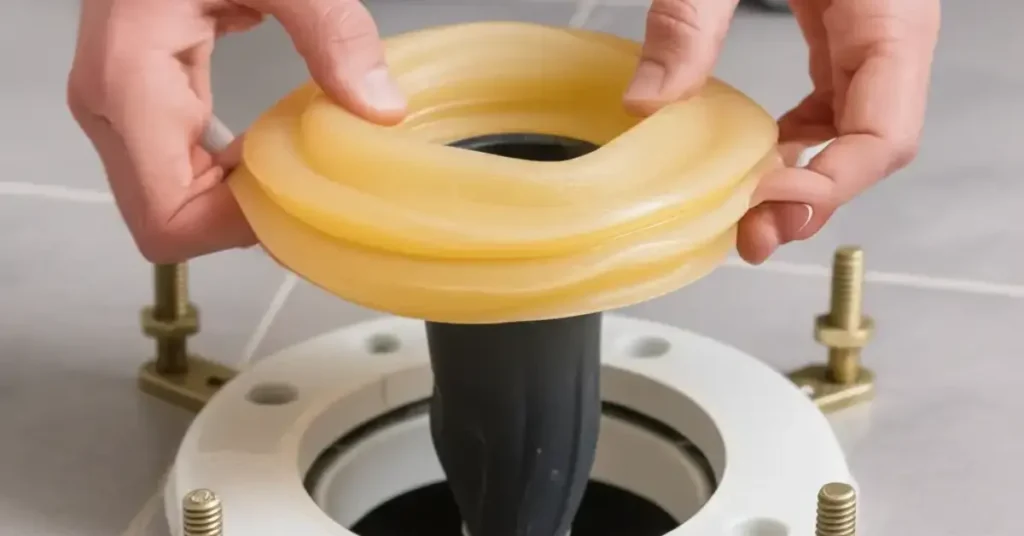
A toilet wax ring creates a watertight seal between the toilet and the drain flange. If the seal fails, water can leak onto the floor and damage the subfloor. Installing a new ring is usually simple, but the toilet must sit level and firmly on the flange. Learning how to install a toilet wax ring starts with proper removal, cleaning, ring placement, and toilet alignment. This guide explains each step, common mistakes, seal choices, and signs that the installation needs more work. What Is a Toilet Wax Ring? A toilet wax ring is a soft sealing ring placed between the bottom of a toilet and the closet flange. The flange connects the toilet drain opening to the home’s drain pipe. When you tighten the toilet bolts, the toilet presses the wax ring against the flange. The wax spreads and fills small gaps around the connection. This helps keep wastewater and sewer gases from escaping. A wax ring does not normally need glue. Its seal comes from pressure between the toilet and flange. The ring must match the toilet and flange setup. A standard ring works for many installations, while an extra-thick ring can help when the flange sits lower than the finished floor. When Should You Replace a Toilet Wax Ring? Wax rings are often replaced when a toilet is removed. Reusing an old ring is not a good idea because the wax may no longer form a reliable seal. Common signs of a failed seal include: Water appears around the toilet base after flushing. The bathroom floor smells like sewage. The toilet rocks or moves when someone sits on it. The wax seal becomes damaged during toilet removal. The toilet has been lifted from the flange for repair. A leak at the toilet base does not always mean the wax ring is the only problem. A cracked flange, loose toilet, damaged drain connection, or blocked drain can also cause trouble. What You’ll Need to Install a Toilet Wax Ring Gather everything before removing the toilet. This makes the job easier and reduces the chance of damaging the new seal. You may need: New toilet wax ring Adjustable wrench Screwdriver Putty knife or plastic scraper Old towels or rags Disposable gloves Bucket Sponge New toilet bolts Level Caulk, if required by local practice or the toilet manufacturer Check the new wax ring before installation. It should be clean and free from damage. If the toilet has been removed before, inspect the flange and mounting bolts before buying the new ring. The condition and height of the flange can affect which seal you need. How to Install a Toilet Wax Ring: Step-by-Step Guide The following process explains a typical toilet wax ring install from start to finish. 1. Turn Off the Toilet Water Supply Find the shutoff valve behind or beside the toilet. Turn it clockwise until the water stops. Flush the toilet to empty most of the tank and bowl. Use a sponge or small container to remove any remaining water. Disconnect the supply line from the bottom of the toilet tank. Keep a towel nearby because some water may remain inside the line. 2. Remove the Toilet Remove the caps covering the toilet mounting bolts. Loosen the nuts with an adjustable wrench. If the nuts are badly rusted, work slowly. Cutting a damaged nut may be safer than putting too much force on the toilet or flange. Once the nuts are removed, hold the toilet firmly and lift it straight up. Avoid rocking the toilet more than necessary. The old wax can stick to the flange and toilet base. Place the toilet on an old towel or cardboard. 3. Remove the Old Wax Use a putty knife or plastic scraper to remove the old wax from the flange. Clean the bottom of the toilet around the drain opening as well. The surfaces should be free of old wax, dirt, and loose material. Do not rush this step. A dirty or uneven surface can make it harder for the new ring to seal properly. Inspect the flange after cleaning. Look for cracks, broken mounting slots, severe rust, or a flange that sits too low. 4. Check the Toilet Flange The flange should be securely attached to the floor and should provide a solid mounting point for the toilet. If the flange is damaged or badly corroded, stop before installing the new wax ring. A new wax ring cannot fix a broken flange. Also check the flange height. If the finished floor has been changed, the flange may now sit below the floor surface. That situation may require a different seal or a flange repair solution. 5. Install the New Wax Ring Place the new wax ring over the toilet flange or onto the toilet base, depending on the ring design and manufacturer instructions. Make sure the ring is centered around the drain opening. Do not press and reshape the wax more than needed. The toilet will compress the ring when it is lowered into position. This is the key part of how to install wax seal on toilet correctly. The ring must remain centered while the toilet is lowered. 6. Position the Toilet Over the Flange Install the new mounting bolts into the flange slots. Lift the toilet carefully and line up the bolt holes with the mounting bolts. Lower the toilet straight down. Do not drop the toilet onto the wax ring. A controlled lowering motion helps keep the ring centered. Once the toilet reaches the floor, apply firm downward pressure. You may feel the toilet settle as the wax compresses. 7. Make Sure the Toilet Is Level Place a level across the toilet bowl or another suitable flat surface. If the toilet rocks, do not solve the problem by simply tightening the bolts harder. A small gap may need toilet shims to provide stable support. Overtightening the bolts can crack the porcelain base. Tighten each side gradually and evenly until the toilet is secure. 8. Trim the

How to Install SharkBite on Copper
Plumbing

How to Install SharkBite on Copper: A Full DIY Guide

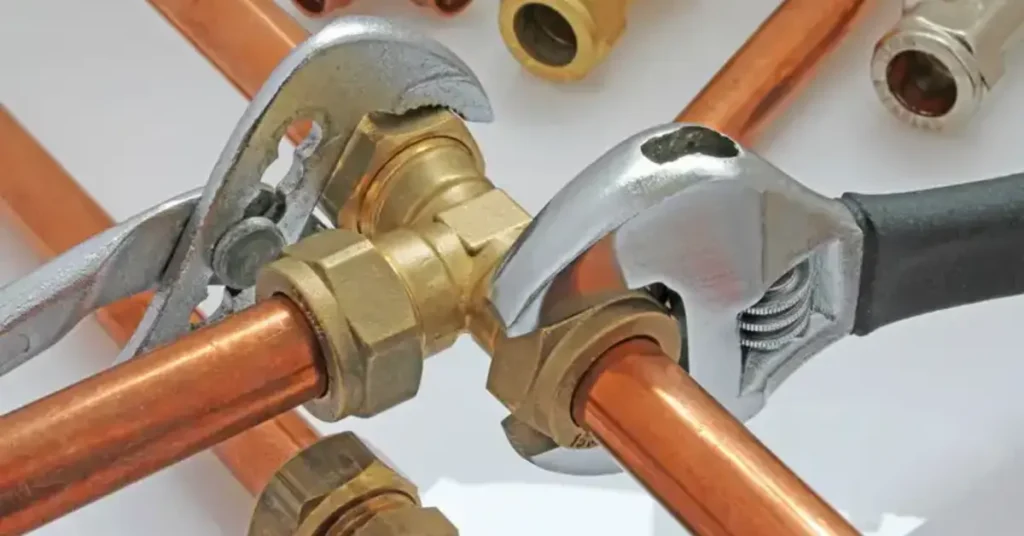
SharkBite fittings are a fast way to join copper pipes without the need for heat or glue. You simply push the fitting onto the pipe to create a strong and waterproof seal instantly. These fittings work well for both permanent repairs and quick fixes when you do not have time to solder. It is the best solution for anyone who wants a professional result without the heavy tools or the risk of fire. Knowing how to install sharkbite on copper is a vital skill that is much simpler than learning what is a drain board for a new sink. You just need to cut the pipe, clean the edges, and push the fitting until it clicks into place. This method saves you hours of work and keeps your home safe from water damage. What is SharkBite? A SharkBite fitting is a type of push-to-connect plumbing joint. It uses a special design to grip pipes and seal them without any extra materials. The body is made of lead-free brass which is very strong. Inside the fitting, there is a stainless steel grab ring with small teeth. These teeth bite into the copper to hold it tight. There is also an EPDM O-ring inside that creates the seal. When you push the copper pipe into the fitting, it passes through the O-ring. This prevents water from leaking out. SharkBite fittings are approved for use behind walls and even underground. They are a top choice for experts and homeowners who want a leak-free home. Materials and Tools Needed To get the job done right, you need a few basic tools. Having the right gear makes installing sharkbite on copper much smoother. Rotary Pipe Cutter: This tool gives you a square and clean cut on the copper. SharkBite Deburr and Gauge Tool: This helps you remove sharp edges and mark the depth. Permanent Marker: Use this to mark how far the pipe needs to go in. Clean Cloth: To wipe away any dirt or grease on the pipe. SharkBite Fittings: Ensure you have the right size for your copper line. Step-by-Step: how to install sharkbite on copper Follow these steps for a perfect seal every time. Do not skip the prep work because it is the most important part of the job. 1. Shut Off the Water Before you start using sharkbite on copper, turn off the main water valve. Open the lowest faucet in your house to drain the lines. This keeps your workspace dry and clean. 2. Cut the Copper Pipe Use your rotary pipe cutter to cut the pipe. You must make sure the cut is perfectly square. Do not use a hacksaw for this job. A hacksaw leaves jagged edges that can damage the internal parts of the fitting. Rotate the cutter around the pipe and tighten it slightly after each turn until the pipe snaps. 3. Deburr and Clean This step is where most people make mistakes with a shark bite fitting copper project. Use your deburring tool to smooth the inside and outside edges of the cut pipe. There should be no sharp bits or burrs left. Sharp edges will cut the O-ring inside the SharkBite and cause a leak. Wipe the end of the pipe with a clean cloth. The pipe must be free of paint, grease, or old solder. 4. Mark the Insertion Depth You cannot just guess how far to push the pipe. Use the SharkBite depth gauge tool to find the correct depth for your fitting size. Place the tool over the end of the pipe and use your marker to draw a line. This line tells you when the pipe is fully seated inside the fitting. 5. Push the Fitting On Now you are ready for the actual sharkbite installation copper step. Push the fitting onto the pipe. You will feel some resistance as it passes the O-ring. Keep pushing until the edge of the fitting reaches the mark you made. If the mark is not touching the fitting, it is not deep enough. 6. Verify the Connection Give the fitting a firm tug. It should stay firmly in place. The teeth in the grab ring should be locked onto the copper. Pipe Size Insertion Depth (1st Gen) Insertion Depth (SharkBite Max) 1/2 inch 15/16 inch 1 inch 3/4 inch 1-1/8 inch 1-1/4 inch 1 inch 1-5/16 inch 1-1/2 inch You can read about: How to Fix Pinhole in Copper Pipe Checking for Leaks Once you finish installing shark bite on copper, you must test your work. Turn the water back on slowly. Do not blast the pressure all at once. Watch the fitting closely for a few minutes. If you see any drips, you may not have pushed the pipe in far enough. Check the fitting again after an hour. Sometimes a slow leak takes time to show up. Use a dry paper towel to wipe the joint. If the towel stays dry, your work is a success. If you find a leak, you might need to remove the fitting and check for scratches on the pipe. Troubleshooting Common Issues Even with a simple install sharkbite on copper project, things can go wrong. Here are the most common issues and how to fix them. The Fitting Leaks Immediately This usually happens because the pipe was not deburred. A sharp edge can nick the O-ring. If the O-ring is torn, the fitting is ruined. You will need a new fitting and a fresh cut on the pipe. Another cause is not pushing the pipe in all the way. Always use the depth mark to be sure. The Pipe is Scratched If the copper pipe has deep scratches on the outside, the O-ring cannot seal properly. Do not use sandpaper to clean the pipe near where the fitting will sit. Sandpaper can leave small grooves that allow water to seep out. Only use a clean cloth to wipe the pipe. The Fitting Spins It is normal for a SharkBite fitting to spin on

how to fix pinhole in copper pipe
Plumbing

How to Fix Pinhole in Copper Pipe | Simple Guide

Discovering a pinhole leak in your copper pipe can be frustrating, as it often indicates a deeper plumbing issue. Fortunately, you don’t always need costly professional help right away. Learning how to fix pinhole in a copper pipe is a valuable skill that can prevent water damage and reduce repair expenses. For a quick temporary solution, you can use epoxy putty or a pipe repair clamp to stop the leak and control the water flow.  These easy fixes buy you time to arrange a more permanent repair, keeping your plumbing system protected and your home safe from damage. How to Detect Pinhole Leaks in Copper Pipe A pinhole leak can be sneaky, but it leaves behind some clear clues. Early detection prevents bigger problems, like mold, mildew, and major damage to your home’s structure. Look for these signs to confirm you need a copper pipe pinhole repair: Blue-Green Stains: Copper reacts with water to create a blue-green stain. If you see this color on exposed pipes or nearby drywall, it is a key sign of a small leak. Damp or Discolored Drywall: A leak inside a wall will cause the drywall or ceiling to feel soft, look discolored, or show bubbling. If the area feels spongy, there’s water behind it. Low Water Pressure: A leak, even a small one, lets water escape. If you notice a drop in water pressure throughout your house, it might be due to a hidden leak. Increased Water Bill: An unexplained jump in your monthly water bill is a strong indicator of an invisible leak. Even a slow drip wastes a lot of water over time. Sound of Running Water: When the house is quiet, listen for a faint hiss or the sound of water running when no fixtures are on. This can pinpoint the location of the leak. What Causes Pinhole Leaks in Copper Pipes Understanding the cause of the leak is important. Pinholes don’t just happen by accident; they are usually a sign of internal corrosion. This wear is often related to the water flowing through the pipes and the environment around them. Pitting Corrosion: This is the most common cause. Certain water qualities, like water that is too acidic (low pH), too alkaline (high pH), or has high levels of dissolved solids or chlorine, can cause tiny, localized points of corrosion. This eats away at the inside of the copper pipe until it creates a small hole. High Water Velocity (Turbulence): Water moving too quickly through your pipes can wear down the copper’s protective internal layer. This turbulent flow often happens near fittings or elbows and speeds up corrosion, leading to a pinhole copper pipe repair need. Exposure to Outside Materials: If a copper pipe touches materials like steel, concrete, or certain chemicals in the soil, it can lead to galvanic corrosion. This external process also degrades the pipe wall over time. Age and Wear: While copper is durable, it doesn’t last forever. Pipes reaching the end of their 20-to-50-year service life are more likely to develop leaks, especially if they’ve been subjected to poor water quality. Cost to Repair Pinhole Leak in Copper Pipe The cost to fix pinhole leak in copper pipe varies widely depending on the fix chosen, the leak’s location, and whether you do it yourself or hire a professional. Repair Type Cost Range (DIY Materials Only) Cost Range (Professional Plumbing Service) Temporary Patch (Epoxy, Clamp) $5 to $30 $150 to $300 (Emergency call fee) Permanent Section Replacement (Coupling) $10 to $50 $250 to $700 Permanent Section Replacement (Soldering) $50 to $100 $380 to $750+ Accessibility Factor N/A High-cost increases if the plumber must cut into drywall or access a crawl space. A professional plumber often charges between $120 and $225 per hour, plus the cost of materials. If they have to open a wall or ceiling, that labor and the subsequent drywall repair will increase your final bill significantly. If you have had several pinhole leaks, you might need a whole-house repiping, which can cost thousands. How to Fix Pinhole Leak in Copper Pipe Without Soldering A permanent copper pipe repair patch requires cutting out the damaged section and replacing it. While soldering is the traditional method, there are excellent no-solder options that any homeowner can use. These are often the best choice for a quick, code-approved hole in copper pipe fix. The Permanent, No-Solder Fix: Push-to-Connect Fittings Push-to-connect fittings, like those made by SharkBite, offer a simple and permanent solution. They use an internal gripping mechanism and an O-ring to create a watertight seal. This method is often code-approved and much faster than soldering. Tools and Materials: Pipe Cutter or Tube Cutter Deburring Tool (or utility knife) Emery Cloth or Sandpaper Measuring Tape and Marker New section of Type L copper pipe (same diameter as the leaky pipe) Push-to-Connect Slip Coupling Step-by-Step Guide: Shut Off Water: Find your main water shut-off valve and turn it off. Open a nearby faucet to drain the line and relieve pressure. Access and Measure: Cut out the damaged section of the pipe using your pipe cutter. For a simple slip coupling, you only need to remove a short section. Measure the space you just cut out. Prepare the Pipe Ends: Use the deburring tool or utility knife to clean the inside and outside edges of the existing pipe. This removes burrs that could damage the fitting’s O-ring. Clean the Pipe: Thoroughly clean the last inch of the pipe ends with emery cloth or sandpaper. The pipe must be smooth and free of dirt for the fitting to seal correctly. Mark Insertion Depth: Push-to-connect fittings require a specific depth of insertion. Use the brand’s depth tool or a measuring tape to mark the correct depth on the existing pipe ends. Install the Coupling: Push the slip coupling onto one pipe end until it reaches your mark. Then, center the fitting over the gap and push it onto the other pipe end until it reaches the second mark. Test the Repair:

how to repair bathtub faucet diverter
Plumbing

How to Repair Bathtub Faucet Diverter | Easy DIY Guide

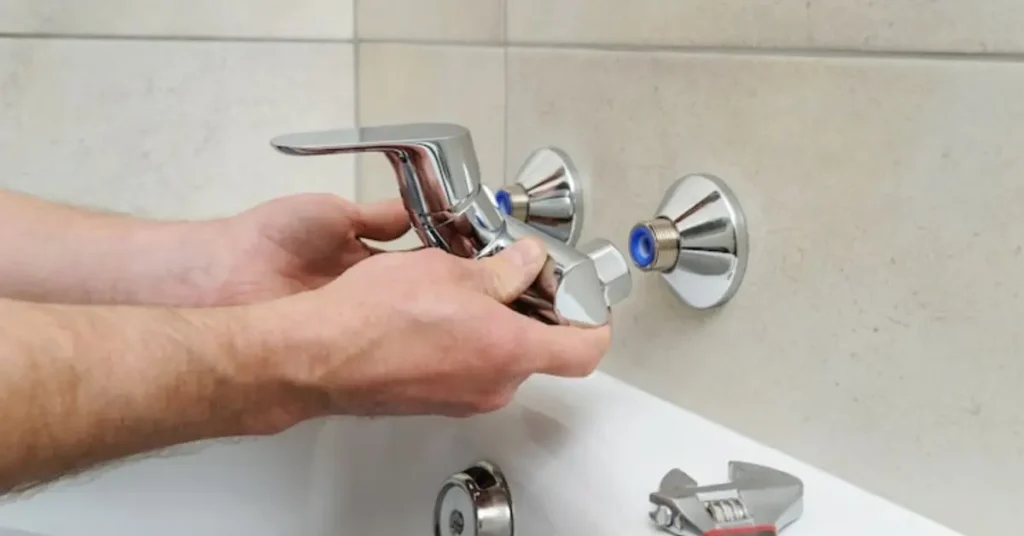
When you pull the little lever on your tub spout, the water is supposed to stop running into the tub and start flowing out of the showerhead. If water keeps trickling or pouring out of the spout while you try to take a shower, you are dealing with a faulty diverter mechanism. It is a common household annoyance that wastes water and ruins your water pressure. The good news is that learning how to repair bathtub faucet diverter systems is a straightforward DIY project that does not require a call to an expensive professional plumber. Most of the time, the issue comes down to a worn-out rubber gasket, mineral buildup, or a corroded internal valve that simply needs a quick cleaning or a cheap replacement part. What Is a Bathtub Faucet Diverter and How Does It Work? A bathtub faucet diverter redirects water flow between the tub spout and the showerhead. Pull up a small knob on the spout, or turn a third handle between the hot and cold controls, and water shifts from filling the tub to spraying overhead. Inside, the diverter relies on a small gate, stem, or cartridge that blocks one path while opening another. Over time, mineral buildup, worn rubber seals, or a stripped mechanism can prevent that gate from sealing properly, which sends water leaking out the tub spout even when you want it flowing through the shower. Understanding this mechanism is the first real step in how to repair bathtub faucet diverter problems correctly, since knowing what’s inside tells you what to check first. Bathtub Spout Diverter vs. Valve Diverter: What’s the Difference? Before you pick up a tool, you need to look at your setup. Bathtub diverters come in a few distinct configurations, and knowing which one you have changes how you fix it. 1. Single-Valve Spout Diverter This is the most common setup in standard homes. The diverter mechanism lives right inside the tub spout itself. It features a small gate attached to a pull-up pin on the top of the spout. When you pull the pin up, the gate blocks the spout opening. 2. Two-Valve Diverter System Found in older homes or custom showers, this system features two separate handles on the wall: one for hot water and one for cold water. The diverter mechanism is housed in a central handle or lever between the hot and cold knobs. Turning this central handle moves an internal stem assembly that opens or closes the pathway to the showerhead. 3. Three-Valve Diverter System This design features a hot water knob, a cold water knob, and a completely dedicated third handle right in the center. Turning that middle handle turns an internal cartridge that mechanically blocks the tub spout and opens the shower line. Signs Your Bathtub Faucet Diverter Needs Repair Watch for these common indicators: Water dribbling from the spout while the shower is running A diverter knob that won’t stay up or falls back down on its own Weak shower pressure even though the tub fills normally A diverter handle that feels loose or spins freely without engaging anything Visible mineral buildup around the spout or diverter knob Any of these point to a shower diverter not working the way it should, and most are fixable without replacing the entire faucet. Common Problems with a Bathtub Shower Diverter A few recurring issues show up again and again in bathtub shower diverter repairs: Worn rubber seals or washers that no longer block water flow completely Mineral deposits restricting the gate or stem from moving freely A stripped or broken pull-up mechanism inside the spout A worn cartridge in valve-style diverters, similar to what causes a dripping faucet Corrosion on older metal components, especially in homes with hard water Common Causes of a Faulty Bathtub Faucet Diverter Most diverter failures trace back to normal wear combined with water quality. Hard water accelerates mineral buildup inside the mechanism, while age alone wears down rubber seals and gaskets over years of daily use. Rough handling also plays a role. Forcing a stuck diverter knob or handle can crack internal components that would have otherwise lasted years longer with gentler use. Tools and Materials Needed to Repair a Bathtub Faucet Diverter Gather these before starting so you’re not stopping mid-repair: Adjustable wrench or pliers Screwdriver (flathead and Phillips) Replacement diverter stem, cartridge, or spout, depending on your type Plumber’s tape White vinegar for soaking mineral deposits A rag or towel Allen wrench (for some spout-style diverters) Before You Start: Turn Off the Water and Identify the Diverter Type Warning: Never attempt to disassemble a plumbing valve while your water lines are fully pressurized. Doing so can cause immediate flooding or send small metal parts flying across your bathroom. Locate your home’s main water shut-off valve, or use the dedicated bathroom isolation valves if your home has an access panel behind the tub. Turn the valves clockwise until they stop. Once turned off, open the tub handles completely to drain any residual water trapped inside the vertical wall pipes. Next, inspect the bottom of your tub spout near the wall. If you see a small notch with a tiny hex screw inside, you have a slip-on spout. If there is no screw and the spout spins when you turn it counterclockwise, you have a threaded spout. How to Repair a Bathtub Faucet Diverter Handle in Two- or Three-Valve Systems If your diverter is controlled by a middle handle on the wall rather than a pin on the spout, follow these steps to service the internal stem. Step 1: Remove the Handle Cap and Screw Pry off the decorative plastic cap in the center of the diverter handle using a small flathead screwdriver. This reveals the internal handle screw. Remove this screw with a Phillips screwdriver and pull the handle straight off the wall stem. Step 2: Remove the Escutcheon Trim Plate Unscrew or unlatch the metal trim plate (the escutcheon) that sits flush against your tile wall.

how to install heat tape on water pipes
Plumbing

How to Install Heat Tape on Water Pipes Easily

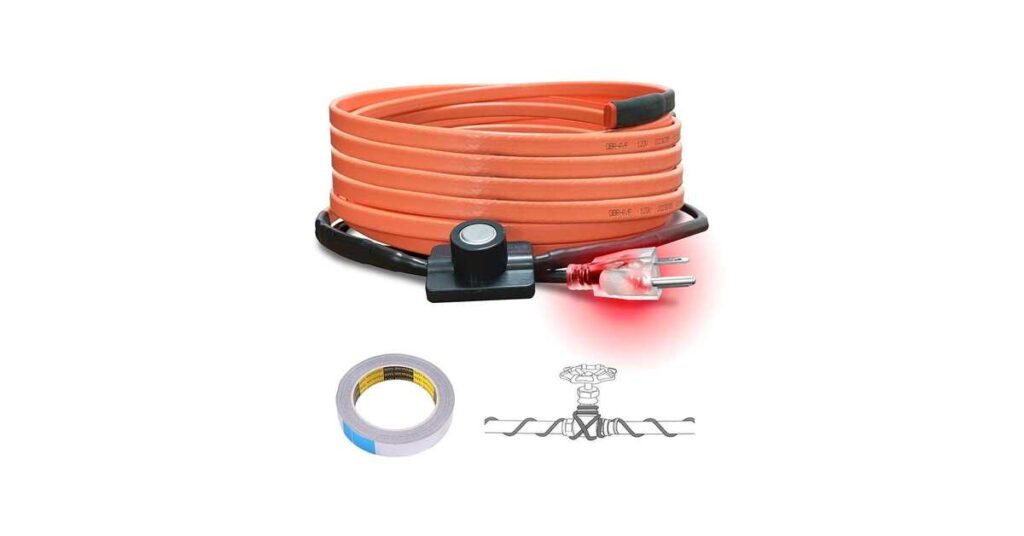
Frozen pipes can do more than clog your water line; they can burst, cause your home to flood, and rack up repair bills in the thousands. That’s why so many people use heat cables as a preventative measure. How to Apply Heat Tape to Pipes Crack, How to Insulate Pipes with Heat Tape, What to Know About Heat Tape for Pipes, Knowing how to insulate your pipes with heat tape is one of the best ways to guard them against cold in winter, and is particularly important if you have exposed or uninsulated pipes (such as those found in a basement or crawl space). It’s simpler than most people think. By following a couple of simple procedures, you can safely load your trailer. Derks Plumbing Company is the source for water heater repair in Eagle Rock, and we are ready to serve you at any time. Why Heat Tape Matters for Pipe Protection Heat tape or heat cable is a heating element in the form of a heating cable or similar that is applied directly to the surface of a pipe to keep water flowing and prevent it from freezing. Most homeowners think frozen pipes can only occur in old homes, yet new construction is just as susceptible if a pipe is exposed, in an unheated area, or surrounded by too little insulation. The pipe is wrapped with Heat wrap as a single piece, and it is usually cheaper than major building repairs. Heat tape is recommended for pipes in the attic, crawl space, garage, basement, mobile homes, and outdoors. And it’s also great for vacation homes or day homes because the weather can definitely turn, and no one is there to keep an eye on things. Types Of Heat Tapes Understanding the different types of heat tape can help you choose the best option for your specific needs. There are three primary varieties available, and each serves a distinct purpose depending on your application and environment. Self-Regulating Heat Tape Self-regulating heat tape automatically adjusts its heat output based on the surrounding temperature. Its conductive core increases resistance as temperatures rise and decreases resistance when temperatures drop. This built-in regulation helps prevent overheating while improving energy efficiency. This option is ideal for long pipe runs or areas with fluctuating temperatures. One major advantage is that it can be overlapped without creating a fire hazard. Although it is more expensive than other options typically costing between $0.50 and $2.00 per foot it offers enhanced safety and lower energy consumption over time. Constant Wattage Heat Tape Constant wattage heat tape delivers a steady, fixed amount of heat regardless of temperature changes. Because it does not adjust automatically, it requires a thermostat or controller to prevent overheating. Overlapping this type of tape should always be avoided, as it can cause dangerous hot spots that may damage pipes or create fire risks. This type works well in applications where consistent, predictable heating is necessary. It is more affordable upfront, usually ranging from $0.25 to $0.75 per foot. However, it may result in higher energy costs over time compared to self-regulating heat tape. Mineral Insulated Heat Cable Mineral insulated heat cable is designed for extreme temperatures and harsh environments. It features a durable copper or stainless steel sheath that protects the internal heating element. This industrial-grade solution offers superior resistance to moisture, chemicals, and physical damage. It is commonly used in commercial or heavy-duty settings where durability is critical. With prices starting at approximately $5 per foot, it is the most expensive option. For most residential pipe freeze protection needs, this heavy-duty cable is typically unnecessary. Understanding the Basics of Heat Tape Installation This is everything you need to know about heat tape installation to get you going. You should feel empowered after reading this to get out there and get the job done. Heat tape is a pipe heating method using electrical heating elements to warm pipes. Some are self-regulating in that they modulate their heat output in relation to the environmental temperature; others have a fixed heat output. Is the manufacturer legitimate to allow the layman to use the heat tape? Your installation success will be determined by how well you measure, which is how well you choose the right tape and follow the safety instructions. Electric heating. According to them, Tang works with electric heating product but people are frightened that they will get shocked, or you burn their house down. Heat tape is effective, reliable, and safe when used with the proper pipe size. And, or Siemens can come out and look at your system or put one in for you so you can sleep at night Derks Plumbing Co and the like are located in Eagle Rock and will argue with your setup. Step-by-Step Guide: How to Install Heat Tape on Pipes Now we will get into the details of how to install heat tape on pipes, from getting everything to putting on insulation. Step 1: Measure and Inspect the Pipes Before application, measure the pipe to be heated. Heat tape should be wrapped around the pipe, and then straightened out for best contact with the pipe. Some manufacturers recommend extending the heat tape beyond pipe valves and joints. You need to check the pipe surface for any fractures or leaks. The pipe should also be checked for armoring. After you fix the problem(s), install securely. Step 2: Select the appropriate Type of Heat Tape There is a bias towards certain types of heat tape. Some are for plastic pipes, and some are for metal. Some people can control themselves. Some people cannot. Step 3: Secure the heat tape to the pipe Take a part of the heat tape. Straighten it out. Then you can start sticking the heat tape to the pipe. You can put the heat tape on the pipe in lines, or you can make spirals with the heat tape. The way you put the heat tape on the pipe can be different depending on what the product’s supposed to look like. A number of manufacturers recommend that heat tape be wrapped in a spiral around the pipe and

how to install a heat pump water heater
Plumbing

How to Install a Heat Pump Water Heater | Easy Guide

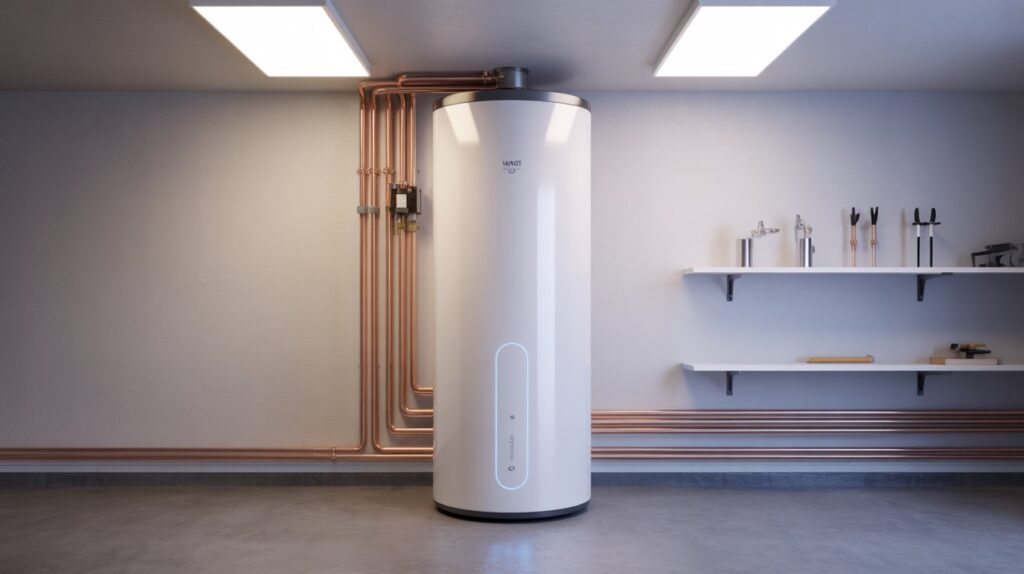
If your old water heater is giving up or you just want lower energy bills, a heat pump water heater is a smart choice. These units are highly efficient and can cut down your monthly hot water costs. This detailed guide will show you how to install a heat pump water heater safely and correctly, covering everything from electrical needs to plumbing connections. A heat pump water heater, also known as a hybrid water heater, does not create heat in the same way a standard unit does. Instead, it moves existing heat from the surrounding air into the tank. This process is much more efficient than using electric resistance heating elements alone, making it a great investment for homeowners. What Is a Heat Pump Water Heater? A heat pump water heater, or hybrid water heater, is a highly energy-efficient alternative to traditional electric tank models. It’s an appliance that uses a refrigeration cycle to transfer heat. Think of it like a refrigerator, but working in reverse. Instead of creating heat, the unit pulls warmth from the air around it. It then transfers this heat into the hybrid hot water tanks to warm the water. This process requires very little electricity, which is why these systems are so energy efficient. Most models are “hybrid,” meaning they also include standard electric resistance heating elements. These elements kick on only when the demand for hot water is very high. This makes sure you never run out of warm water, even during times of heavy use. How Heat Pump Water Heaters Work Understanding how these units function is key to a successful heat pump water heater installation. The process involves three main parts: Air Intake: A fan draws in air from the surrounding room a basement or garage, for example. Heat Extraction: This air passes over an evaporator coil. The refrigerant inside this coil absorbs the heat from the air. Even air that feels cool contains heat. Heat Transfer: The now-heated refrigerant moves through a compressor. This increases its temperature and pressure greatly. The super-heated refrigerant then runs through a condenser coil, which is immersed in the water tank. The heat transfers from the coil to the water, warming it up. Cool Air Exhaust: The air that has had its heat removed is blown out of the unit. This exhaust air is cool and dry, which is why these units often work best in areas that are already somewhat warm or have good ventilation. Because the system simply moves heat instead of generating it, it uses significantly less electricity. This is what makes the hybrid water heater installation so appealing How Much Does It Cost to Install a Heat Pump Water Heater? The cost to install a heat pump water heater varies widely based on whether you do it yourself or hire a professional, and the complexity of your current plumbing and electrical setup. As of 2025, the average cost range for a professional heat pump water heater installation is typically $3,200 to $4,700. Cost Factor Average Price Range Notes Unit Cost (Tank & HP) $1,500 to $3,500 Depends on the size (e.g., 50-gallon, 80-gallon) and brand. Professional Labor $1,500 to $2,500 If converting from gas or an older system, labor costs increase due to new plumbing and electrical work. New Electrical Circuit $500 to $1,500 Needed if you do not already have a dedicated 240V, 30-amp circuit. Condensate Pump/Drainage $100 to $300 If no floor drain is nearby. Permits & Inspection $50 to $300 Varies by location. While the upfront cost is higher than a standard model, the energy savings mean the unit typically pays for itself in 3 to 5 years. Look into federal, state, and local rebates, as these can lower your final purchase price significantly. How to Install a Heat Pump Water Heater: Step-by-Step Diagram & Guide This is a general guide for replacing an existing electric tank. Always follow the specific instructions in your model’s manual. For complex steps, especially the 240V wiring, hire a licensed pro. Step 1: Safety First—Remove the Old Unit Turn Off Power: At your main electrical panel, turn off the breaker for the old water heater. Use a voltage meter to confirm no power is running to the unit. Turn Off Water: Close the cold-water inlet valve at the top of the old tank. Drain the Tank: Connect a garden hose to the drain valve at the bottom of the old tank. Route the hose to a safe drain (like a floor drain or outside). Open the drain valve and open a hot water tap in your house to let air in, which speeds up the draining. Disconnect: Once empty, disconnect the old water lines and the electrical wiring (again, only do this if you are qualified). Remove: Carefully move the old water heater out of the way. Step 2: Position the New Unit Placement: Place the new unit in its final location. Make sure you meet all the clearance requirements. Level: Use a level to ensure the unit sits flat. If your floor is uneven, adjust the leveling feet on the bottom of the unit. This is important for proper drainage and performance. Drain Pan: If local code requires it, place a drain pan beneath the unit and connect it to a drain line. Step 3: Plumbing Connections T&P Valve: Install the Temperature and Pressure (T&P) relief valve into the side or top of the tank. This is a crucial safety device. Water Lines: Connect the cold-water supply line to the tank’s cold inlet and the hot water outlet line to the tank’s hot outlet. Use flexible copper or braided steel connectors for an easier and more reliable connection that reduces vibration noise. Use dielectric unions to connect copper piping to the tank’s steel nipples; this prevents corrosion. T&P Discharge: Install the discharge pipe onto the T&P valve. It must run to a floor drain or other approved location, terminating a few inches above the floor. Step 4: Electrical Wiring Note: If

how to repair sink faucet
Plumbing

How to Repair Sink Faucet: The Simple 2025 Guide

An ongoing drip can be more than just bothersome; it’s wasting water, increasing your utility bill, and usually indicates a problem with the plumbing that needs to be addressed immediately. This detailed guide will give you the necessary knowledge and experience-based steps to properly diagnose and how to repair sink faucet issues.   The first step to diagnosing the problem of a leaking sink faucet and having a quiet bathroom or kitchen once again is to understand how your fixture works. We will walk you through the process of repairing that sink dripping water faucet and cover everything from figuring out which faucet type you have and replacing any parts that might be worn out. Common Signs Your Faucet Needs Repair Your faucet tells you when something’s wrong. Catch these signs early and you’ll avoid bigger problems. Constant Dripping A sink faucet leaking one drop per second wastes 2,700 gallons yearly. You’ll see water pooling around the base or dripping from the spout. This usually means worn washers or O-rings inside. Reduced Water Flow When water trickles instead of flows, mineral buildup blocks the aerator. You might also have debris in the cartridge or valve seat. This issue gets worse over time if ignored. Handle Feels Loose or Stiff A sink leaking from handle areas often starts with movement problems. Loose handles wobble when you turn them. Stiff handles need excessive force. Both signal internal wear. Water Pools at the Base Seeing water around your faucet base? The O-rings have likely failed. This creates a mess on your counter and can damage cabinets below. Fix it before mold grows. Squealing or Grinding Sounds Strange noises mean metal parts are rubbing together wrong. The washer might be worn out. Or sediment has built up inside. These sounds get louder as damage increases. Temperature Control Issues Can’t get the right water temperature? Your cartridge may be failing. This happens in single-handle faucets when internal parts degrade. You’ll struggle to find that perfect warm setting. Tools and Materials You May Need Having the right tools makes repairs faster and easier. Here’s what to gather before you start. Essential Tools: Adjustable wrench (two are better) Phillips and flathead screwdrivers Allen wrench set (hex keys) Pliers (regular and needle-nose) Flashlight for seeing tight spaces Bucket or container for water Towels and rags Common Replacement Parts: O-rings (various sizes) Washers (rubber and fiber) Valve seats Cartridges (match your model) Faucet repair kits Plumber’s grease Thread seal tape Optional but Helpful: Basin wrench for tight spaces Penetrating oil for stuck parts Camera phone to document disassembly Masking tape to label parts Buy a complete faucet repair kit at hardware stores. These cost $10-$25 and include common parts. Having extras saves you a second trip to the store. Identify the Type of Faucet Four main faucet types exist. Each repair is different. Here’s how to tell which you have. Compression Faucets These are the oldest styles. You’ll see two separate handles for hot and cold. When you turn a handle, it compresses a rubber washer against a valve seat. Most dripping kitchen tap problems in old homes involve this type. They’re simple but wear out faster. Ball Faucets Common in kitchens with one handle. Inside sits a rounded ball that controls water flow and temperature. You can spot these by the single handle that moves in all directions. They have more parts than other types. A sink dripping water faucet with this design often needs O-ring replacement. Cartridge Faucets These use a movable stem cartridge. They come in single or double handle versions. The handle moves up and down to control flow, side to side for temperature. Less prone to leaks than compression types. When learning how to fix sink faucet drip issues, these are mid-complexity repairs. Ceramic Disk Faucets The most reliable modern design. A single handle controls two ceramic disks that slide over each other. These rarely leak and last for years. When they do fail, you usually replace the whole cartridge. The newest faucets in most homes use this technology. How to Tell What You Have Look at your faucet handle. Two handles usually mean compression type. One handle that moves freely in all directions is likely a ball faucet. One handle with limited side-to-side and up-down movement suggests cartridge or ceramic disk. Check under your sink for the model number. Search it online to confirm the exact type. Step-by-Step: How to Repair Sink Faucet Now let’s fix that leak. These steps work for most common problems. Prepare Your Work Area Turn off water supply valves under the sink. Turn both the hot and cold lines clockwise until tight. Open the faucet to drain remaining water. Place a bucket under the pipes. Plug the drain so small parts don’t fall in. Lay down towels to catch drips. Remove the Faucet Handle Look for a decorative cap on top of the handle. Pop it off with a flathead screwdriver. You’ll see a screw underneath. Use the right screwdriver or Allen wrench to remove it. Some handles have a set screw on the side instead. Wiggle the handle gently as you pull up. Stuck handles need penetrating oil and patience. Access the Internal Components Once the handle is off, you’ll see the inner workings. For compression faucets, use a wrench to unscrew the packing nut. For cartridge types, remove the retaining clip or nut. Take photos as you go. This helps during reassembly. Keep parts in order on a clean towel. Inspect and Replace Worn Parts For Compression Faucets: Check the washer at the bottom of the stem. If it’s cracked or flat, replace it. Remove the screw holding it. Clean the valve seat with a cloth. Rough seats need a valve seat wrench to remove and replace. Apply plumber’s grease to the new washer before installing. For Ball Faucets: Replace all O-rings and springs. These come in repair kits. Pull out the old cam and ball. Check for corrosion or wear. Install new rubber seats and

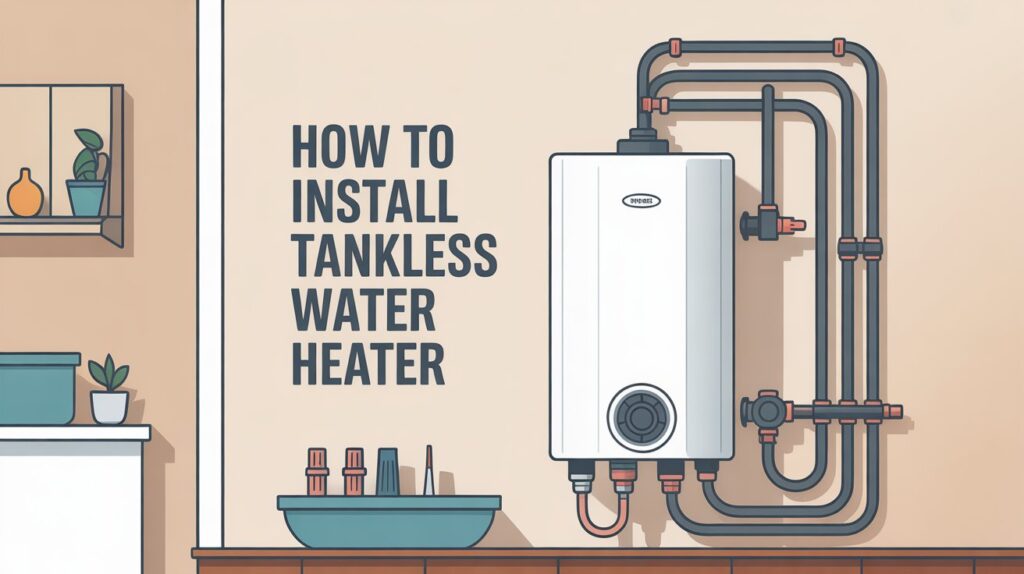
how to install tankless water heater
Plumbing

How to Install Tankless Water Heater | Step-by-Step Guide

A tankless water heater heats water when you need it, without storing hot water in a large tank. It can save space and may lower energy use in the right home. However, installation depends on your fuel source, water demand, plumbing, and local building codes. Gas models need proper venting and enough gas supply, while electric models may need powerful circuits. Learning How to Install Tankless Water Heater starts with choosing the right unit and checking your home’s setup. This guide covers the main steps, common mistakes, and safety checks. It also explains when professional help is the safer choice. How Does a Tankless Water Heater Work? A tankless water heater warms water as it flows through the unit. When you open a hot water tap, the system senses the flow and starts heating. The heated water then travels to your shower, sink, or other fixture. Unlike a tank heater, a tankless model does not store a large amount of hot water. This can reduce standby heat loss. However, the unit still has limits on how much water it can heat at once. For example, running two showers and a kitchen tap together may exceed the unit’s flow rate. Choosing the right size helps prevent sudden changes in water temperature. Tankless heaters may use natural gas, propane, or electricity. Each type has different needs for power, venting, and connections. Always check the product manual before planning the work. What to Know Before Installing a Tankless Water Heater Before starting a tankless water heater installation, check whether the new unit will work with your home’s existing systems. A tankless model may need more power or a larger gas supply than an older tank heater. Review these key points: Fuel source: Choose a model that matches your available gas or electrical supply. Indoor or outdoor use: Not every unit is rated for both locations. Water quality: Hard water can cause mineral buildup inside the heat exchanger. Location: Leave the clearances needed for service, air supply, and venting. Local codes: Check permit and inspection rules before work begins. Manufacturer instructions: Follow the exact requirements for your model. Replacing a tank heater with a tankless unit may involve more than changing the appliance. Gas lines, wiring, venting, and water pipes may need upgrades. Do not assume the old connections are suitable. A licensed plumber or qualified installer can assess the existing setup and identify needed changes before you buy the unit. How to Choose the Right Tankless Water Heater Size Tankless heaters are sized by flow rate and temperature rise. Flow rate measures how much water the unit can heat each minute. Temperature rise is the difference between incoming cold water and the desired hot water temperature. Start by listing the fixtures that may run at the same time. A shower, dishwasher, and kitchen tap can all draw hot water. Add their expected flow rates to estimate your home’s peak demand. Next, consider how cold the incoming water gets during winter. Colder water needs more heating, which can lower the unit’s available flow rate. Check the manufacturer’s performance chart for your expected temperature rise. Do not choose a model based only on the number of bathrooms or its advertised maximum flow rate. If the unit is too small, you may notice weak hot water flow when several fixtures run together. A correctly sized model can better meet demand without wasting money on an unsuitable system. Tools and Materials Needed The tools and parts depend on the heater type and the work required. Read the installation manual before purchasing anything. Common supplies may include: Measuring tape and level Wrenches and screwdrivers Approved water pipes, valves, and fittings Mounting brackets and suitable fasteners Manufacturer-approved vent parts for applicable gas models Electrical parts rated for the unit, when needed Approved gas fittings, where applicable A bucket and towels for water spills The manufacturer’s installation manual Some systems also need isolation valves, a condensate drain, a water filter, or a scale-control device. These needs depend on the model and local rules. Do not use generic fittings just because they seem to fit. Parts must match the unit’s pressure, temperature, and material requirements. Leave gas work and high-load electrical connections to qualified professionals. How to Prepare for Tankless Water Heater Installation Choose a location that meets the manufacturer’s clearance and service rules. The unit should be easy to reach for repairs and routine maintenance. Indoor gas models also need the correct venting and air supply. Before removing the old heater, confirm the new unit’s measurements and connection points. Check the gas line capacity or electrical circuit rating. Make sure the water supply and drain arrangements meet the manual’s requirements. Find out whether your area requires a permit or inspection. Local rules may cover vent materials, electrical protection, gas piping, and seismic safety. Clear the work area and protect nearby surfaces from water. Shut off the water and energy supplies using the approved procedure. If you cannot safely isolate the gas or electricity, stop and contact a professional. How to Remove the Old Water Heater If a tank heater is being replaced, it must be shut down and drained safely. Water inside may be hot enough to cause burns, so allow it to cool first. Close the cold water supply and follow the manufacturer’s instructions for shutting off the energy source. Attach a garden hose to the tank’s drain valve and direct the water to a suitable drain. Opening a hot water tap can help air enter the system as the tank drains. Do not force a blocked drain valve or disconnect a line that remains under pressure. Gas piping and electrical wiring must be disconnected safely. Hire a qualified professional when you lack the required skills or local rules require one. Once the tank is empty and disconnected, move it carefully. A drained tank can still be heavy. Check the surrounding pipes and valves for corrosion or damage before fitting the new unit. How to Mount the New

how to detect a gas leak
Plumbing

How to Detect a Gas Leak: A Simple Guide to Stay Safe

How to detect a gas leak is a question that every homeowner and tenant should be able to answer. Gas leaks can be dangerous, leading to fires, explosions, or serious health issues. Fortunately, early detection can prevent accidents and save lives. This article explains the signs of a gas leak, how to respond, and the best methods for testing for gas leak problems. Understanding gas leak detection helps ensure safety for your family and your property. Common Signs of a Gas Leak The first step in finding a gas leak is recognizing the warning signs. Most household gas leaks involve natural gas, which is odorless in its pure form. To help detect leaks, gas companies add a chemical that gives it a strong smell, like rotten eggs. Smell of Gas The most common way to detect a gas leak is through your nose. If you smell something like sulfur or rotten eggs, this is a clear warning sign. Do not ignore it, even if the smell seems faint. Hissing Sounds Listen closely near gas lines or appliances. A hissing or whistling sound can mean gas is escaping through a small opening. These sounds are more noticeable when the area is quiet. Physical Symptoms Gas exposure can cause health issues. If you or your family experience headaches, dizziness, nausea, or difficulty breathing, leave the area immediately. These symptoms may disappear when you are outside. Dead Plants or Discolored Grass If you notice patches of dead grass or plants near a gas line, this may point to an underground leak. The leaking gas blocks oxygen in the soil, causing the vegetation to die. How to Test for a Gas Leak at Home Testing for gas leak concerns can be done safely at home using a few simple methods. However, you must avoid using open flames or electrical switches during any inspection. Soapy Water Test This is one of the most effective ways to confirm a leak. Mix water with liquid dish soap and apply it to the suspected area, such as a gas line or connection. If you see bubbles forming, gas is leaking from that spot. Gas Leak Detectors You can purchase handheld gas detectors that beep or light up when gas is present. These tools are reliable for basic gas leak detection in homes and small buildings. Use of Gas Sniffers Professionals often use gas sniffers to locate leaks. These devices are highly sensitive and provide fast results. If you are unsure, hire a licensed technician for proper testing. What to Do If You Detect a Gas Leak When you suspect or confirm a gas leak, time is critical. Follow these steps to protect yourself and others. Do Not Use Electronics or Open Flames Turn off all appliances and avoid flipping switches. A tiny spark can ignite the gas. Do not light candles, use lighters, or operate your phone near the leak. Ventilate the Area Open all windows and doors to let the gas escape. This reduces the risk of buildup and explosion. Leave the Building Exit immediately and stay outside at a safe distance. Do not return until a professional gives the all-clear. Call Emergency Services Once outside, call your gas provider or the fire department. Let them handle the situation with proper equipment. Professional Gas Leak Detection Services While home methods are helpful, nothing replaces expert inspection. Professionals use advanced tools to detect leaks and check for long-term safety. Services include infrared cameras, ultrasonic detectors, and pressure tests. If you are unsure about finding a gas leak, schedule a routine inspection at gas installation and repair especially before winter or after home renovations. Preventing Gas Leaks in the Future Prevention is the best way to avoid emergencies. Here are some tips: Schedule yearly gas line inspections Replace aging or damaged gas appliances Keep flammable items away from gas lines Teach family members about how to detect a gas leak Install carbon monoxide and gas detectors Staying alert and proactive reduces the risk of danger. Importance of Early Detection Learning how to detect a gas leak is not just about fixing a problem. It is about protecting your family, your home, and your health. Whether you are testing for gas leak concerns with soap solution or hiring professionals for gas leak detection, action must be taken immediately when signs appear. Gas leaks do not go away on their own. Small leaks can grow and lead to severe outcomes. Always treat any sign seriously, and never delay repairs. Final Thoughts Understanding how to detect a gas leak is a skill every homeowner should have. The more aware you are of the signs, the safer your living space will be. If in doubt, do not attempt major repairs on your own. Contact trained professionals who are equipped to handle the situation safely. FAQs 1. What does a gas leak smell like? It smells like rotten eggs or sulfur. This odor is added to help with gas leak detection. 2. Can I test for a gas leak myself? Yes, you can use the soapy water test or a gas leak detector. But for safety, call a professional if you are unsure. 3. Is a small gas leak dangerous? Yes. Even small leaks can cause fires, explosions, or health issues over time. 4. What should I do first if I smell gas? Leave the area, open windows if possible, and call emergency services from a safe distance. 5. Are gas leak detectors reliable? Yes. Handheld detectors and home sensors are useful for testing for gas leak concerns, but they should be part of a full safety plan. 6. How often should I check for gas leaks? At least once a year or whenever you install or replace gas appliances. 7. What causes gas leaks in homes? Common causes include old pipes, poor connections, damaged appliances, and corrosion. 8. Can a gas leak make you sick? Yes. Exposure can cause headaches, dizziness, nausea, and breathing problems. 9. Is natural gas the only kind

Fast and Efficient Plumbing Services in Eagle Rock

Client Reviews

Posted on Google Google
Ryan Haden profile picture
Ryan Haden
Google star 1Google star 2Google star 3Google star 4Google star 5Trustindex verifies that the original source of the review is Google.
Could not have been happier with Alex! We was right on time, polite, fixed all my kitchen sink issues and have me good tips on how to best maintain. I will for sure be using him again and highly recommend anyone who needs a great plumber to use his services as well. Thank you!
Posted on Google Google
Lorena Marcoe profile picture
Lorena Marcoe
Google star 1Google star 2Google star 3Google star 4Google star 5Trustindex verifies that the original source of the review is Google.
Talk about a professional...yes, I am talking about Alex Derks, Derks Plumbing. He is by far the most knowledgeable plumber we have ever had the pleasure of hiring. He's been in the plumbing business for years and it shows. Any questions you have re: plumbing issues, install, etc., Alex is your man. So happy with his work and he has a great sense of humor as well... extremely easy to talk to...thank you Alex!!!
Posted on Google Google
Andrew Jalil profile picture
Andrew Jalil
Google star 1Google star 2Google star 3Google star 4Google star 5Trustindex verifies that the original source of the review is Google.
Alex did a great job installing my kitchen faucet and an under-sink Aquasana water filter. He also addressed a few other plumbing-related issues. He was friendly and helpful. Excellent work!
Posted on Google Google
Abigail Bigham profile picture
Abigail Bigham
Google star 1Google star 2Google star 3Google star 4Google star 5Trustindex verifies that the original source of the review is Google.
Alex does what other plumbers cannot do! He is our go to.
Posted on Google Google
Danielle Driver profile picture
Danielle Driver
Google star 1Google star 2Google star 3Google star 4Google star 5Trustindex verifies that the original source of the review is Google.
Alex is very friendly and responsive. What a pleasure to work with!
Posted on Google Google
Lawrence Isaacs profile picture
Lawrence Isaacs
Google star 1Google star 2Google star 3Google star 4Google star 5Trustindex verifies that the original source of the review is Google.
Very very happy with the work Alex did for us replacing the tanks in our Aquasana filtration system. From first contact over the phone through job completion Alex was a pleasure to work with. He explained what he was doing, and why, every step of the way, and made sure we understood what we needed to do to maintain the system. Strongly recommend Alex!
Posted on Google Google
Joey Aucoin profile picture
Joey Aucoin
Google star 1Google star 2Google star 3Google star 4Google star 5Trustindex verifies that the original source of the review is Google.
Alex Derks has been such a lifesaver for me. Anytime I'm in a pinch with the plumbing in my home, Alex is only a phone call away and I've only seen great results from his work. He's reliable, knowledgable, and entirely trustworthy. A must-have source when owning a home.
Posted on Google Google
Eric Gorman profile picture
Eric Gorman
Google star 1Google star 2Google star 3Google star 4Google star 5Trustindex verifies that the original source of the review is Google.
After working with dozens of plumbing services in the LA area, I can confidently say Derks is the best in the business. On time, reliable and capable of even the most difficult tasks, Derks goes above and beyond to make sure your water system is working correctly.
Posted on Google Google
Jason Gruenbaum profile picture
Jason Gruenbaum
Google star 1Google star 2Google star 3Google star 4Google star 5Trustindex verifies that the original source of the review is Google.
Excellent know-how and fast!! Reasonable pricing and super responsive!!
Posted on Google Google
Jonathan Hepfer profile picture
Jonathan Hepfer
Google star 1Google star 2Google star 3Google star 4Google star 5Trustindex verifies that the original source of the review is Google.
Alex is an expert plumber, and he always goes out of his way to educate me about how to prevent future issues. Highly recommended!

Derks Plumbing has been providing professional plumbing services to Eagle Rock residents for over 20 years. Our experience and strong reputation have allowed us to grow, and we are proud to serve customers in 15 nearby areas, including Venice, Santa Monica, Beverly Hills, and more.

Contact

Hours of Operation

Monday: Open 24 Hours
Tuesday: Open 24 Hours
Wednesday: Open 24 Hours
Thursday: Open 24 Hours
Friday: Open 24 Hours
Saturday: Open 24 Hours
Sunday: Open 24 Hours

© 2026 Created by Localpro1

Scroll to Top