We are Available 24/7

Plumbing

how do i repair a leaky bathtub faucet
Plumbing

How Do I Repair a Leaky Bathtub Faucet Fast? 7 Steps

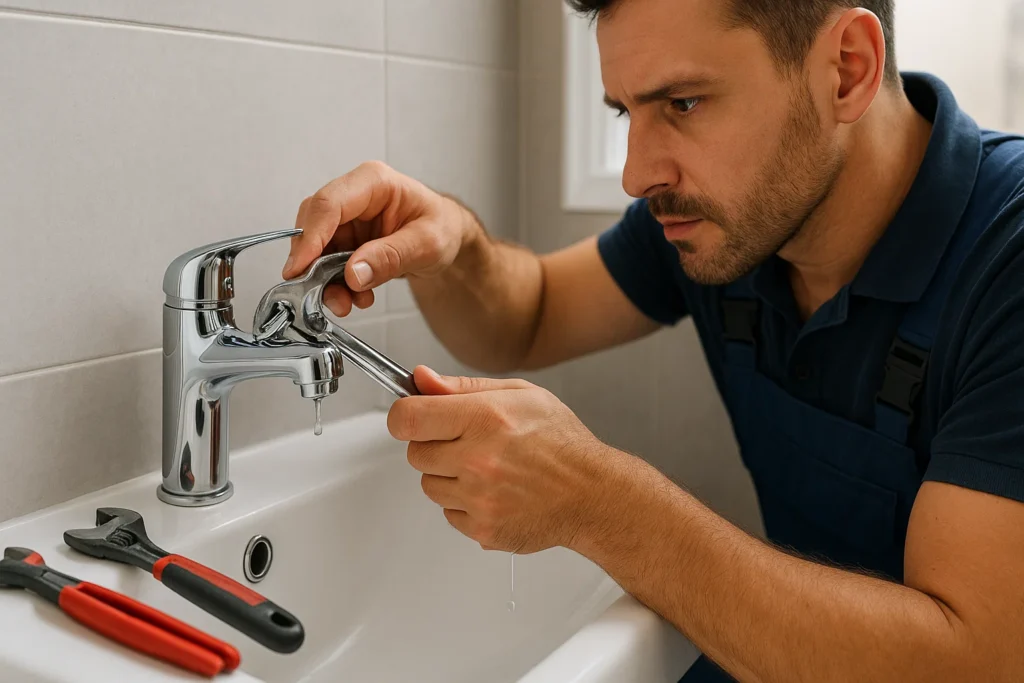
A dripping bathtub faucet is more than just a minor annoyance; it wastes water, drives up utility bills, and can eventually lead to rust and water damage. Fixing this issue is a common home repair task that many homeowners can handle themselves with the right tools and knowledge. Addressing a leaky faucet tub right away is the smart, cost-effective choice. Learning how do i repair a leaky bathtub faucet is simple. The process usually involves replacing a small, inexpensive internal part, such as a washer, O-ring, or cartridge. We will walk you through the steps to stop that wasteful bathtub faucet drip and restore silence to your bathroom. What Causes a Leaky Bathtub Faucet? Understanding why your tub faucet leaks helps you fix it right the first time. Most leaks come from worn-out parts inside the faucet body. Worn washers and O-rings are the top culprits. These rubber seals create a watertight barrier when you turn off the water. After years of use, they crack, flatten, or tear. Water then seeps through and creates that steady drip. Corroded valve seats cause leaking tub faucet problems too. The valve seat connects the faucet to the spout. Mineral deposits from hard water build up here over time. This buildup prevents a tight seal and lets water through. Loose parts make your bathtub faucet drip even when everything looks fine. The packing nut around the stem can loosen from regular use. Temperature changes also cause metal parts to expand and contract, which loosens connections. Wrong washer size creates gaps where water escapes. If someone replaced parts before but used the wrong size, your tub faucet leak will continue no matter how tight you turn the handle. High water pressure stresses faucet components and causes premature wear. Pressure above 80 PSI pushes against seals constantly and makes them fail faster. Tools and Materials Needed for Bathtub Faucet Repair Get these items before you start. Having everything ready makes the job go smoothly. Basic tools: Screwdriver set (flathead and Phillips) Adjustable wrench Allen wrenches Pliers Utility knife Flashlight Replacement parts: Faucet repair kit (matches your faucet brand) New washers O-rings Valve seat Plumber’s grease Additional supplies: Old towels Bucket White vinegar Penetrating oil Most hardware stores carry universal repair kits for under $15. Bring your old parts to the store to match sizes exactly. Taking photos of your faucet type also helps staff point you to the right kit. Step-by-Step Guide: How Do I Repair a Leaky Bathtub Faucet Follow these steps to stop that annoying drip. Work carefully and keep track of parts as you remove them. Turn Off the Water Supply Find the shut-off valves for your bathtub. They’re usually in a basement, crawl space, or access panel behind the tub. Turn both hot and cold valves clockwise until tight.No shut-off valves? You’ll need to turn off the main water supply to your house. Open a faucet on a lower floor after shutting off water to release pressure from the pipes. Remove the Faucet Handle Look for a small screw on top or behind the handle. Some handles have decorative caps that pop off to reveal the screw. Remove this screw with the right screwdriver.Pull the handle straight off. It might be stuck from mineral buildup. Wiggle it gently while pulling. Apply penetrating oil if it won’t budge, then wait five minutes and try again. Take Out the Stem Assembly You’ll see the stem assembly once the handle is off. It has a packing nut around it. Use your adjustable wrench to turn this nut counterclockwise.Pull out the entire stem. Note which way it faces so you can reinstall it correctly. Some stems unscrew from the faucet body instead of pulling straight out. Inspect and Replace Worn Parts Check the washer at the bottom of the stem. Look for cracks, tears, or flat spots. Replace it even if it looks okay since washers are cheap.Remove the old washer by taking out its brass screw. Clean the seat where it sits. Put the new washer in place and secure it with the screw. Don’t overtighten.Check all O-rings on the stem. Roll them between your fingers to find cracks or stiff spots. Replace any that aren’t soft and flexible. Coat new O-rings with plumber’s grease before installing. Clean the Valve Seat Shine your flashlight into the faucet body. The valve seat is the small ring where the stem sits. Feel it with your finger for rough spots or buildup.Use a valve seat wrench to remove it if it’s damaged. These wrench sets cost about $10. Turn counterclockwise to unscrew the old seat. Install the new one by turning clockwise until snug.Can’t remove the valve seat? Some are built into the faucet. Use fine sandpaper wrapped around your finger to smooth rough spots instead. Reassemble the Faucet Put everything back in reverse order. Slide the stem into the faucet body. Thread the packing nut back on and tighten with your wrench. Don’t crank it too tight or the handle will be hard to turn.Replace the handle and secure it with the screw. Put any decorative caps back on. Make sure the handle sits straight when the water is off. Test Your Repair Turn the water supply back on slowly. Let air escape from the lines. Check around the faucet base for new leaks as pressure builds.Turn the faucet on and off several times. Water should flow smoothly when open and stop completely when closed. No drips means you fixed your leaking faucet tub successfully.Wait 10 minutes and check again. Some slow leaks take time to show up. How Much Does It Cost to Fix or Replace a Bathtub Faucet? Doing the repair yourself costs between $5 and $30 for parts. A basic washer and O-ring kit runs $5 to $10. Complete rebuild kits with all new internal parts cost $15 to $30. Hiring a plumber costs more but saves time. Expect to pay $150 to $300 for professional tub faucet leak repair. This includes labor
how much does it cost to repair sewer line
Plumbing

How Much Does It Cost to Repair Sewer Line? | Guide

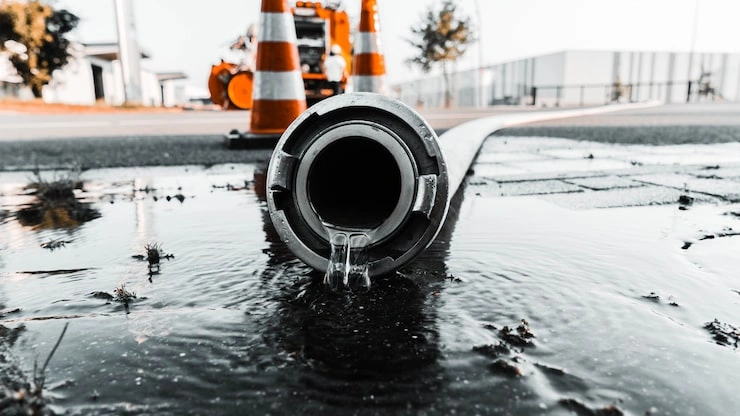
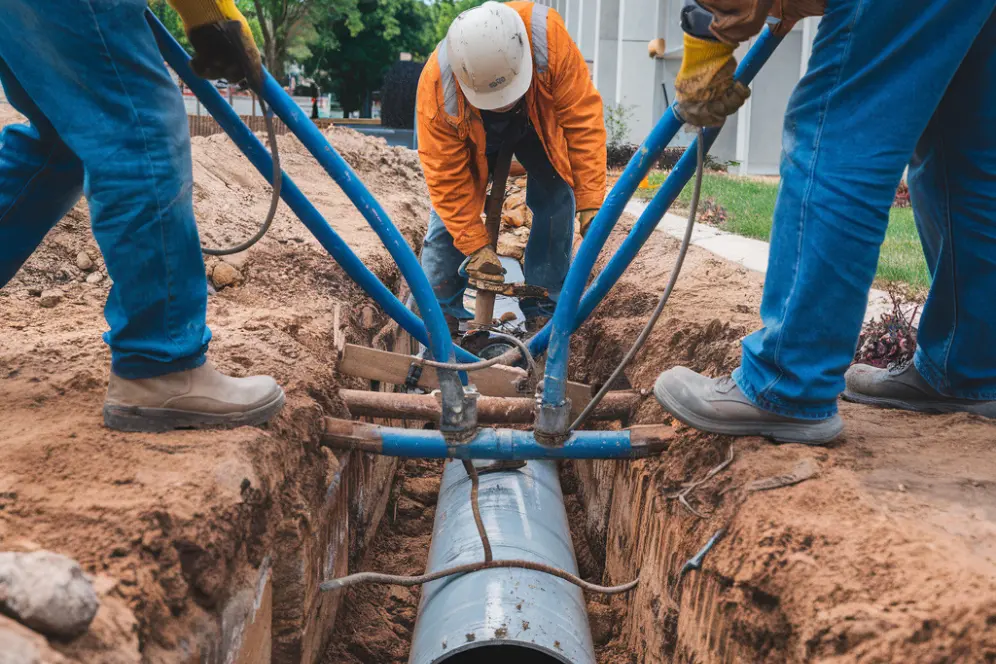
A damaged sewer line can lead to slow drains, unpleasant odors, sewage backups, and expensive property damage if the problem is left untreated. For homeowners, one of the first concerns is understanding how much the repair will cost and whether the entire pipe needs replacement. Sewer line repair typically costs around $1,100 to $4,100 for many residential repair projects, although the final price depends on the type of damage, pipe length, accessibility, and repair method.  A simple sewer clog may cost considerably less, while a collapsed pipe or extensive underground damage can require a much larger investment. Published U.S. cost estimates vary by project and location, so these figures should be treated as general budgeting guidance rather than a guaranteed quote.Before approving the work, it helps to understand what caused the problem, which repair options are available, and what your plumber includes in the estimate. Average Sewer Line Repair Cost The cost to repair a sewer line depends on whether the plumber is clearing a blockage, fixing one damaged section, or replacing a longer section of underground pipe. The following estimates provide a general starting point for homeowners. Type of service Typical estimated cost Main sewer line clog removal 187–569 Localized or spot pipe repair 600–1,050 General sewer line repair 1,100–4,100 Sewer line replacement 1,388–5,323 for many typical projects Extensive or difficult replacement $10,000 or more in some cases These are broad U.S. cost estimates compiled from published pricing guides, not fixed prices or guarantees. The categories can overlap, and the total for a particular property may fall outside these ranges. A collapsed line, deep excavation, or work beneath concrete can significantly increase the bill. Why Is There Such a Large Price Difference? A sewer line problem does not always require replacing the entire pipe. If the issue is a removable blockage, cleaning may restore drainage without structural repairs. A cracked section may need a targeted repair, while a severely damaged line may require partial or complete replacement. For example, a plumber who can access a damaged section through an existing cleanout may need less labor than a crew that must excavate a deep pipe beneath a driveway. The symptoms may look similar to a homeowner, but the amount of work involved can be very different. What Factors Affect Sewer Line Repair Cost? Several factors determine the final price. Understanding them makes it easier to evaluate estimates and ask useful questions before work begins. 1. Type and Severity of Pipe Damage The condition of the pipe is one of the most important cost factors. A blockage caused by grease, waste, or tree roots may require professional cleaning or root removal. A small crack or separated joint could need a localized repair. A pipe that has collapsed, shifted significantly, or suffered extensive deterioration may no longer be suitable for a simple repair. A camera inspection can help identify whether the issue is a blockage, a structural defect, or a combination of problems. This information helps the plumber recommend work that addresses the actual cause instead of repeatedly treating the symptoms. 2. Length of the Damaged Sewer Line Repairing a short section generally requires less pipe, labor, and excavation than replacing a long run from the house to the municipal connection. Some contractors quote sewer work by the linear foot, while others provide a project price that includes labor, equipment, and other services. Ask whether the quoted footage refers to the damaged section alone or the entire line being replaced. The distinction matters because replacing an entire sewer line when only one section is damaged may not be necessary. 3. Pipe Depth and Accessibility Underground pipes are not always easy to reach. A shallow line in an open yard may be relatively straightforward to access, while a deeper pipe can require additional excavation, equipment, and labor. Costs can also rise if the pipe runs beneath: A concrete driveway or patio A garage or foundation slab Mature landscaping or retaining walls Other underground utility lines Areas with limited access for excavation equipment Ask whether digging, backfilling, disposal of old pipe, and restoration of the affected surface are included in the estimate. 4. Pipe Material and Condition Older homes may have clay, cast-iron, or other legacy sewer piping, while newer installations commonly use plastic piping such as PVC or ABS where permitted. The material and its condition influence the repair method. A plumber must consider whether the existing pipe is structurally sound enough for a localized repair or lining, or whether deterioration is too extensive. Material availability, fittings, compatibility with existing connections, and local code requirements can also affect the final price. 5. Repair Method Traditional excavation involves digging down to the damaged section and repairing or replacing the pipe. Trenchless methods may reduce the amount of digging and surface restoration needed, but they are not appropriate for every sewer line. The plumber should explain which method is suitable for your pipe and why. The least expensive initial quote is not necessarily the best value if it fails to address the underlying damage. 6. Permits, Inspection, and Restoration Some sewer repairs require permits or inspections, depending on the location and scope of the work. Additional expenses may include a sewer camera inspection, excavation, debris removal, and restoration of landscaping, pavement, or concrete. Before accepting a quote, request a written breakdown that identifies which items are included and which could be billed separately. Sewer Backup Repair Cost: What Should Homeowners Expect? The sewer backup repair cost depends on whether the problem is a blockage, a damaged pipe, or a combination of plumbing and cleanup issues. For a basic main sewer line clog, published U.S. estimates commonly fall around $187 to $569. However, this figure generally refers to clearing a blockage, not repairing a broken sewer line or restoring a property affected by sewage. The total cost to fix a sewer backup can be higher when additional work is needed. Common Expenses Associated With a Sewer Backup Drain cleaning: Removes an obstruction that is preventing

How Much Is a Sewer Line?
Plumbing

How Much Is a Sewer Line?

When homeowners face plumbing trouble, one of the most stressful and costly problems is a broken sewer line. If you’re asking yourself, “How much is a sewer line replacement cost?” you’re not alone. Sewer line problems can happen from age, tree roots, soil shifting, or normal wear and tear. Understanding the costs involved helps you plan a budget and make smart decisions. In this article I break down sewer line replacement costs, the factors that affect price, the differences between traditional and trenchless methods, and what to expect so you can plan with confidence. What is a sewer line and why is it important? A sewer line is the underground pipe that connects your home’s plumbing to the municipal sewer system (or to a septic tank). It carries wastewater away from sinks, toilets, showers, and appliances. If the sewer line fails, wastewater has nowhere to go this leads to backups, foul odors, wet spots in the yard, and health risks. When the main sewer is damaged, replacement becomes a vital expense to keep your home safe and functional. How much does a sewer line replacement cost on average? The common sewer line replacement cost ranges from $3,000 to $7,500; however, in some cases it can be as low as $1,500 for very small repairs or exceed $15,000 for complex projects with extensive restoration. If you’re wondering specifically “How much is a sewer line replacement cost?”, here’s a short overview: Minor repairs (spot repairs): $1,000 – $3,000 Full replacement (typical residential): $3,000 – $7,500 Complex projects with heavy excavation or major restoration: $10,000 – $15,000+ The final cost depends on how long the pipe is, how deep it’s buried, and whether there are obstacles like driveways, trees, or landscaping in the way. Cost per linear foot Many providers price by the foot. Here are common per-foot ranges used across the industry: Traditional open-cut excavation: $50 – $200+ per linear foot Trenchless methods (pipe lining, pipe bursting): $60 – $250+ per linear foot, depending on the method and access conditions Example: A 50-foot run can therefore range roughly $2,500 to $12,500+ depending on method, material, and restoration needs. Factors that affect sewer line replacement cost Several factors can increase or decrease the cost of replacing the sewer line. Here are the most important ones: 1. Length of the sewer line The longer the line, the more materials and labor are required. Most homes have sewer laterals that are 30–100 ft long. Each extra foot adds to the total cost. 2. Depth of the sewer line If your sewer line is buried deep, contractors need heavier equipment to dig it up, which increases the expense. 3. Type of material used Different pipe materials carry different costs: PVC: inexpensive and durable (a common choice) Cast iron: stronger but more expensive Clay: traditional but less durable 4. Method of replacement Traditional excavation: involves digging up the yard and typically costs less per foot in simple cases but adds large restoration costs. Trenchless technology: involves less digging and faster installation. It often costs more per foot but can save money on landscaping and driveway repairs. 5. Location of the line If the sewer line runs under a driveway, sidewalk, or large trees, costs go up because of added restoration and complexity. Trenchless vs. traditional: pros, cons and cost tradeoffs Traditional excavation (open cut) Pros: Often less expensive per foot for simple runs; feasible when pipes are severely collapsed. Cons: Major digging, destroys landscaping, and requires significant restoration. Estimate: $50–$200+/ft (plus restoration). Trenchless methods (pipe lining / pipe bursting) Pros: Minimal surface disruption, faster, and often much less surface restoration cost. Cons: Higher per-foot equipment cost; not always feasible if the pipe is badly collapsed or misaligned. Typical ranges: $60–$250+/ft; many residential trenchless jobs fall between $3,000 and $12,000. When trenchless may not be possible: collapsed pipes in multiple spots, severe offsets, or runs with too many bends often require open excavation. Always confirm with a camera inspection. Start with a camera (video) inspection A sewer camera inspection (sewer scope) is a professional video that shows the condition of the pipe. It helps determine whether you need a spot repair, lining, pipe bursting, or full replacement. Skipping the camera can lead to inaccurate quotes and surprise costs. Typical camera inspection cost: $125 – $1,000+, depending on length and access. Ask any contractor for a camera inspection before accepting a quote. Hidden costs: permits, restoration, and fees Don’t forget these line items when budgeting: Permit & inspection fees: vary by city — ask the contractor to include permits in the estimate. Driveway/sidewalk replacement: patching or full replacement can add $600 – $3,000+ (or more for large concrete repaves). Landscaping and irrigation repair: can add several hundred to several thousand dollars depending on scope. A trenchless job usually reduces surface restoration costs, which is why it can be cost-effective despite higher per-foot charges. Signs you may need sewer line replacement Look for these warning signs: Frequent drain clogs across multiple fixtures Foul sewage smells around your home Sewage backups in toilets or sinks Patches of unusually green grass in your yard (may indicate leaks underground) Wet spots in the yard with no recent rain If you notice these signs, don’t wait, calling a plumber quickly can sometimes reduce costs, since small repairs are cheaper than full replacements. Example estimate — 50-foot replacement (ballpark) Traditional excavation: 50 ft × $50–$200/ft = $2,500 – $10,000 (plus driveway/landscaping restoration) Trenchless (pipe lining/pipe bursting): 50 ft × $60–$250/ft = $3,000 – $12,500 (often with lower surface restoration cost) Ways to save on sewer line replacement cost If you’re worried about cost, here are practical tips: Get multiple quotes — compare plumbers and contractors with itemized estimates. Check homeowner’s insurance — sometimes damage is covered depending on cause and policy. Ask about trenchless options — these can reduce restoration costs. Regular maintenance and inspections — routine checks can spot problems early and avoid full replacement. Conclusion So, how much is a sewer line

Do Tankless Water Heaters Need Recirculation Pumps?
Plumbing

Do Tankless Water Heaters Need Recirculation Pumps? | Expert Tips

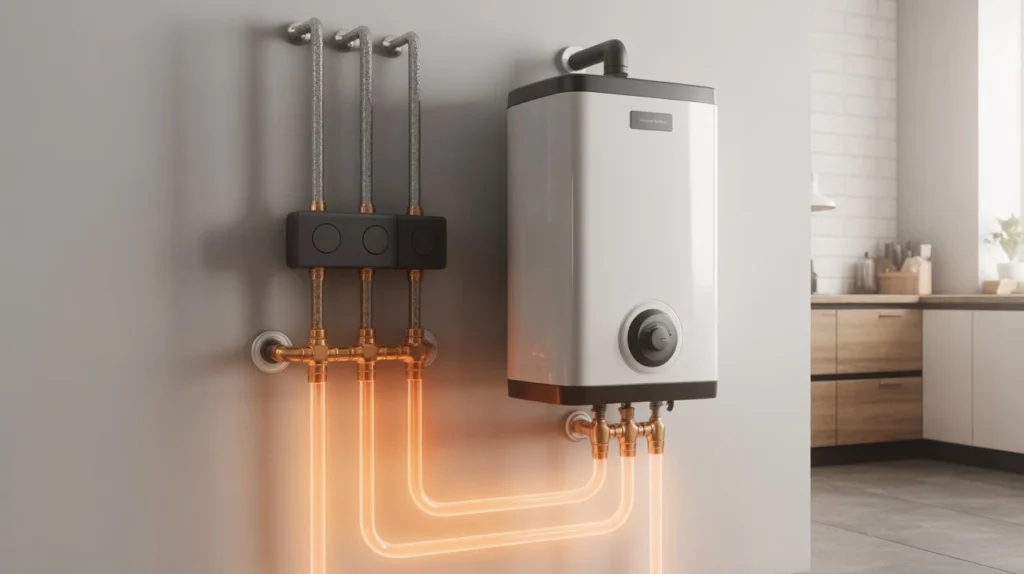
Tankless water heaters are a popular choice for homeowners looking to save space and energy while providing on-demand hot water. Unlike traditional water heaters that store hot water in a tank, tankless units heat water directly as it flows through the system. This method eliminates standby energy losses, making tankless systems more efficient. However, many homeowners wonder if a tankless water heater needs a recirculation pump to ensure a consistent supply of hot water. Let’s explore the role of recirculation pumps and whether they are necessary for tankless water heaters. What is a Recirculation Pump? A recirculation pump is a device that helps maintain a continuous flow of hot water in the plumbing system. It works by keeping hot water moving through the pipes so that hot water is immediately available when you turn on the faucet. Without a recirculation pump, you often experience a waiting period for hot water to arrive, which can be inconvenient and wasteful. In traditional water heaters, a recirculation system can help reduce water waste by providing instant hot water at the faucet, especially in large homes with long plumbing runs. The pump circulates hot water from the water heater through the pipes, ensuring that hot water is always readily available. Do Tankless Water Heaters Need Recirculation Pumps? Technically, a tankless water heater does not require a recirculation pump to function. The unit will heat water on demand whenever you turn on the hot water faucet. However, there are situations where adding a recirculation pump can improve performance, convenience, and efficiency. Let’s break down the key factors: 1. Instant Hot Water Without a recirculation pump, tankless water heaters typically have a small delay in delivering hot water to the faucet. This is because the water in the pipes has to travel from the heater to the tap, and it may cool off during the process. A recirculation pump can eliminate this delay by keeping hot water circulating in the pipes, making it instantly available. If your home has long plumbing runs or multiple stories, a recirculation pump can be especially beneficial for reducing the time you wait for hot water. This convenience might be worth the additional cost and energy consumption of the pump. 2. Energy Efficiency While tankless water heaters are already more energy-efficient than traditional models, adding a recirculation pump can have mixed effects on energy consumption. On the one hand, a recirculation system ensures you don’t waste water while waiting for it to warm up, which can save on water usage. However, the pump itself consumes energy and may slightly offset the efficiency gains of your tankless water heater. Some modern recirculation pumps are designed to be energy-efficient, offering timers or on-demand activation features to minimize energy usage when hot water isn’t needed. If you choose the right system, you can enjoy the benefits of instant hot water without a significant increase in energy costs. 3. Comfort and Convenience For large homes or homes with multiple bathrooms, a recirculation pump can be a real game-changer. It provides the convenience of having hot water available as soon as you turn on the faucet, which is particularly helpful for larger families or anyone who values quick access to hot water. Additionally, in colder climates, recirculation pumps can help prevent pipes from freezing by keeping water flowing through the system. 4. Cost Considerations Adding a recirculation pump to your tankless water heater setup will increase the upfront cost of installation. Not only will you need to purchase the pump, but there may also be additional plumbing or electrical work required to integrate the pump with your existing system. It’s important to weigh the costs against the benefits, especially if you’re on a budget. Is It Necessary for Tankless Systems? In short, no, a tankless water heater does not require a recirculation pump to function. The water will still heat as needed when you turn on the faucet. However, a recirculation system can enhance the performance of the heater, particularly in larger homes with extensive plumbing. It’s a good option for those who want faster access to hot water and are willing to invest in the necessary infrastructure. Conclusion: Should You Add a Recirculation Pump? While tankless water heaters don’t inherently need a recirculation pump, the addition of one can greatly improve convenience, comfort, and performance. If you have a large home with long plumbing runs, or if you’re tired of waiting for hot water, a recirculation pump could be a valuable investment. Just be mindful of the added costs and the potential increase in energy consumption. Ultimately, the decision depends on your specific needs, home size, and budget. Tired of Waiting for Hot Water? Upgrade to a Tankless Water Heater with Recirculation for Instant, On-Demand Hot Water! Call (323) 284 2410 Book Tankless Water Heater Service

How to Install a Toilet : A Easy Guide for Homeowners
Plumbing

How to Install a Toilet | A Step-by-Step DIY Guide

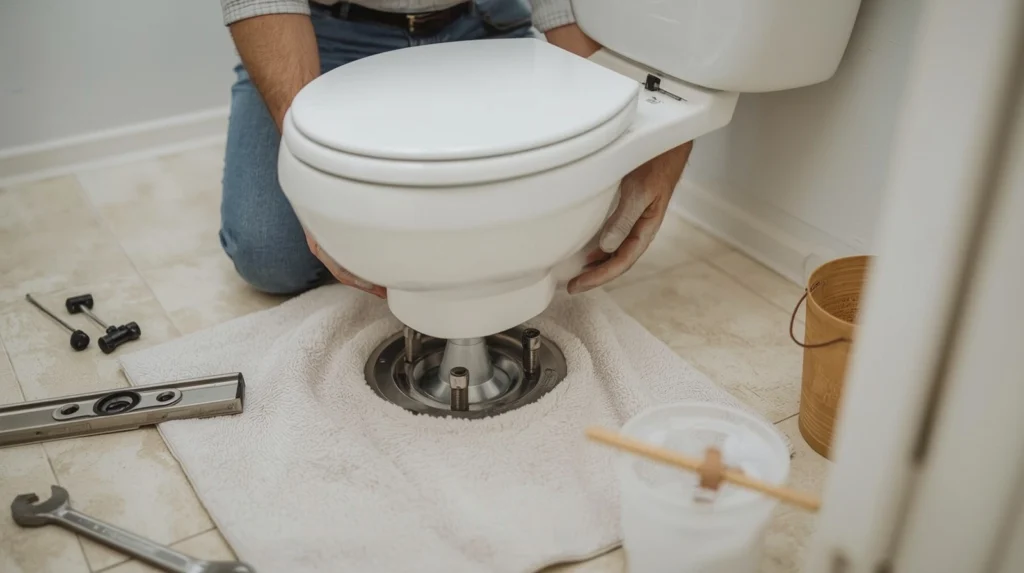
Installing a new toilet can be a manageable DIY project if your existing plumbing is in good condition and the replacement toilet fits the space. The process involves removing the old fixture, checking the toilet flange, placing a new seal, securing the toilet, and reconnecting the water supply. Learning how to install a toilet can help you save on labor costs while understanding which problems need a professional plumber. Before starting, make sure you have the correct tools, a compatible toilet, and enough time to complete the job without rushing. A poorly fitted seal or an uneven toilet can cause leaks, unpleasant odors, and floor damage, so careful preparation is essential. Tools and Materials Needed for Toilet Installation Gather everything before removing the existing toilet. Leaving the drain exposed while searching for tools can make the job more difficult. Tools: Adjustable wrench Screwdriver Pliers Putty knife or scraper Small bucket and sponge Towels or rags Level Utility knife, if needed Protective gloves Materials: New toilet with the appropriate fittings Compatible wax ring or wax-free toilet seal New closet bolts, if required Toilet supply line, if the existing one is worn or incompatible Shims designed for toilet leveling, if needed Caulk suitable for bathroom use, where appropriate Check the manufacturer’s installation instructions before buying replacement parts. Some toilets include the necessary hardware, while others require separate purchases. Before You Install a New Toilet A little preparation can prevent unnecessary expenses and installation problems. Check the Rough-In Measurement The rough-in is the distance from the finished wall behind the toilet to the center of the toilet’s floor drain or mounting bolts, measured according to the toilet manufacturer’s instructions. Many standard residential toilets use a 12-inch rough-in, but other sizes are available. Measure before purchasing a replacement. Also check the toilet’s width, bowl shape, and clearance from nearby walls, cabinets, and doors. Inspect the Toilet Flange The toilet flange connects the toilet to the drainpipe and provides a mounting point for the fixture. After removing the old toilet, inspect the flange for cracks, corrosion, loose fasteners, or signs that it has moved. A broken flange or a flange that sits at the wrong height may need repair before the new toilet can be installed. Do not try to compensate for a damaged flange by tightening the toilet bolts harder. Check the Shutoff Valve Locate the water supply shutoff valve, usually near the wall or floor behind the toilet. It should close fully without leaking. If the valve is corroded, damaged, or will not shut off the water, arrange for a repair before disconnecting the supply line. How to Install a Toilet Step by Step Step 1: Shut Off the Water Supply Turn the toilet’s shutoff valve clockwise to close it. Flush the toilet to empty most of the water from the tank and bowl. Use a sponge and bucket to remove the remaining water. Then disconnect the water supply line from the tank using an adjustable wrench, keeping a towel underneath to catch any residual water. If the shutoff valve will not close completely, do not force it. You may need to shut off the home’s main water supply and have the valve repaired. Step 2: Remove the Old Toilet Remove the decorative caps covering the toilet’s mounting bolts. Loosen the nuts with a wrench. If the bolts are badly corroded, proceed carefully to avoid damaging the flange. Once the fasteners are loose, gently rock the toilet to release the old seal. Lift the fixture straight up and move it to a protected area. Toilets are heavy and awkward, so get help lifting one if necessary. Scrape away the old wax from the flange and toilet base area. Place a temporary drain cover or suitable rag over the drain opening to help prevent sewer odors and keep debris out. Do not push the rag into the drain, and remember to remove it before installing the new toilet. Step 3: Inspect the Flange and Floor With the old toilet removed, check the flange, mounting bolts, and surrounding floor. Look for: Cracked or loose flange material Rusted or missing mounting hardware Soft, swollen, or discolored flooring Evidence of previous water leaks A flange that is noticeably too high or too low The floor should be firm enough to support the toilet evenly. If you find rotten subflooring, a loose flange, or significant damage, resolve the problem before proceeding. Installing a toilet over a weak floor can allow movement and cause the seal to fail. Step 4: Install the New Toilet Seal Choose a wax ring or wax-free seal compatible with the toilet and the existing flange. Follow the product instructions because seal placement varies by design. For a traditional wax ring, the instructions commonly call for placing the ring on the flange or toilet outlet, depending on the product. Align the new closet bolts with the flange slots and make sure they are positioned correctly. Avoid touching or compressing the seal unnecessarily. Once the toilet is lowered onto it, lifting the fixture back up may compromise the seal. If you need to reposition the toilet after the seal has been compressed, install a new seal rather than assuming the old one will work again. Step 5: Position and Secure the Toilet Remove the temporary drain cover. Carefully lower the toilet over the mounting bolts, keeping the bowl aligned with the flange and seal. Apply gentle, even pressure to help the toilet settle into position. Avoid rocking it back and forth or forcing it down with excessive body weight. Check that the bowl sits evenly on the floor. If it rocks, use suitable toilet shims to stabilize it. Do not rely on the mounting bolts to pull an uneven toilet down onto the floor. Install the washers and nuts, then tighten them gradually and evenly. Follow the manufacturer’s instructions for the correct tightening method. Porcelain can crack if the bolts are overtightened. Trim exposed bolt ends if necessary and fit the decorative caps. Step 6:

How to Install a Well Pressure Tank
Plumbing

How to Install a Well Pressure Tank: Easy Step by Step Guide

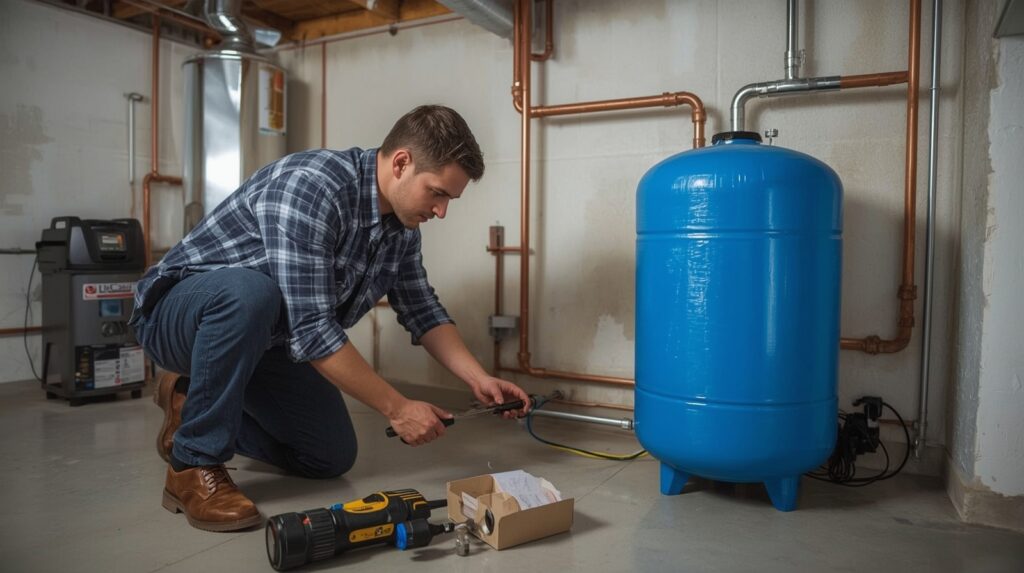
If you depend on a nicely gadget for water for your home, a perfect well pressure tank performs a vital function in maintaining water flowing successfully and retaining steady strain. Whether you’re putting in place a brand new gadget or changing an antique tank, understanding how to install a well pressure tank can prevent time, money, and headaches. This particular manual will stroll you through the procedure of well pressure tank installation, from coaching to setup, making sure a secure and powerful result. What is a Well Pressure Tank and Why It`s Important A well pressure tank holds water under pressure and helps control when the pump turns on and off. Without it, the pump would have to run every time you use water, which can wear it out too quickly. Main things of a tank include: Consistent water strain Longer pump lifespan Energy efficiency Reduced pump cycling Tools & Materials Needed Before beginning the well pressure tank installation, collect those gear and supplies: Adjustable wrench Pipe wrenches Teflon tape Pipe sealant Pipe fittings (PVC or copper, relying to your plumbing) Pressure gauge Pressure switch (if changing) Well strain tank Safety gloves and goggles Easy Step Guide: How to Install a Well Pressure Tank Now let’s break the process of installation of well pressure tank in different steps Step 1: Turn Off the Power and Water Supply Safety comes first. Shut off electric electricity to the properly pump from the circuit breaker. Turn off the water deliver valve. Relieve gadget stress via way of means of beginning a faucet. Step 2: Drain the Old Tank (If Replacing) If you`re changing pressure tank, join a lawn hose to the drain valve and empty it absolutely right into a secure drainage area. Step 3: Disconnect Plumbing and Wiring Remove pipes from the vintage tank the use of a wrench. If the stress transfer is connected to the vintage tank, disconnect it carefully. Label wires to keep away from confusion throughout reinstallation. Step 4: Prepare the New Tank Before properly well pressure tank setup, check: Pre-rate air stress: Most tanks are pre-charged to 38PSI for a 40-60 pressure transfer. Adjust with an air pump if necessary. Inspect fittings for leaks or defects. Step 5: Install the Tank Place the tank on a stable, degree floor near your pump for green water flow. Step 6: Connect the Plumbing Apply Teflon tape and sealant to threaded fittings. Connect inlet/outlet pipes securely. Ensure all connections are tight to save you leaks. Step 7: Install or Reconnect the Pressure Switch If changing the transfer: Mount it at the pump line or tank. Reconnect wires in line with the labels you made earlier. Step 8: Test the System Turn at the water deliver slowly. Restore strength to the pump. Let the tank fill and display for leaks. Check that the pump cycles on and stale properly. Well Pressure Tank Replacement Tips Always fit the tank potential for your family water needs. Replace the strain transfer if it`s antique or damaged. If the pump short-cycles (turns on/off too quickly), take a look at air strain within side the tank. Safety Precautions Never paintings at the machine with strength on. Use right equipment to keep away from adverse fittings. Wear protection glasses whilst reducing or threading pipes. Signs You Need a New Pressure Tank Fluctuating water strain Pump going for walks too frequently Visible leaks or rust at the tank Waterlogged tank (no air cushion) If you be aware those issues, properly strain tank alternative is the pleasant option. Maintenance After Installation Check tank strain each 6 months. Drain and check out the tank annually. Keep the strain transfer easy and freed from debris. Conclusion Knowing the way , how to install well pressure tank offers you manipulate over your water machine and allows you store on expert exertions costs. Whether it`s well pressure tank installation , alternative or replacement, changing the pressure tank, following the proper steps guarantees a safe, leak-unfastened setup. With right maintenance, your tank can ultimate 10–15 years, preserving your water strain consistent and your pump in precise shape. Need Reliable Residential Plumbing? From leaky faucets to well pressure tanks, Derks Plumbing keeps your home’s plumbing running smoothly! Call (323) 284 2410 Get Residential Plumbing Service   FAQ: How to Install a Well Pressure Tank How lengthy does it take to put in a properly strain tank? Typically, 2–four hours, relying on enjoy and machine complexity. Do I want a expert for properly strain tank set up? If you’ve got got plumbing and simple electric skills, you could do it yourself. Otherwise, hiring a certified plumber guarantees protection and compliance. How an awful lot does a properly strain tank alternative cost? DIY alternative can cost $300–$600 (which include the tank). Professional set up can be $600–$1,200. What length strain tank do I want? A 20–forty four gallon tank works for maximum homes. Larger families can also additionally want 80–one hundred twenty gallons. Can I update a strain tank with out changing the pump? Yes, so long as the pump is in precise operating condition.

How much does a plumber cost
Plumbing

How Much Does a Plumber Cost? | 2026 Local Pricing Guide

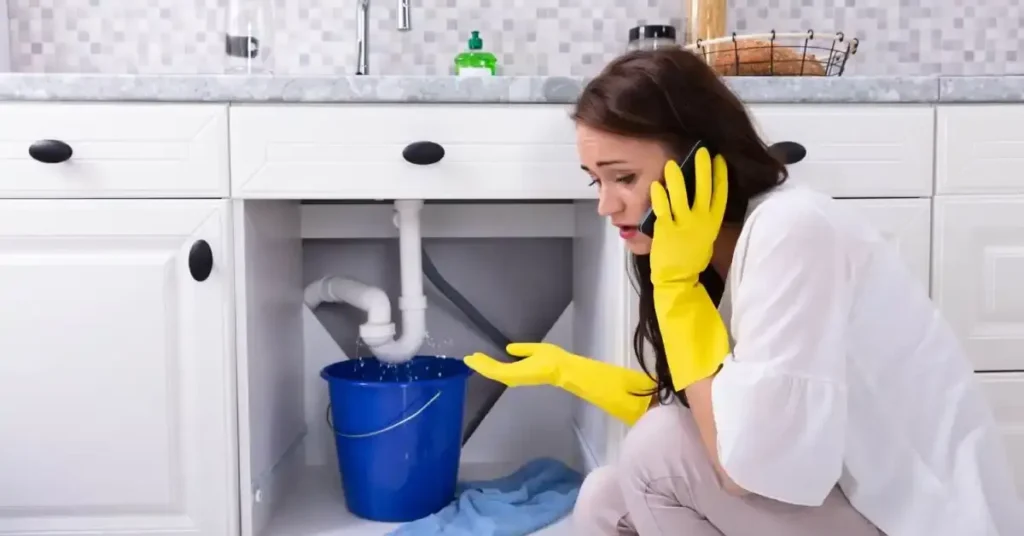
No one likes dealing with a sudden plumbing issue, but ignoring it only makes it much worse. When dirty water starts pooling under your kitchen sink or your only toilet refuses to flush, your very first question is almost always going to be the exact same one. So, how much does a plumber cost? On average, most homeowners pay between $150 and $450 for a standard residential repair. Minor fixes can run $75 to $150, while major plumbing jobs like replacing main sewer lines will scale from $1,500 to $5,000. Average Plumber Cost When trying to understand the total cost of your repair, it helps to look at the project scale. Most residential plumbing jobs fall into three main categories based on the complexity of the work. First, we have small repairs. These are quick jobs that a professional can finish in an hour or two. Examples include fixing a dripping faucet, replacing a toilet flapper, or clearing a simple sink clog. You will usually pay between $150 and $450 for these tasks. Second, we have medium projects. These require more labor and better materials. Examples include installing a new sump pump, replacing a garbage disposal, or running a new water line to your refrigerator. For these jobs, expect to pay between $500 and $1,500. Third, we have large installations and replacements. These projects often take multiple days and require heavy machinery. Examples include replacing a water heater, repiping an entire home, or replacing a broken underground sewer line. These major projects can range from $1,600 to $7,000 or even more. How Much Do Plumbers Charge Per Hour? Most professional plumbers charge an hourly labor rate that ranges from $75 to $200 per hour. The final price you see on your invoice is heavily tied to the experience level of the technician who knocks on your door. Apprentice Plumbers ($45 – $75/hr): These are entry-level technicians in training. They work under the direct supervision of a licensed plumber and typically handle basic, low-risk tasks. Journeyman Plumbers ($75 – $120/hr): These professionals have completed their state licensing requirements and can work independently on standard residential repairs and installations. Master Plumbers ($100 – $200/hr): These are highly experienced experts who have passed advanced exams and managed complex commercial systems. They possess the deep technical knowledge required for difficult system diagnostics, building code compliance, and planning. Keep in mind that many companies charge a trip fee or diagnostic fee of $50 to $150 just to send a truck to your home. In many cases, if you agree to hire them for the repair, they will waive this trip fee and apply it toward your final plumbing labor price list. Plumbing Costs by Service Type The total cost of plumbing repairs is always tied to the specific service you need. Here is a detailed look at plumbing services prices for the most common household repairs. Drain Cleaning Services Clogged drains are highly common in busy households. A simple drain snaking for a kitchen sink or shower usually costs $100 to $300. If the clog is deep in your main sewer line, the price rises to $300 or $800. For very stubborn grease or root clogs, plumbers use a high-pressure water system called hydro jetting. Hydro jetting costs between $600 and $1,500. Toilet Repair and Installation A running toilet can waste hundreds of gallons of water every day. Replacing a bad flush valve or wax ring costs between $100 and $300. If you want to replace the entire toilet, the labor cost to install a new one ranges from $250 to $600. This does not include the price of the actual toilet. Faucet and Sink Repair Leaky faucets are annoying and waste water. Fixing a leaky faucet cartridge or O-ring costs between $100 and $250. If you want to upgrade to a brand-new faucet, the installation price ranges from $150 to $535. Replacing a broken garbage disposal costs between $200 and $450. Water Leak Detection and Repair Water leaks can cause mold and structural damage if you do not fix them quickly. Repairing an easy-to-reach pipe under a sink costs $150 to $400. If the leak is hidden behind a wall, finding it and fixing it costs $400 to $1,200. A slab leak under your concrete foundation is the most expensive to fix, costing between $500 and $4,000. Water Heater Services Water heaters work hard every day and eventually wear out. Fixing a broken heating element or thermostat costs $200 to $900. If you need to replace your old water heater, a new standard tank unit costs $900 to $2,500. A tankless water heater is more efficient but costs more, ranging from $2,000 to $5,500 to install. Key Factors That Affect Plumber Costs Every home is built differently, meaning no two plumbing calls are exactly the same. When a plumber inspects your home to write an estimate, they evaluate several physical and logistical details. Accessibility: If a leaking pipe is located in an open basement or crawlspace, it is fast and cheap to fix. If the plumber has to cut through tile, plaster, or plasterboard walls, your labor costs will climb quickly. Materials Used: Copper pipes are durable and long-lasting, but copper is expensive. PEX (cross-linked polyethylene) is a flexible, modern plastic piping that is faster to install and costs significantly less. Permit and Code Requirements: Large-scale projects like repiping a home or replacing a main sewer line require official city permits and independent inspections. These administrative fees can add $100 to $500 to your final bill. Local Cost of Living: Plumbers in major metropolitan areas with high living costs charge higher hourly rates than those working in smaller rural towns. You can read about: How Much Does an Emergency Plumber Cost? Emergency Plumbing Costs Plumbing disasters do not wait for a convenient time. Pipes can burst at midnight or during a major holiday weekend. When water is flooding your living room, you must call for help immediately. Emergency plumbing services cost more than

How Long Do Toilet Seals and Valves Last?
Plumbing

How Long Do Toilet Seals & Valves Last?

Most toilet seals and valves last for several years, but their lifespan depends on the component, water quality, usage, and maintenance. Toilet flappers and rubber seals commonly last around 5 years, while toilet fill valves typically last 5 to 7 years. Flush valve bodies can last much longer, although their seals may wear sooner. Mineral buildup, sediment, deteriorated rubber, and in-tank cleaners can shorten component life. A toilet may continue working properly for years without replacement, but leaks, running water, or slow filling can indicate worn parts. Manufacturers such as Kohler recommend inspecting these components when problems occur rather than replacing them based on age alone. Quick Answer Toilet flappers and rubber seals typically last around 5 years, while toilet fill valves commonly last 5 to 7 years. Flush valve bodies can last much longer, but their seals may wear sooner. Water quality, mineral buildup, toilet usage, installation, and replacement-part quality can all affect how long these components last. How Long Do Toilet Fill Valves Last? A toilet fill valve typically lasts around 5 to 7 years, although some can last longer under favorable conditions. The fill valve is responsible for allowing fresh water into the toilet tank after a flush. Once the tank reaches the correct water level, the fill valve should shut off. Water quality and sediment can affect its lifespan. Toilets exposed to hard water or significant mineral buildup may develop problems sooner. What Are the Signs of a Failing Fill Valve? A failing fill valve may cause: The toilet to take longer than usual to refill. Hissing or running water after the tank has filled. The valve to repeatedly turn on and off. A float or valve mechanism that sticks. The tank to stop filling at an incorrect water level. Inconsistent or noisy refilling. A slow-filling toilet does not always mean the fill valve itself has failed. Sediment, a partially restricted water supply, or another plumbing issue can cause similar symptoms. How Long Do Toilet Flush Valves Last? There is no universal lifespan for a complete toilet flush valve. The flush valve body can last for many years, while the rubber flapper or seal associated with it may wear out sooner. The flush valve controls the release of water from the tank into the bowl when the toilet is flushed. Depending on the toilet, the system may use: A traditional flapper. A canister-style flush valve. A flush valve seal. Another manufacturer-specific sealing mechanism. If only the rubber seal has deteriorated, replacing the seal may be enough. A complete flush valve replacement may only be necessary if the valve itself is cracked, damaged, warped, or otherwise unable to provide a reliable seal. When Should a Flush Valve Be Replaced? A flush valve may need replacement when: The valve body is cracked. The sealing surface is damaged. A properly installed replacement seal still leaks. The valve assembly has become warped. The toilet continues to experience flushing problems. Compatible replacement seals are no longer available. Identifying the toilet manufacturer and model before purchasing replacement parts can help prevent compatibility problems. How Long Do Toilet Flappers Last? A toilet flapper generally lasts around five years, although its actual lifespan can vary. The flapper is the rubber component that keeps water inside the tank until you flush. Each time you flush, it lifts to release water into the bowl and then closes again. Over time, the rubber can become: Brittle. Warped. Cracked. Soft or deteriorated. Unable to create a proper seal. A damaged flapper can allow water to slowly leak from the tank into the bowl. The EPA recommends replacing toilet flappers at least every five years to help prevent leaks. What About Other Toilet Seals? The term “toilet seal” can refer to several different components, and each one has different maintenance requirements. Component Typical Lifespan or Guidance Common Problem Toilet flapper Around 5 years Water leaking into bowl Flush valve seal Several years, depending on use Tank-to-bowl leakage Fill valve Around 5 to 7 years Slow filling or running Tank-to-bowl gasket No fixed lifespan Water leaking around tank Wax ring No fixed replacement interval Water leaking at toilet base A wax ring is different from the seals inside the toilet tank. It seals the connection between the toilet and the drain flange. It does not normally need to be replaced simply because the toilet has reached a certain age. However, it should generally be replaced when the toilet is removed, or if there is evidence of a leak around the toilet base. How Can You Tell Which Toilet Valve Is Failing? A running toilet does not necessarily mean the fill valve is defective. Several different components can produce similar symptoms. 1. Check for a leaking flapper Add a few drops of food coloring to the toilet tank without flushing. Wait approximately 10 minutes. If colored water appears in the bowl, water is escaping from the tank. The flapper or flush valve seal is a likely source. Flush the toilet after completing the test. 2. Listen after the tank fills Once the tank reaches its normal water level, the fill valve should shut off. If you continue hearing water entering the tank, inspect the fill valve and water-level adjustment. 3. Watch for repeated refilling If the toilet fills normally but then starts refilling periodically without anyone flushing it, water may be slowly escaping from the tank into the bowl. In this situation, the flapper or flush valve seal may be the actual problem. The fill valve is simply responding to the falling water level. Why Do Toilet Seals and Valves Fail? Several factors can affect the lifespan of toilet components. Water Quality Minerals and sediment can accumulate inside valves and around sealing surfaces. Hard water can be particularly challenging for plumbing components because mineral deposits may interfere with moving parts and seals. Frequent Toilet Use A toilet in a busy household or commercial property may be flushed significantly more often than a lightly used bathroom. More frequent operation can contribute

How Much Does an Emergency Plumber Cost
Plumbing

How Much Does an Emergency Plumber Cost? | Find Out Now

A burst pipe at 2 AM. A backed-up toilet on Thanksgiving. Water flooding your basement on a Sunday morning. These plumbing nightmares happen when you least expect them. When disaster strikes, you need help fast, but you also wonder about the bill. How much does an emergency plumber cost? Emergency plumber rates typically range from $150 to $450 per hour, with most homeowners paying between $200 and $350. The final price depends on the time of day, severity of the problem, and required repairs. What is the Average Cost of an Emergency Plumber? The cost for emergency plumber services varies widely across the country. National averages give us a starting point, but your actual costs may differ.Most emergency plumbers charge a base call-out fee. This fee covers the trip to your home and initial diagnosis. Expect to pay $100 to $300 just for the plumber to show up.After that, hourly rates kick in. Standard emergency plumber cost runs $150 to $250 per hour during business hours. Night and weekend rates jump to $250 to $450 per hour. Here’s what you might pay for common emergency repairs: Burst pipe repair: $400 to $1,500 Sewer backup: $300 to $5,000 Water heater emergency: $350 to $1,200 Toilet overflow: $150 to $500 Clogged drain: $200 to $600Parts and materials add to labor costs. A simple valve replacement might need $20 in parts. Complex repairs could require hundreds in materials.Some plumbers offer flat-rate pricing for specific jobs. This approach removes surprises from your bill. You know the total cost before work begins. Factors That Affect Emergency Plumbing Costs Multiple variables determine your final emergency plumber price. Understanding these factors helps you budget better. Time of Day and Week Emergency plumber rates spike outside normal business hours. Weeknight calls cost more than daytime service. Weekend and holiday rates reach the highest levels.A Tuesday afternoon call might cost $175 per hour. The same problem at 3 AM Saturday could run $350 per hour or more. Problem Complexity Simple fixes take less time and cost less money. A running toilet might need 30 minutes. A broken sewer line requires hours of work.The tools and expertise needed also affect plumber cost. Basic clogs need a snake. Serious blockages require hydro-jetting equipment. Geographic Location Urban areas typically charge more than rural locations. High cost-of-living cities see higher rates across the board.Los Angeles emergency plumbers charge differently than those in smaller towns. Competition and demand drive local pricing. Parts and Materials The repair type determines material costs. Replacing a faucet washer costs pennies. Installing a new water heater runs thousands.Some plumbers mark up parts by 20% to 40%. Others charge retail prices. Ask about parts pricing upfront. Accessibility Hard-to-reach problems cost more to fix. Pipes behind walls require cutting and patching. Crawl space work takes longer and demands more effort.Easy-access repairs under sinks or in basements cost less. The plumber spends more time fixing and less time accessing. Company Reputation and Experience Established companies with stellar reviews often charge premium rates. Their experience and reliability justify higher emergency plumber costs.Newer or less-known services might offer lower prices. Balance cost savings against potential quality concerns. What is Considered a Plumbing Emergency? Not every drip qualifies as urgent. True emergencies risk property damage or health hazards. Knowing the difference saves money and stress. Clear Emergencies Requiring Immediate Help Burst or frozen pipes: Water spraying everywhere causes major damage fast. Shut off your main water valve and call immediately. Sewage backup: Raw sewage in your home poses serious health risks. This situation demands instant professional attention. No water supply: Complete water loss affects daily life. Multiple causes could be responsible. Gas line leaks: Smell gas? Evacuate and call the gas company first. Then contact a licensed plumber to repair the line. Major leaks: Water pooling on floors or dripping through ceilings can’t wait. Every minute increases damage. Overflowing toilet: If plunging doesn’t work and water keeps rising, you need professional help now. Issues That Can Wait Until Morning Slow drains: Annoying but not destructive. Schedule regular-hours service. Dripping faucets: Wasteful but not urgent. Book a same-day or next-day appointment. Running toilets: Increases your water bill but won’t flood your home. Fix it soon but not at 3 AM rates. Water heater issues (with hot water still available): If you have some hot water, wait for business hours. When to Call a Professional vs. DIY Small clogs respond to plungers or drain snakes. Try these first before calling for help. Tightening a loose pipe connection might stop minor leaks. Basic tools and YouTube tutorials can guide you. But know your limits. Trying repairs beyond your skill level can worsen problems. That minor leak becomes a flood. Your DIY attempt turns into a costlier professional fix. You can read about: How Excessive Rain Can Affect Your Plumbing How to Prevent Plumbing Emergencies Prevention beats emergency plumber rates every time. Regular maintenance and smart habits protect your home and wallet. Regular Maintenance Schedule Inspect visible pipes monthly. Look for corrosion, moisture, or small leaks. Early detection prevents bigger problems.Flush your water heater annually. Sediment buildup reduces efficiency and shortens lifespan.Have a professional inspect your plumbing every two years. They spot issues before they become emergencies. Winter Preparation Frozen pipes cause expensive damage. Insulate exposed pipes in unheated areas.Keep cabinet doors open during cold snaps. This allows warm air to reach pipes under sinks.Let faucets drip slightly when temperatures drop below freezing. Moving water resists freezing.Drain and shut off outdoor faucets before winter. Disconnect garden hoses. Smart Daily Habits Never pour grease down drains. It solidifies and creates clogs.Use drain screens to catch hair and debris. Clean them regularly.Avoid flushing anything except toilet paper. “Flushable” wipes aren’t really flushable.Don’t ignore small problems. That tiny leak will grow. Address it now before it becomes an emergency. Know Your System Locate your main water shutoff valve. Practice turning it off. In emergencies, you’ll need to act fast.Label important shutoff valves throughout your home. Tag the water heater, washing machine,

How to Fix a Leaking Bath Tap
Plumbing

Powerful Tips to Fix a Leaking Bath Tap

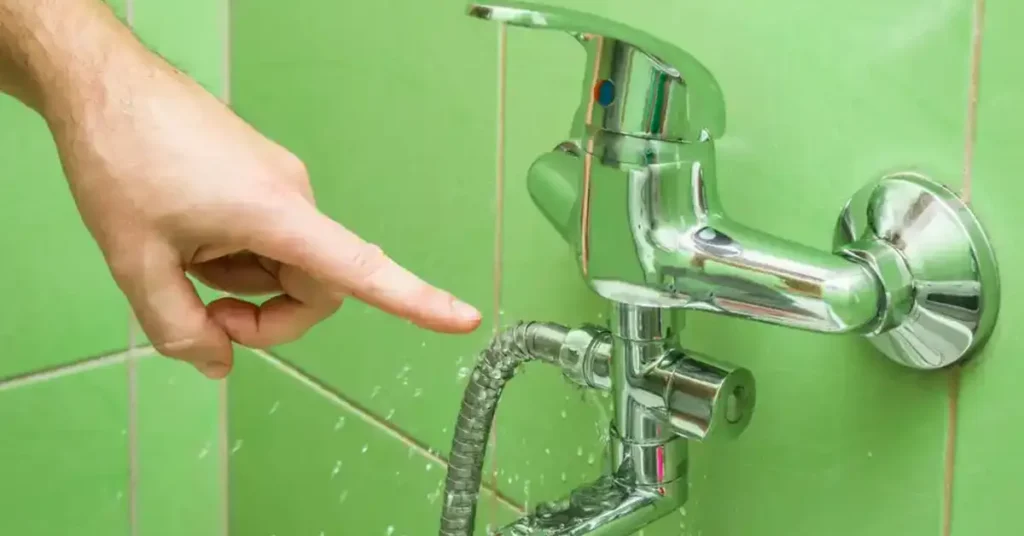
It can be annoying and expensive to deal with a dripping bath tap or any other dripping taps in the bathroom. A simple part like an O-ring or nut often needs to be replaced when a bathroom sink tap starts to leak. I have fixed many bathroom faucets that leak and the first thing I do is figure out where the water is coming from. Watch for drips of water at the base or tip of the tap. Let me explain in depth how to fix a leaking bath tap. If the base of your bathroom faucet leaks, it’s likely because the seal or O-rings are worn out. Most of the time, a worn washer or cartridge inside the tap will cause water to drip when it’s not turned on. In my experience, it’s usually easy to fix a leak once you know where it is. In fact, one guide says that fixing a tap that drips is often easy to do yourself as long as you have the right parts and tools on hand. Tools to fix a leaking tap Get the right tools together before you start fixing a leaky tap. An adjustable wrench or spanner, flat-head and Phillips screwdrivers, new washers, O-rings, or cartridges, and plumber’s grease or silicone sealant are some of the most important tools. And in one do-it-yourself guide, it says to have an adjustable wrench, scissors, a set of screwdrivers, and new tap cartridges or washers with O-rings. These are the tools you need to fix a tap that is leaking. When you have everything you need on hand, you can get work done quickly and without having to stop. In real life, you can do the fix slowly if you have the right tools on hand. Replacing a tap washer A usual first step is to change the washer on the tap. There is a small rubber washer at the base of the stem of many traditional faucets that stops water flow. These faucets have different knobs for hot and cold water. If this nut is broken or worn out, the tap will drip when it is closed. It’s easy to fix: turn off the water, take off the handle, loosen the nut that holds it in place, and then pull out the stem. Take out the old washer and put in a new one that is the same size. To test, put the tap back together and turn the water back on. I’ve found that changing the washer stops most drips right away. It’s a quick and cheap fix. Replacing a faucet cartridge There are a lot of mixer-style bath faucets on the market today that use a ceramic cylinder instead of a rubber washer. Before you change the filter in the faucet, turn off the water and open the tap to release any pressure. Take off the cosmetic cover and the tap handle to get to the retaining nut. With a wrench, loosen this nut and take out the old cartridge. Leaks usually happen when a ceramic disc in the cartridge breaks. To fix this, you will have to change the whole cartridge. Get a new cartridge by taking the old one (or its part number) to a hardware shop. Put the new cartridge in, tighten the nut again, and put the tap back together. The leak should be fixed when you turn the water back on. O-ring replacement for tap A new O-ring for the tap might be needed if the leak is around the spout or base of a mixing faucet. The small rubber seals that go between tap parts are called O-rings. First, take off the tap spout or neck (many of them just pop off or unscrew). At the bottom of the spout, you’ll see an old O-ring. Remove the old ring by prying it out or cutting it out, then slide on a new one that is the same size. Put a little plumber’s grease on the new O-ring to make sure it seals well. After that, put the spout back on. Changing this one small part stops the leak most of the time. Once the O-ring is back in place, turn on the water and test the faucet to make sure the leak is gone. Valve seat reseating Sometimes a tap leaks even after the O-rings and screws are changed. Maybe the valve seat is to blame. The valve seat is the metal area that the washer presses against. Water can get around the washer if the seat is rusted or has holes in it. This can be fixed by reseating the valve seat. Put the valve seat tool or cutter into the faucet body and turn it a few times to make the seat smooth. Get rid of any metal bits, and then put the tap back together. From what I’ve seen, this usually fixes a leaky seal without having to repair the whole faucet. Resealing around the tap base If water is leaking around the outside base of the tap, like on the bath deck, you might need to seal the bath around the tap again. First, wipe away any old putty or glue and let the area dry. Then, put a thin line of waterproof silicone glue between the sink or tub and the base of the faucet. Make it smooth, and then let it dry completely. This keeps water from getting into the wall or floor from under the faucet. If nothing else works, replacing the old, cracked sealer around the base of the tap is often enough to fix the leak. Run the tap after resealing to make sure no water is leaking out at the base. Repairing a leaking mixer tap A leaking mixer tap (one button mixes hot and cold water) is fixed in the same way, but you need to look at the inside of the mixer. Most of the time, leaks are caused by the cartridge or the covers. To fix a mixer tap

Fast and Efficient Plumbing Services in Eagle Rock

Client Reviews

Posted on Google Google
Ryan Haden profile picture
Ryan Haden
Google star 1Google star 2Google star 3Google star 4Google star 5Trustindex verifies that the original source of the review is Google.
Could not have been happier with Alex! We was right on time, polite, fixed all my kitchen sink issues and have me good tips on how to best maintain. I will for sure be using him again and highly recommend anyone who needs a great plumber to use his services as well. Thank you!
Posted on Google Google
Lorena Marcoe profile picture
Lorena Marcoe
Google star 1Google star 2Google star 3Google star 4Google star 5Trustindex verifies that the original source of the review is Google.
Talk about a professional...yes, I am talking about Alex Derks, Derks Plumbing. He is by far the most knowledgeable plumber we have ever had the pleasure of hiring. He's been in the plumbing business for years and it shows. Any questions you have re: plumbing issues, install, etc., Alex is your man. So happy with his work and he has a great sense of humor as well... extremely easy to talk to...thank you Alex!!!
Posted on Google Google
Andrew Jalil profile picture
Andrew Jalil
Google star 1Google star 2Google star 3Google star 4Google star 5Trustindex verifies that the original source of the review is Google.
Alex did a great job installing my kitchen faucet and an under-sink Aquasana water filter. He also addressed a few other plumbing-related issues. He was friendly and helpful. Excellent work!
Posted on Google Google
Abigail Bigham profile picture
Abigail Bigham
Google star 1Google star 2Google star 3Google star 4Google star 5Trustindex verifies that the original source of the review is Google.
Alex does what other plumbers cannot do! He is our go to.
Posted on Google Google
Danielle Driver profile picture
Danielle Driver
Google star 1Google star 2Google star 3Google star 4Google star 5Trustindex verifies that the original source of the review is Google.
Alex is very friendly and responsive. What a pleasure to work with!
Posted on Google Google
Lawrence Isaacs profile picture
Lawrence Isaacs
Google star 1Google star 2Google star 3Google star 4Google star 5Trustindex verifies that the original source of the review is Google.
Very very happy with the work Alex did for us replacing the tanks in our Aquasana filtration system. From first contact over the phone through job completion Alex was a pleasure to work with. He explained what he was doing, and why, every step of the way, and made sure we understood what we needed to do to maintain the system. Strongly recommend Alex!
Posted on Google Google
Joey Aucoin profile picture
Joey Aucoin
Google star 1Google star 2Google star 3Google star 4Google star 5Trustindex verifies that the original source of the review is Google.
Alex Derks has been such a lifesaver for me. Anytime I'm in a pinch with the plumbing in my home, Alex is only a phone call away and I've only seen great results from his work. He's reliable, knowledgable, and entirely trustworthy. A must-have source when owning a home.
Posted on Google Google
Eric Gorman profile picture
Eric Gorman
Google star 1Google star 2Google star 3Google star 4Google star 5Trustindex verifies that the original source of the review is Google.
After working with dozens of plumbing services in the LA area, I can confidently say Derks is the best in the business. On time, reliable and capable of even the most difficult tasks, Derks goes above and beyond to make sure your water system is working correctly.
Posted on Google Google
Jason Gruenbaum profile picture
Jason Gruenbaum
Google star 1Google star 2Google star 3Google star 4Google star 5Trustindex verifies that the original source of the review is Google.
Excellent know-how and fast!! Reasonable pricing and super responsive!!
Posted on Google Google
Jonathan Hepfer profile picture
Jonathan Hepfer
Google star 1Google star 2Google star 3Google star 4Google star 5Trustindex verifies that the original source of the review is Google.
Alex is an expert plumber, and he always goes out of his way to educate me about how to prevent future issues. Highly recommended!

Derks Plumbing has been providing professional plumbing services to Eagle Rock residents for over 20 years. Our experience and strong reputation have allowed us to grow, and we are proud to serve customers in 15 nearby areas, including Venice, Santa Monica, Beverly Hills, and more.

Contact

Hours of Operation

Monday: Open 24 Hours
Tuesday: Open 24 Hours
Wednesday: Open 24 Hours
Thursday: Open 24 Hours
Friday: Open 24 Hours
Saturday: Open 24 Hours
Sunday: Open 24 Hours

© 2026 Created by Localpro1

Scroll to Top