We are Available 24/7

Plumbing

How to Remove Tree Roots from Sewer Line
Plumbing

How to Remove Tree Roots from Sewer Line: Ultimate Fix

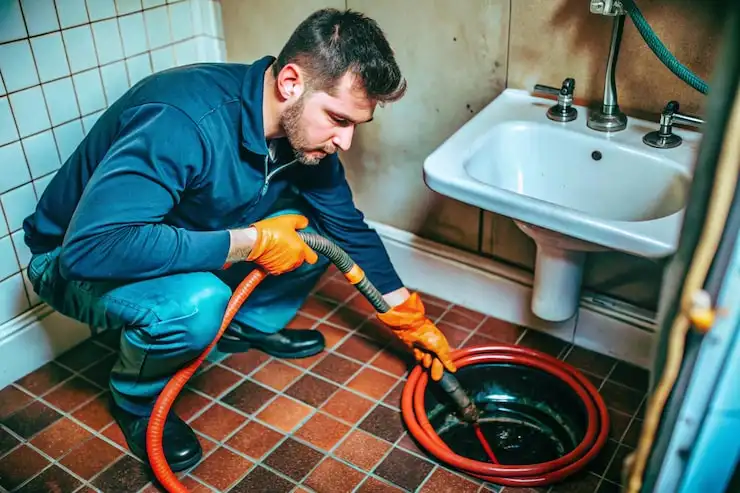
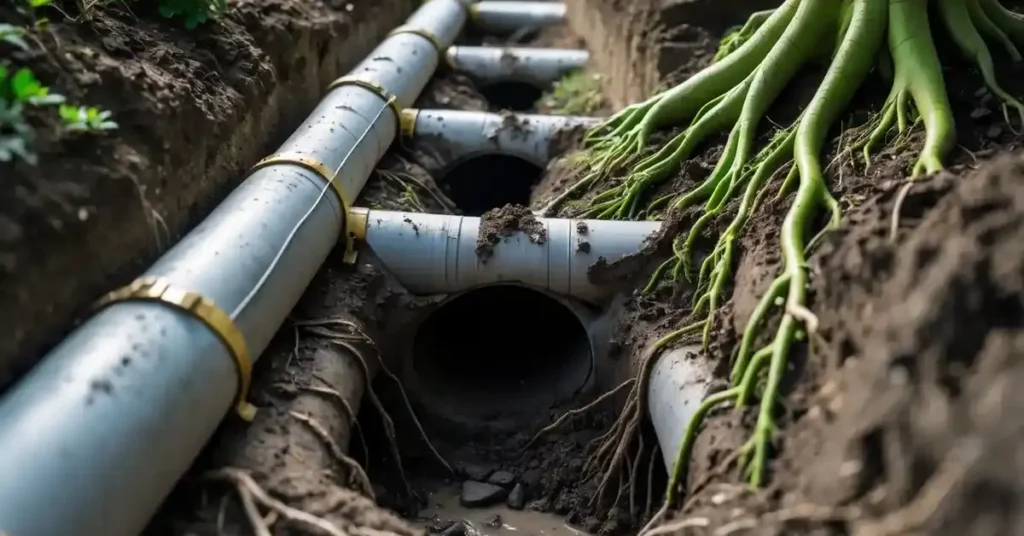
Tree roots are a top cause of plumbing nightmares for homeowners. They chase water sources, find tiny cracks in your sewer pipes, and quickly turn a small leak into a major blockage. This guide will walk you through proven methods for dealing with this costly problem. The key to fixing this issue is fast action and knowing your options. This comprehensive guide details everything you need to know about How to Remove Tree Roots from Sewer Line and how to stop them from coming back, keeping your system clear and functional. How Do Tree Roots Enter Sewer Lines? To effectively manage roots in your sewer, you must first understand how they get inside. Tree roots seek out the most vital resources for growth: water, oxygen, and nutrients. A sewer line provides all three in a perfect, warm environment. The Source of the Problem: Cracks and Joints Even a small, microscopic imperfection is enough for a root to start an invasion. Vulnerable Pipe Joints: The connections between two sections of pipe are the weakest points. Over time, ground settling or slight shifts can cause these joints to separate slightly. Existing Cracks: Older pipes, such as clay or cast iron, are prone to cracking or corroding due to age and soil pressure. A single hairline crack acts like a beacon for searching root tips. The Tiny Intruder: Tree roots start as incredibly fine root hairs. These hairs follow the vapor trail of water leaking from the pipe. Once inside, the rich sewage water and constant moisture cause the root to grow rapidly. Once they get in, the roots create a dense tangle. This tangle acts like a net, trapping paper, grease, and other debris. The result is a total blockage of wastewater flow. This blockage can lead to tree root damage that forces expensive sewer line repair. Key Signs of Tree Roots in a Sewer Line Recognizing the signs early saves you significant time and money. Ignoring the symptoms will only increase the tree roots in sewer line removal difficulty. Symptom Description Severity What it Means Gurgling Toilets A distinct gurgling sound after you flush, especially in the lowest floor toilet. Moderate Air is trapped and being forced past a partial blockage. Slow Draining Bathtubs, sinks, or showers drain slowly, often after you have used the toilet. Moderate Water is having trouble passing the root mass, which is catching debris. Frequent Clogs Your plumbing clogs repeatedly, even after simple snaking, or you must use a plunger often. High The root mass is large and is regrowing quickly after small cleanings. Sewage Backups Raw sewage backs up into your bathtub, shower, or toilet. This is usually the first sign of a complete blockage. Extreme The main line is fully clogged, requiring immediate professional attention. Lush Lawn Patches An area of your lawn directly above the sewer line is much greener or lusher than the surrounding grass. High The roots have caused a leak, fertilizing the soil directly above the pipe. If you notice any of these signs, you need to find out how to fix roots in sewer line right away. Do not delay. Step by Step Guide: How to Remove Tree Roots from Sewer Line Removing roots in your sewer requires the right approach for your situation. The process depends on blockage severity and pipe condition. DIY Methods Rock Salt Treatment Rock salt dehydrates roots without harsh chemicals. Pour two pounds of rock salt into your toilet. Flush it down with a gallon of water. The salt draws moisture from roots and kills them slowly.Repeat monthly for maintenance. This method works best for minor root intrusions. Results take several weeks to appear. Don’t use it if you have a septic system as salt harms beneficial bacteria. Copper Sulfate Application Copper sulfate crystals poison roots on contact. Pour half a cup into your toilet and flush. The crystals stick to roots and kill them within days.Use this treatment twice yearly for prevention. Wear gloves when handling crystals. Keep away from skin and eyes. This chemical also affects septic systems, so check local regulations first. Foaming Root Killers Commercial foaming products coat pipe walls completely. The foam sticks to roots longer than liquid treatments. Follow package directions carefully for best results.These products work well in partially clogged lines. Pour the foam down your toilet at night when water usage is low. The foam needs several hours to work effectively. Mechanical Augering Rent a drain auger or rooter machine from hardware stores. Feed the cable into your cleanout opening slowly. The rotating blade cuts through roots as it advances.Pull back and push forward repeatedly. This action clears the blockage section by section. Run water afterward to flush debris. This method provides immediate relief but roots grow back without chemical treatment. Professional Ways to Remove Roots in Pipes Hydro Jetting Professional plumbers use high-pressure water streams. This sewer root treatment blasts away roots, grease, and scale buildup. Water pressure reaches 4,000 PSI or higher.The process clears pipes completely. It also scours pipe walls smoothly. This prevents new roots from grabbing hold easily. Hydro jetting costs more but lasts longer than augering. Video Camera Inspection Professionals insert cameras into your sewer line. The camera shows exact locations of root intrusions. It also reveals pipe damage and other issues.This technology eliminates guesswork. Plumbers see what they’re dealing with before starting work. The inspection footage helps plan the best removal strategy. Trenchless Pipe Lining This method repairs damaged pipes without digging. Technicians insert an epoxy-coated liner through existing pipes. The liner hardens into a new pipe inside the old one.Pipe lining seals cracks and prevents future root growth. The process takes hours instead of days. Your yard stays intact with minimal disruption. Pipe Bursting Replacement Severely damaged pipes need complete replacement. Pipe bursting breaks old pipes while pulling new ones through. A hydraulic machine does the work underground.This technique requires only small access holes. New pipes are root-resistant HDPE or PVC. The investment pays off with decades of
who to call to fix garbage disposal
Plumbing

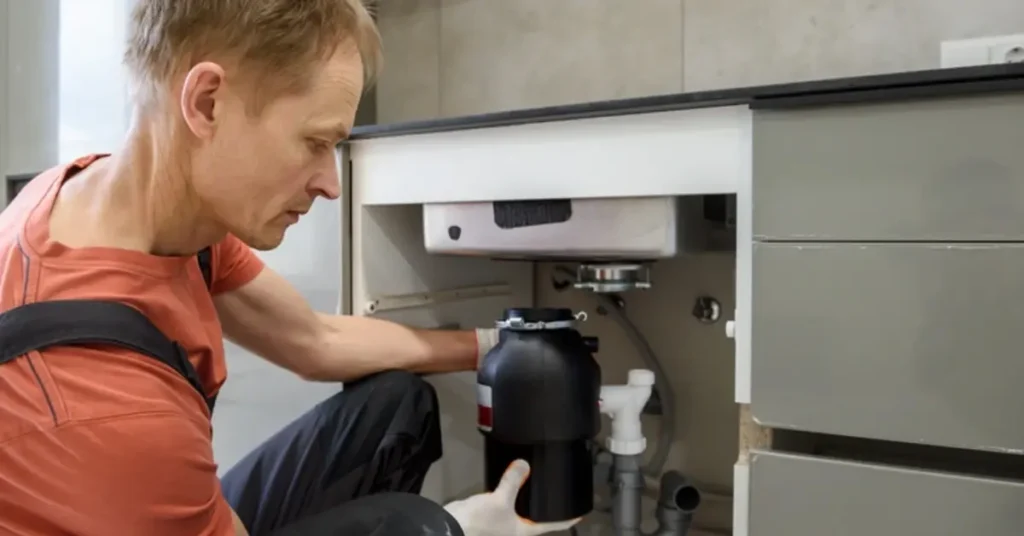
Who to Call to Fix Garbage Disposal: Expert Guide

A faulty garbage disposal can bring kitchen cleanup to a sudden, messy halt. You flip the switch, hear a concerning noise, or perhaps nothing at all, and water backs up. This leaves you with a critical question: who to call to fix garbage disposal when it suddenly fails? The concise answer is a licensed plumber, as they possess the key knowledge for both the plumbing and electrical aspects of this specific home appliance. Understanding when a professional is needed for garbage disposal repair versus a simple DIY fix will save you time and money. Signs Your Garbage Disposal Needs Professional Repair Your disposal sends clear signals when it needs help. Learn to spot them early, and you’ll save time and money. Strange Noises Mean Trouble Grinding metal sounds point to broken blades or stuck objects. A humming motor without blade movement means a jam. These issues rarely fix themselves. Ignoring them can burn out the motor and force a full replacement. Water Leaks Under the Sink Pools of water under your sink indicate seal failures or loose connections. Small leaks grow into big problems. Water damage spreads to cabinets, floors, and walls. A garbage disposal repair plumber can spot the source and stop it before your kitchen suffers serious harm. Frequent Resets Required If you’re hitting that reset button daily, something’s wrong. The overload switch trips when the motor works too hard. This happens with dull blades, heavy jams, or worn parts. Your unit is telling you it can’t keep up. Foul Odors That Won’t Go Away Bad smells mean trapped food or failing seals. Simple cleaning might help, but persistent odors often signal deeper issues. Bacteria can grow in cracks you can’t see or reach. Slow Draining or Standing Water When water sits in your sink after running the disposal, you have a drainage problem. Could be a clog in the pipes or a disposal that’s not grinding properly. Either way, garbage disposal services can clear it out. Complete Loss of Power No sound, no movement, nothing. Check your breaker first. If power’s on but the unit stays dead, internal electrical problems need attention. Don’t open up electrical components yourself. You can read about: How Does A Garbage Disposal Work? So, Who to Call to Fix Garbage Disposal? Let’s break down your options and help you choose the right professional for your situation. Licensed Plumbers: Your Best Choice Plumbers top the list for garbage disposal repair. They understand your entire drain system, not just the unit itself. When who fixes garbage disposals comes up, plumbers have the complete answer. They can spot problems in your pipes that might cause disposal issues.A good plumber brings proper tools, replacement parts, and years of training. They pull permits when needed and guarantee their work. Most offer same-day service for urgent problems. Handyman Services: For Simple Jobs General handymen can handle basic garbage disposal installation or simple repairs. They cost less than specialized plumbers. But their plumbing knowledge has limits. For complex issues, they might need to call a plumber anyway.Use handymen for straightforward swaps on standard units. Skip them for leak repairs, pipe work, or troubleshooting mystery problems. Appliance Repair Specialists Some companies focus on kitchen appliances. They know garbage disposals well, but might not handle plumbing issues. If your problem involves pipes, drains, or connections to your dishwasher, you’ll need plumbing expertise. Home Warranty Companies Got a home warranty? Call them first. They’ll send an approved contractor. You’ll pay just your deductible, usually $75 to $125. But you can’t choose who fixes a garbage disposal, and service might take longer. You can read about: Who to Hire to Get a Water Faucet Installed When DIY Is Enough You can handle some garbage disposal problems yourself. Know when to grab your tools and when to grab your phone. Safe DIY Repairs You Can Try Reset Button Method Find the red or black button on the bottom of your unit. Press it firmly. This often fixes overload issues. Wait five minutes, then try running the disposal again. Clearing Simple Jams Turn off the power at your breaker box. Never reach into a disposal with power on. Use a flashlight to look inside. Remove visible objects with pliers or tongs. Many units include an Allen wrench that fits a hole in the bottom. Turn it back and forth to free the blades. Tightening Loose Connections Check the pipes and mounting. A loose drain pipe might just need tightening. Grab a wrench and snug up the connections. Put a bucket underneath first to catch drips. Basic Cleaning Drop ice cubes and salt into the disposal. Run cold water and turn it on. This scours the blades and breaks up grease. Follow with citrus peels for freshness. When to Stop and Call a Pro Stop if you see water leaking from the unit body. Internal seals require special tools and expertise. Stop if you smell burning rubber or plastic. Motor damage needs professional diagnosis.Stop if the unit keeps tripping your breaker. This signals electrical problems that can start fires. Stop if you removed the jam but the disposal still won’t run. The motor might be burned out. Never bypass safety switches. Never stick your hand in while the power’s connected. Never use chemical drain cleaners in disposals. They damage seals and don’t fix mechanical problems. When Should You Repair or Replace Your Garbage Disposal? This question saves you money. Sometimes repair makes sense. Sometimes replacement is smarter. Repair Makes Sense When: Your unit is less than five years old. Most disposals last 10 to 15 years with proper care. Younger units are worth fixing.The problem is simple. Jams, clogs, and loose connections cost little to repair. Parts run $20 to $100. Labor adds another $100 to $200.Your unit still has warranty coverage. Manufacturers cover defects for 2 to 10 years depending on the model. Free repairs beat paid replacements. Replace Instead of Repair When: Your disposal is over 10 years old. Older units often develop

brown water coming out of faucet
Plumbing

Brown Water Coming Out of Faucet: 10-Min Solution

You turn on your tap expecting clear water, but muddy brown liquid flows out instead. This common problem startles homeowners and raises immediate health concerns. The good news is that the brown water coming out of faucet issues usually have simple explanations and fixable solutions. Brown discoloration in your tap water typically stems from rust, sediment buildup, or maintenance work in your area. While alarming to see, most cases pose minimal health risks. Understanding the root cause helps you take the right action quickly. Why Is the Brown Water Coming Out of Faucet Brown water appears when rust particles, minerals, or sediment enter your home’s water supply. Your plumbing system contains metal pipes that corrode over time. This corrosion releases iron oxide, commonly known as rust, into the water flowing through your taps. The discoloration can affect your entire house or just specific faucets. If brown water from the faucet appears only when you first turn on the tap, the problem likely exists within your home’s pipes. When the issue affects multiple homes in your neighborhood, the municipal water system is usually responsible. Water utilities sometimes flush fire hydrants or repair main water lines. These activities stir up sediment that has settled in distribution pipes. The disturbed material then travels through the system to your home, causing temporary discoloration. Common Causes of Brown Water Coming Out of a Faucet Corroded Pipes Older homes built before 1960 often have galvanized steel pipes. These pipes develop rust as their protective zinc coating wears away. Iron and steel pipes gradually corrode from the inside out, releasing rust particles into your water supply. The hot water heater accelerates corrosion because heat speeds up chemical reactions. This explains why brown hot water appears more frequently than discolored cold water. Your water heater’s anode rod may be depleted, causing the tank itself to rust. Sediment in Water Heater Water heaters accumulate mineral deposits and sediment at the bottom of the tank. Calcium, magnesium, and other minerals separate from heated water and settle. This buildup gets disturbed when water flows, mixing rust-colored sediment into your hot water supply. Regular flushing prevents sediment accumulation. Most manufacturers recommend draining your water heater annually. Neglecting this maintenance causes the sediment layer to grow thicker each year. Municipal Water Main Work City water departments perform routine maintenance on distribution systems. When crews repair broken mains or replace aging pipes, they temporarily shut off water flow. Restarting the system stirs up rust and sediment that has accumulated in the lines. Fire hydrant flushing is another common municipal activity. Water departments open fire hydrants to test their functionality and clean out the water mains. The high-flow operation dislodges buildup from pipe walls, sending it downstream to homes and businesses. Well Water Issues Private well systems pull water from underground aquifers. Heavy rain can wash surface material into your well, causing temporary discoloration. Iron bacteria thrive in wells and create rust-colored slime that contaminates the water supply. The well pump may be drawing water from a different depth than usual. Sediment layers at certain depths contain more minerals that discolor water. A damaged well screen allows sand and sediment to enter your plumbing system. Disturbed Rust Buildup Years of rust accumulation inside pipes creates a stable layer on pipe walls. Sudden changes in water pressure or flow direction can break loose this buildup. Construction work, water main breaks, or even your neighbor’s heavy water usage can create pressure fluctuations. The rust particles then flow through your plumbing system until they exit through faucets. This type of brown water coming from faucets typically clears up within a few hours as the disturbed material flushes out. Is Brown Water Dangerous? Brown water from rust poses minimal health risks in most situations. Iron is an essential mineral your body needs. The amounts present in discolored tap water rarely exceed safe consumption levels. The Environmental Protection Agency sets a secondary standard of 0.3 milligrams per liter for iron, primarily for aesthetic reasons rather than health concerns. However, brown water can harbor bacteria if the discoloration comes from a contaminated source. If your water smells foul, has an oily appearance, or contains visible particles, avoid drinking it. Municipal water systems must meet safety standards, but private wells require regular testing. The water from faucet is brown but still safe for showering and washing dishes in most cases. Rust stains clothing and fixtures, creating frustrating cleaning problems. White laundry can turn orange, and bathtubs develop stubborn brown rings. People with compromised immune systems should exercise extra caution. Contact your water provider to confirm the water meets safety standards before consuming discolored water. When in doubt, use bottled water for drinking and cooking until the issue resolves. How to Fix Brown Water Coming Out of Your Faucet Run Cold Water First Turn on your cold water taps and let them run for several minutes. Start with the faucet closest to your main water line. This action flushes sediment from your pipes without drawing from your water heater. If the water comes out brown initially but clears up, the problem exists in your distribution lines. Municipal issues typically resolve within 20 to 30 minutes of flushing. Run all cold water faucets simultaneously to speed up the process. Flush Your Water Heater Annual water heater flushing prevents sediment buildup and extends tank life. Turn off the power or gas supply to your water heater. Connect a garden hose to the drain valve at the bottom of the tank. Open the drain valve and let water flow until it runs clear. The first water will likely appear brown and contain visible sediment. Continue draining until the water looks clean, which may take 10 to 20 minutes. Close the valve and refill the tank before restoring power. This simple maintenance task eliminates most hot water discoloration problems. Consider replacing the anode rod if your water heater is more than five years old. Check With Neighbors Ask nearby residents if they experience similar water discoloration.

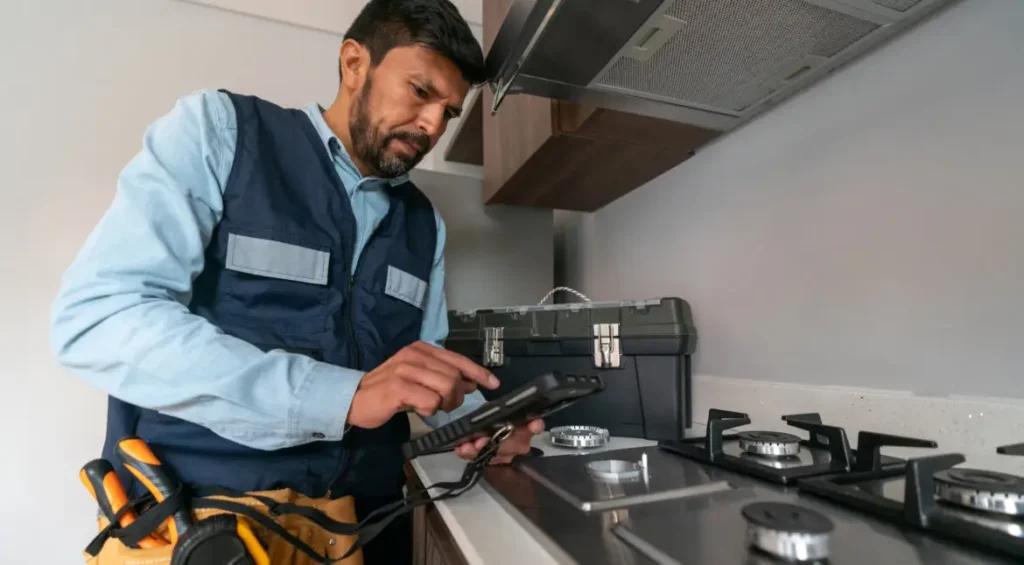
do plumbers fix gas leaks
Plumbing

Do Plumbers Fix Gas Leaks? Truth Saves Lives (2025)

Gas leaks are scary. That smell of rotten eggs can send anyone into panic mode. Your hands shake as you reach for your phone, wondering who to call. A gas leak plumber might be your answer, but you need to know fast. So, do plumbers fix gas leaks?. The answer is yes most licensed plumbers can handle gas leaks safely. They have special training and equipment to detect, repair, and prevent dangerous gas line problems. But not every plumber works on gas lines, so you need one with proper certification. Understanding Gas Leaks and Why They’re Dangerous Natural gas powers millions of homes across America. It heats water, cooks food, and keeps houses warm. But when gas lines crack or fittings loosen, invisible danger fills your home. Gas leaks create three main threats to your safety: Explosion Risk: Natural gas is highly flammable. A single spark from a light switch or appliance can ignite leaked gas. These explosions destroy homes and injure families every year. Health Hazards: Breathing natural gas causes headaches, dizziness, and nausea. Long exposure leads to serious respiratory problems. Children and pets feel the effects faster than adults. Carbon Monoxide Poisoning: Incomplete gas combustion creates carbon monoxide. This silent killer has no smell. It causes confusion, chest pain, and can be fatal within hours. Gas companies add mercaptan to natural gas. This chemical smells like rotten eggs or sulfur. Without this additive, gas would be odorless and even more dangerous. Signs of a Gas Leak Your senses are the first line of defense against gas leaks. Learn to recognize these warning signs: The Rotten Egg Smell: This is the most obvious sign. If you smell sulfur or rotten eggs near gas appliances or pipes, you likely have a leak. Hissing or Whistling Sounds: Listen near gas lines, meters, and appliances. A hissing noise means gas is escaping under pressure. Dead Plants Indoors: House plants near a gas leak will wilt and die. Gas displaces oxygen that plants need to survive. Physical Symptoms: Family members might experience headaches, fatigue, or breathing problems. These symptoms improve when you leave the house. Higher Gas Bills: A sudden spike in your gas bill without increased usage suggests gas is leaking somewhere in your system. Dirt or Dust Blowing: If you see a white cloud or dust blowing near a gas line outside, underground gas might be escaping. Bubbles in Water: Apply soapy water to suspected leak areas. Bubbles form where gas escapes. Trust your instincts. If something feels wrong with your gas system, call a professional plumber immediately. So, Do Plumbers Fix Gas Leaks? Yes, licensed plumbers are trained to fix gas leaks. But there’s an important detail most people miss. Not every plumber has gas line certification. A plumber to fix gas leaks must have specific training beyond standard plumbing work. This certification covers gas line installation, repair, and safety protocols. What Makes a Gas Line Plumber Qualified? Licensed gas plumbers complete specialized training programs. They learn gas line materials, proper installation methods, and leak detection techniques. Most states require separate licensing for gas work. These professionals carry specialized equipment that regular plumbers don’t need. They use combustible gas detectors, pressure gauges, and specialized pipe wrenches designed for gas fittings. Types of Gas Leak Repairs Plumbers Handle: Fixing loose pipe connections and fittings Replacing corroded or damaged gas lines Repairing gas valve leaks Fixing leaks at appliance connections Testing and pressure checks after repairs Installing new gas lines for appliances A professional plumber who works on gas systems knows local building codes. These codes vary by state and city. Proper installation prevents future leaks and keeps your home safe. You can read about: How Does a Plumber Find a Water Leak Underground What to Do When There’s a Gas Leak Gas leak emergencies require quick action. Follow these steps exactly: Step 1: Get Everyone Out Don’t wait to investigate. Move all people and pets outside immediately. Don’t stop to grab belongings. Step 2: Leave Everything As Is Don’t turn lights on or off. Don’t unplug appliances. Don’t use your phone inside the house. Any spark can trigger an explosion. Step 3: Don’t Try to Find the Source You’re not a gas leak plumber. Searching for the leak keeps you in danger longer. Just get out. Step 4: Call 911 or Your Gas Company Once you’re at a safe distance, call for help. Use a neighbor’s phone or your cell phone from outside. Gas companies have 24/7 emergency lines. Step 5: Wait for the All-Clear Don’t go back inside until professionals say it’s safe. The gas company will check your home and may shut off your gas. Step 6: Call a Licensed Plumber After the emergency team secures your home, you’ll need a plumber repair gas leak permanently. The gas company finds the leak but won’t always fix it. Why Call a Plumber for a Gas Leak? You might wonder why you need a plumber when gas companies respond to leaks. Here’s the truth. Gas Companies vs. Professional Plumber Services Gas companies provide emergency response. They locate leaks and shut off gas if needed. But they don’t repair your private lines or appliances. That’s where plumbers come in. Your gas company owns lines up to your meter. Everything beyond that meter is your responsibility. This includes all pipes running through your house and connections to appliances. Benefits of Hiring a Licensed Gas Plumber: Proper Diagnosis: Plumbers use professional equipment to find hidden leaks. They check entire systems, not just obvious problem spots. Code-Compliant Repairs: Gas line work must meet strict building codes. Licensed plumbers know these requirements and ensure repairs pass inspection. Warranty Protection: Professional repairs come with warranties. If problems return, the plumber fixes them at no extra cost. Safety Assurance: Can a plumber fix a gas leak safely? Licensed ones can. They test repairs thoroughly before restoring gas service. Future Prevention: Experienced plumbers spot potential problems during repairs. They’ll recommend upgrades before small issues become emergencies. Can I Fix

How Much Does it Cost To Snake a Drain
Plumbing

How Much Does it Cost To Snake a Drain?: Real Costs

A clogged drain can turn your day upside down fast. Water backs up in your sink, shower, or toilet, and you need a fix now. Most homeowners face this problem at some point, and snaking offers a quick solution that works. So, understand how much does it cost to snake a drain? The average price ranges from $100 to $275 for basic drain snaking. The final cost depends on factors like drain location, clog severity, and whether you hire a professional or rent equipment yourself. What Does “Snaking a Drain” Mean? Drain snaking uses a special tool called a drain snake or auger. This flexible metal cable feeds through your pipes to break up or pull out clogs. The snake has a coiled end that grabs hair, soap buildup, and other debris blocking your drain. Plumbers insert the snake into your drain opening. They push it through the pipe until hitting the clog. Then they rotate the snake to break apart or hook the blockage. This method works for most common household clogs without damaging your pipes. Two main types exist: manual snakes and power augers. Manual snakes work well for simple clogs near the drain opening. Power augers handle tougher blockages deeper in your plumbing system. Both clear drains faster than chemical cleaners and cause less pipe damage. How Does It Cost to Snake a Drain in 2025? Drain snaking prices vary based on several factors. Here’s what you can expect to pay: Basic Sink or Tub Drain: $100 to $250 Most kitchen and bathroom sinks fall in this range. These drains sit close to the surface and take less time to clear. Toilet Drain: $125 to $300 Toilets need special augers due to their design. The S-trap shape makes toilet clogs slightly harder to reach. Main Sewer Line: $350 to $600 Main line blockages require heavy-duty power augers. These jobs take more time and need professional equipment. Emergency or After-Hours Service: Add $100 to $300 Calling a plumber at night or on weekends costs more. Emergency fees cover their availability outside normal business hours. The plumber cost to snake a drain includes labor, equipment, and expertise. Most jobs take 30 minutes to 2 hours depending on clog location and severity. What Can Impact Your Drain Cleaning Cost? Several factors affect how much you’ll pay for drain cleaning: Location of the Clog: Clogs near the drain opening cost less to fix. Blockages deep in your pipes or main sewer line require more work and specialized tools. Type of Drain: Kitchen sinks with grease buildup need different treatment than bathroom drains with hair clogs. Shower and tub drains often cost less than main line work. Severity of Blockage: Simple clogs clear quickly with basic snaking. Stubborn blockages might need multiple attempts or stronger equipment, raising the price to snake a drain. Time of Service: Regular business hours offer the best rates. Evening, weekend, or holiday service adds premium charges to your bill. Geographic Location: Urban areas with higher living costs charge more. Rural locations might have fewer plumbers available, which can also affect drain snaking prices. Additional Services Needed: Some jobs require camera inspection to find the clog. Others need hydro-jetting for really tough blockages. These extras increase the cost of drain cleaning. Accessibility Issues: Hard-to-reach drains take more time. If your plumber needs to remove fixtures or access points, expect higher charges. DIY vs. Professional Snaking: What Makes Sense? You can rent snake drain equipment from hardware stores for $30 to $50 per day. This saves money if you want to handle the job yourself. DIY Drain Snaking: Costs less upfront Works for minor clogs near the surface Requires physical effort and patience Risk of damaging pipes if done wrong No guarantee of success When DIY Makes Sense: You can try snaking yourself for simple bathroom sink or shower drain clogs. These often involve hair and soap scum near the drain opening. If you’re handy and patient, a manual snake might do the trick. Professional Service Benefits: Right equipment for any clog type Experience identifying underlying problems Warranty on work performed Time savings and less mess Camera inspection capabilities Professionals know how much to snake a drain effectively without risking pipe damage. They spot warning signs of bigger plumbing issues during the job. Is It Worth Hiring a Professional? Yes, in most cases. Professional plumbers bring skills that justify the snake a drain cost. Expertise and Efficiency: Professionals clear drains faster. They’ve seen thousands of clogs and know the best approach for each situation. What takes you two hours might take them 20 minutes. Proper Diagnosis: A good plumber doesn’t just clear the clog. They find out why it happened. Tree roots, pipe damage, or poor venting might cause repeat problems. Finding the root cause saves money long-term. Right Tools for the Job: Professional power augers work better than rental equipment. They have different snake sizes and attachments for various drain types. This means better results and less risk of damage. Safety and Liability: When you rent equipment, you assume all risk. Damage your pipes, and you pay for repairs. Professionals carry insurance that protects you from accidents or mistakes. Long-Term Value: The drain cleaning costs might seem high compared to DIY. But professionals often prevent future problems through proper cleaning and advice. This saves money over time. Preventing Future Drain Clogs Smart habits keep drains clear and reduce how often you need snaking services. Kitchen Drains: Never pour grease down the sink Use drain screens to catch food particles Run hot water after each use Avoid putting coffee grounds in the disposal Bathroom Drains: Install hair catchers in showers and tubs Clean pop-up stoppers monthly Don’t flush anything except toilet paper Avoid letting soap buildup accumulate All Drains: Flush with hot water weekly Use baking soda and vinegar monthly Avoid chemical drain cleaners Watch for slow drainage as an early warning Monthly Maintenance: Pour a pot of boiling water down each drain once a month. This melts

worm in toilet bowl
Plumbing

Worm in Toilet Bowl | Causes and How to Get Rid of Them

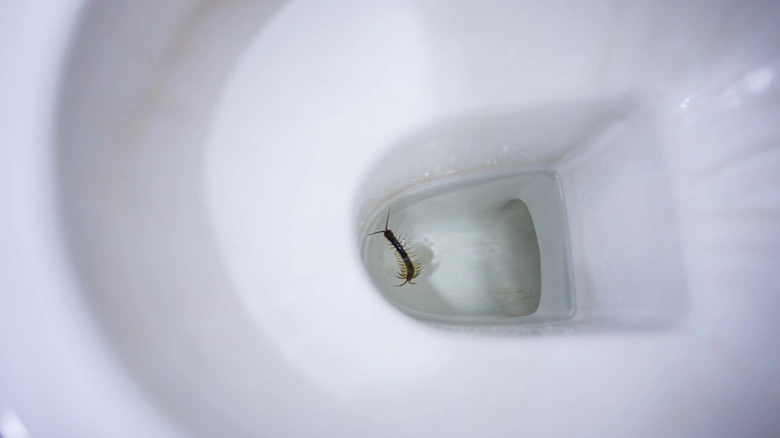
Finding a worm in toilet bowl water can be unpleasant, especially when you do not know where it came from. These creatures may be insect larvae, earthworms, or other small organisms that enter the bathroom through different routes. A single sighting does not always mean your plumbing system has a problem. The best way to deal with this issue is to identify the organism, clean the affected area safely, and look for possible sources. Understanding why it appeared can help you decide whether you need better drain cleaning, pest control, or a professional plumbing inspection. What Could Be a Worm in the Toilet Bowl? Not every worm-like creature found in a toilet is an actual worm. Its size, color, shape, and movement may provide clues about what it is, although appearance alone cannot confirm its identity. Tiny Worms in Toilet If you notice tiny worms in toilet water, check whether similar organisms are present around your bathroom sink, shower, or floor drain. Some may be drain fly larvae, which can develop in the organic buildup inside damp drains. Others may enter from soil or nearby openings. Look for recurring sightings and inspect nearby areas for moisture or organic residue. Taking a photograph can help a pest-control professional identify the organism. Pink Worm in Toilet A pink worm in toilet water may be a small worm, an insect larva, or another organism with a reddish appearance. Pink stains around bathroom fixtures may also come from bacterial growth rather than an actual worm. Observe whether the object moves and note its shape. Do not assume its color alone identifies the species or confirms that it came from the sewer. Brown or Black Worms Brown or dark worm-like creatures may include earthworms or certain insect larvae. Earthworms can sometimes enter buildings through damp soil or openings around walls and pipes. Check the toilet base, nearby floor, and plumbing entry points for gaps, moisture, or damage. Repeated sightings may require a closer inspection to identify the source. Why Are Worms Appearing in Your Toilet? Several conditions may explain why you find a worm in the toilet bowl. The source depends on the organism and whether you notice other plumbing or pest-related symptoms. Organic Buildup in Bathroom Drains Hair, soap residue, and other organic material can collect inside bathroom drains. This buildup may provide a suitable environment for drain fly larvae. If you notice small larvae near the sink or shower as well as the toilet, inspect those drains. Cleaning accessible drain surfaces and removing organic buildup can help address the conditions that support drain flies. Gaps Around Pipes or the Toilet Small organisms may enter through gaps around plumbing pipes, damaged seals, or openings near exterior walls. Earthworms may be more likely to appear after wet weather when the surrounding soil is damp. Inspect the bathroom for visible gaps, leaks, or damaged areas. If the toilet is loose or water collects around its base, have the fixture checked for possible seal or plumbing problems. Moist Soil and Outdoor Entry Points Some worm-like creatures come from outdoor environments. Damp soil, heavy rain, and moisture around a building can increase the chance of finding them indoors. Check nearby exterior walls, floor drains, and plumbing openings. Sealing suitable gaps and fixing moisture problems may help prevent further entry. Possible Drainage or Sewer Problems A worm in the toilet does not automatically indicate a damaged sewer line. The water inside the toilet trap normally creates a barrier between the bathroom and the drainage system. However, recurring sightings combined with slow drains, gurgling sounds, sewage odors, or wastewater backups may indicate a plumbing issue that needs investigation. How to Get Rid of Worms in Toilet Bowl Knowing how to get rid of worms in toilet bowl water starts with safe removal and proper cleaning. If the problem keeps returning, identifying the source is just as important as removing the visible organism. Step 1: Remove the Visible Organism Wear disposable gloves and avoid direct contact with the organism. Remove it with a suitable disposable tool or flush it if the toilet is functioning normally and flushing is appropriate. If you cannot identify it, take a clear photograph before removal. This may help with identification if it appears again. Step 2: Clean and Disinfect the Toilet Clean the toilet bowl, rim, and affected surfaces with a suitable toilet cleaner or disinfectant. Follow the product instructions and use a toilet brush to remove visible residue. Wash your hands thoroughly after cleaning, even if you wore gloves. Never mix bleach with ammonia, acidic toilet cleaners, or other cleaning products because dangerous gases may form. Step 3: Inspect Nearby Drains Check the sink, shower, and floor drains for larvae or organic buildup. If drain flies are present, clean accessible drain surfaces and remove accumulated debris. A product specifically designed for drain buildup may help when used according to its label. Avoid pouring pesticides or unapproved chemicals into plumbing fixtures. Step 4: Check for Leaks and Gaps Inspect the toilet base, water supply connection, nearby pipes, and bathroom floor for moisture or visible damage. If the toilet moves, leaks, or produces persistent odors, contact a plumber. Covering a gap with caulk will not fix an underlying leak or a damaged toilet seal. Step 5: Monitor the Area After cleaning, check whether the organism returns. Record where it appears and whether similar creatures are visible near other drains. If the problem continues, consider professional identification rather than repeatedly cleaning the toilet without addressing the source. How to Prevent Worms from Returning You can reduce the chances of another sighting by keeping the bathroom clean and addressing conditions that attract pests. Clean accessible drain surfaces regularly and remove hair and organic debris. Repair leaking pipes, faucets, and other sources of persistent moisture. Seal suitable gaps around plumbing openings and exterior walls. Check the toilet for movement, leaks, or drainage problems. Keep the bathroom ventilated to reduce excess moisture. Investigate recurring sightings instead of relying only on

Signs of a Broken Sewer Line
Plumbing

Signs of a Broken Sewer Line | Every Homeowner Must Know

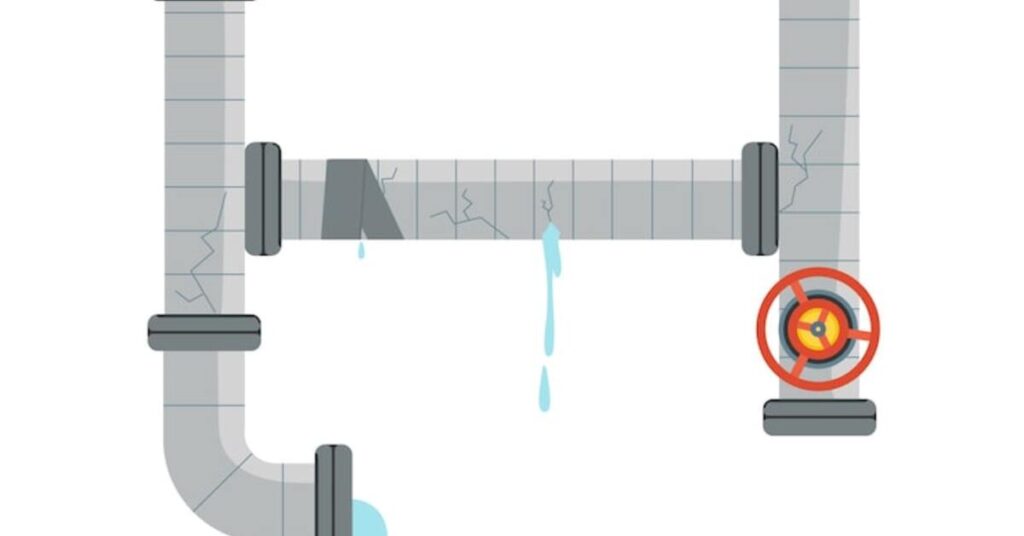
Finding out you have a broken sewer line is the kind of problem no homeowner wants to face. This issue is more than a simple clog; it can lead to costly damage, health risks, and a truly unpleasant mess inside and outside your home. We wrote this guide to clearly explain the warning signs, help you act fast, and understand what to do next. A damaged sewer pipe needs professional attention right away to protect your property and health. Learning the most common signs of a broken sewer line will save you a lot of headaches and money. The Top 10 Most Common Signs of a Broken Sewer Line 1. Persistent Sewage Odors A healthy sewer system keeps nasty smells trapped underground. When you smell sewage inside your home or near your foundation, it’s a major warning sign. These odors mean gases are escaping through cracks or breaks in your sewer line. The smell often starts faint but grows stronger over time. You might notice it near drains, in your basement, or around your yard. Don’t ignore this symptom. Sewer gases contain harmful bacteria and methane that pose health risks. 2. Multiple Slow or Clogged Drains One slow drain usually means a local blockage. But when several drains back up at once, you’re dealing with broken sewer line symptoms. The main sewer line connects all your home’s drains to the city system. Watch for toilets that won’t flush properly, bathtubs that drain slowly, and sinks that gurgle. When the damage happens in your main line, every fixture struggles. You might clear one drain only to have another clog immediately. 3. Sewage Backups in Your Home This is the most obvious and urgent sign of sewer line problems. Raw sewage backing up through drains means complete blockage or severe damage. It usually starts in your lowest drains, like basement floor drains or ground-level toilets. Sewage backups create serious health hazards. They expose your family to dangerous bacteria and viruses. They also cause extensive water damage to floors, walls, and belongings. This situation requires immediate professional help. 4. Soggy Patches or Pooling Water in Your Yard Notice wet spots in your yard when it hasn’t rained? A broken sewer line leaks wastewater underground. This creates persistent damp areas or standing water above the damaged pipe section. These soggy patches often appear along the path from your house to the street. The ground might feel spongy when you walk on it. In severe cases, you’ll see actual puddles that never dry up completely. 5. Unusually Green or Lush Grass Patches Sewage acts as fertilizer for grass and plants. If you spot an area of your lawn that’s noticeably greener or grows faster than surrounding grass, check for sewer line issues beneath it. This happens because leaked sewage provides extra nutrients to the soil. The grass above the break grows thick and vibrant while nearby areas look normal. It’s one of the more subtle signs of a broken sewer line that homeowners often miss. 6. Foundation Cracks or Settling Leaking sewer lines erode soil around and under your foundation. This causes the ground to shift and settle unevenly. You might see new cracks in your foundation walls, uneven floors, or doors that suddenly don’t close right. Water from a sewer line broken near your foundation is especially dangerous. It weakens the structural support of your entire home. Small foundation cracks can turn into major structural problems quickly. 7. Increased Pest Activity Rats, insects, and other pests love broken sewer pipes. Even tiny cracks provide entry points for rodents seeking water and shelter. You might notice more rats, mice, or cockroaches around your property. These pests can travel through damaged pipes and enter your home. They carry diseases and create their own damage. An uptick in pest problems often points to hidden sewer line damage. 8. Mold Growth Inside Your Home Excess moisture from sewer leaks creates perfect conditions for mold. You might see mold on walls, ceilings, or behind appliances. It often appears in rooms far from obvious water sources. Mold from sewer leaks is particularly dangerous. It combines with bacteria from wastewater to create serious health problems. Black mold, especially, requires immediate attention and professional remediation. 9. Gurgling Sounds from Drains and Toilets Strange noises from your plumbing indicate air trapped in the system. When you hear gurgling, bubbling, or glug-glug sounds, it means water isn’t flowing smoothly through your pipes. These sounds happen when air pockets form due to blockages or breaks. You might hear toilets gurgle when someone uses the sink. Or drains might make noise on their own. These are clear signs of bad sewer pipe conditions developing. 10. Sudden Spike in Water Bills A broken sewer line doesn’t just leak sewage out. It can also let groundwater seep in. This makes your water meter run constantly, driving up your bills without explanation. Compare your recent bills to previous months. A significant increase without changed usage patterns suggests hidden leaks. While this could indicate various plumbing issues, paired with other symptoms it points to sewer problems. What Causes Sewer Lines to Break? Tree Root Intrusion Tree roots cause most residential sewer line damage. Roots grow toward moisture sources and can detect water vapor from tiny pipe cracks. Once they find a way in, they expand inside the pipe, causing major blockages and breaks. Even small ornamental trees can damage sewer lines. Roots can extend far beyond the tree’s canopy, reaching pipes 50 feet away or more. Older clay pipes are especially vulnerable to root penetration. Aging and Deterioration Sewer pipes don’t last forever. Clay and cast iron pipes, common in homes built before 1970, typically last 50 to 60 years. After that, they become brittle and prone to cracking. Corrosion eats away at metal pipes from inside and out. Chemical reactions between waste materials and pipe metals weaken the structure. Even newer PVC pipes eventually wear down from constant use and environmental stress. Ground Shifting and Settlement Soil naturally

How To Unclog Your Bathroom Sink
Plumbing

How To Unclog Your Bathroom Sink | Fast & Easy

A clogged bathroom sink is a common problem that brings daily life to a grinding halt. If water won’t drain, your simple morning routine turns into a big mess. The good news? You can fix most clogs yourself without a pricey emergency call. This in-depth guide will show you exactly how to unclog your bathroom sink using simple tools and household items, saving you time and money today. We’ll cover everything from simple boiling water fixes to using a drain snake, making sure you can get your water flowing freely again. Why Your Bathroom Sink is Not Draining Your bathroom sink stopped up for specific reasons. Hair is the main culprit. It wraps around the drain stopper and catches soap residue, creating a thick mat that blocks water flow. Soap scum builds up on pipe walls over time. It narrows the passage and slows drainage. Toothpaste, shaving cream, and skincare products add to this sticky mess. The P-trap under your sink collects debris. This curved pipe holds water to block sewer gases. But it also catches objects that slip down the drain. Jewelry, cotton swabs, and dental floss often lodge here. Hard water leaves mineral deposits in pipes. These crusty layers reduce pipe diameter and make clogs worse. If you live in an area with hard water, this buildup happens faster. Sometimes the vent stack gets blocked. Your plumbing needs air to drain properly. A clogged vent creates slow drainage throughout your bathroom. Unclog a Sink Drain With Boiling Water This method works best for fresh clogs caused by soap and grease buildup. Start by removing standing water from your sink using a cup or bowl. Boil a full kettle of water. You need at least six cups for this to work. Pour the boiling water directly down the drain in three stages. Wait 10 seconds between each pour. The hot water melts soap scum and grease. It pushes the softened blockage through your pipes. This method costs nothing and takes five minutes. Test your drain by running cold water. If it drains slowly, repeat the process. For tough clogs, move to the next method. Important note: Don’t use boiling water if you have PVC pipes. Temperatures above 175°F can soften and damage PVC. Use hot tap water instead. Unclog a Sink With Vinegar and Baking Soda This natural solution breaks down organic matter without harsh chemicals. The fizzing reaction helps dislodge hair and soap buildup. Remove the drain stopper first. Most pop-up stoppers twist counterclockwise to come out. Clean off any visible hair and gunk. Pour one cup of baking soda down the drain. Use a funnel if you have one. Follow with one cup of white vinegar. Cover the drain with a wet cloth or plug to contain the reaction. Wait 30 minutes while the mixture works. You’ll hear fizzing as the vinegar and baking soda react. This creates carbon dioxide that pushes against the clog. Flush with hot water for five minutes. The clog should wash away. This method is safe for all pipe types and won’t damage your plumbing. Repeat if your bathroom sink is clogged but draining slowly. Some tough clogs need two or three treatments. Unclog a Sink with a Plunger A plunger creates pressure that forces clogs through pipes. You need a cup plunger, not a flange plunger. The cup type has a flat bottom and works better on sinks. Fill your sink with enough water to cover the plunger cup. This creates a seal for better suction. Remove the overflow cover if your sink has one. Cover the overflow hole with a wet rag or duct tape. Place the plunger over the drain opening. Press down firmly to create a seal. Push down and pull up rapidly 15 to 20 times. Don’t break the seal during plunging. Remove the plunger and check if water drains. If the bathroom sink clogged condition continues, repeat the process three or four times. The vacuum action pulls debris loose from pipe walls. The pressure pushes it through your plumbing system. This method works on most hair and soap clogs. Unclog a Sink With a Drain Snake A drain snake reaches clogs that other methods can’t touch. You can buy a basic snake for $10 at any hardware store. Professional plumbers use motorized versions, but manual snakes work fine for home use. Remove the P-trap under your sink first. Place a bucket underneath to catch water. Loosen the slip nuts with pliers or by hand. Pull the P-trap down and empty it. Check the P-trap for clogs. Clean it with a brush and hot water. If the clog isn’t here, it’s deeper in the drain pipe. Insert the snake into the drain pipe opening. Feed it slowly while turning the handle clockwise. You’ll feel resistance when you hit the clog. Push and pull the snake while turning. This breaks up the blockage. Hair wraps around the snake’s tip or auger. Pull out the snake and clean off debris. Run hot water through the drain for several minutes. Reattach your P-trap and test the sink. This method clears unclogging bathroom sink problems that happen deep in pipes. Unclog a Sink With a Wet-Dry Vac A shop vacuum pulls clogs out instead of pushing them through. This method works when you can’t reach the blockage with a snake. You need a wet-dry vacuum for this technique. Regular vacuums aren’t built for water and will break. Set your vacuum to wet mode. Remove the filter if your model requires it. Check your manual for proper setup. Create a tight seal around the drain. Press the vacuum hose firmly against the drain opening. You can wrap a wet towel around the hose for a better seal. Turn on the vacuum at full power. The suction pulls water and the clog toward the vacuum. Hold the seal for 30 to 60 seconds. Check if the toilet sink clogged issue is resolved. This powerful method often succeeds where plungers fail. The strong

How Much Does Hydro Jetting Cost
Plumbing

How Much Does Hydro Jetting Cost? | Full Breakdown

Dealing with stubborn drain clogs can be stressful. While snaking might offer short-term relief, the issue often comes back. That’s where hydro jetting is a powerful method that uses high-pressure water to clear years of buildup from your pipes, restoring smooth water flow. If you’re wondering and want to know how much does hydro jetting cost, most homeowners spend between $350 to $600 for standard service. Prices can range from $250 to $1,200, depending on the clog’s severity, pipe length, and accessibility. Understanding the cost helps you plan ahead, protect your plumbing, and prevent future drain or sewer problems. What is Hydro Jetting? Hydro jetting uses high pressure water to blast away clogs and buildup in your pipes. Think of it as a pressure washer for your plumbing system. A specialized machine sends water through a hose at 3,000 to 8,000 PSI. That’s enough force to cut through grease, tree roots, and mineral deposits. The water scours pipe walls clean as it flows. Regular drain snakes just poke holes through clogs. Hydro jetting removes the entire blockage. It clears years of accumulated gunk from your pipes. This method works on all types of pipes. Cast iron, PVC, and clay pipes all respond well to hydro jet drain cleaning. The process is safe when done by trained professionals. Average Hydro Jetting Cost The hydro jetting cost varies based on what you are cleaning and where you live. Kitchen and bathroom drains: $350 to $600 Basic sink and shower drain cleaning falls in this range. These jobs are quick and straightforward. Main sewer line: $500 to $1,000 Your main line carries waste from your whole house. Cleaning it costs more because of the length and equipment needed. Severe blockages: $800 to $1,500 Tree roots or decades of buildup require more time and power. The hydro jetting plumbing cost increases with job complexity. Commercial properties: $1,000 to $3,000 Restaurant grease traps and large building systems need industrial-grade equipment. These jobs take longer and require special training. Location affects pricing too. Urban areas with higher living costs charge more. Rural service calls might include travel fees. Factors Affecting Hydro Jetting Costs Several things impact what you’ll pay for hydro jet drain cleaning. Pipe location and accessibility Easy-to-reach cleanout access points keep costs down. Pipes buried deep underground or behind walls cost more to access. Some jobs need digging or cutting into concrete. Severity of the blockage Minor soap buildup clears quickly. Heavy grease accumulation or tree roots take more time and power. Stubborn clogs mean higher costs. Pipe length A 50-foot run costs less than 150 feet of pipe. More footage means more time and water usage. The cost to hydrojet sewer line increases with distance. Pipe condition Older pipes might need gentler pressure settings. This takes more time and skill. If pipes are damaged, repairs add to the total cost. Camera inspection Most pros include a video inspection before and after. This ensures complete clearing and checks for damage. Some companies charge $100 to $300 extra for this service. Emergency service Calling a plumber at 2 AM costs more. Weekend and holiday rates run 1.5 to 2 times higher than normal. Plan ahead when possible. Geographic location Big cities charge more than small towns. California and New York rates exceed those in the Midwest. Research local averages in your area. Is Hydro Jetting Worth the Cost? The cost of hydro jet drain cleaning seems high compared to snaking. But the benefits often justify the price. Long-lasting results Snaking clears a path through clogs. Buildup remains on pipe walls and returns quickly. Hydro jetting strips everything clean. Your drains stay clear for years instead of months. Prevents future problems Clean pipes mean fewer emergency calls. You avoid water damage from overflows. The initial investment saves money over time. Better than pipe replacement Replacing damaged sewer lines costs $3,000 to $25,000. Regular hydro jetting prevents this expense. It’s maintenance that protects your investment. Eco-friendly solution Chemical drain cleaners damage pipes and harm the environment. High pressure water is completely safe. No toxic fumes or groundwater pollution. Complete cleaning You get what you pay for. Half-measures lead to repeat service calls. Thorough cleaning means real value. Do the math on repeat service calls. Three snaking jobs at $200 each equal $600. One hydro jetting session costs the same but lasts much longer. Signs You Need Hydro Jetting Watch for these warning signs that indicate you need professional help. Multiple slow drains One slow drain means a local clog. Several slow drains point to a main line problem. This requires more than a plunger. Frequent backups Clearing the same drain every few weeks is a red flag. Something bigger is blocking your system. Standard methods aren’t cutting it. Bad odors Foul smells from drains mean buildup is rotting inside pipes. Bacteria thrive in this environment. Fresh-smelling drains should be your norm. Gurgling sounds strange when water drains indicate air trapped by blockages. Your plumbing is trying to tell you something. Standing water pools forming around floor drains or in your yard signal serious backup. Don’t wait until sewage overflows into your home. Tree root invasion Trees seek water sources. Roots penetrate tiny cracks in sewer lines. Hydro jetting cuts through these invaders effectively. Old homes with original plumbing Homes built before 1980 often have decades of accumulation. Cast iron pipes corrode and collect debris. A thorough cleaning prevents failures. DIY vs. Professional Hydro Jetting You might wonder about doing this job yourself. Here’s what you need to know. Why DIY Isn’t Recommended Hydro jetting equipment is powerful and potentially dangerous. Consumer-grade pressure washers lack the proper nozzles and pressure control. Using the wrong equipment can damage your pipes severely. Professional machines cost $5,000 to $20,000. Renting one runs $200 to $400 per day. Without proper training, you risk injury and property damage. The savings aren’t worth the risk. High pressure water can shatter old or damaged pipes. It can also cause serious injuries if mishandled. Professionals

how to repair garbage disposal humming
Plumbing

How to Repair Garbage Disposal Humming: Step-by-Step

A loud grinding noise from your kitchen sink disposal is never good, but a gentle humming can be just as frustrating when the unit refuses to work. The good news is that this common issue usually has a simple fix you can do yourself. This article will show you how to repair garbage disposal humming using easy and professional steps. The humming sound means the motor is getting power but the shredder plate the part that grinds food is stuck, preventing it from spinning. The most common cause is a jam from a piece of food waste or a foreign object. What Does It Mean When Your Garbage Disposal Is Humming? A humming garbage disposal means the motor is getting power but the blades can’t spin. The motor tries to turn but something blocks the grinding plate. This creates that distinctive humming or buzzing noise you hear.The sound tells you the electrical parts work fine. The problem sits in the grinding chamber where food gets stuck. The motor hums because it’s working against resistance it can’t overcome. If you ignore a humming disposal, the motor can overheat and burn out. This turns a simple fix into an expensive replacement. Acting quickly protects your investment and prevents water damage from a backed-up sink. Common Causes of a Humming Garbage Disposal Foreign Objects Jamming the Blades Small items fall into your disposal without you noticing. Bottle caps, twist ties, broken glass, or utensils wedge between the blades and housing. These objects stop the impeller plate from rotating even though the motor runs.Metal objects cause the most damage because they’re hard and don’t break down. Even a small piece of broken dishware can lock up the entire system. Accumulated Food Buildup Fibrous foods like celery, potato peels, and corn husks wrap around the blades. Starchy foods like pasta and rice expand and create thick paste. Grease hardens and glues everything together.This buildup happens slowly over weeks or months. One day you add just enough food to tip the scale from working to jammed. The disposal can’t push through the mass of stuck material. Tripped Reset Button Your disposal has a built-in safety feature on the bottom. When the motor works too hard or overheats, a red reset button pops out. This cuts power to protect the motor from damage.A tripped reset button makes your garburator humming but not working. The motor tries to start but the safety switch keeps it from running at full power. Worn Internal Components Garbage disposals last 8 to 15 years with proper care. The bearings wear down over time. The flywheel loosens. The mounting assembly corrodes from constant water exposure.Old disposals develop more friction in their moving parts. This makes them more likely to jam and harder to free when they do. A disposal near the end of its life jams more often. Step-by-Step Guide: How to Repair Garbage Disposal Humming Safety First: Turn Off the Power Find your circuit breaker box and flip the switch for your garbage disposal. Never work on a disposal with the power on. Unplug the unit if it has a power cord under the sink.Test that the power is off by flipping the wall switch. You should hear nothing. This simple step prevents serious injury from accidental startup. Check and Press the Reset Button Look under your sink at the bottom of the disposal. Find the small red or black button that sticks out. Push it firmly until you hear or feel it click back in.Wait five minutes for the motor to cool if the button won’t stay in. Try pressing it again. If it keeps popping out, you have a bigger problem that needs professional help. Use the Allen Wrench Method Most disposals come with a small Allen wrench (hex key). Look for a hexagonal hole in the center bottom of your unit. Insert the wrench and turn it back and forth.This manual rotation breaks up jams and frees stuck blades. Turn the wrench clockwise and counterclockwise several times. You’ll feel resistance at first, then it should move more freely.If you lost the original wrench, a 1/4-inch Allen wrench from any hardware store works. Keep one under your sink for future use. Remove the Jam from Above Turn on a flashlight and look into the drain opening. Never put your hand inside. Use long pliers or tongs to grab visible objects.Remove any foreign items you see. Pull out fibrous food waste that’s wrapped around the visible parts. Work slowly and carefully to avoid pushing items deeper. Use a Wooden Spoon Handle If you don’t have the Allen wrench, use a wooden spoon or broom handle. Insert it into the disposal and push against one of the blades. Apply firm pressure to rotate the flywheel manually.Work the handle back and forth to free the jam. This method takes more effort but works when you need a quick fix. The wood won’t damage the disposal like metal tools might. Clear the Drain Line Sometimes the issue is farther down in the drainpipe. Your sink disposal not working might be a clog below the unit. Check the P-trap under the sink for blockages.Place a bucket under the trap and unscrew the fittings. Remove built-up material and flush the pipe with water. Reassemble everything tightly to prevent leaks. Test Your Disposal Turn the power back on at the circuit breaker. Run cold water into the sink. Flip the disposal switch and listen for normal grinding sounds.Feed small amounts of soft food waste to test it. If your garbage disposal just hums again, turn it off immediately. You may need to repeat the repair steps or call for help. Preventing Future Garbage Disposal Humming Run Cold Water Always Start the water before you turn on the disposal. Keep it running for 30 seconds after you turn the disposal off. Cold water solidifies grease so it grinds up instead of coating the pipes.Hot water melts grease, which then sticks to your pipes and disposal parts. This

Fast and Efficient Plumbing Services in Eagle Rock

Client Reviews

Posted on Google Google
Ryan Haden profile picture
Ryan Haden
Google star 1Google star 2Google star 3Google star 4Google star 5Trustindex verifies that the original source of the review is Google.
Could not have been happier with Alex! We was right on time, polite, fixed all my kitchen sink issues and have me good tips on how to best maintain. I will for sure be using him again and highly recommend anyone who needs a great plumber to use his services as well. Thank you!
Posted on Google Google
Lorena Marcoe profile picture
Lorena Marcoe
Google star 1Google star 2Google star 3Google star 4Google star 5Trustindex verifies that the original source of the review is Google.
Talk about a professional...yes, I am talking about Alex Derks, Derks Plumbing. He is by far the most knowledgeable plumber we have ever had the pleasure of hiring. He's been in the plumbing business for years and it shows. Any questions you have re: plumbing issues, install, etc., Alex is your man. So happy with his work and he has a great sense of humor as well... extremely easy to talk to...thank you Alex!!!
Posted on Google Google
Andrew Jalil profile picture
Andrew Jalil
Google star 1Google star 2Google star 3Google star 4Google star 5Trustindex verifies that the original source of the review is Google.
Alex did a great job installing my kitchen faucet and an under-sink Aquasana water filter. He also addressed a few other plumbing-related issues. He was friendly and helpful. Excellent work!
Posted on Google Google
Abigail Bigham profile picture
Abigail Bigham
Google star 1Google star 2Google star 3Google star 4Google star 5Trustindex verifies that the original source of the review is Google.
Alex does what other plumbers cannot do! He is our go to.
Posted on Google Google
Danielle Driver profile picture
Danielle Driver
Google star 1Google star 2Google star 3Google star 4Google star 5Trustindex verifies that the original source of the review is Google.
Alex is very friendly and responsive. What a pleasure to work with!
Posted on Google Google
Lawrence Isaacs profile picture
Lawrence Isaacs
Google star 1Google star 2Google star 3Google star 4Google star 5Trustindex verifies that the original source of the review is Google.
Very very happy with the work Alex did for us replacing the tanks in our Aquasana filtration system. From first contact over the phone through job completion Alex was a pleasure to work with. He explained what he was doing, and why, every step of the way, and made sure we understood what we needed to do to maintain the system. Strongly recommend Alex!
Posted on Google Google
Joey Aucoin profile picture
Joey Aucoin
Google star 1Google star 2Google star 3Google star 4Google star 5Trustindex verifies that the original source of the review is Google.
Alex Derks has been such a lifesaver for me. Anytime I'm in a pinch with the plumbing in my home, Alex is only a phone call away and I've only seen great results from his work. He's reliable, knowledgable, and entirely trustworthy. A must-have source when owning a home.
Posted on Google Google
Eric Gorman profile picture
Eric Gorman
Google star 1Google star 2Google star 3Google star 4Google star 5Trustindex verifies that the original source of the review is Google.
After working with dozens of plumbing services in the LA area, I can confidently say Derks is the best in the business. On time, reliable and capable of even the most difficult tasks, Derks goes above and beyond to make sure your water system is working correctly.
Posted on Google Google
Jason Gruenbaum profile picture
Jason Gruenbaum
Google star 1Google star 2Google star 3Google star 4Google star 5Trustindex verifies that the original source of the review is Google.
Excellent know-how and fast!! Reasonable pricing and super responsive!!
Posted on Google Google
Jonathan Hepfer profile picture
Jonathan Hepfer
Google star 1Google star 2Google star 3Google star 4Google star 5Trustindex verifies that the original source of the review is Google.
Alex is an expert plumber, and he always goes out of his way to educate me about how to prevent future issues. Highly recommended!

Derks Plumbing has been providing professional plumbing services to Eagle Rock residents for over 20 years. Our experience and strong reputation have allowed us to grow, and we are proud to serve customers in 15 nearby areas, including Venice, Santa Monica, Beverly Hills, and more.

Contact

Hours of Operation

Monday: Open 24 Hours
Tuesday: Open 24 Hours
Wednesday: Open 24 Hours
Thursday: Open 24 Hours
Friday: Open 24 Hours
Saturday: Open 24 Hours
Sunday: Open 24 Hours

© 2026 Created by Localpro1

Scroll to Top