A water heater replacement sounds intimidating, but it’s one of the more manageable home projects when you know the steps and respect the safety rules. Most standard tank replacements are done in a few hours. Get the type, size, and connections right, and the unit runs reliably for a decade or more.
Knowing how to install a water heater properly protects your home, your family, and your investment. This guide covers every step from choosing the right unit to testing the finished install so nothing gets missed.
Understanding Water Heater Installation
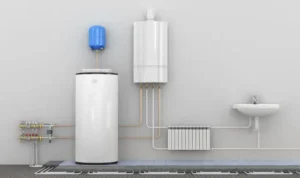
Water heater installation means more than connecting a few pipes. It involves properly sizing the unit for your home’s demand, meeting local code requirements, making safe gas or electrical connections, setting up the correct venting or exhaust, and testing everything before the unit goes live.
The process differs based on the fuel type; gas and electric installs have different connection steps, safety checks, and code requirements. Both require attention to the T&P (temperature and pressure relief) valve, expansion tank, and proper drain routing. Skipping any of these steps leads to problems that are expensive to correct later.
Types of Water Heaters

Choosing the right type is the starting point for any hot water heater installation project.
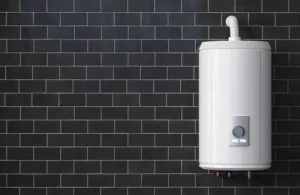
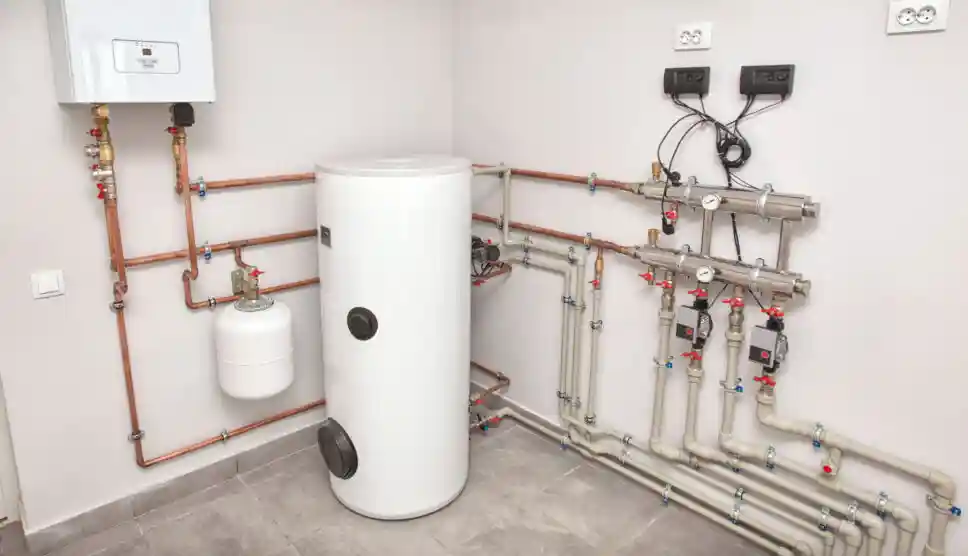
Tank Water Heater (Storage)
The most common type in U.S. homes. A large insulated tank stores 30 to 80 gallons of preheated water. It’s always ready to deliver hot water immediately. Tank units are the least expensive to purchase and the most straightforward to install.
Downside: standby heat loss. The unit keeps reheating water around the clock even when nobody needs it.
Tankless Water Heater
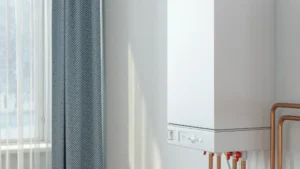
Heats water on demand with no storage. Long lifespan 15 to 25 years and more energy efficient than tank units. More complex to install, especially gas models that require larger gas lines and dedicated venting.
Heat Pump Water Heater
Pulls heat from surrounding air to warm water. Highly efficient uses 60% to 70% less electricity than a standard electric tank. Needs adequate surrounding space (at least 700 to 1,000 cubic feet) and works best in rooms that stay above 40°F year-round.
Solar Water Heater
Uses roof-mounted solar collectors to preheat water before it enters a backup tank. Long-term energy savings are significant. High upfront cost and installation complexity mean most homeowners use a licensed solar contractor.
How to Choose the Right Water Heater for Your Home
Matching the unit to your household needs prevents two common problems: running out of hot water and paying for capacity you never use.
Consider these factors:
Fuel type. If your home has natural gas, a gas tank or tankless unit is usually the most cost-effective long-term choice. If gas isn’t available, an electric unit or heat pump heater is the answer.
Usage pattern. A household of two people uses roughly 20 to 30 gallons per day. A family of five might use 60 to 80 gallons. Patterns matter for both sizing and fuel type.
Energy efficiency. Look for the UEF (Uniform Energy Factor) rating. Higher UEF means lower operating costs. High-efficiency electric water heater installation or heat pump units qualify for the 2026 federal energy tax credit (up to $600 under the 25C credit).
Space available. Tank units need floor space. Heat pump units need ceiling clearance of at least 7 feet. Tankless units mount on the wall and take minimal space.
Water Heater Sizing Guide: What Size Do You Need?
For tank water heater installation, the key spec is the First Hour Rating (FHR) how many gallons the unit can deliver in the first hour of heavy use.
Use this as a rough guide based on household size:
- 1 to 2 people: 30 to 40 gallons
- 3 to 4 people: 40 to 50 gallons
- 5 or more people: 50 to 80 gallons
For gas hot water heater installation, BTU input also matters. Higher BTU units recover faster — they reheat a depleted tank more quickly. A 36,000 BTU unit reheats about 21 gallons per hour. A 40,000 BTU unit reheats about 23 gallons per hour.
For electric units, the element wattage (4,500 to 5,500 watts is standard) determines recovery speed.
Water Heater Installation Tools and Materials Checklist
Having everything ready before you start prevents mid-job delays.
Tools:
- Pipe wrench and adjustable wrench
- Channel-lock pliers
- Screwdrivers (flat and Phillips)
- Hacksaw or pipe cutter
- Non-contact voltage tester (electric units)
- Gas leak detector or leak detection solution (gas units)
- Garden hose for draining
- Bucket and sponge
- Bubble level
- Drill and appropriate bits
Materials:
- New water heater (correct size and fuel type)
- Flexible braided water supply connectors (hot and cold)
- T&P relief valve (if not included with unit)
- Thermal expansion tank (required in many jurisdictions)
- Earthquake straps (required in seismic zones)
- Teflon tape and pipe thread sealant
- Dielectric unions (where copper meets galvanized pipe)
- Flexible gas connector (gas units new, rated for BTU load)
- Flue pipe and draft hood (gas units)
- Wire nuts and electrical tape (electric units)
Water Heater Installation Safety Precautions
Safety is non-negotiable on this job.
Gas units: Never work on gas connections without confirming the gas supply is off at the shutoff valve. After making connections, test every joint with gas leak detection solution or a digital gas detector before turning the gas on. Carbon monoxide from improper venting is invisible and odorless — install a CO detector near the water heater if one isn’t already present.
Electric units: Confirm the breaker is off and locked before touching any wiring. Use a non-contact voltage tester on the wire terminals before connecting anything. A 240-volt shock is lethal.
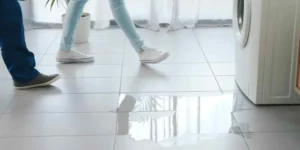
Both types: Turn off the cold water supply before disconnecting the old unit. Drain the tank fully before moving it a 50-gallon tank full of water weighs over 400 lbs. Have help for the lifting steps.
Do You Need a Permit for Water Heater Installation?
In most U.S. jurisdictions, yes. A permit is required for water heater replacement both gas and electric.
The permit triggers an inspection after installation. An inspector confirms the unit is correctly vented, the T&P valve drain is properly routed, the expansion tank is installed if required, and seismic straps are in place where needed.
Skipping the permit creates three problems:
- No confirmation the install is safe and code-compliant
- Potential issues at home sale when unpermitted work is discovered during inspection
- Possible voiding of homeowner’s insurance coverage for water damage from a non-permitted installation
Pull the permit before starting. Most building departments now offer online applications. The process takes 10 to 15 minutes for a standard water heater swap.
Step-by-Step: How to Install a Water Heater
This guide covers a standard gas tank replacement, the most common residential scenario. Electric installations follow the same water connection steps but substitute electrical work for gas line and venting steps.
Step 1: Shut Off Gas and Water
Turn the gas supply valve at the unit to OFF. Turn the cold water inlet valve on top of the heater clockwise until closed. Connect a garden hose to the drain valve at the base of the old unit and route it to a floor drain or outside.
Step 2: Drain the Old Tank
Open a hot water faucet in the house to break the vacuum and allow air in. Open the drain valve. Let the tank empty completely. This takes 20 to 45 minutes for a 40 to 50-gallon unit.
Step 3: Disconnect the Old Unit
Disconnect the gas flex connector at the unit not at the gas line. If the connection hasn’t been disturbed in years, it may be stiff. Use two wrenches to prevent twisting the pipe.
Disconnect the flue pipe from the draft hood. Disconnect the water supply lines at the top of the unit.
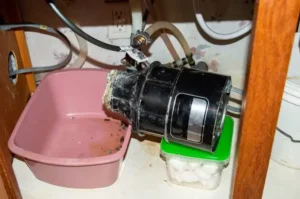
Move the old unit out carefully. Even drained tank heaters are heavy 100 to 150 lbs. Use a hand truck.
Step 4: Prepare the New Unit
Set the new unit in position. Check with a level it must sit plumb. In earthquake zones (California and others), attach the seismic straps to wall studs before connecting anything else. Code requires two straps at one-third and two-thirds of the unit’s height.
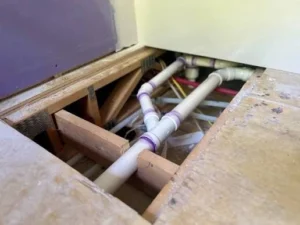
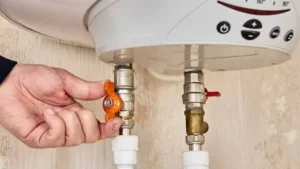
Step 5: Connect the Water Lines
Wrap all threaded fittings with Teflon tape three to four wraps clockwise. Connect the cold water inlet (blue or marked “C” to the cold supply line) and the hot water outlet (red or marked “H” — to the hot water distribution line).
Use flexible braided stainless connectors. They’re easier to work with than rigid copper in tight spaces and handle minor misalignments without stress on the fittings.
If the existing pipes are copper and the new unit has brass fittings, connect directly. If connecting to galvanized steel pipes, use dielectric unions at each connection to prevent electrolytic corrosion between different metals.
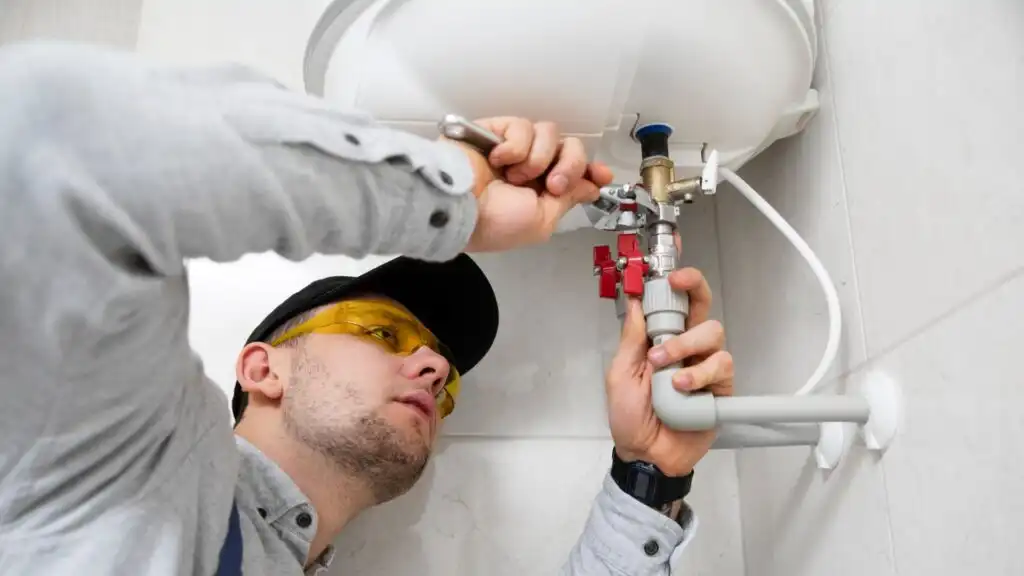
Step 6: Install the T&P Valve
The T&P valve is the most critical safety component on the unit. It releases pressure and temperature if the tank overheats or overpressurizes. Without it, a sealed tank can rupture.
Apply Teflon tape to the T&P valve threads. Screw it into the designated port on the unit — typically on the side near the top and tighten firmly.
Attach a copper or CPVC drain pipe to the valve outlet. Route it downward to within 6 inches of the floor, to a floor drain, or to the exterior. The drain line must discharge at a safe location never capped, never routed upward.
Step 7: Install the Expansion Tank
Many jurisdictions now require a thermal expansion tank on all hot water tank installation projects. This small tank typically 2 to 4 gallons absorbs the pressure created when water expands during heating.
Without it, that pressure repeatedly stresses the T&P valve, causing it to weep or fail prematurely. It also stresses tank welds and fittings over time.
Install the expansion tank on the cold water supply line near the heater. It can be mounted in any orientation. Use Teflon tape on the threads and tighten securely.
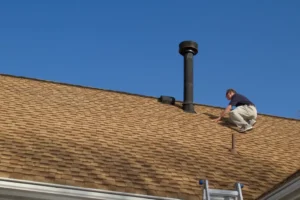
Step 8: Connect the Flue Pipe (Gas Units)
The flue pipe connects the draft hood on top of the unit to the existing exhaust vent. Use the same diameter flue pipe as the unit’s draft hood outlet typically 3 or 4 inches.
The flue must slope upward toward the vent stack never level or downward. Secure all joints with sheet metal screws. Ensure a minimum of 1/4 inch per foot rise from the unit to the main vent.
If the existing flue shows rust, damage, or blockage, replace the affected sections before connecting the new unit.
Step 9: Connect the Gas Line (Gas Units)
Use a new flexible gas connector rated for the BTU output of the unit. Never reuse an old connector — they’re single-use and can develop cracks that aren’t visible.
Apply gas-rated pipe thread sealant (not Teflon tape) to all threaded connections. Tighten securely. Do not overtighten damaged threads.
Turn the gas supply on. Immediately test every joint with gas leak detection solution or a digital gas detector. Apply the solution and watch for bubbling at every connection point. Any leak must be corrected before proceeding.
Step 10: Wire the Electric Unit (Electric Units)
With the breaker confirmed off and voltage tested at zero, connect the wires to the terminal block inside the access panel at the top of the unit. Match wire colors black to black, red to red, green or bare copper to the ground terminal. Secure all connections with wire nuts. Replace the access panel.
Step 11: Fill the Tank and Check for Leaks
Slowly open the cold water inlet valve. Open a hot water faucet in the house to allow air to escape. Let the tank fill the hot water faucet will run steady and air-free when the tank is full.
Inspect all water connections carefully. Check the T&P valve connection and drain line. Check the expansion tank connection. Any drip needs to be corrected now.
Step 12: Restore Power or Light the Pilot and Test
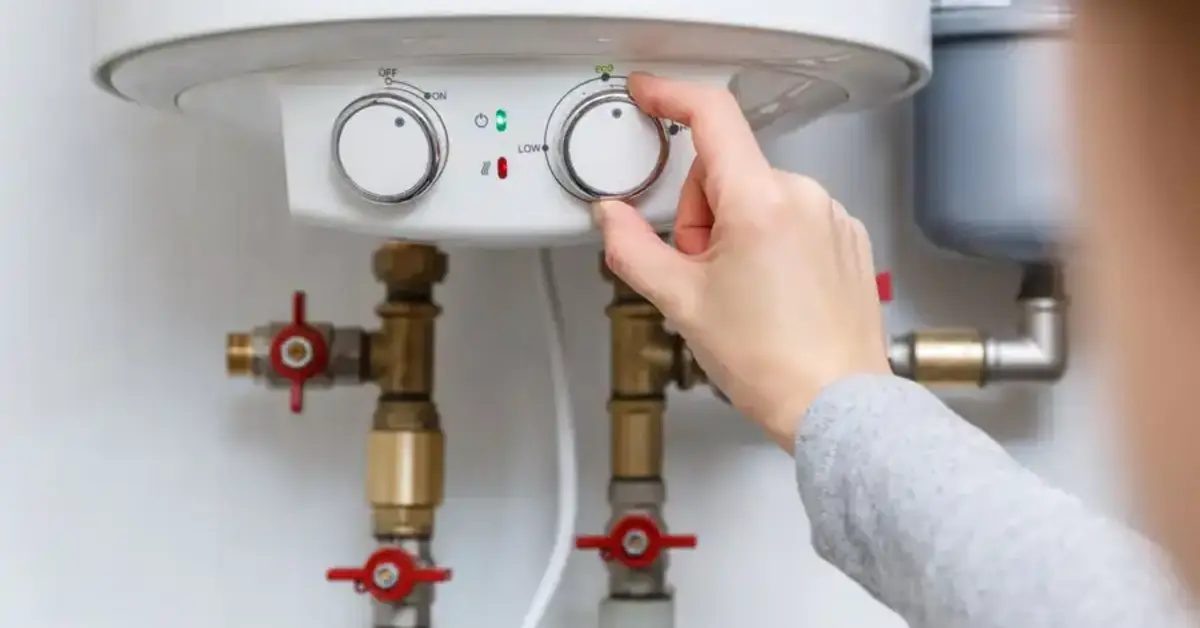
Gas units: Turn the gas control valve to “Pilot.” Follow the manufacturer’s pilot lighting instructions on the label of the unit. Once the pilot is lit and stable, set the thermostat to 120°F and turn the control knob to “Hot.”
Electric units: Flip the breaker on. The elements begin heating immediately.
Wait 30 to 60 minutes and test hot water at a faucet. Confirm the unit is heating to the set temperature. Check all connections one final time.
You can read about: How to Install Tankless Water Heater
How Long Does Water Heater Installation Take?
For a professional doing a standard tank water heater installation, the job takes 2 to 3 hours. A first-time DIYer on an electric unit should plan for 4 to 6 hours.
Gas hot water heater installation takes slightly longer due to gas line work, flue pipe setup, and pilot lighting. Complex jobs, larger units, relocated heaters, new gas line runs take 4 to 8 hours.
How to install a water heater same-day is realistic for straightforward tank replacements when the unit is in stock.
How Much Does Water Heater Installation Cost?
In 2026, total installed cost for a professional water heater installation breaks down like this:
Standard gas tank (40 to 50 gallon): $900 to $1,800 installed Standard electric tank (40 to 50 gallon): $700 to $1,400 installed Tankless gas (whole home): $1,500 to $3,500 installed Heat pump water heater: $1,500 to $3,000 installed
Labor alone runs $300 to $700 for a standard replacement. Complex jobs, new gas lines, electrical panel work, custom venting add $300 to $1,000 more.
DIY on an electric unit saves the labor cost but requires the right tools and skills. Gas hot water heater installation DIY is not recommended gas line and venting work requires licensed contractors in most states.
Common Water Heater Installation Mistakes
These are the errors that cause failures, leaks, and callbacks:
Skipping the expansion tank. Repeated pressure spikes stress tank welds and the T&P valve. Many code inspectors now require it on every installation.
Capping or misrouting the T&P drain line. This is a safety code violation. The line must discharge freely at floor level or outdoors.
Reusing an old flexible gas connector. Old connectors develop invisible cracks. Use a new connector every time.
Not testing for gas leaks. Every joint must be tested before lighting the pilot. Skipping this step is dangerous.
Turning on the electric elements before the tank is full. Dry firing burns out the element within minutes.
Using the wrong pipe thread sealant. Teflon tape works for water connections. Gas connections require gas-rated thread sealant. Using the wrong product on a gas joint can cause a leak over time.
No dielectric unions on mixed-metal connections. Direct contact between copper and galvanized steel causes electrolytic corrosion that eats through fittings within a few years.
Troubleshooting Common Water Heater Installation Problems
No hot water after installation (electric): The element may not be submerged — the tank may not be fully filled. Confirm the tank is full before troubleshooting the element. Check that the breaker is on and that the reset button on the high-limit thermostat hasn’t tripped (press the red button on the element access panel).
Pilot won’t stay lit (gas): The thermocouple may not be positioned correctly in the pilot flame. Recheck the thermocouple position per the installation manual. A new unit with a faulty thermocouple is a warranty issue — call the manufacturer.
Water dripping from T&P valve: The valve is releasing, which means pressure or temperature exceeded safe limits. Check the thermostat setting (should be 120°F). Confirm the expansion tank is installed and charged to the correct pressure. If the valve continues to drip, replace it.
Low hot water pressure after installation: Check that both the cold inlet and hot outlet isolation valves are fully open. Check for debris in the supply line screens.
Gas smell after connection: Shut the gas off immediately. Open windows. Leave the house. Do not operate any electrical switches. Call the gas company. Do not re-enter until the gas company clears the area.
DIY vs. Professional Water Heater Installation
DIY makes sense when:
- It’s an electric tank replacement with an existing circuit
- The job is a direct like-for-like swap with no code upgrades required
- Local code permits homeowner installation of electric water heaters
- You have basic plumbing and electrical skills and the right tools
Call a licensed plumber when:
- It’s a gas unit of any type gas line and venting work requires licensing in most states
- The job requires a new electrical circuit or panel upgrade
- The existing venting, gas line, or connections are non-compliant
- Your jurisdiction requires permitted work performed by a licensed contractor
- You find a damaged flange, corroded shut-off valve, or soft subfloor around the old unit
The cost of professional electric water heater installation runs $300 to $700 in labor. That fee is far less than the cost of a flooded utility room or a failed gas connection.
Water Heater Maintenance After Installation
A new unit maintained from day one reaches its full expected lifespan. Here’s what matters most:
Year 1: Flush the tank to remove any manufacturing debris. Confirm the thermostat is set to 120°F. Register the warranty.
Every year: Flush the tank through the drain valve to remove sediment. Test the T&P valve by lifting the lever briefly and confirming it releases and reseats cleanly.
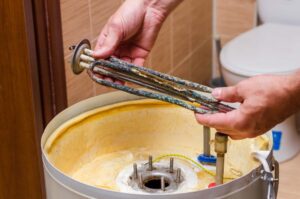
Every 3 to 5 years: Inspect and replace the anode rod. This is the single most impactful maintenance task for extending the tank’s life.
When you notice anything unusual: Discolored water, sulfur smell, popping sounds, or moisture around the base all warrant immediate inspection. Small problems caught early cost far less than a failed tank.
Why Choose Derks Plumbing Company?
For homeowners, Water Heater Installation in Eagle Rock is a service Derks Plumbing handles from start to finish permits, removal of the old unit, code-compliant installation, full testing, and a workmanship guarantee on every job.
What sets Derks Plumbing apart:
Licensed and insured. Every technician is licensed, bonded, and insured. You’re protected from the moment the job starts.
Permit handling. Derks pulls the permit and schedules the inspection. You don’t have to track any of that.
Upfront pricing. You get a clear, written price before any work begins. No surprise charges at the end.
Same-day availability. For emergency water heater failures, same-day service is available on standard tank replacements.
Workmanship warranty. Every installation is backed by a written guarantee. If something isn’t right, they come back and fix it.

Final Thoughts
How to install a water heater the right way is about more than connecting pipes. Choosing the correct unit size, meeting code requirements, making safe gas or electrical connections, and testing everything thoroughly are what separate a reliable install from one that fails in two years.
Electric tank replacements are manageable for capable DIYers who pull the right permit. Gas unit installations belong with licensed plumbers no exceptions. Either way, the investment in doing it correctly pays back every year the unit runs without a problem.
FAQs
Q: How to install a water heater if the old one is still working but old?
Replace it proactively when it’s 9 to 10 years old or older. A planned replacement on your schedule costs less than an emergency replacement when the old unit fails and potentially floods the utility room.
Q: How do I know what size water heater to install?
Check the First Hour Rating on the unit’s Energy Guide label. A family of four typically needs a 40 to 50-gallon tank with an FHR matching or exceeding your peak morning demand. A plumber can calculate the right size for your household in minutes.
Q: Can I do a gas hot water heater installation myself?
In most states, gas line connections and venting require a licensed contractor. Even where it’s technically legal to do your own gas work, the risk of an improper connection gas leak, carbon monoxide, fire makes professional installation the right choice.
Q: What is a thermal expansion tank and do I need one?
It’s a small pressurized tank that absorbs water expansion during heating. Many jurisdictions now require one on all water heater installations. Without it, repeated pressure spikes wear out the T&P valve and stress tank welds prematurely.
Q: How long after installation before I have hot water?
A gas unit with a working pilot light delivers hot water in 20 to 40 minutes. A standard electric unit takes 45 to 90 minutes to heat a cold tank to operating temperature. A heat pump unit takes longer up to 2 hours for a first heat cycle.