Want to know how to replace and install a kitchen sink without calling a plumber? You can do it yourself in 2 to 3 hours with basic tools. Turn off the water, disconnect the old plumbing, drop in your new sink, reconnect the lines, and test for leaks. That’s the short version, and we’ll walk you through every step in detail below.
Whether your current sink is cracked, leaking, or just outdated, a sink replacement is one of the most rewarding DIY home projects. This guide covers everything, from choosing the right sink to avoiding the mistakes that cause leaks or gaps in your countertop.
When Should You Consider Replacing a Kitchen Sink?

A kitchen sink takes a lot of daily use. Over time, problems build up that go beyond looks. Here are the signs it’s time for a sink replacement:
- Persistent leaks: If water drips under the cabinet even after tightening connections, the sink itself may be cracked or the seal has failed.
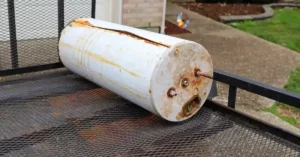
- Rust or stains that won’t clean: Surface rust on stainless steel or enamel chips on cast iron mean the protective layer is gone.
- Mold under the sink: Slow leaks cause wood rot and mold in the cabinet. The longer you wait, the more damage you get.
- Slow drainage you can’t fix: If drain cleaning doesn’t help, the drain assembly may be corroded or poorly positioned.
- You’re remodeling: Updating countertops is the perfect time to swap in a new sink that matches your new look.
How to choose the perfect sink for your kitchen?

Picking the wrong sink is the most common DIY mistake. The right choice depends on your countertop material, cabinet size, and daily habits.
Sink Mounting Styles
- Drop-in (top-mount): Easiest to install. Sits on top of the countertop. Great for laminate, tile, or wood. Best choice for first-time DIYers.
- Undermount: Attached beneath the countertop for a clean look. Requires a solid surface like granite or quartz. Harder to DIY but looks modern.
- Farmhouse (apron-front): Extends past the cabinet face. Needs cabinet modification. Best left to professionals unless you’re experienced.
Sink Materials at a Glance
- Stainless steel: Lightweight, affordable, and easy to clean. Look for 16 to 18 gauge for durability. Resists heat and stains.
- Cast iron: Very heavy with a thick enamel coating. Lasts decades. Needs cabinet support. Quieter than stainless steel.
- Fireclay: Fired at high heat for extreme hardness. Popular in farmhouse-style kitchens. Resistant to chips and scratches.
- Composite granite: Made from granite dust and resin. Scratch-resistant, heat-resistant, and available in many colors.
Single Bowl vs. Double Bowl
- Single bowl: Better for large pots and sheet pans. More usable space. Good for smaller kitchens.
- Double bowl: Lets you multitask, wash on one side, rinse on the other. The 60/40 split gives you flexibility.
Best Kitchen Sinks for Easy Installation
| Sink Model | Type | Material | Bowls | Best For |
| Ruvati RVH8001 Workstation | Drop-in | Stainless Steel | Single | DIY + accessories included |
| Kohler Whitehaven | Farmhouse | Cast Iron | Single | Farmhouse kitchen style |
| Kraus KHU100-32 | Undermount | Stainless Steel | Single | Modern, clean countertops |
| Ruvati RVL2100WH | Drop-in | Fireclay | Single | Farmhouse + reversible design |
| Glacier Bay All-in-One | Drop-in | Stainless Steel | Double | Budget DIY + easy install |
Tip: Always measure your existing cutout before ordering. Most drop-in sinks need a 22 x 33 inch opening, but sizes vary by brand.
Tools and Materials You’ll Need
Gather everything before you start. Stopping mid-job to run to the hardware store wastes time and risks leaving your sink disconnected.
Tools
- Basin wrench (essential for reaching tight nuts under the sink)
- Adjustable wrench
- Channel-lock pliers
- Putty knife or scraper
- Utility knife
- Flashlight or headlamp
- Bucket and old towels
- Safety glasses
- Hacksaw (if needed for cutting old pipes)
Materials
- New kitchen sink
- New faucet (recommended to replace at the same time)
- Drain assembly with drain strainer
- Plumber’s putty
- Silicone sealant (100% waterproof, like Loctite Clear Silicone)
- Teflon tape (for supply line threads)
- Mounting clips or brackets (usually included with the sink)
- PVC P-trap (replace if old one is cracked or corroded)
- New supply lines (braided stainless steel for reliability)
Step-by-Step Guide: How to Replace and Install a Kitchen Sink

Follow these steps carefully. Rushing any stage, especially the sealing and reconnection steps, is how leaks happen.
Step 1: Shut Off the Water Supply
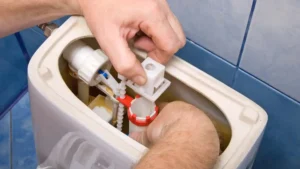
Find the two shutoff valves under your sink, one for hot and one for cold. Turn them clockwise until they stop. Then turn on the faucet to release pressure and drain any water left in the lines. If the valves are stuck or old, shut off the main water supply to the house instead.
Step 2: Disconnect the Plumbing
Place a bucket under the P-trap to catch leftover water. Use an adjustable wrench to loosen the supply lines from the shutoff valves and the faucet. Then unscrew the slip nuts on the P-trap by hand or with pliers. Pull the P-trap off. If the drain pipe is corroded, now is a good time to replace it.
Step 3: Remove the Old Sink
For drop-in sinks: Use a putty knife to cut through the silicone or putty around the rim. Look underneath for mounting clips, usually 4 to 8 of them. Loosen the screws and remove the clips. Then push the sink up from below or lift it from above. Have someone help, some sinks are heavier than they look.
For undermount sinks: The sink is held with adhesive and support brackets. Remove the brackets first, then carefully cut the silicone bead with a utility knife. Lower the sink down with help. Never let it drop, it can damage the countertop from below.
Step 4: Clean the Countertop Surface
Scrape off all old silicone, putty, and debris with your putty knife. The surface must be completely clean and dry before you install the new sink. Any old sealant left behind can prevent a watertight seal and lead to leaks in a few months.
Step 5: Prep the New Sink
Install the faucet and drain assembly before dropping the sink in. It’s much easier to do this now, while you have clear access, than reaching up through the cabinet later.
For the drain: Roll plumber’s putty into a rope and press it around the drain hole. Insert the drain strainer from above, then tighten the locknut from below until snug. Wipe away excess putty.
For the faucet: Insert it through the pre-drilled holes in the sink. Secure it with the mounting nut and washer underneath. Wrap the supply line threads with Teflon tape before connecting them.
Step 6: Set the Sink in Place
For drop-in sinks: Run a bead of silicone sealant around the underside of the rim. Lower the sink into the cutout. Press it down firmly and evenly. Attach the mounting clips under the sink and tighten them so the rim grips the countertop. Wipe away any sealant that squeezes out.
For undermount sinks: Apply silicone to the top edge of the sink. Lift it into position under the countertop. Secure it with support brackets. Let the silicone cure for at least 24 hours before using the sink.
Step 7: Reconnect the Drain and P-Trap
Reconnect the P-trap to the drain tailpiece and the wall drain pipe. Hand-tighten the slip nuts first, then give each one a quarter turn with pliers. Don’t overtighten. That cracks the plastic fittings. Make sure the P-trap has a slight downward slope toward the wall drain.
Step 8: Hook Up the Supply Lines
Connect the hot and cold supply lines to the shutoff valves. Hand-tighten, then tighten a half turn more with a wrench. Overtightening strips the threads. Turn the shutoff valves back on slowly.
Step 9: Test for Leaks
Turn the water on fully. Check every connection point: supply line joints, the P-trap, and around the drain. Fill the sink with water and let it drain. Watch for drips. If you see any, turn off the water and tighten or reseal the problem joint. Don’t skip this step, a slow drip can cause mold and cabinet rot within weeks.
You can read about: How to Install a Garbage Disposal Unit
Common Mistakes to Avoid During Sink Installation
This section alone can save you a second trip to the hardware store.
- Not measuring the cutout first: A sink that’s slightly too big won’t fit. A sink that’s too small leaves an ugly gap. Always measure the opening, not just the old sink.
- Skipping the faucet install before placement: Once the sink is set, accessing the mounting nuts is a nightmare. Install the faucet first.
- Using too little sealant: A thin bead of silicone leads to leaks in 6 to 12 months. Apply a full, continuous bead with no gaps.
- Overtightening drain connections: Plastic slip nuts and drain locknuts crack under too much force. Firm hand-tight plus a quarter turn is enough.
- Ignoring the P-trap angle: A flat or upward-sloping P-trap causes slow drains. It must slope downward toward the wall.
- Not replacing old supply lines: Old braided lines can fail at the worst time. New stainless steel lines cost $10 and are worth it.
Adding a Garbage Disposal During Sink Installation
If your new sink has a disposal knockout, this is the perfect time to install a garbage disposal. You’re already under the sink with the plumbing disconnected.
Most disposals mount to the drain flange with a twist-lock system. You’ll need to add a disposal drain arm to your P-trap assembly. Check that your local plumbing code allows garbage disposals, some older areas don’t.
Popular options like the InSinkErator Badger 5 and Moen GX50C are easy DIY installs and connect directly to a standard drain outlet.
Cost of a Kitchen Sink Replacement
Here’s an honest breakdown of what you’ll spend:
| Sink Type | DIY Cost | With Professional Labor |
| Basic drop-in sink | $100 – $300 | $300 – $700 |
| Undermount sink | $200 – $500 | $500 – $900 |
| Farmhouse / apron-front sink | $400 – $1,200 | $700 – $1,800 |
| Workstation sink | $300 – $700 | $600 – $1,200 |
Extra costs to budget for: new P-trap ($8 to $20), supply lines ($10 to $30), silicone sealant ($6 to $15), and drain assembly ($15 to $40). A full DIY kitchen sink installation with all materials usually runs $150 to $600, depending on the sink you choose.
Hiring a licensed plumber adds $200 to $500 for labor. That cost is worth it if your countertop is granite, the drain location is changing, or you’re installing a heavy farmhouse sink.
Where to Buy a Kitchen Sink
You have several good options depending on your budget and timeline:
- Home Depot and Lowe’s: Large selection of drop-in and undermount sinks from brands like Kohler, Kraus, and Elkay. Staff can help with fitting questions.
- Local plumbing supply stores: Often carry professional-grade sinks not found in big box stores. Prices can be competitive, especially on cast iron and fireclay.
- Online retailers (Amazon, Build.com): Best for price comparisons and specialty sinks. Read dimensions carefully since you can’t see them in person.
When to Hire a Professional Installer
Some kitchen sink installations are straightforward DIY. Others really aren’t. Call a professional if:
- Your drain location needs to move to fit the new sink
- The countertop is granite, quartz, or marble (cutting or sealing these wrong causes cracks)
- You’re installing a heavy farmhouse sink that needs cabinet reinforcement
- The shutoff valves under the sink are corroded and won’t turn
- You find rotted wood or mold inside the cabinet during removal
At Derks Plumbing, our licensed team handles every type of sink installation in the Los Angeles area. We also offer full Plumbing Services in Los Angeles, from drain cleaning to faucet repair. If your project has any of the complications above, contact us for a fast quote and reliable installation.

Conclusion
Knowing how to replace and install a kitchen sink gives you real control over one of the most-used fixtures in your home. A new sink improves your kitchen’s look, prevents water damage, and makes daily tasks easier.
Use this guide to choose the right sink, prep properly, and work through each step without rushing. Measure before you buy, install the faucet first, seal everything completely, and test for leaks before calling it done.
If the job gets complicated, Derks Plumbing is here to help. But with the right prep, most homeowners finish this in one afternoon.
FAQs
Can I replace a kitchen sink myself?
Yes. Drop-in sink replacement is a beginner-friendly DIY project. If you can use a wrench and follow steps carefully, you can do it. Undermount and farmhouse sinks are harder and may need professional help.
How long does kitchen sink installation take?
A basic drop-in sink replacement takes 2 to 3 hours for most DIYers. Undermount sinks take longer because the silicone needs 24 hours to cure before use.
Do I need to replace the faucet when I replace the sink?
Not always. If your faucet fits the new sink’s pre-drilled holes and is in good shape, reuse it. But since you’re already disconnected, it’s a smart time to upgrade if the faucet is old.
What sealant is best for kitchen sink installation?
Use 100% silicone sealant for the sink rim and plumber’s putty for the drain. For granite or stone countertops, skip the putty and use silicone only. Silicone brands like Loctite or GE work well.
How do I know if my new sink will fit?
Measure the cutout opening in your countertop. Most drop-in sinks need a 22 x 33 inch cutout. Compare that with the sink’s template dimensions. If they match, you’re good. If not, the countertop will need to be cut or a different sink size chosen.
Can I replace a kitchen sink without turning off the main water?
Yes, as long as the under-sink shutoff valves work. Turn those clockwise to stop flow to just the sink. If the valves are stuck or leaking, shut off the main supply instead.
What’s the difference between sink replacement and sink installation?
Sink replacement means removing an existing sink and putting a new one in the same spot. Sink installation usually refers to adding a sink where none existed before, which may require new plumbing rough-in work.
Do I need a permit to replace a kitchen sink?
In most areas, a like-for-like sink replacement does not require a permit. If you’re moving the drain or changing the plumbing layout, check with your local building department first.