We are Available 24/7

Plumbing

how to test a pressure switch on a well
Plumbing

How to Test a Pressure Switch on a Well: A Simple DIY

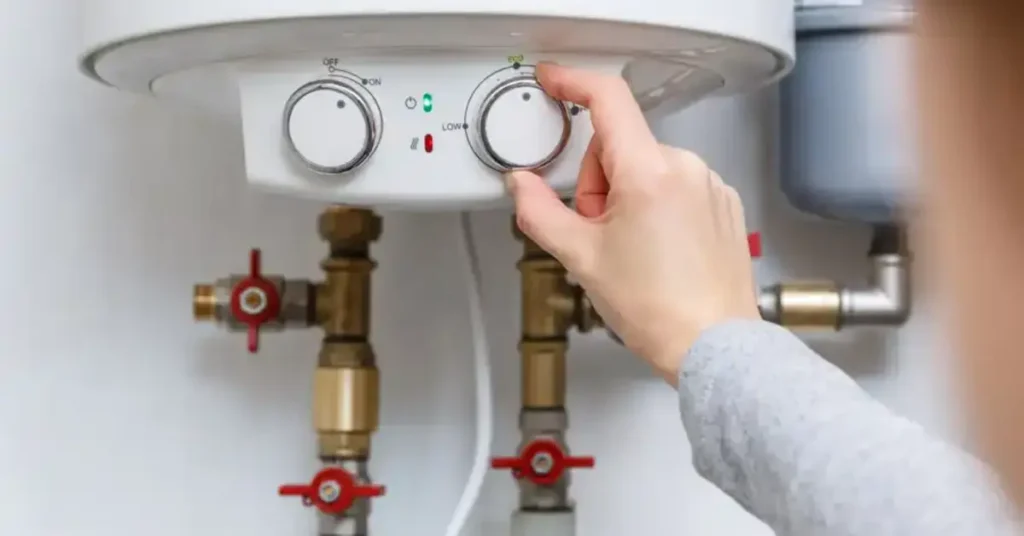
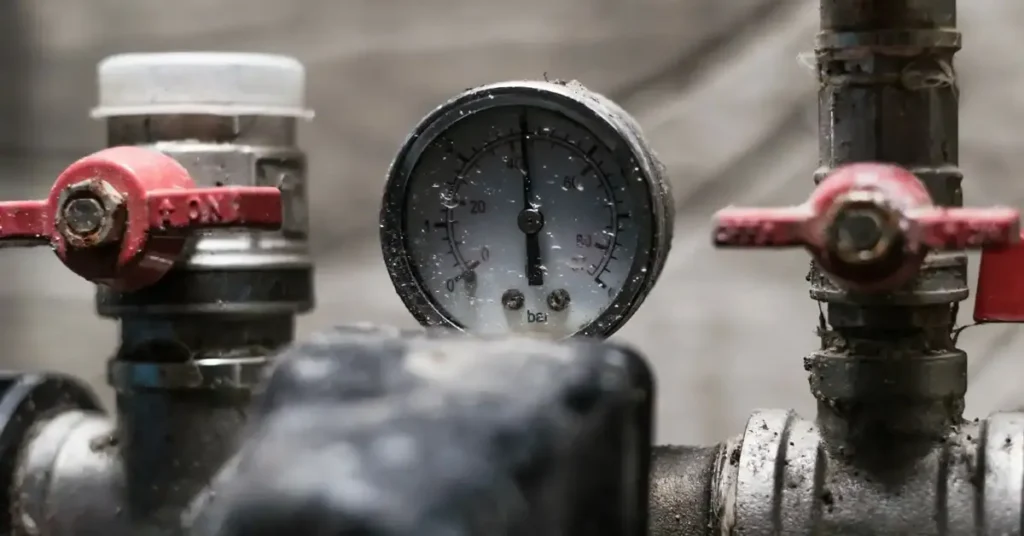
If your well pump keeps short cycling, loses pressure, or will not turn on, the pressure switch is often the cause. This small part controls when your pump starts and stops. When it fails, your water system cannot work right. Testing it early can save your pump and your wallet. How to test a pressure switch on a well is a simple process when done the right way. You check power, pressure response, and contact action in a clear order. This guide gives direct steps, real examples, and plain advice so you know what to do and when to stop. What Is a Well Pressure Switch? A well pressure switch is the brain of your home water system. It tells the pump when to start and when to stop. Without it, your pump would not know when you need water. It sits on a small pipe near your pressure tank. The switch has a set of springs and electrical contacts inside. When water pressure drops, the springs push the contacts together. This sends power to the pump to pull water from the ground. When the tank is full, the pressure pushes the contacts apart to stop the pump. Most switches work on a 30/50 or 40/60 range. These numbers stand for pounds per square inch or PSI. For example, a 40/60 switch turns the pump on at 40 PSI. It turns it off when the pressure hits 60 PSI. This cycle keeps your home’s water pressure steady. Signs Your Well Pressure Switch May Be Failing You might notice well pressure switch problems before the water stops completely. One common sign is a clicking sound. If you hear a rapid click-click-click near the tank, the switch is struggling. This often means the contacts are worn out or dirty. Another sign is low water pressure in the house. Your shower might feel weak even when the pump is running. You might also see the pump staying on for too long. If the pump never shuts off, the switch might be stuck in the “on” position. Sometimes the water might pulse or sputter at the tap. This could mean the switch is turning on and off too fast. We call this short cycling. It is very hard on your pump motor. You should check the pressure switch on well systems right away if this happens. Safety Precautions Before Testing Safety is the most important part of this job. You are working with both water and high voltage electricity. These two do not mix well. Always wear rubber-soled shoes to stay safe. Make sure the floor around the well tank is dry. Go to your main electrical panel first. Find the breaker for the well pump. Flip it to the “off” position. Use a non-contact voltage tester to be 100% sure the power is out. Check the wires at the switch before you touch anything. Never try to adjust the switch while the power is on. The sparks from the contacts can be dangerous. Also, do not stick metal tools into the switch while it is live. Following these rules keeps you safe while testing a pressure switch. Tools and Materials You’ll Need You do not need many tools for this task. Most homeowners already have these in the garage. Gather them before you start so you do not have to stop mid-way. A flathead or Phillips screwdriver. A pair of needle-nose pliers. A multimeter to check for power and continuity. An air pressure gauge like the one used for car tires. A small piece of fine-grit sandpaper. A wrench or a socket set. Having the right tools makes the job much easier. A multimeter is very helpful for finding electrical shorts. The sandpaper is great for cleaning the metal contacts inside the switch. Step-by-Step: How to Test a Pressure Switch on a Well Follow these steps to find out what is wrong. Work slowly and check each part of the system as you go. 1. Perform a Visual Inspection Remove the plastic or metal cover on the switch. Look at the four metal contact points. Are they black or pitted? This is a sign of carbon buildup. Carbon keeps the electricity from flowing correctly. Check the wires for any loose connections. If a wire is wobbly, the pump might not get enough power. Look for signs of ants or bugs inside the housing. Insects love the warmth of the electrical switch and can cause it to fail. 2. Clean the Contact Points If the contacts look dirty, you can clean them. Use your fine-grit sandpaper to gently rub the metal surfaces. You want to see shiny metal again. Do not over-sand them or you might remove too much material. Once they are clean, blow out any dust or debris. This simple fix often solves pressure switch problems without buying new parts. Many people think they need a new switch when they just need a cleaning. 3. Check the Sensing Tube There is a small pipe called a pigtail or nipple under the switch. This tube carries water to the switch so it can sense the pressure. Over time, sediment or rust can clog this tube. If the tube is clogged, the switch cannot “feel” the water pressure. It might think the pressure is high when it is actually low. Unscrew the switch and check the hole at the bottom. If it is full of gunk, clean it out with a thin wire. 4. Test for Continuity Use your multimeter for this part of testing a pressure switch. Set the meter to the continuity or “ohms” setting. With the power off, touch the probes to the terminals that the contacts bridge. If the contacts are touching, the meter should beep or show zero. If it shows an “OL” or no reading, the electricity cannot pass through. This means the switch is broken and needs to be replaced. 5. Check the System Voltage Turn the power back on carefully. Set your multimeter to AC
can you put coffee grounds down the sink
Plumbing

Can You Put Coffee Grounds Down the Sink? | Plumber’s Advice

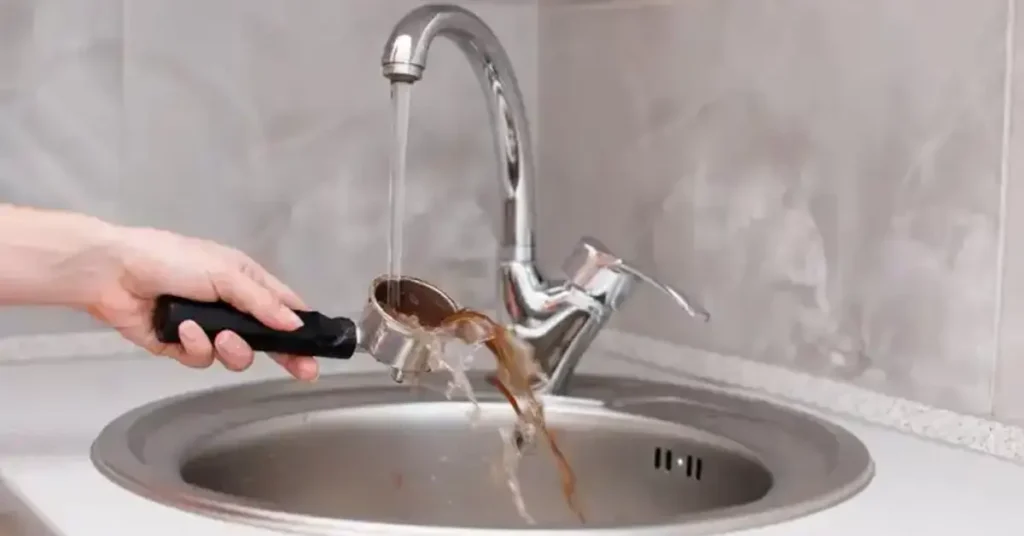
No, you should never put coffee grounds in your sink. They do not dissolve in water like salt or sugar. Instead, they clump together and form a thick paste. This paste gets stuck in the bends of your pipes. It will lead to a very messy and expensive clog eventually. Many people ask can you put coffee grounds down the sink while using a drain board. Even if you have the best setup, the grounds will still ruin your plumbing. Always throw them in the trash or your garden instead. Can you put coffee grounds down the sink? The short answer is a loud no. Most people think because the grounds are small, they will just flow away. This is a big mistake that many homeowners make every morning. Coffee grounds are organic, but they are very tough. They act more like tiny rocks than food waste. When you rinse them away, they do not stay separate. They find other debris in your pipes and start to build a wall. Why Grounds and Water Don’t Mix Water usually helps things move through your pipes. But coffee grounds are different. They are dense and do not break down. When they get wet, they become heavy and sink to the bottom of the pipe. They do not float away like a piece of bread might. Instead, they sit there and wait for more grounds to join them. This creates a solid mass that water cannot pass through. The Science of the Sink Clog Pipes are designed to carry liquid and small, soft bits of food. Coffee grounds are coarse and abrasive. They have natural oils that make them sticky. This stickiness is what makes them so dangerous for your plumbing. They grab onto the sides of the metal or plastic pipes. Once one ground sticks, thousands of others follow. It is like building a dam inside your kitchen wall. Myths About Running Hot Water Some people think running hot water will melt the grounds. This is not true at all. Hot water might melt grease for a second, but it does nothing to coffee. The grounds will just travel a few feet further before they settle. By the time the water cools down, you have a hard, greasy coffee brick in your drain. No amount of hot water will fix a thick pile of coffee grounds down sink drains. You can read about: Can You Flush Cat Litter Down the Toilet Are coffee grounds bad for kitchen drains? Yes, they are one of the worst things you can pour away. Plumbers see this issue more than almost any other type of clog. The kitchen drain is the heart of your home’s waste system. When it stops working, your whole kitchen shuts down. Coffee grounds down drain pipes lead to slow water flow and eventually a complete stop. Accumulation in the P-Trap The P-trap is the U-shaped pipe under your sink. Its job is to hold a little water to block sewer gases. Because of its shape, it is the perfect place for coffee to hide. The grounds settle in the bottom of the “U” and never leave. Over weeks or months, the trap fills up. You won’t notice it until your sink takes ten minutes to drain. By then, the pipe is already packed tight. Sludge Formation with Soap and Grease Your kitchen pipes are already coated with soap scum and old grease. When you add coffee grinds in sink water, they stick to this gunk. It creates a substance often called “sludge.” This sludge is very thick and hard to remove. It does not wash away with a simple plunger. It often requires professional tools to scrape the inside of the pipe clean again. Long-term Pipe Damage Repeatedly putting grounds down the drain can wear out your pipes. The gritty texture acts like sandpaper. Over years, this can thin the walls of your metal pipes. It can also lead to leaks at the joints. Fixing a leak inside a wall is much more expensive than throwing grounds in the trash. It is a risk that is never worth the five seconds you save. Can coffee grounds clog pipes? They definitely can and they usually do. If you do it once, you might get lucky. If you do it every day, you are guaranteed to have a problem. Many people wonder will coffee grounds clog drains if they use a lot of water. The answer is still yes. Water pressure in a home is not strong enough to clear out heavy, wet grounds. Comparison with Other Food Waste Compare coffee to something like a piece of boiled carrot. A carrot is soft and will eventually break apart. Coffee grounds are the seeds of a fruit. They are meant to survive in nature. They do not soften or rot quickly. They stay hard and gritty for a very long time. This makes them much more likely to cause a blockage than most other kitchen scraps. Warning Signs of a Blockage You can tell if your pipes are starting to fail. First, you might hear a gurgling sound after the water goes down. This is air trapped behind a growing pile of coffee. Next, you will see the water level stay high for a few seconds. Finally, you might notice a bad smell. If you see these signs, stop putting coffee grounds sink waste down the drain immediately. How Ground Size Matters The type of coffee you drink matters too. Espresso grounds are very fine and turn into a paste quickly. French press grounds are coarse and act like gravel. Both are dangerous but in different ways. Fine grounds create a seal that blocks all water. Coarse grounds catch other food bits like hair or pasta. No matter the size, they belong in the trash. Can you put coffee grounds down the sink with a garbage disposal? A garbage disposal is not a magic hole. It is designed to grind up soft food

can you flush cat litter down the toilet
Plumbing

Can You Flush Cat Litter Down the Toilet? | Plumbing Guide

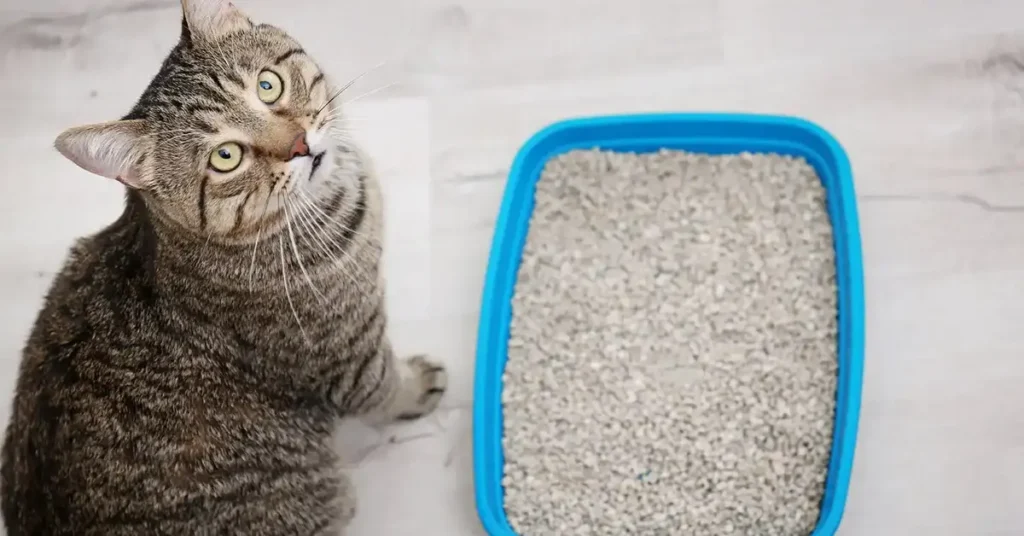
No, you should never flush cat litter down your toilet. Even litters sold as flushable can cause severe blockages in your home drainage pipes. Clay litters absorb water, expand, and turn into solid cement inside your plumbing system. Toilet infrastructure is designed only to process liquid waste, human waste, and water-soluble toilet paper. If you are wondering can you flush cat litter down the toilet, the short answer is always no. Flushing litter leads to costly pipe repairs, backups, and environmental damage. This article covers why litter ruins pipes and how to dispose of it safely. Can You Flush Cat Litter Down the Toilet? The simple answer to whether can cat litter be flushed is a firm no. Your home plumbing system uses water flow and gravity to push organic waste through narrow pipes. Most cat litter is designed to absorb liquid and bind together into firm clumps. When these materials hit the standing water in your drain line, they swell rapidly. Many homeowners ask, can i flush cat litter if it is just a tiny amount? Even small daily scoops build up along the walls of your sewer pipe. Over time, the material acts like a trap for grease, hair, and paper. This creates a dense barrier that standard plungers cannot break apart. Modern home plumbing systems use low-flow toilets to conserve water. These units send only 1.2 to 1.6 gallons of water down the line per flush. That small volume of water lacks the pressure required to push heavy, dense cat litter through long pipe routes. The litter settles in low spots of your main drain line, hardens, and causes total home backups. Why Flushing Cat Litter Is Bad for Plumbing Cat litter causes catastrophic damage to residential drainage systems for several physical reasons. The main material used in traditional cat litter is sodium bentonite clay. This specific clay can expand up to fifteen times its original size when exposed to liquid. When you put cat litter in toilet bowls, the clay mixes with water and forms a thick sludge. This sludge travels into your indoor drain line where water cools and slows down. The heavy clay settles on the bottom of horizontal pipes. Within hours, the clay dries and hardens into a substance similar to concrete. Here are the main physical problems caused by flushing litter: Pipe constriction as sticky clay coats the inner diameter of plastic and cast iron drain lines. Heavy blockages at pipe bends, traps, and elbows where flow velocity naturally drops. Complete main sewer line blockages that force raw sewage back up through shower drains and toilets. Severe mechanical damage to garbage disposals and residential sewage ejector pumps. Once litter hardens inside your pipes, standard drain clearing chemicals will not dissolve it. Chemical drain cleaners generate heat that can crack your pipes, but they cannot melt clay. Clearing a clay blockage requires professional hydro-jetting equipment or heavy mechanical drain snakes. Is Flushable Cat Litter Really Safe? Many pet food companies sell products labeled as flushable cat litter. These items are typically made from plant materials like corn, wheat, wood fiber, pine, or paper pulp. Manufacturers claim these natural fibers break down in water like toilet paper. However, asking is flushable cat litter safe for plumbing gets a very different answer from licensed plumbers. Most pipe experts agree that flushable litter is not safe for home plumbing or public sewer systems. While plant fibers do break down faster than bentonite clay, they still require a large amount of water and time to dissolve fully. Modern low-flow toilets do not supply enough water volume to break down plant clumps. The clumps travel whole down your pipes, where they catch on pipe rough spots, rust, and tree roots. Furthermore, flushable litter is especially dangerous for homes with septic tanks. Septic tanks rely on natural bacteria to digest organic solids. Plant litters add massive amounts of indigestible solid waste to the tank. The litter settles at the bottom, kills beneficial bacteria, fills the tank prematurely, and causes drain field failure. What Types of Cat Litter Should Never Be Flushed? You must keep every major commercial litter type out of your toilet and drain system. Each material creates unique hazard conditions for plumbing infrastructure and environment. Sodium Bentonite Clumping Clay Litter This is the most common and most dangerous litter type. Sodium bentonite acts as an expander when wet. It forms solid, sticky clumps designed to trap liquid waste. Flushed clay litter creates hard plugs in pipes that resemble dry plaster. Silica Gel Crystal Litter Crystal litter is made from porous sodium silicate. These crystals absorb massive moisture amounts and hold odors. Synthetic silica crystals do not dissolve in water under any condition. They sit at the bottom of pipes, collect organic debris, and form solid blockages. Non-Clumping Clay Litter Non-clumping litter uses natural clay minerals like attapulgite or kaolin. While it does not form round clumps, it sinks instantly in standing water. It forms a dense, heavy sediment layer in main sewer lines that restricts normal wastewater flow. Recycled Paper Pellets Paper pellets absorb moisture and swell into large soft masses. When flushed, these wet paper masses wedge tightly into pipe bends. They block water movement and catch toilet paper, leading to immediate toilet overflows. Pine, Corn, and Wheat Litters Even though these natural litters are sold as biodegradable, they should never go into your toilet. They absorb water, swell up, and absorb pipe grease, creating dense clogs that damage household drains. Can Any Cat Litter Be Flushed? No cat litter product is completely safe to flush into a toilet system. Even if a product box says flushable on the front label, plumbing standards advise against putting it down your drain. Some manufacturers suggest flushing one small clump at a time and waiting twenty minutes between flushes. Following these steps wastes tens of gallons of clean water for a single litter box cleanup. It also fails to stop litters from settling in main lateral pipes under

how do i get rid of drain flies
Plumbing

How Do I Get Rid of Drain Flies? Quick Solutions That Work

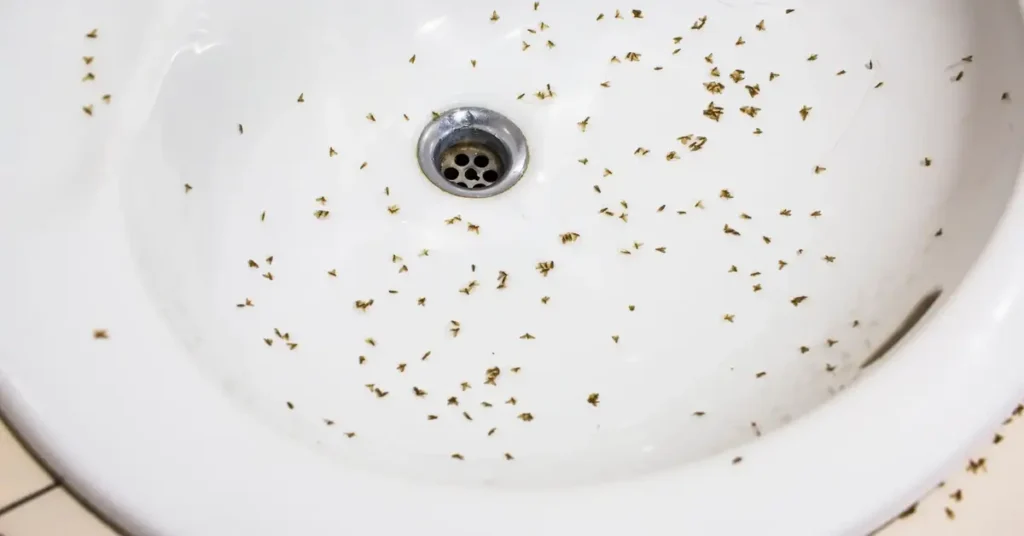
Tiny, fuzzy insects fluttering around your sink or shower drain are a common but annoying household pest. These are drain flies, also known as sewer flies or moth flies. They are breeding in the slimy buildup inside your pipes. To get rid of drain gnats, you must eliminate the organic film that feeds their larvae, not just swat the flying adults. The simple answer to how do I get rid of drain flies is to thoroughly clean the inside walls of your pipes. This guide provides the professional plumbing steps and products needed for complete drain fly removal tips that work better than any bug spray. We will show you exactly how to kill the larvae and prevent future infestations. What Are Drain Flies? Drain flies are small, non-biting insects often seen resting near bathroom and kitchen drains. They are sometimes called moth flies because their hairy bodies and wings give them a fuzzy, moth-like look. They are very weak fliers and rarely travel far from their breeding site. These flies do not look for human food. They look for standing water and the thick layer of organic matter, called biofilm, that coats the inside of plumbing pipes. This biofilm is a mix of soap scum, grease, hair, and other decaying materials. The larvae live inside this slime, protected and well-fed, until they emerge as adult flies. The entire life cycle takes about three weeks. You must break this cycle to achieve lasting results. Drain Flies vs. Fruit Flies People often mix up drain flies and fruit flies, but they’re different pests that need different solutions. Drain flies have fuzzy wings and bodies. They look like tiny moths. You’ll find them near sinks, showers, and floor drains. They fly in short, jerky patterns and often rest on walls near drains. Fruit flies are smaller and smoother. They have red eyes and tan bodies. These bugs hang around ripe fruit, garbage cans, and anything sweet or fermenting. They fly in quick, darting movements. The key difference? Drain flies breed in drains. Fruit flies breed in rotting food. If you see fuzzy flies near your bathroom or kitchen sink, you’re dealing with drain flies. How to Know if You Have Drain Flies Spotting a few flies doesn’t confirm you have drain flies. Here’s how to check: The Tape Test works best. Before bed, dry the inside of your drain with a towel. Place clear tape over the drain opening, sticky side down. Leave it overnight. Check the tape in the morning. If you see small flies stuck to it, you’ve found their breeding spot. You can also look for these signs: Small flies resting on bathroom or kitchen walls Fuzzy-looking insects near drains or pipes Flies that seem weak or slow (they’re not strong fliers) More activity in the evening when drain flies are most active Check every drain in your home. Drain flies can breed in shower drains, sink drains, basement floor drains, and even washing machine drains. The tape test helps you find exactly where they’re breeding. Why Drain Flies Come Into Homes Drain flies don’t just appear randomly. They’re attracted to specific conditions in your plumbing. Organic buildup is the main draw. Hair, soap scum, food particles, and grease create a slimy layer inside pipes. This slime feeds bacteria, which drain fly larvae. The thicker the buildup, the better the breeding ground. Moisture keeps the slime wet and hospitable. Drains that get regular use stay damp enough for drain flies to thrive. Even small leaks under sinks can create breeding spots. Cracks and gaps let adult flies enter. Broken pipe seals, loose drain covers, and cracks in basement floors give them access to breeding areas. Rarely used drains are especially prone to drain fly problems. Guest bathroom sinks, basement floor drains, and outdoor spigots can develop thick slime layers when water doesn’t flow regularly to wash buildup away. How to Get Rid of Drain Flies Getting rid of drain gnats requires attacking their breeding grounds. Killing adult flies won’t solve the problem because new ones keep hatching. Follow these steps for effective drain fly removal tips. Step 1: Identify All Affected Drains Use the tape test on every drain in your home. Mark which drains show flies. You need to treat all breeding sites or the problem continues. Step 2: Clean Drains Thoroughly This is the most important step for drain flies treatment. You need to remove the slime where they breed. For accessible drains: Remove the drain cover and stopper Use a drain brush or pipe brush to scrub the sides Reach as far down as you can to break up slime Rinse with hot water Boiling water method: Boil a full kettle of water Pour it slowly down the drain Wait 5 minutes Repeat 2-3 times Do this daily for one week The hot water kills larvae and loosens slime. But it won’t remove all the buildup by itself. Baking soda and vinegar treatment: Pour 1/2 cup baking soda down the drain Add 1/2 cup white vinegar Let it fizz for 30 minutes Flush with hot water Repeat every few days This method breaks down organic matter naturally. Step 3: Use Enzymatic Drain Cleaners These products eat away the organic slime. Look for gel-based enzyme cleaners made specifically for drain flies. Follow the product directions carefully. Most require overnight treatment. Apply the cleaner before bed so it can work while the drain isn’t being used. Regular drain cleaners with harsh chemicals don’t work well because they don’t target the slime layer effectively. Step 4: Kill Remaining Adults While you’re treating the drains, reduce the adult population: Use a fly swatter for quick kills Set up apple cider vinegar traps near affected drains Spray adults with soapy water (dish soap and water in a spray bottle) Vinegar trap method: Fill a small bowl with apple cider vinegar Add 2 drops of dish soap Place it near the drain Flies are attracted to vinegar and drown in the

what is pvc pipe made of
Plumbing

What Is PVC Pipe Made Of? Materials & Components Explained

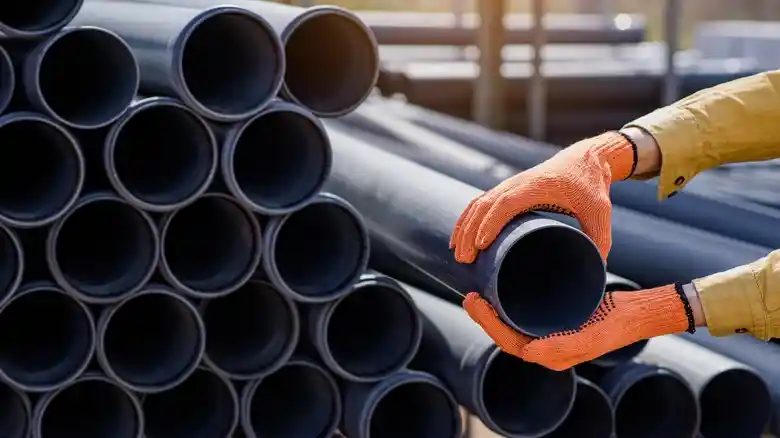
Polyvinyl Chloride, widely known as PVC, is a ubiquitous material in modern construction. It forms the core of piping systems in homes and businesses globally. This remarkable plastic owes its widespread use to its durability, chemical resistance, and cost-effectiveness. Understanding what is PVC pipe made of reveals why it’s so dependable. The primary raw material is a polymer created through a fascinating chemical process. This article explores the exact composition, manufacturing methods, and various applications that make PVC a powerhouse in the plumbing world. What is PVC Pipe? A PVC pipe is a rigid length of tubing made from the polymer Polyvinyl Chloride. The material is a thermoplastic, which means it becomes moldable at a certain high temperature and solidifies upon cooling. This property is key to how is PVC pipe made through extrusion. PVC piping is known for its light weight and strength. It resists corrosion, chemical damage, and microbial growth better than many traditional materials like metal. These pipes are essential for transporting water, managing waste, and protecting electrical wiring. They have become the industry standard for a huge range of applications due to their longevity and reliability. Is PVC Pipe Safe? Safety is a top concern, especially when dealing with drinking water. The question of safety often depends on the specific type of PVC and its intended use. Generally, PVC pipes approved for potable water are considered safe for public health. Modern manufacturing processes adhere to strict international standards to ensure pipes do not leach harmful substances. When used for water distribution, the unplasticized type (PVC-U) and the chlorinated type (CPVC) are most often certified. CPVC, for example, is highly safe for transporting both hot and cold drinking water. Its resistance to biofilm contamination is a major benefit, as it prevents bacteria from breeding inside the pipe. Like any material, using the correct type of pipe for the right job is vital for maintaining safety. What Is PVC Pipe Made Of? The main ingredient is polyvinyl chloride resin, which accounts for about 90% of the pipe material. This resin starts as a powder that gets heated and shaped into pipes. The resin comes from two basic materials: Chlorine makes up 57% of the base polymer. It comes from salt through a process called electrolysis. This element gives PVC its fire resistance and durability. Ethylene forms the other 43%. This comes from petroleum or natural gas. It provides the carbon backbone that holds the plastic together. But raw PVC resin alone wouldn’t make good pipes. Manufacturers add several other components: Stabilizers (5-10% of total weight) prevent the plastic from breaking down when exposed to heat or UV light. These used to contain lead but now use calcium, zinc, or tin compounds. Impact modifiers (2-5%) make the pipes tougher. They help PVC resist cracking when hit or when temperatures drop. Common modifiers include chlorinated polyethylene and acrylic polymers. Lubricants (1-2%) help the plastic flow during manufacturing. They create smooth surfaces inside and outside the pipe. Calcium stearate is a typical lubricant. Pigments give pipes their color. White PVC contains titanium dioxide. Gray pipes use carbon black. These colors help identify pipe types and protect against UV damage. Fillers like calcium carbonate may be added to reduce costs. They bulk up the material without changing its basic properties. Not all PVC pipes contain fillers. The exact formula varies by manufacturer and pipe purpose. Drain pipes need different properties than water supply lines. Each application requires specific additives to meet performance standards. Different Types of PVC Pipes Not all PVC pipes are the same. Different types of pvc pipes serve unique purposes. Understanding these types helps you pick the right pipe for your project. Schedule 40 PVC is the most common type. It has medium wall thickness and works for most residential plumbing. You’ll find this in drain lines, vent pipes, and irrigation systems. The walls are thick enough for normal water pressure. Schedule 80 PVC has thicker walls than Schedule 40. It handles higher pressure and is stronger. This type costs more but lasts longer in demanding applications. Industrial settings and underground installations often use Schedule 80. CPVC (Chlorinated PVC) can handle hot water. Regular PVC softens at high temperatures, but CPVC stays rigid. It’s used for hot water supply lines in homes. The chlorination process makes it heat resistant. PVC-U (Unplasticized PVC) contains no plasticizers. This makes it rigid and strong. Most plumbing pipes are PVC-U. They maintain their shape under pressure and temperature changes. PVC-O (Oriented PVC) goes through a special process that aligns molecules. This creates pipes that are lighter but stronger. They’re becoming popular for water mains and large-scale projects. Each type has specific pressure ratings and temperature limits. Always check local building codes before choosing a pipe type. Using the wrong type can lead to failures and code violations. How PVC Pipes Are Manufactured How are pvc pipes made in factories? The process is straightforward but requires precision. Understanding manufacturing helps you appreciate pipe quality. Step 1: Compound Mixing Workers mix PVC resin powder with stabilizers, modifiers, and other additives. This happens in large blenders. The mixture must be uniform for consistent pipe quality. Temperature control is critical during mixing. Step 2: Extrusion The mixed compound goes into an extruder. This machine heats the material to about 350-400°F. The plastic melts and gets pushed through a die. The die shapes the melted plastic into a pipe form. A mandrel in the center creates the hollow interior. Step 3: Cooling Hot pipes come out of the extruder and enter a cooling bath. Water or air brings the temperature down quickly. This sets the pipe shape. Proper cooling prevents warping and ensures straight pipes. Step 4: Sizing Some pipes through a sizing tool while still warm. This ensures exact outer diameter measurements. Consistent sizing is important for fittings to connect properly. Step 5: Cutting Long pipes get cut to standard lengths. Saws make clean, square cuts. Most pipes come in 10 or 20-foot sections. Custom lengths

what temperature freezes pipes
Plumbing

What Temperature Freezes Pipes? Winter Protection Guide

Most household pipes are at risk of freezing once outdoor temperatures fall to 20°F (-6°C) or below. Even though water freezes at 32°F (0°C), the pipes in your home are somewhat protected by insulation and surrounding building materials. But when the temperature drops past that 20°F threshold, that protection often isn’t enough to keep the water inside from freezing. Knowing what temperature freezes pipes is crucial for every homeowner. The risk is not the ice itself, but the massive pressure that builds up when water expands as it turns to ice. This pressure can cause the pipe to rupture, leading to major water damage inside your home. Taking action before the deep cold hits is your best defense against costly repairs. Why Do Pipes Freeze? Water expands by roughly 9% when it freezes. That expansion creates enormous pressure inside your pipes up to 2,000 pounds per square inch. Something has to give, and usually it’s the pipe itself. The science is simple but the damage is severe. When water molecules slow down and lock into ice crystals, they take up more space. Your pipes can’t expand to accommodate that growth. The pressure builds until the weakest point cracks. Material matters. Copper and steel pipes conduct cold quickly. They lose heat faster than the surrounding air can replace it. PEX and PVC pipes insulate better but still freeze when exposed to prolonged cold. Location is everything. Pipes in unheated spaces freeze first. Your attic, basement, garage, and crawl spaces are danger zones. Even pipes inside exterior walls face higher risk than those buried deep in interior walls. Wind makes it worse. Cold wind strips heat from exposed pipes faster than still air. That’s why pipes on north-facing walls or near drafty windows freeze more often. Poor insulation accelerates the problem. Gaps around pipes where they enter walls let cold air blast directly onto the metal or plastic. Small air leaks cause big freezing problems. What Temperature Will My Pipes Freeze? The frozen pipes temperature threshold sits at 20°F (-6°C) for most homes. This surprises people who expect freezing right at 32°F. Your home provides a protective buffer. Indoor heat radiates through walls and floors. Building materials hold warmth. This creates a microclimate around your pipes that stays warmer than outside air. Duration beats severity. A quick drop to 15°F overnight might not freeze your pipes. But sustained 25°F weather for 12 hours straight? That’s when pipes start freezing solid. Several factors determine when pipes freeze: Insulation quality changes everything. Well-wrapped pipes survive temps that would freeze bare ones. Even basic foam sleeves add 5-10 degrees of protection. Water movement helps. Flowing water resists freezing better than standing water. That’s the science behind letting faucets drip during cold snaps. Moving molecules don’t lock into ice crystals as easily. Pipe diameter affects timing. Small half-inch pipes freeze faster than two-inch mains. Less water volume means less thermal mass to resist cold. Geographic location shifts the danger zone. Homes in warm climates have minimal insulation. A 28°F night in Texas causes more frozen pipes than the same temperature in Minnesota. Northern homes are built for cold weather. Southern homes aren’t. Previous cold exposure matters too. Pipes that barely survived one cold night are more vulnerable the next night. The water is already cold. It needs less time to freeze solid. What Temperature Will My Pipes Burst? Bursting happens when ice blockages trap water between two points. The expanding ice has nowhere to go. Pressure builds up to 2,000 pounds per square inch.Pipes freeze at what temp they burst varies by material. Copper pipes can withstand more pressure than galvanized steel. But even copper has limits.Most pipes burst between 20°F and 32°F. The exact pipe freezing temperature for failure depends on: Pipe age and condition: Old pipes with corrosion or weak spots fail first. New pipes handle pressure better but aren’t bulletproof. Pipe material: Copper stretches slightly before bursting. PEX is more flexible and less likely to burst. PVC becomes brittle in extreme cold. Ice blockage location: Ice near a faucet or valve creates more pressure than ice in open pipe runs. The trapped water has nowhere to expand. The burst often happens during thawing, not freezing. Ice melts and water rushes into the damaged section. That’s when you discover the crack or split that formed while frozen. Do Frozen Pipes Always Burst? No. Many frozen pipes thaw without damage. But you can’t predict which ones will survive. Ice formation alone doesn’t guarantee a burst. The pressure must exceed the pipe’s structural strength. Sometimes ice forms slowly enough that small air pockets absorb the expansion. The pressure never hits critical levels. Partial freezes are safer. If water can still trickle through the pipe, pressure stays manageable. Complete ice plugs create the highest burst risk. Quick action saves pipes. Catching frozen pipes early and thawing them carefully prevents most bursts. Waiting hours or days increases damage risk exponentially. The freeze-thaw cycle causes cumulative damage. Pipes that freeze and thaw repeatedly get weaker each time. Eventually they fail even under normal pressure. Key Signs Pipes Are Frozen Spotting frozen pipes early saves thousands in repairs. Watch for these warnings: No water flow is the obvious sign. Turn on a faucet and nothing comes out. Or water trickles when it should gush. Check the faucet if one works but another doesn’t, you’ve found the frozen section. Frost on exposed pipes tells the story. Visible ice crystals or heavy condensation mean temps dropped below freezing right there. Check your basement, crawl space, and attic weekly during cold weather. Strange odors signal trouble. Frozen pipes trap sewer gases that back up into your home. Odd smells near drains suggest blockage downstream. Weird noises happen when water hits ice. Whistling, banging, or gurgling sounds when you turn on faucets mean ice is blocking flow somewhere. The water pressure behind the blockage makes pipes shake and rattle. Cold wall sections reveal hidden problems. Touch walls near pipe locations. Unusually cold spots

how much does it cost to repair a slab leak​
Plumbing

How Much Does It Cost to Repair a Slab Leak? A Complete Guide

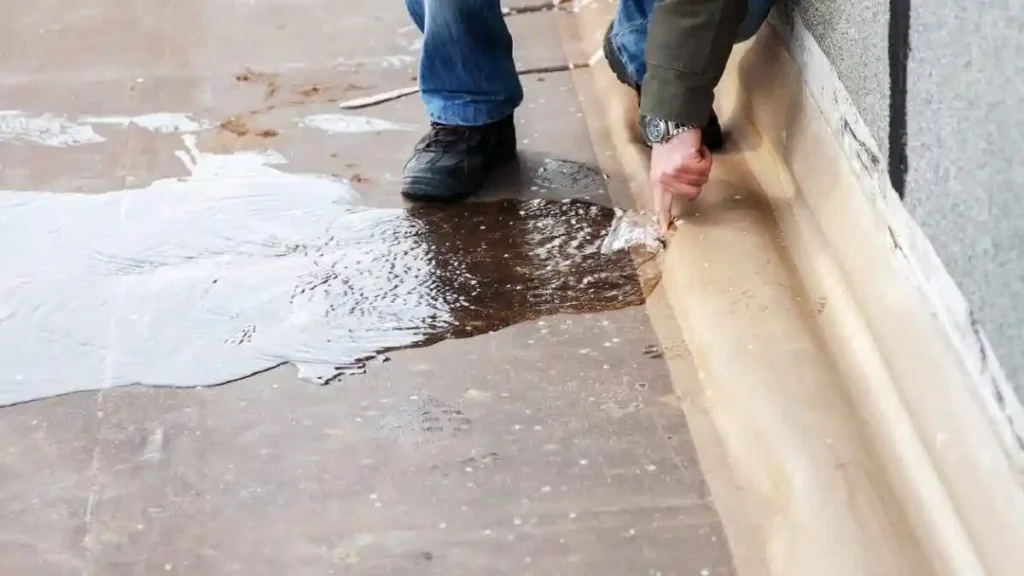
A slab leak is a plumbing problem that happens beneath your home’s foundation. It causes serious damage and is always stressful for a homeowner. Getting a clear answer on the repair cost upfront helps manage this crisis. So, how much does it cost to repair a slab leak? The average repair runs between $630 and $4,400, with most people paying around $2,300. The final price depends on where the leak is, how bad the damage is, and which repair method your plumber uses. What Is a Slab Leak? A slab leak happens when water pipes under your concrete foundation start leaking. Your home sits on a concrete slab, and pipes run through or beneath it. When these pipes crack or burst, water seeps into the foundation.These leaks don’t announce themselves with obvious signs. They work quietly, damaging your home from the ground up. The concrete protects the pipes, but it also hides problems until they become serious. Common Causes of Slab Leaks Poor installation tops the list. Pipes installed without proper support shift over time. This movement creates weak spots that eventually fail.Corrosion eats through older copper pipes. Homes built 20 to 30 years ago face higher risk. The metal breaks down, creating pinhole leaks.Ground shifting puts pressure on pipes. Earthquakes, soil erosion, and settling foundations all stress your plumbing. Even small movements can crack rigid pipes. High water pressure wears out pipes faster. When pressure exceeds 80 PSI, it strains connections and weak points. This constant stress shortens pipe life. Warning Signs You Need Slab Leak Repair Your water bill jumps without explanation. A hidden leak wastes thousands of gallons monthly. If your usage doubles but your habits haven’t changed, suspect a slab leak.Warm spots appear on your floor. Hot water leaks heat the concrete above them. Walk barefoot and feel for areas warmer than others.You hear running water when everything’s off. Put your ear near the floor. That rushing sound means water’s escaping somewhere.Cracks form in walls or floors. Water weakens your foundation.  New cracks or widening old ones signal serious trouble.Mold grows along baseboards. Moisture from below creates perfect conditions for growth. That musty smell isn’t normal. What Is the Cost of Slab Leak Repair? The cost to fix a slab leak breaks down into detection, access, and repair. Basic repairs start around $630 for simple patches. Complex jobs requiring foundation work hit $4,400 or more. Factors That Affect Slab Leak Repair Cost Location drives your bill up or down. Leaks under bathrooms cost less to fix because pipes are accessible. Kitchen leaks often require more digging.Leak severity changes everything. A small pinhole needs different treatment than a burst pipe. Multiple leaks mean higher costs.Your foundation type matters. Post-tension slab foundations require special care. Workers must avoid cutting tension cables, which adds complexity. Access difficulty increases labor time. Furniture, cabinets, and flooring all need removal. Some repairs require cutting through tile, hardwood, or carpet.Pipe material affects repair methods. Copper pipes can be patched or replaced. PEX and other materials might need different approaches. Average Costs by Repair Method Direct Access Method: $630 to $1,800 Workers break through the slab directly above the leak. This works best for accessible locations with minimal obstacles. Rerouting Method: $1,500 to $4,000 Plumbers run new pipes through walls or attic spaces. This avoids breaking the foundation but uses more materials. Epoxy Pipe Coating: $800 to $1,600 A less invasive option that seals leaks from inside. It works for small leaks but won’t fix severe damage. Complete Repiping: $4,000 to $15,000 The nuclear option. You replace all pipes under the slab. This makes sense for older homes with multiple problem areas. Cost Breakdown by Home Size Small homes (under 1,200 sq ft) typically pay $2,000 to $3,500 for standard repairs. Less square footage means shorter pipe runs and easier access.Medium homes (1,200 to 2,500 sq ft) average $2,500 to $5,000. The sweet spot for most repairs falls here.Large homes (over 2,500 sq ft) face bills from $3,500 to $8,000. More ground to cover means higher material and labor costs. You can read about: How to Detect Water Leak Under Concrete Slab How Much Are Slab Leak Repair Labor Costs? Labor makes up 40% to 60% of your total slab leak repair cost. Most plumbers charge $75 to $200 per hour. Specialized foundation work adds another $100 to $150 hourly. What Affects Labor Pricing Emergency calls cost more. After-hours service and weekend work can double your rate. A leak that can wait until Monday saves you money.Your location changes rates. Urban areas charge more than rural regions. California and New York see higher rates than the Midwest.Contractor expertise matters. Licensed plumbers with slab leak experience charge premium rates. Their efficiency often saves money long-term.Project complexity extends work time. Simple patches take 4 to 8 hours. Major reroutes need 16 to 24 hours spread across several days. Additional Labor Expenses Foundation specialists might join your plumber. They assess structural damage and handle concrete work. Budget $500 to $1,500 for their services.Flooring removal and replacement adds costs. Professionals charge $2 to $8 per square foot to remove flooring. Reinstallation runs $3 to $15 per square foot depending on material.Restoration work follows repairs. Drywall patching, painting, and cleaning add $300 to $1,000 to your bill. How Do You Prevent a Slab Leak? Prevention beats expensive repairs every time. Regular maintenance catches problems before they become disasters. Install a Pressure Regulator High water pressure kills pipes. A pressure regulator costs $150 to $350 installed. It protects your entire plumbing system and can prevent costly slab leaks repair needs down the road. Schedule Regular Inspections Professional plumbers should check your system every 2 to 3 years. They spot corrosion and weak points early. This service costs $100 to $200 but saves thousands. Monitor Your Water Quality Hard water accelerates pipe corrosion. A water softener costs $800 to $2,500 installed. It extends pipe life by removing minerals that cause buildup. Watch Your Water Bill Track monthly usage. Sudden spikes

how long do copper pipes last
Plumbing

How Long Do Copper Pipes Last: Complete Guide

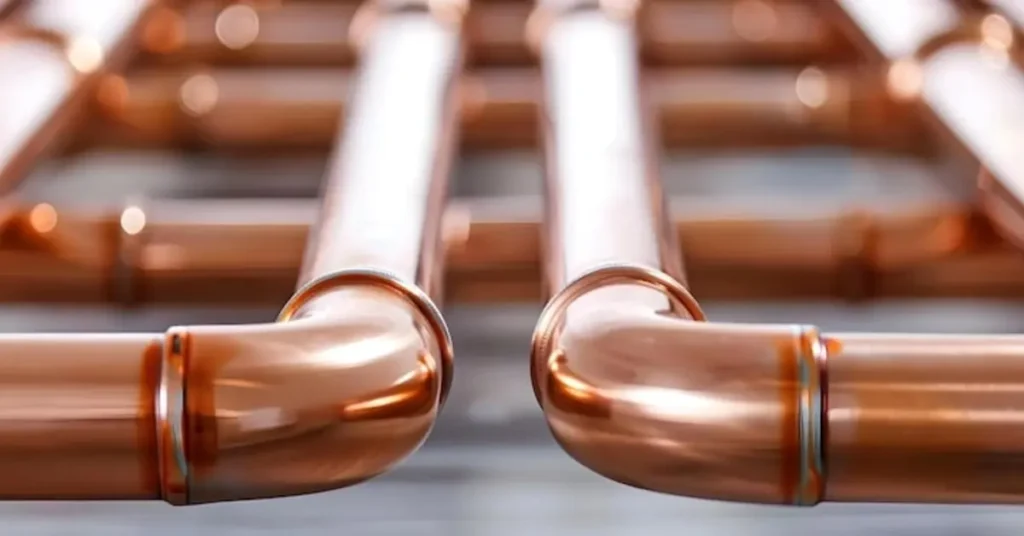
Copper pipes are a trusted choice for home plumbing systems. They’re strong, safe, and can handle both hot and cold water without breaking down. Many homes built in the last 50 years use copper for their water lines. So, how long do copper pipes last? Most copper pipes work well for 50 to 70 years with proper care. Some can even reach 100 years in the right conditions. The actual lifespan depends on water quality, installation, and maintenance habits. What is Copper Piping? Copper pipes are metal tubes that carry water through your home. They’ve been used in plumbing since the 1960s when they replaced galvanized steel pipes. Copper doesn’t rust like iron, and it stops bacteria from growing in your water supply. These pipes come in different thicknesses called types. Each type works best for certain jobs in your home’s plumbing system. Types of Copper Pipes Type K Copper Pipes Type K has the thickest walls. It’s the most durable option and often used underground or in commercial buildings. This type costs more but lasts the longest. Type L Copper Pipes Type L is the most common choice for homes. It has medium-thick walls that balance cost and strength. Most plumbers use Type L for both water supply lines and indoor plumbing. Type M Copper Pipes Type M has the thinnest walls. It’s cheaper but less durable than other types. Some areas don’t allow Type M for certain plumbing jobs because the walls can fail faster. How Long Do Copper Pipes Last? The copper piping lifespan ranges from 50 to 70 years on average. Many factors play into this timeline. Well-maintained systems in homes with good water quality often hit the 70-year mark or beyond.Hard water areas may see shorter lifespans. Pipes exposed to acidic water or high mineral content wear out faster. Installation quality also matters. Properly soldered joints and correct pipe placement help extend the life of copper pipe systems. Durability and Life Span of Copper Piping Copper is naturally resistant to corrosion. Unlike plastic or steel, copper forms a protective layer on its surface over time. This layer, called patina, helps shield the pipe from further damage.The lifespan of copper pipes depends on wall thickness too. Type K pipes with thicker walls last longer than Type M pipes. Underground pipes face more stress from soil conditions and may need replacement sooner than indoor pipes. Temperature swings affect durability. Pipes that carry hot water expand and contract more often. This movement can weaken joints over decades. Cold water pipes face less stress and typically outlast hot water lines. Factors That Affect the Lifespan of Copper Pipes Water Quality Water chemistry plays a huge role in how long copper pipes last. Acidic water with a pH below 7 eats away at copper over time. This process, called corrosion, creates tiny holes called pinhole leaks.Hard water contains high levels of calcium and magnesium. These minerals build up inside pipes and reduce water flow. While buildup doesn’t destroy copper as fast as acid, it causes other problems.Chlorine in city water can also affect copper. High chlorine levels speed up corrosion, especially in hot water lines. Well water often contains different minerals that may either protect or damage pipes. Installation Quality Poor installation cuts years off pipe life. Improper soldering creates weak joints that leak early. Using the wrong flux or failing to clean pipes before soldering leads to joint failure.Pipes need proper support. Loose pipes vibrate and stress the joints. Over time, this movement causes cracks and leaks. Professional installation with correct hangers and brackets prevents these issues.Mixing metals causes problems. When copper touches certain metals like galvanized steel, a reaction occurs. This electrochemical process, called galvanic corrosion, eats through the copper faster. Water Pressure High water pressure puts constant stress on pipes and joints. Most homes should have pressure between 40 and 80 PSI. Pressure above 80 PSI can damage copper pipes over time.Sudden pressure changes, called water hammer, create shock waves. These waves slam through pipes when you quickly shut off a faucet. Repeated water hammer weakens pipes and fittings.A pressure regulator protects your system. This device keeps pressure steady and prevents damage. Installing one adds years to your copper pipe lifespan. Temperature Fluctuations Hot water pipes expand when heated. Cold water makes them contract. This constant movement stresses the copper, especially at joints and bends.Freezing water causes major damage. When water freezes, it expands and can burst pipes. Even one freeze event can ruin a section of piping. Insulating pipes in cold areas prevents this problem.Extreme heat also causes issues. Water heaters set too high push very hot water through pipes. This accelerates the expansion and contraction cycle that wears out copper. Soil Conditions Underground pipes face unique challenges. Acidic soil eats through copper just like acidic water. Clay soils retain moisture and increase corrosion risk.Rocky soil can damage pipes through physical pressure. Shifting soil puts stress on pipes and joints. Professional plumbers use protective sleeves for underground copper installations.Soil with high salt content speeds up corrosion. Coastal areas often have this problem. Testing soil before installation helps predict how long copper piping will last underground. Signs Your Copper Pipes Are Wearing Out Visible Corrosion Green or blue stains on pipes signal corrosion. These stains show copper is breaking down. Small amounts aren’t an emergency, but widespread staining means trouble ahead.Flaking or pitting on pipe surfaces indicates advanced corrosion. You might see rough patches or thin spots. These are weak points where leaks will likely develop. Discolored Water Blue or green water comes from dissolved copper. This happens when pipes corrode and copper leaches into your water supply. While small amounts aren’t harmful, it shows your pipes are failing.Brown or rust-colored water suggests sediment buildup. This isn’t always a copper pipe problem, but it can signal issues in your plumbing system. Reduced Water Pressure Gradual pressure loss often means buildup inside pipes. Mineral deposits narrow the pipe opening and restrict flow. Severe buildup can reduce a

how to install a water heater
Plumbing

How to Install a Water Heater | Step-by-Step Guide

A water heater provides hot water for showers, laundry, dishes, and daily cleaning. When an old unit fails, replacing it can restore comfort and help prevent leaks. The right installation depends on your heater type, home setup, local building codes, and fuel source. A small mistake with gas, wiring, or venting can create serious safety risks. Learning How to Install a Water Heater starts with choosing a compatible unit, preparing the work area, and understanding the main connections. Some preparation is manageable for homeowners, but gas and electrical work may require a licensed plumber or electrician. How to Install a Water Heater: What to Know First Before buying a new unit, check your current heater and the needs of your household. A replacement should fit the space and provide enough hot water for daily use. Review these details before choosing a model: Fuel source: Check whether your current heater uses gas or electricity. Tank capacity: Choose a size that meets your household’s hot water demand. Available space: Measure the height, width, and service clearance around the unit. Connections: Check the water lines, power supply, gas line, and venting system. Energy use: Compare the energy ratings and expected running costs of suitable models. Local rules: Confirm permit, inspection, and safety requirements with your local building department. Replacing an old unit with a similar model may reduce the changes needed. However, the new heater must still meet current codes and manufacturer instructions. Switching from gas to electric, or electric to gas, often requires extra work. The home may need new wiring, gas connections, venting, or other changes. Check these needs before purchasing the unit. Tools and Materials Needed for Water Heater Installation The tools and supplies depend on your heater type and existing plumbing. Read the manufacturer’s installation manual before gathering materials. Common tools and supplies include: Adjustable wrenches and screwdrivers A tape measure and level A garden hose for draining the old tank Approved water connectors and fittings Sealant suitable for the connection type Safety glasses and work gloves A drain pan, where required The new heater’s installation manual Gas models may require approved gas fittings and vent parts. Electric models need wiring and circuit protection that match the unit’s rating. Do not choose parts based only on size or appearance. Check the material, pressure rating, and model instructions. If you are unsure which fittings to buy, ask a qualified installer before starting. How to Prepare for Water Heater Installation Good preparation can prevent delays, leaks, and damage. Clear the work area and keep children and pets away. Make sure the route for removing the old tank is free of obstacles. Find the cold water shut-off valve and identify the correct power breaker or gas shut-off. Never assume a circuit is safe just because a switch is off. Electrical work requires proper isolation and testing. Check whether a permit or inspection is needed. Local rules may cover drain pans, seismic straps, relief valves, venting, and access space. Requirements vary by location and heater type. Review the new unit’s instructions before disconnecting anything. If you cannot safely shut off the energy source, stop and call a professional. How to Remove an Old Water Heater Removing a heater involves hot water, pressure, and possibly gas or electricity. Follow the manufacturer’s instructions and do not proceed with connections you cannot handle safely. Shut off the energy source. Turn off the correct breaker for an electric heater. Follow the approved shutdown procedure for a gas model. If you smell gas, leave the building and contact the gas provider or emergency service from a safe location. Close the cold water supply. This prevents more water from entering the tank. Let the water cool. Hot water can cause serious burns. Do not drain a dangerously hot tank. Attach a garden hose. Connect it to the drain valve and direct the other end to a suitable drain. Open a hot water tap. This can help release pressure and allow the tank to drain. Drain the tank. Follow the instructions for your model. Do not force a blocked or damaged drain valve. Disconnect the unit. Gas lines and electrical wiring should be handled by qualified people when required. Never cut a gas line or pull on live wires. Move the old tank. Once it is empty and safely disconnected, remove it carefully. Even a drained tank can be heavy and awkward. If a valve will not close, a pipe is badly corroded, or a connection is stuck, stop. Forcing the part can cause flooding or other damage. How to Position the New Water Heater Place the new tank on a stable, level surface. Follow the required clearances in the installation manual. Keep the unit accessible for future checks and repairs. Install a drain pan if the model or local rules require one. Where needed, connect the pan to an approved drain. A pan can limit water damage, but it cannot prevent every leak. Secure the heater when required by local code or the manufacturer. This is especially important in areas where earthquakes can cause a tank to move. Before connecting pipes, confirm that the hot and cold ports match your home’s plumbing. Check that the temperature and pressure relief valve, often called the T&P valve, is installed correctly. Never block or cap the relief valve’s discharge pipe. This part helps protect the tank from unsafe pressure. Its pipe must follow the manufacturer’s instructions and local code. How to Connect the Water Supply Lines Most tank heaters have marked hot and cold connections. Connecting them incorrectly can stop the system from working as intended. Connect the cold supply to the marked inlet and the home’s hot water pipe to the outlet. Use approved connectors that match the heater and existing pipe material. Apply thread sealant only where the manufacturer allows it. Some fittings use washers or gaskets instead. The wrong sealant can damage a fitting or prevent a proper seal. Some plumbing systems need a thermal expansion tank or

how much to install tankless water heater
Plumbing

How Much to Install a Tankless Water Heater?

Have you ever considered how you could have the luxury of warm water when you want it without a giant tank hogging your space? Well, a tankless water heater may be right up your alley. With a tankless water heater, you get many benefits, such as its compact size, the lack of standby heat loss, and the assurance of a ready supply of hot water if the unit is properly sized. But there may be added costs. How much does it cost to put in a tankless water heater? You’ll spend between $2,000 and $5,500 (including installation) on average, so yes…you will save.  That‘s it! Or maybe not! Here’s an at-a-glance of how much you will end up paying for your installation including equipment, labor, and miscellaneous. And remember that your personal project may be more or less costly depending on the difficulty of the installation.  How Much Does a Tankless Water Heater Cost?  Getting straight to the point. What is the cost of a tankless water heater? The price for complete installation of a tankless water heater, including the unit, ranges from about $2,000 to $5,500 for typical installation. That’s the total cost and includes installation by a licensed professional. You’ll see some asking around $2,600, but the price can vary significantly based on the type of unit, fuel type, installation requirements, and your local labor costs.  Considering an electric model? These might be cheaper to purchase and more straightforward to install if your electrical panel can handle it. On the other hand, gas models might have a higher equipment price tag, partly because of the extra equipment for venting and adjustments to a gas line and the higher installation costs that come with them.  So, how much do you have to spend? Check out the table below to get a general idea of the US price range to start a planning list.   Expense  Estimated Cost  Electric tankless unit  300– 300– 1,500  Gas tankless unit  500– 500– 2,000+  Professional installation labor  500– 500– 2,000  Electrical or gas-line upgrades  300– 300– 1,500+  Venting and exhaust work  200– 200– 800  Permits and inspections  50– 50– 300  Typical complete installation  2,000– 2,000– 5,500  Ever debated why your installation price is so obnoxiously high? It might be because you require additional electrical wiring, long runs of plumbing, high-end equipment, or complicated venting. These are not all fixed prices, and yes, some of the costs may be duplicated.   You can read about: How to Install Tankless Water Heater What Factors Affect Tankless Water Heater Installation Cost?  Considering a tankless water heater? It’s more than the sticker price you find on the internet. Many other factors come into play when you’re thinking about the final cost your home’s existing plumbing, the size of the system, and the amount of work involved to make it all operate.   1. Type of Water Heater  Did you know? Electric tankless water heaters tend to be more budget-friendly compared to gas units. This option is perfect for households with less demanding water needs or just a single point of use, as long as your electrical system can support it. However, you may have to rewire if you’re installing an electric whole-house system.  Gas models are usually the better choice if you’ve got a bigger house or higher hot water demand. They supply a large quantity of hot water but may include other considerations such as the need for appropriately sized gas lines, approved venting, and meeting various safety standards. Also keep in mind the needs of gas storage and gas delivery systems if you plan on using a propane model.   2. Size and Hot-Water Demand  How much hot water do you really need? If you’re just a small household with one shower going at a time, then a smaller unit is right for you, but if you’re a big family with showers running all at once and the laundry, the hot tub, and the dishwasher going at the same time, then you’ll want to be looking at something larger. We know what flow rate in GPM you’ll need in your water heater to make things work smoothly; it’s what we do, and it depends on your incoming water temperature if it’s a really hot day or your area is a little more tropical.   3. Existing Plumbing and Utility Connections  Awesome, so all you need to do now is determine which model is appropriate for you. Conventional Storage Tank Your water connections, venting, and draining condensate will be dissimilar, and even where you can mount it is going to vary. And don’t forget your plumbing and shutoff valves. Outdated pipes will need a little love when you set them up, so keep that in mind before you buy a device to stay away from surprise costs.   Gas vs. Electric Tankless Water Heater: Which Is More Affordable?   A couple of questions about electric and gas systems? You’re not alone! There’s often a difference in initial cost, installation, and running cost. Electric or gas? Which is right for you? Well, it comes down to your home’s connecting utility, the demand of the household, and the energy rate in your area not just the purchase price.   Feature  Electric System  Gas System  Equipment price  Generally lower  Generally higher  Installation complexity  Low if electrical capacity is adequate  Often higher due to venting and gas connections  Electrical requirements  May require dedicated high-amperage circuits  Requires power for controls on many models  Venting  Usually unnecessary  Required for combustion exhaust  Best fit  Smaller demands or suitable electrical setups  Many whole-house, higher-demand applications  Running expenses  Depend on electricity rates and efficiency  Depend on gas prices and efficiency  Considering an upgrade to your heating? An electric system can be cheaper if your panel can carry it. But a major panel upgrade can eat away at those savings. Gas makes the most sense if you already have the right supply and venting.  So, which one should I choose? Ask a professional installer to calculate

Fast and Efficient Plumbing Services in Eagle Rock

Client Reviews

Posted on Google Google
Ryan Haden profile picture
Ryan Haden
Google star 1Google star 2Google star 3Google star 4Google star 5Trustindex verifies that the original source of the review is Google.
Could not have been happier with Alex! We was right on time, polite, fixed all my kitchen sink issues and have me good tips on how to best maintain. I will for sure be using him again and highly recommend anyone who needs a great plumber to use his services as well. Thank you!
Posted on Google Google
Lorena Marcoe profile picture
Lorena Marcoe
Google star 1Google star 2Google star 3Google star 4Google star 5Trustindex verifies that the original source of the review is Google.
Talk about a professional...yes, I am talking about Alex Derks, Derks Plumbing. He is by far the most knowledgeable plumber we have ever had the pleasure of hiring. He's been in the plumbing business for years and it shows. Any questions you have re: plumbing issues, install, etc., Alex is your man. So happy with his work and he has a great sense of humor as well... extremely easy to talk to...thank you Alex!!!
Posted on Google Google
Andrew Jalil profile picture
Andrew Jalil
Google star 1Google star 2Google star 3Google star 4Google star 5Trustindex verifies that the original source of the review is Google.
Alex did a great job installing my kitchen faucet and an under-sink Aquasana water filter. He also addressed a few other plumbing-related issues. He was friendly and helpful. Excellent work!
Posted on Google Google
Abigail Bigham profile picture
Abigail Bigham
Google star 1Google star 2Google star 3Google star 4Google star 5Trustindex verifies that the original source of the review is Google.
Alex does what other plumbers cannot do! He is our go to.
Posted on Google Google
Danielle Driver profile picture
Danielle Driver
Google star 1Google star 2Google star 3Google star 4Google star 5Trustindex verifies that the original source of the review is Google.
Alex is very friendly and responsive. What a pleasure to work with!
Posted on Google Google
Lawrence Isaacs profile picture
Lawrence Isaacs
Google star 1Google star 2Google star 3Google star 4Google star 5Trustindex verifies that the original source of the review is Google.
Very very happy with the work Alex did for us replacing the tanks in our Aquasana filtration system. From first contact over the phone through job completion Alex was a pleasure to work with. He explained what he was doing, and why, every step of the way, and made sure we understood what we needed to do to maintain the system. Strongly recommend Alex!
Posted on Google Google
Joey Aucoin profile picture
Joey Aucoin
Google star 1Google star 2Google star 3Google star 4Google star 5Trustindex verifies that the original source of the review is Google.
Alex Derks has been such a lifesaver for me. Anytime I'm in a pinch with the plumbing in my home, Alex is only a phone call away and I've only seen great results from his work. He's reliable, knowledgable, and entirely trustworthy. A must-have source when owning a home.
Posted on Google Google
Eric Gorman profile picture
Eric Gorman
Google star 1Google star 2Google star 3Google star 4Google star 5Trustindex verifies that the original source of the review is Google.
After working with dozens of plumbing services in the LA area, I can confidently say Derks is the best in the business. On time, reliable and capable of even the most difficult tasks, Derks goes above and beyond to make sure your water system is working correctly.
Posted on Google Google
Jason Gruenbaum profile picture
Jason Gruenbaum
Google star 1Google star 2Google star 3Google star 4Google star 5Trustindex verifies that the original source of the review is Google.
Excellent know-how and fast!! Reasonable pricing and super responsive!!
Posted on Google Google
Jonathan Hepfer profile picture
Jonathan Hepfer
Google star 1Google star 2Google star 3Google star 4Google star 5Trustindex verifies that the original source of the review is Google.
Alex is an expert plumber, and he always goes out of his way to educate me about how to prevent future issues. Highly recommended!

Derks Plumbing has been providing professional plumbing services to Eagle Rock residents for over 20 years. Our experience and strong reputation have allowed us to grow, and we are proud to serve customers in 15 nearby areas, including Venice, Santa Monica, Beverly Hills, and more.

Contact

Hours of Operation

Monday: Open 24 Hours
Tuesday: Open 24 Hours
Wednesday: Open 24 Hours
Thursday: Open 24 Hours
Friday: Open 24 Hours
Saturday: Open 24 Hours
Sunday: Open 24 Hours

© 2026 Created by Localpro1

Scroll to Top