We are Available 24/7

Plumbing

Why Does My Bathroom Sink Smell Like Sewer
Plumbing

Why Does My Bathroom Sink Smell Like Sewer? Possible Answers and Solutions

When you enter your bathroom and wonder why does my bathroom sink smell like sewer? And get frustrated? Then you are not alone. It is one of those stinky problems that many people face daily. Don’t worry, we are here to help you to find out why your sink stinks like a sewer and the things you can do to remove that foul odor very easily. What causes the smelly Bathroom Sink? That stinky smell is usually a sign that sewer gas like hydrogen sulfide is gaining access into your home through the house lines. Gross, right? It is not only bad smelling, but also a signal that your plumbing system is not working properly. Such exposure to sewer gases may cause different health issues like nausea, dizziness and discomfort. Now, how does it occur? Let’s find the causes behind this problem below Dry P-Trap The dried P-trap could be the reason behind the smell of the sewer. It is the U shape bent at the bottom of your sink usually meant to contain some water, which serves as sort of a seal to prevent sewer gases. When sink is not used for some time, these gases come out as smell due to the lack of water seal and cause your sink to smell like sewer. The Overflow Hole Gunk Do you recognize that small hole up towards the brim of your sink? It is the spot where the bacteria and soap scum accumulate and cause a sewer smell in the bathroom sink. Vent Problems in the Plumbing Your plumbing involves vents that release sewer gases outside of your house. When one of these vents gets clogged up by leaves or nest of birds it creates pressure which blows the smells back inside and hence your bathroom sinks bad. Leakages or Broken Seals Sometimes your old, damaged pipes may contain small cracks which cause gas release. You may not notice it, but your nose will surely. Problem with toilet Seals The wax seal under the toilet is the one that attaches the toilet to the sewer line and prevents gas leakages into the bathroom. Remember the damaged wax ring gives a way to sewer odor in bathroom. Issues in the Sewer Line In severe cases, when sewer lines get blocked or breaks may lead to a backup that causes the sewer smell in the entire bathroom. Easy Steps to Follow Before Calling a Plumber Run the water: Sometimes the P-trap gets dry after not using it for a long time and can be refilled by running water through the sink, Clean the overflow hole: Take a bottle brush and a drop of cleaner and scrub inside the hole, but not too hard. Make sure to do these cleaning regularly. Use baking soda and vinegar: Put half a cup of baking soda in the toilet after which you can pour half a cup of vinegar. Allow it to fizz for 10 minutes, afterward, wash down with hot water. Do visual checkups: Use flashlights to check the pipes under the sink to see whether there are signs of visible leaks such as puddles or wet areas, corrosion, or the odor of fungus. When to Call a Pro Despite following all possible steps and your sink smells like sewer constantly then go and call on a plumber. Constant sewer smell in the bathroom might indicate something more serious such as a clogged drain or leaking pipe, broken up vent, or even clogged main sewer line. Do not try to ignore it because sewer gases may be hazardous, particularly in the case of methane accumulation. If the smell won’t go away or you’re dealing with leaks or sewer issues, don’t wait contact our trusted team for fast and reliable emergency plumbing in Eagle Rock and surrounding areas. We’re here 24/7 to help. Final Thoughts Everyone can understand that having an odor like sewer gives the bathroom a bad smell, and you may be asking, why does my bathroom sink smell like sewer? Well, the most likely causes and solutions to that question are now revealed. It can be a dry P-trap, the problem in the venting, or simply a clog in the drain, but the important thing is a timely detection and understanding that when you should do it yourself or ask for help. A fresh smelling bathroom is not a big deal. In some simple, easy habits, you can also become able to wave the stink away and breathe easily once again.

how to install a window ac unit
Plumbing

How to Install a Window AC Unit: A Complete Step-by-Step Guide

Putting in a window air conditioner (AC) can be a simple and effective way to cool down a room without having to hire a professional. You can save time and money by setting up your window AC unit yourself if you have the right tools, plan ahead, and pay close attention to the details. In this detailed guide, we will show you how to install a window AC unit from start to finish, including how to fix problems and stay safe. Introduction to Window AC Units What is a Window AC Unit? A window AC unit is a small air conditioner that is made to fit right into the frame of a window. The mechanism cools the air inside a room and sends the heat outside. Most of the time, these units are cheaper and use less energy than central air conditioning systems. This makes them a popular choice for people who live in apartments or want to cool off individual rooms. Why Choose a Window AC Over Other Types of ACs? Window air conditioners are easy to set up, don’t need complicated piping, and can be taken out of the window when not in use. Also, compared to movable units or central air systems, they tend to use less energy to cool down small spaces. Tools and Materials You’ll Need Before you begin, gather the necessary tools and materials to ensure a smooth installation. Here’s a list of essential items you’ll need: Essential Tools for Installation Screwdriver: To secure the unit into the window frame. Measuring Tape: To measure the window dimensions and the AC unit. Drill: For drilling holes to secure the brackets. Level: To ensure the AC unit is straight and level in the window. Window Kit: This usually comes with the AC unit and helps fill any gaps. Weather Sealing Tape: To ensure the unit is properly insulated. Safety Equipment to Consider Gloves: For protecting your hands while handling the unit. Safety Goggles: To protect your eyes from dust or debris during installation. Ladder: If you’re installing the unit on a higher window. Preparing for Installation Measuring Your Window Space Get the exact measurements of the window where you want to put the AC unit before you buy or install one. It’s important to make sure that your window is big enough for the AC, even though most window AC units are made to fit normal window sizes. To avoid extra stress, make sure you also measure how much weight the window frame can hold. Checking the Electrical Requirements Ensure your window AC unit will be installed near a dedicated electrical outlet. Check the unit’s power requirements (usually listed on the label) to ensure that the outlet can provide the necessary voltage. Most window AC units require a 115V or 230V outlet. Step by Step Guide to Install Window AC Step 1: Unboxing and Inspecting the Window AC Unit First, carefully take your window AC unit out of its box. Make sure that all of the parts are included, such as the fitting kit and, if needed, the remote control. Check the unit for any flaws or damage. Before you start the download, it’s better to make sure there are no problems. Step 2: Setting Up the AC Unit on a Stable Surface Set the air conditioner down on a stable surface, like a table or a clean floor. Check to see if the unit is level and that nothing is blocking the movement. This step is very important for the AC unit to work well. Step 3: Assembling the Window Kit Most window AC units come with a kit that helps seal the space between the unit and the window frame. Usually, this kit comes with side walls and sealing strips. Follow the manufacturer’s directions for attaching the side panels to the unit. Step 4: Installing the AC Unit into the Window Take care to lift the AC unit and put it in the window frame. The unit should be put where the exhaust side faces the outside. Make sure the air conditioner is sitting flat on the window sill, and then use the clips or screws that came with it to hold it in place. Step 5: Sealing the Gaps and Ensuring Proper Insulation Once the unit is in place, fix any gaps around the window with the weather-sealing tape or foam strips that came with it. Having the right insulation keeps warm air out of the room, which makes your AC work better. Step 6: Plugging In and Testing the AC Unit Finally, connect the unit to a power source and turn it on. Check the cooling feature and listen for any strange sounds or problems. Make sure the unit is working at full speed and that nothing is blocking the movement. Troubleshooting Common Installation Issues AC Unit Not Fitting Properly? If your AC unit doesn’t fit right in the window, it might be because the measures are off or the window is too small. You could try adjusting the side pieces or adding more sealing tape to close the space. Unit Not Powering On? Check the electrical link again if the unit won’t turn on. Please check that the outlet works and that the unit is safely plugged in. Check the fuse or circuit breaker if the AC still won’t work. Air Leaks or Gaps Around the Unit? If your window AC unit has air leaks, it may not work as well. Make sure that all the gaps in the seal around the unit are covered with weatherproof tape or foam. Make sure the window is also firmly locked so that it can’t be opened or closed. Maintenance Tips After Installation Cleaning the AC Filters To keep the AC working at its best, clean the air filter on a regular basis. The filter can get clogged with dust and other particles, which stops movement and makes cooling less effective. The filter should be cleaned once a month or as directed by

How to Install a Garbage Disposal Unit
Plumbing

How to Install a Garbage Disposal Unit

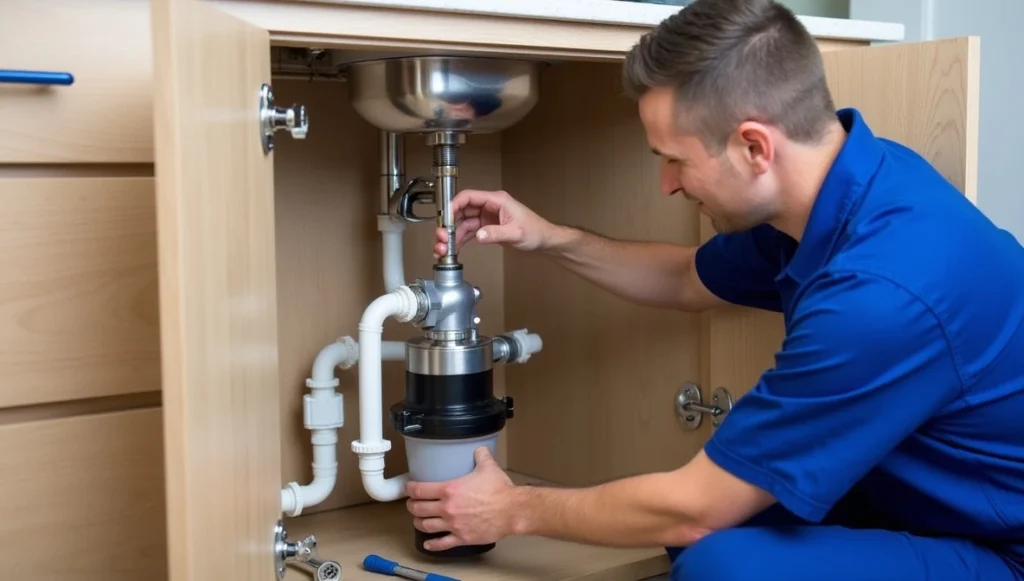
One of the most useful kitchen appliances you can add is a garbage disposal. It keeps your kitchen clean, cuts down on food waste, and keeps your plumbing from getting clogged. Putting in a garbage disposal may look like a job for a professional, but many homeowners can do it themselves with the right help. We’ll show you how to install a garbage disposal unit in this article, whether you’re replacing an old one or putting one in for the first time. Gathering the Tools and Materials Before you begin, make sure you have the following: Tools: Flat-head screwdriver Phillips screwdriver Adjustable wrench Plumber’s putty Hammer or mallet Bucket and towels Wire connectors Wire stripper (if connecting wiring manually) Materials: Garbage disposal unit Disposer flange and mounting ring Discharge tube Electrical cable (if not pre-wired) Dishwasher connector kit (if needed) Turning Off Power and Removing the Old Unit If you’re replacing an old garbage disposal, turn off the power at the circuit breaker first. If the old unit is a plug-in type, unplug it. If it’s hardwired, disconnect the wiring. Place a towel or bucket under the sink to catch any water that is still there. Then, if there are any, disconnect the drain pipes and the dishwasher hose. Grab the old garbage disposal with a wrench and carefully pull it out from under the sink. Loosen the mounting ring. Before you go any further, make sure you’re working in a dry area and that the power is off. Removing the Existing Sink Flange The sink flange is what connects the garbage disposal to the sink drain. You’ll need to take it off once the old unit is out of the way. Get under the sink and loosen the mounting assembly. Then, take out any screws or clamps that are holding it in place. Lift out the flange on the top of the sink and clean the sink opening really well. Before you put in the new unit, make sure there is no old plumber’s putty or dirt on the seal. If there is, the new unit might not fit properly and leak. Installing the New Sink Flange Make a rope out of a small amount of plumber’s putty and wrap it around the bottom of the new flange to install it. Place the flange over the drain hole in the sink’s top. Put the rubber gasket, backup ring, and mounting ring on from the bottom. Evenly tighten the screws to make a seal that won’t let water in. Get rid of any extra putty that comes out from around the flange. This part of the installation is necessary to keep leaks from happening again. Wiring the Garbage Disposal Unit If your new garbage disposal doesn’t have a power cord already attached, you’ll have to connect the wires by hand. First, take off the unit’s bottom electrical cover plate. There are hot (black), neutral (white), and ground (green or bare copper) wires inside. Take off about 0.5 inches of insulation from each wire, and then use wire connectors to make sure the wires are well-matched and connected. Put the cover plate back on and use a clamp to hold the cable in place. If your unit comes with a plug that is already wired in, all you have to do is plug it in when the time comes. Mounting the Disposal Under the Sink The new garbage disposal needs to be put in place now. Put the disposal in the mounting ring and make sure it lines up with the sink flange. Turn the garbage disposal counterclockwise until it locks firmly in place. It might need a wrench to be really tight and keep it from moving. Take your time with this step, because if you don’t do it right, vibrations and leaks could happen later. If you’re also connecting a dishwasher, now is the time to put the dishwasher drain hose into the disposal’s opening and clamp it down. Connecting the Discharge Tube Step two is to connect the drain tube to the disposal. This makes the disposal work with your drain system. Using the flange and gasket that come with the unit, connect the tube to the outlet on the disposal. Next, connect the tube’s other end to the P-trap or sink drain pipe. Tighten all of the connections with your wrench, but don’t do it too much or the plastic parts or threads will break. To avoid future drainage problems, it’s important to make sure that all of the connections are lined up correctly. Testing the Unit for Leaks and Performance When everything is ready, turn the power back on at the circuit breaker. Run cold water through the sink after you turn on the water. Then turn on the garbage disposal to see how it works. If you hear any strange sounds, like grinding or rattling, it could mean that something is not lined up right. Check for leaks around the flange, discharge tube, and drain pipe under the sink while the water is running. Your installation is done if everything stays dry and the garbage disposal works well. You can read about: How to Unjam a Garbage Disposal Avoiding Common Installation Mistakes When putting in a garbage disposal, a lot of people make a few common mistakes. People often make the mistake of not using plumber’s putty when they install the sink flange, which can cause leaks that are very annoying. Another mistake is not taking out the plug inside the disposal’s dishwasher inlet when connecting a dishwasher. This can make water back up or not drain properly. It’s also easy to damage parts and start leaks by overtightening the mounting ring or the plastic connections. When You Should Call a Professional It’s possible to install a garbage disposal on your own, but not everyone should do it. It might be best to call a professional if you don’t know how to work with electrical wiring, don’t have the right tools, or are putting

what to know about plumbing
Plumbing

What to Know About Plumbing: A Simple Guide for Homeowners

Plumbing is a part of those things which most average homeowners only think about when there is a problem. In the US 1 trillion gallons of water are wasted every year through plumbing leaks. That is the same as 40 million swimming pools. Many such leaks do not even require a professional. Being a new homeowner or simply wanting to be more self sufficient, basic information can help prevent wasting money and unnecessary worries. Are you Interested in learning something about plumbing, but not sure what to know about plumbing? Then You are in the right place. We will wade through the basics in a manner that is easily digestible, even when you have never even held a wrench in your life. Why Understanding Basic Plumbing Matters First you don’t have to hire a professional plumber to make sure that your home is in good condition. Some basic plumbing knowledge can make you confident enough to prevent major leaks and repair minor issues yourself. It is not about repairing, it is a proactive approach that highlights the importance of understanding of warning signs of plumbing issues that can prevent water damage, mold growth and roof touching utility costs. Plumbing Basics for Beginners The plumbing system of your house consists of two components: The in flow system of clean water, the water supply system. The drain system, which eliminates waste and dirty water. To know the basics of plumbing it is very important to be familiarized with the following sections Pipes: Distribute water to your house. Fixtures and faucets: Regulation of water. Valves: Close supply of water to various sections of the house. Drains and traps: Assist in the draining of waste and keeping the sewer gases down. These plumbing basics for beginners can assist you to detect the problem of specific section of plumbing and help you to troubleshoot and explain the issue easily when calling a plumber. Common Plumbing Problems and Their Solutions Most of the homeowners used to face a couple of plumbing issues such as Clogged pipes: Pipes get clogged usually when they get in contact with hair, grease and food particles resulting in poor and slow draining of water. Leaky faucets: These are the most common and frequently occurring problem of plumbing. The drip drop is not only driving you crazy but also a waste of water and money. It can be prevented by replacing a worn out washer or cartridge. Running toilets: This is often the result of a flapper that does not work well. It can be fixed easily just by replacing the flappers or filling valve. Poor water pressure: Low water pressure is frustrating, usually caused by mineral deposition and blockages in your plumbing system and can easily be fixed by using gauge. Sewer Line Backups: Foul odors, slow drains, and wastewater backing up into your home can be a sign of a sewer line blockage. It usually occurs due to the roots of trees and can be prevented by using root killers. Apparently, these problems are minor but when neglected, they can grow to be much larger ones. Essential Plumbing Tips for Homeowners There are some of the readily applicable plumbing tips for homeowners that may go a long way in preventing trouble Learn the location of your principal water shut-off valve. Within a short period of time, you can turn off the water in the event of some leak and avoid serious consequences. Do not flush anything that is non-flushable. Wet wipes and feminine products can block your piping, as well as apparently flushable wipes. Avoid frosting of the pipes. During winter, the faucets should be left dripping so that shower stream is emitted and the doors of the cabinets should be left open so that warm air atmosphere can flow. See under sinks regularly. Regular checking of sinks is necessary to Identify some leaks such as pools, corrosion, or mold. Remembering such minor features will help prolong the plumbing system and minimize the risk of a critical situation. Surprising Facts about Plumbing The history of plumbing is, surprisingly, rich and has quite interesting facts. To begin with, the term plumber was derived by the Latin term ‘plumbum’ which refers to lead as the main composition of the early pipes. It is very surprising to know that the first ever plumbing systems was observed in the ancient civilization of Egyptians more than four thousand years ago. Do you understand that a dripping faucet can waste more than three thousand gallons of water in a year? Which can be used to make small swimming pool. In 1963, Jockey Gordon Cooper got a makeshift plumbing system, put in space and discovered that even astronauts must have plumbing. These facts about plumbing reveal the significance and revolution of plumbing from using clay pipes to smart leak alarms in a modern house. When to Call a Professional There are some problems which need to be fixed by a plumber Sewage smell in your place of residence A burst pipe or a severe leakage No water by any means Serious drainage complications such as clogging of several outlets simultaneously Trying to repair them without the right tools or experience is when things take a bad turn. It never hurts to be safe than sorry. Need Professional Plumber? Contact Us or visit: Certified Plumbers in Eagle Rock Conclusion You should not fear learning what to know about plumbing. A basic plumbing knowledge and some preventive habits will help you to take care of the plumbing system of your home better. Whether you have learned plumbing basics for beginners or have followed several effective plumbing tips for homeowners, you are now much prepared to deal with most problems and when it is time to seek assistance. Who knows, you may even shock their friends the next time you have them over with some cool facts about plumbing.

how do i find a water leak in my house
Plumbing

How Do I Find a Water Leak in My House? A Complete Guide

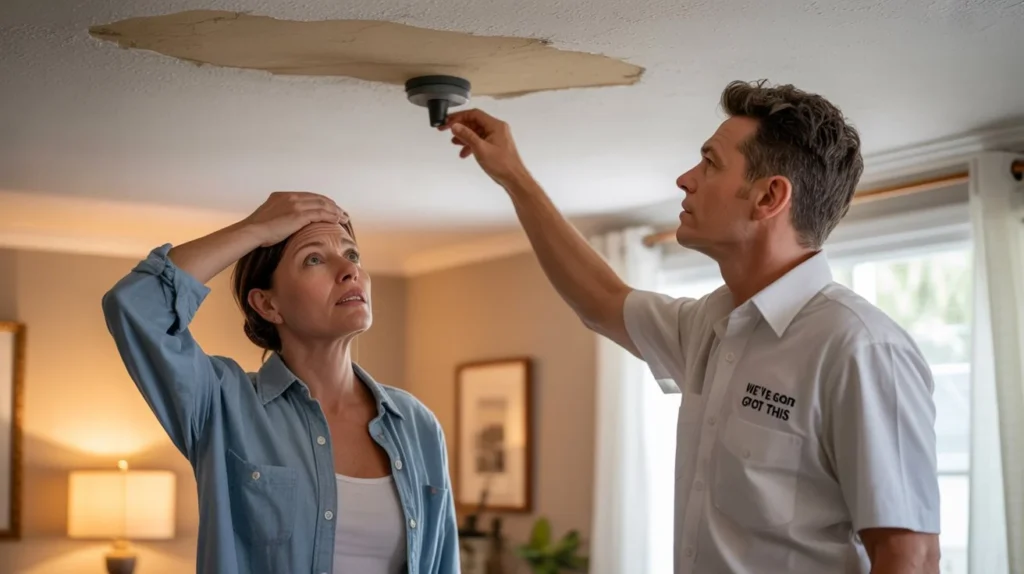
Imagine opening your water bill and seeing a number twice as high as usual but you haven’t changed your habits. Or noticing a mysterious damp spot on your ceiling that wasn’t there last week. Water leaks can be sneaky, often hiding behind walls, under floors, or in places you’d never think to check. Finding a leak early saves money, prevents damage, and protects your home. Let’s explore how do i find a water leak in my house, even you you’re not a plumber. Understanding Water Leaks: Why Early Detection Matters Water leaks waste over 10,000 gallons per household annually in the U.S. alone. Left unchecked, they can weaken your home’s structure, promote mold growth, and spike your water bill. The good news? Most leaks can be identified through simple checks that you can perform yourself. 1. Start with Your Water Meter: The Silent Leak Detective Your water meter is like a lie detector for your plumbing. Here’s how to use it: Turn off all water: Close every tap, shut off appliances like washing machines, and avoid flushing toilets. Locate the meter: It’s usually near the street or in a basement. Watch the dial: If the numbers keep climbing after 30 minutes, you likely have a hidden leak. Example: A family in Queensland noticed their meter ticking upward overnight. A plumber found a cracked pipe under their driveway saving them from a potential $8,800 bill. 2. Listen Closely: The Sound of Trouble Leaks often announce themselves with subtle noises: Hissing behind walls (like a quiet snake). Dripping when the house is silent (check under sinks at night). Running water when no taps are open2. Pro Tip: Use a stethoscope or a long screwdriver pressed against pipes to amplify sounds. 3. The Toilet Test: Food Coloring as Your Ally Toilets are leak champions, wasting up to 60,000 gallons monthly if ignored. Here’s a simple experiment: Add food coloring to the tank (10-15 drops). Wait 30 minutes without flushing. Check the bowl: If it’s colored, the flapper valve is leaking. Fix: Replace the flapper valve a $5 part that takes minutes to install. 4. When Your Water Bill Screams “Leak!” A sudden spike in your bill, like jumping from $250 to $8800, often signals hidden leaks. Compare bills month-to-month: Unexplained increase: Check for leaks even if you see no water. Steady rise: Could mean a slow leak in underground pipes. Case Study: A high-rise building’s $20,000 bill traced to a single leaking pipe behind a wall. 5. Visible Clues: What Your Walls and Floors Are Telling You Leaves stains, mold, or warping? Your home is waving red flags: Yellow/brown stains on ceilings or walls. Peeling paint or bubbling wallpaper. Musty smells in bathrooms (mold loves dampness). Action Step: Probe damp areas with a moisture meter (under $20 at hardware stores). 6. Hunting Hidden Leaks: Tools of the Trade Some leaks are ninjas hidden underground or inside walls. Professionals use: Thermal cameras: Spot temperature changes from water. Acoustic sensors: Hear leaks humans can’t. Tracer gas: Harmless gas that escapes through cracks, pinpointing leaks. Did You Know? Plumbers found a leak under a concrete slab using sound waves, avoiding costly demolition. 7. High Bill, No Leak? Check These Surprising Culprits If your meter isn’t moving and there’s no visible water: Faulty meter: Test by filling a 5-gallon bucket. If the meter shows more, it’s broken. Neighbor’s usage: Shared pipes might mean their leak affects you. Seasonal changes: Summer irrigation or winter pipe cracks Leak Detection Services in Los Angeles If you’re tired of chasing mysterious water stains, high bills, or that nagging drip you just can’t trace, it’s time to call in the experts. Our Leak Detection Services Los Angeles team uses cutting-edge technology like thermal imaging and acoustic sensors to find even the sneakiest hidden leaks without tearing up your walls or floors. We know how stressful water damage can be, so we treat your home with the same care we’d want for our own. Don’t wait for a small leak to become a big problem reach out today and let us give you peace of mind. Conclusion Finding leaks early is like fixing a small crack in a dam before it bursts. Regular checks monthly meter tests, annual toilet inspections can save thousands. When in doubt, call a pro: modern leak detection avoids messy digging FAQs: Your Leak Questions Answered Q: Can a leaking toilet really cost $60,000? A: Yes! A running toilet wastes up to 200 gallons daily that’s 6,000 gallons/month. Q: How do I check for leaks without tearing up floors? A: Plumbers use infrared cameras to “see” through walls. Q: My yard is soggy, but the meter isn’t moving. Why? A: It could be a sewer line leak or rainwater pooling. Call a specialist. Q: Are hidden leaks covered by insurance? A: Often yes, but policies vary. Document damage with photos. Q: Can smart devices help? A: Absolutely! Smart meters like Bluebot alert you to leaks in real-time.

Why is Sewer Line Replacement so Expensive?
Plumbing

Why is Sewer Line Replacement so Expensive?

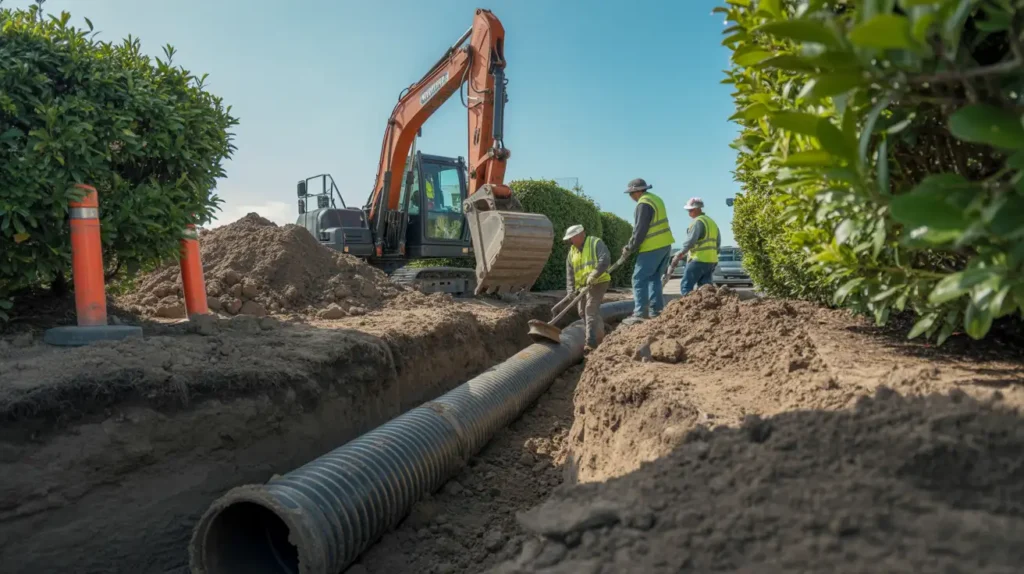
Wondering why is sewer line replacement so expensive? Sewer line replacement is expensive because it involves complex labor, specialized materials, and unpredictable challenges hidden underground. The average cost ranges from $1,390 to $25,000, depending on factors like pipe length, material, and repair method. Let’s explore why this essential home project often comes with a hefty price tag and how homeowners can navigate the costs Breaking Down the High Cost of Sewer Line Replacement 1. Labor-Intensive Excavation Drives Up Costs The Challenge of Digging Deep Replacing a sewer line isn’t as simple as fixing a leaky faucet. Plumbers must dig trenches to access pipes buried 3–6 feet underground. This requires heavy machinery like backhoes and skilled operators, which adds to labor expenses. For example, excavating a 50-foot line can cost $50–$200 per linear foot just for labor. Restoring Landscapes Adds Hidden Fees After replacing the pipe, your yard or driveway might look like a construction zone. Restoring grass, concrete, or pavement can cost $500–$5,000. One Denver homeowner spent $7,000 repairing their lawn after a traditional excavation. 2. Pipe Material Significantly Impacts Prices PVC vs. Cast Iron: A Cost Comparison PVC pipes: Affordable ($4.50 per foot) and corrosion-resistant but less durable. Cast iron pipes: Extremely durable but cost $50–$85 per foot. Older homes often have crumbling clay or orangeburg pipes, which require full replacement. Upgrading to modern materials like ABS or copper adds upfront costs but prevents frequent repairs. 3. Trenchless Methods Save Landscapes—But Not Money Pipe Lining and Bursting: Minimal Digging, Maximum Costs Trenchless methods avoid major excavation by relining old pipes with epoxy ($1,900–$6,000) or bursting them open to insert new ones. While these techniques protect your yard, they require advanced equipment and expertise, raising the new sewer line cost by 20–40%. 4. Permits and Regulations Add Red Tape Legal Requirements You Can’t Skip Most cities require permits for sewer work to ensure compliance with environmental and safety standards. For example, Shelby County charges $30–$200 for residential permits. Skipping permits risks fines or faulty installations that harm groundwater. 5. Surprise Problems Inflate Budgets Tree Roots, Leaks, and Hidden Damage Imagine starting a replacement only to find: Tree roots tangled in pipes ($300–$1,000 to remove). Collapsed sections requiring extra excavation. Soil contamination from leaks, needing hazardous cleanup. These surprises can turn a $5,000 project into a $15,000 ordeal. How to Reduce Sewer Line Replacement Costs Plan Ahead and Compare Options Get multiple quotes: Prices vary between contractors. A Derks Plumbing plumber might charge $5,000, while another offers trenchless for $8,000. Consider partial repairs: If only 10 feet are damaged, repair costs drop to $1,000–$2,500. Schedule off-season: Winter demand is lower, potentially reducing labor rates You can read about: Sewer Line Inspection Before Winter? Reliable Sewer Line Installation and Repair Los Angeles When it comes to sewer line issues, quick and professional service is essential to avoid costly damage and disruptions. Our expert team specializes in both sewer line installation and repair, using the latest techniques from traditional excavation to trenchless methods to ensure durable, long-lasting solutions tailored to your home’s needs. We understand that the sewer line cost and replacement services can feel overwhelming, which is why we provide clear, upfront pricing and personalized advice to help you make the best decision. Whether you’re facing frequent clogs, leaks, or aging pipes, we’re here to restore your system efficiently and affordably, with minimal disruption to your daily life. Conclusion While the cost to replace a sewer line feels overwhelming, delaying repairs risks sewage backups or foundation damage. By understanding material choices, labor demands, and trenchless alternatives, homeowners can make informed decisions. As Ryan Eten of Jolly Plumbing advises, “Proactive maintenance and honest quotes are key to avoiding budget shocks”. FAQs Q: How long does sewer line replacement take? A: Traditional excavation takes 2–5 days; trenchless methods finish in 1–2 days. Q: Can I repair instead of replacing? A: Yes! Small cracks can often be lined for $80–$250 per foot. Q: Why are permits necessary? A: They ensure work meets safety standards and prevent environmental harm. Q: Does insurance cover sewer replacement? A: Usually not, unless damage is from a covered peril like a storm.

how earthquakes can damage your plumbing
Plumbing

How Earthquakes Can Damage Your Plumbing

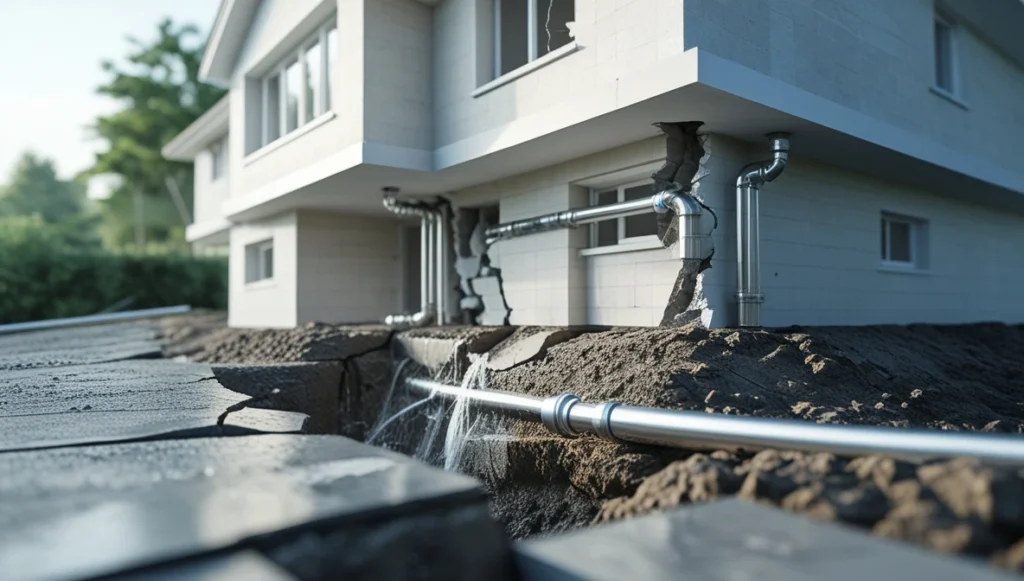
When the ground shakes during an earthquake, your home’s plumbing system faces invisible threats that can lead to leaks, bursts, and even health hazards. Earthquakes damage plumbing by shifting soil, cracking pipes, and stressing connections, problems that often remain hidden until water bills spike, mold grows, or dangerous gas leaks emerge. This guide breaks down how earthquakes can damage your plumbing, how seismic activity impacts pipes, how to spot trouble, and what you can do to protect your home. Why Earthquakes Threaten Your Plumbing System Earthquakes don’t just rattle dishes, they twist, pull, and compress the intricate network of pipes hidden in your walls and underground. Here’s how: Ground Shifting and Pressure Changes When the earth moves, soil layers shift unevenly, bending underground water and sewer lines. This can snap rigid pipes or loosen joints, especially in older systems not designed to flex. For example, a 1971 San Fernando earthquake caused underground gas lines to rupture due to soil movement, leading to fires. Modern homes in earthquake-prone areas often use flexible fittings to absorb these shifts, but older plumbing remains vulnerable. Old or Fragile Pipe Materials Cast iron, clay, or galvanized steel pipes common in mid-20th-century homes are brittle and prone to cracking under stress. During the 1994 Northridge earthquake, homes with outdated plumbing suffered more pipe breaks than those with copper or PVC pipes. Newer materials like PEX (cross-linked polyethylene) can stretch slightly during tremors, reducing rupture risks. Foundation Cracks and Structural Stress Earthquakes can shift your home’s foundation, misaligning pipes connected to sinks, toilets, or water heaters. Even a small crack in the foundation may strain pipe joints, leading to slow leaks. In Southern California, post-quake inspections often reveal leaks where pipes pass through slightly shifted walls. Common Signs of Earthquake-Related Plumbing Damage Don’t wait for a flood! Watch for these subtle red flags after a quake: Visible Water Leaks and Wet Spots Check under sinks, around toilets, and near your water heater for drips or puddles. A cracked pipe behind a wall might leave damp patches on drywall or warped flooring. Mold Growth or Musty Odors Hidden leaks create moist environments where mold thrives. If your bathroom smells like a damp basement days after a quake, investigate immediately. Reduced Water Pressure or No Water A sudden drop in pressure often signals a break in the main water line. After the 2019 Ridgecrest earthquakes, some homeowners reported muddy water or no flow due to cracked underground pipes. Strange Noises from Pipes Gurgling, banging, or hissing sounds after turning on faucets suggest air trapped in damaged pipes or debris blocking flow. Sewer Line Backups or Smells Sewer gases or wastewater pooling in drains indicate a broken underground line. Raw sewage backups pose serious health risks and require urgent repairs. Gas Leaks and Sulfuric Odors The rotten egg smell of natural gas means a line may have ruptured. Evacuate and call professionals gas leaks caused 60% of post-quake fires in the 1906 San Francisco disaster. You can read about: Role of Clean Out in Plumbing System Most Vulnerable Parts of Your Plumbing System Underground Sewer and Water Lines Buried pipes bear the brunt of soil shifts. A 2023 study in San Jose found that 78% of post-quake plumbing emergencies involved cracked sewer lines. Water Heaters and Connections Unstrapped water heaters can topple, snapping gas or water lines. California building codes now require earthquake straps, but older installations often lack them. Gas Lines and Valves Rigid gas pipes fracture more easily than flexible water lines. Earthquake-activated shut-off valves prevent leaks by cutting gas flow during tremors. Pipe Joints, Fittings, and Shut-Off Valves Threaded joints in older homes often loosen under vibration. After the 2014 Napa quake, 40% of pipe failures occurred at connection points. What to Do After an Earthquake Inspect for Leaks and Cracks Look for: Dripping pipes Cracks in exposed lines Warm spots on floors (sign of hot water leaks) Shut Off Water and Gas Lines If Needed Locate your main shut-off valves beforehand. Turn off gas if you smell sulfur; shut water if pipes burst to prevent flooding. Test Water Pressure and Drainage Run faucets and flush toilets. Slow drainage or sputtering taps suggest hidden blockages or breaks. Use Emergency Plumbing Services When Necessary Persistent leaks or gas odors require professional help. Companies like Lee’s Air & Plumbing offer 24/7 emergency response in seismic zones. Watch for Delayed Damage Symptoms Some cracks take weeks to leak. Monitor water bills a sudden spike often reveals hidden issues. Earthquake-Proofing Tips for Your Plumbing Install Flexible Pipe Fittings Replace rigid connectors with braided stainless steel or PEX lines. These materials bend, reducing rupture risks during tremors. Secure Your Water Heater Properly Use dual earthquake straps (top and bottom) to prevent tipping. California’s 2022 safety guidelines recommend straps rated for 40+ gallons. Know Where Your Shut-Off Valves Are Label main water and gas valves clearly. Practice turning them off during a quake, every second counts. Schedule a Plumbing Safety Inspection A pro can spot weak joints, outdated materials, and unsecured appliances. Many insurers offer discounts for seismic retrofits. Build an Emergency Plumbing Kit Include: Pipe tape for temporary leaks A wrench for shut-off valves A gas leak detector Fast and Reliable Emergency Plumbing When an earthquake hits, plumbing problems can turn from minor annoyances into major emergencies burst pipes, gas leaks, and flooding demand immediate attention. That’s why our team is here 24/7 to provide trusted Emergency Plumbing in Los Angeles. We understand how stressful post-quake damage can be, so we respond quickly with expert repairs to keep your home safe and dry. Whether it’s a hidden leak or a gas line issue, count on us to handle your plumbing crisis with care and speed, so you can focus on what matters most your family’s safety.

How Excessive Rain Can Affect Your Plumbing
Plumbing

How Excessive Rain Can Affect Your Plumbing: Prevent Backups & Damage

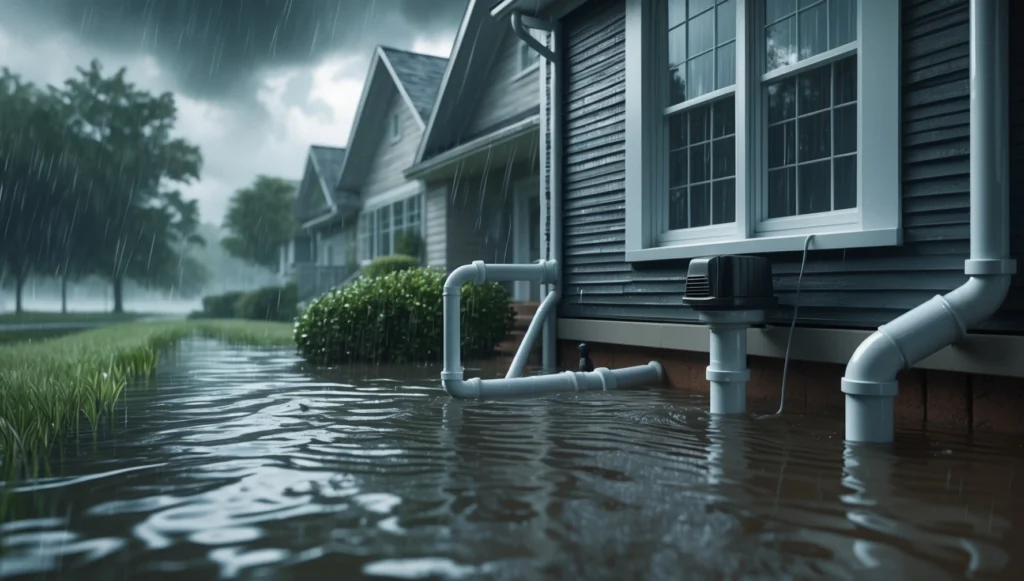
Thinking or facing issues about How excessive rain can affect your plumbing? Excessive rain can transform your home’s plumbing system from a reliable utility into a source of major headaches. From toilets refusing to flush to water mysteriously bubbling up from the ground, heavy rainfall exposes vulnerabilities in drainage, septic systems, and pipes. This happens because rainwater overloads sewer lines, saturates soil, and pushes groundwater into places it shouldn’t be leading to backups, overflows, and even structural damage. Understanding these risks and implementing preventive measures can save you from costly repairs and health hazards. Below, we explore how rain impacts plumbing, dive into specific issues like septic tank failures and drain backups, and provide actionable solutions to keep your systems running smoothly. How Heavy Rain Overwhelms Plumbing Systems Saturated Soil and Rising Groundwater When the ground becomes soaked after days of rain, it loses its ability to absorb more water. This saturation forces groundwater to rise, which can infiltrate cracks in pipes or seep into basements. Clay-heavy soil exacerbates the problem by slowing drainage, while sandy soil allows water to percolate faster but may still overwhelm systems during prolonged storms. As the water table climbs, pressure builds in underground pipes, increasing the risk of leaks or bursts. Sewer System Overload Municipal sewer systems are designed to handle average rainfall, but excessive rain can flood these networks. When stormwater and sewage mix a common scenario in older combined systems the excess volume has nowhere to go, causing backups into homes through toilets, sinks, and floor drains. This is why toilets often gurgle or fail to flush during heavy rain: sewage is trapped in overloaded pipes. Toilets Won’t Flush After Heavy Rain: Causes and Fixes Blocked Sewer Lines Debris like leaves, dirt, and grease often wash into sewer lines during storms, creating clogs that prevent toilets from flushing. Tree roots seeking moisture can also invade pipes, worsening blockages. If flushing your toilet results in slow drainage or no movement at all, a professional inspection is critical to locate and clear the obstruction. Preventative Measures Install a Backflow Preventer: Backflow Preventer device stops sewage from reversing into your home during overloads. Regular Drain Cleaning: Annual hydro-jetting removes buildup before storms hit. Gutter Maintenance: Clean gutters and downspouts direct rainwater away from your foundation, reducing pressure on sewer lines. If you’re dealing with a malfunctioning toilet, don’t worry  we’ve got you covered. Check out our Toilet Repair and installation Guide for step-by-step solutions and expert tips. Water Coming Up from Ground After Heavy Rain The Role of Soil and Water Tables When soil reaches its saturation point, rainwater pools on the surface or rises through capillary action a process where water climbs through tiny spaces in soil particles. In areas with high water tables, this can force groundwater upward, creating puddles in yards or basements. Homes in low-lying areas or near natural springs are especially prone to this issue. Solutions for Groundwater Intrusion French Drains: These underground channels redirect water away from your property. Sump Pumps: Install a pump in basements or crawl spaces to remove standing water. Land Grading: Sloping soil away from your home prevents water from pooling near the foundation. Can Heavy Rain Cause Sewer Backup? Yes. Combined sewer systems, which handle both wastewater and stormwater, are particularly vulnerable. When rain overwhelms these systems, sewage can flow backward into homes through drains. Signs include multiple drains backing up simultaneously, foul odors, and gurgling sounds from pipes. Mitigation Strategies Install a Check Valve: This one-way valve allows sewage to exit but blocks reverse flow. Avoid Flushing During Storms: Reduce strain on the system by postponing laundry or dishwashing. Washer Standpipe Overflowing: Why It Happens Clogged Drain Hoses and Standpipes Lint, detergent residue, and debris accumulate in washing machine drain hoses over time. During heavy rain, already stressed sewer lines struggle to handle additional wastewater, causing backups into the standpipe. If the standpipe is shorter than the recommended 34 inches, it’s more likely to overflow. Prevention Tips Monthly Hose Cleaning: Remove lint traps and flush hoses with hot water. Correct Standpipe Height: Ensure the pipe extends at least 34 inches above the floor. Drains Back Up When It Rains: Common Culprits Tree Root Intrusions and Damaged Pipes Roots infiltrate pipes through tiny cracks, growing into thick masses that trap debris. Heavy rain accelerates root growth, worsening blockages. Similarly, corroded or collapsed pipes restrict flow, causing backups. Solutions CCTV Inspections: Cameras identify root intrusions or pipe damage without excavation. Pipe Relining: A resin-coated liner seals cracks and restores flow without replacing pipes. Toilet Gurgling After Heavy Rain: Septic Tank Warnings Saturated Drain Fields Septic systems rely on drain fields to filter wastewater into the soil. During heavy rain, saturated soil can’t absorb more liquid, causing toilets to gurgle as air escapes through traps. If ignored, this can lead to sewage surfacing in your yard or basement. Protecting Your Septic System Reduce Water Usage: Postpone laundry and long showers during storms. Pump Regularly: Schedule septic tank pumping every 3–5 years to prevent overflow. Septic Issues When It Rains: Long-Term Fixes Drain Field Alternatives If your drain field frequently floods, consider installing a raised bed or mound system to elevate the filtration area above the water table. Regular Maintenance Avoid Parking on Drain Fields: Heavy vehicles compact soil, reducing absorption. Plant Grass Over Drain Fields: Roots stabilize soil and improve drainage Curious about the life expectancy of Septic System? Check out our blog on How long does a septic system lasts. Protect Your Home from Rain-Related Plumbing Disasters When heavy rain threatens your pipes, Plumbing services in Los Angeles offer fast solutions to keep your home safe. Our trusted team tackles clogged drains, sewer backups, and sump pump failures with 24/7 emergency because storms don’t wait. From installing backflow valves to emergency drain cleaning, we’re here to prevent messy overflows and costly water damage. Let us handle the stress so you can enjoy peace of mind, rain or shine. Conclusion: Proactive Plumbing Protection Excessive rain tests every component of your plumbing, from sewer lines to septic

what does a power flush do
Plumbing

What Does a Power Flush Do? A Complete Guide to Healthier Heating Systems

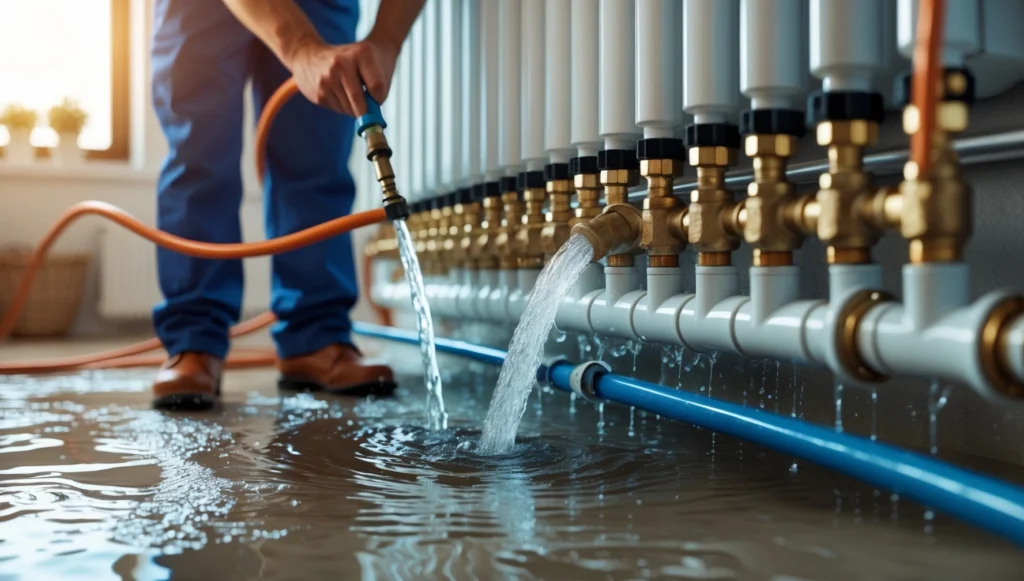
A power flush cleans your home’s central heating system by forcefully removing sludge, rust, and debris from pipes, radiators, and boilers. Think of it like a deep clean for your heating similar to how doctors clear clogged blood vessels to improve circulation. Over time, dirty water circulating through radiators and pipes leaves behind gunk that makes your system work harder, waste energy, and even break down. A power flush solves this by restoring efficiency, preventing costly repairs, and extending your heating system’s lifespan. This guide breaks down what does a power flush do, why it matters, and how it keeps your home warm without breaking the bank. How a Radiator Power Flush Works: The Science of Clean Pipes Step 1: Chemical Treatment to Loosen Sludge Engineers start by adding special chemicals to your central heating system. These cleaners dissolve stubborn sludge and rust that’s stuck to pipe walls and radiator interiors. Imagine pouring dish soap on a greasy pan the chemicals break down the grime so it can be washed away. Step 2: High-Pressure Water Circulation Next, a powerful machine pumps water through the system at high speed. This “power flush drain” step blasts loosened debris out of radiators and pipes. The water flows backward and forward to ensure every corner is cleaned, much like rinsing a muddy garden hose from both ends. Step 3: Magnetic Filtration for Tiny Particles Even after flushing, tiny metal particles can remain. Engineers use magnetic filters to trap these bits, preventing them from settling back into the system. It’s like using a sieve to catch leftover coffee grounds in your mug. Step 4: Adding Protective Chemicals Finally, a corrosion inhibitor is added to the clean water. This chemical coats the pipes and radiators, acting like a shield against future rust and sludge. When Do You Need a Central Heating Power Flush? Your heating system shows clear signs when it’s crying out for a power flush: Cold Radiator Patches: Sludge blocks hot water from reaching all parts of the radiator, leaving cold spots at the bottom. Strange Noises: Gurgling or clanking sounds mean debris is banging around inside pipes. Slow Heating: If your home takes forever to warm up, sludge is likely slowing water flow. Frequent Repairs: Boilers over 8–10 years old with recurring issues often need flushing to avoid breakdowns. Experts recommend a power flush every 5–10 years, or before installing a new boiler. Ignoring maintenance can cut your system’s lifespan in half. Benefits of a Central Heating Power Flush 1. Lower Energy Bills A clean system heats water faster, reducing gas use by up to 15%. For a typical UK household, this could save £100–£200 annually. 2. Warmer Home, Faster Radiators heat evenly after flushing, eliminating cold spots. One user reported their living room reaching 21°C in 10 minutes instead of 30 after a power flush. 3. Fewer Breakdowns Sludge is the #1 cause of boiler failures. Flushing removes this risk, saving £300–£500 on emergency repairs. 4. Longer Lifespan for Boilers Clean systems reduce wear and tear. Regular flushing can extend a boiler’s life by 5–8 years. Power Flush Cost: Is It Worth the Investment? Property Type Hours (Range) Cost (USD) Duration 2-bed flat 4–6 hours $400 – $570 1 day 3-bed house 8–10 hours $600 – $700 1 day 4-bed house 12–15 hours $650 – $1,000 1–2 days While DIY kits cost $150–$200, professionals recommend against them. Incorrect flushing can damage pipes or leave sludge behind, leading to leaks. Restore Your Heating System with Power Flush Services by Derks Plumbing If your radiators have cold spots, your boiler is making odd noises, or your heating bills are creeping up, it’s time to give your central heating a fresh start. At Derks Plumbing, our expert engineers use advanced equipment to deliver a thorough, mess-free power flush that removes stubborn sludge and restores warmth and efficiency to your home. Don’t wait for a breakdown. Book your Power flush services by Derks Plumbing today and enjoy a warmer, more reliable heating system all winter long. Conclusion Just like annual doctor visits keep you healthy, a central heating power flush keeps your radiators and boiler running smoothly. It’s a small investment that prevents sky-high energy bills, chilly rooms, and unexpected repair costs. Whether you’re a new homeowner or maintaining an older property, scheduling a power flush every 5–10 years ensures your heating system works smarter, not harder. FAQs related to What does a Power Flush Do 1. How long does a power flush take? Most jobs take 6–8 hours. Larger homes (4+ bedrooms) may need 2 days. 2. Will a power flush fix noisy radiators? Yes! Gurgling sounds usually disappear after flushing. 3. Can I power flush just one radiator? Partial flushes are possible, but whole-system cleaning is better for long-term health. 4. How messy is a power flush drain? Engineers use sealed hoses to direct dirty water outside. No indoor mess is created. 5. Do new boilers need a power flush? Yes. Installing a new boiler on a dirty system voids warranties and risks damage

how long do garbage disposals last
Plumbing

How Long Do Garbage Disposals Last? Expert Advice You Need

Essential appliances in many kitchens, garbage disposals help to cut food waste and maintain clear drains. Like other appliances, they are not immortal. How long do garbage disposals last? It depends on how well it is kept and how often it is used, a garbage disposal usually has a 10 to 15 year average lifetime. Knowing what factors are affecting a garbage disposal’s lifespan can help you to better maintain it and prevent expensive repairs or replacements. Factors Affecting the Lifespan of Garbage Disposals Your garbage disposal’s lifetime depends on a number of elements. A part is played by regular maintenance, use patterns, and unit quality as well as by Here is a closer view of the factors influencing garbage disposals’ lifetime: 1. Frequency of Use Daily users of garbage disposals will wear them out more quickly than those used sporadically. Regular use might over time cause the motor and grinding parts to deteriorate. Regularly disposing of a lot of food waste down the disposal could cut the general lifetime of the device. 2. Maintenance and Care The extended life of your garbage disposal depends on regular maintenance. Cleaning it and making sure food particles are not clogged will help to stop early breakdowns. Ignoring regular maintenance could cause your garbage disposal to need replacement far sooner than expected. 3. Quality of the Garbage Disposal Not every garbage disposal is designed equally. Generally speaking, high quality models outlast more reasonably priced ones. Premium disposals include better grinding components, stronger motors, and increased durability, which helps to explain their lifetime edge. How to Extend the Life of Your Garbage Disposal Your disposal will last as long as possible if you follow a few easy guidelines: Avoid Hard Materials: Never toss down your garbage disposal bones, fibrous veggies, or grease. These elements can ruin the motor and blades. Run Water Regularly: While using the disposal, always use cold water to assist avoid food from sticking and system clogging. Clean Your Disposal: To keep your disposal free of smells and obstructions, periodically clean it with vinegar or baking soda or use commercial cleaners especially made for garbage disposals. What Happens When Your Garbage Disposal Breaks Down? Garbage disposals can finally breakdown even with correct maintenance. You may find two typical choices when this occurs: replacement or repair of garbage disposal. The degree of the damage determines the option between the two. Garbage Disposal Repair Costs Depending on the problem, fixing a garbage disposal can cost somewhat different. Little issues like a clogged drain or jam could only cost between $50 and $150 to fix. Repairing more major problems like a damaged motor or bad wiring, however, might run upwards of $200. Sometimes it would be more affordable to replace the device totally than to fix it. When Should You Replace Your Garbage Disposal? Replacing your garbage disposal could eventually be less expensive than keeping it under repair. You should think about a replacement if your garbage disposal is more than ten years old and requires continual repairs. This is particularly true should the cost of replacing a garbage disposal be more than that of acquiring a new one. Cost of Replacing a Garbage Disposal For basic models, replacing garbage disposal ranges from roughly $150 to $400, for professional-grade machines, the cost can be considerably more. An additional $100 to $200 can be added to the overall cost by installation charges. Replacing a waste disposal could therefore be an expense, but it guarantees that your kitchen continues to operate without problems. Signs That You Need to Replace Your Garbage Disposal If you’re unsure whether it’s time to repair or replace your garbage disposal, here are a few warning signs: Persistent Clogs: It could be time to replace your disposal if it routinely clogs or drains improperly. Unusual Noises: Should your disposal produce loud grinding or buzzing noises, this could point to a motor issue needing a repair. Leaks: Any indications of water leaking around the disposal’s base point to the unit’s malfunction and need for replacement. Conclusion Maintaining your kitchen appliances and preventing un-needed repairs depend on knowing how long garbage disposers endure. Knowing the lifetime of trash disposals will help you to maintain them and recognize when it is time to replace or fix your device. Mindful use and regular maintenance will ensure your garbage disposal runs for many years to come. Knowing the cost of fixing trash disposal and replacing garbage disposal will also help you make a wise selection if you do need repairs or replacements. Need a new garbage disposal installed or your current one repaired? Our expert team offers fast, reliable, and affordable installation and repair services to keep your kitchen running smoothly. FAQs How long do garbage disposals last? With correct maintenance, most waste disposals run between 10 and 15 years. The longevity relies on use, maintenance, and unit quality. What factors affect the lifespan of a garbage disposal? How often a garbage disposal is used, the care it gets, and the unit’s quality itself all influence its lifespan. How much does it cost to replace a garbage disposal? For the equipment itself, replacing a garbage disposal costs $150 to $400; installation charges add another $100 to $200. How can I maintain my garbage disposal? Run cold water during use, avoid throwing hard items like bones or grease down your disposal, and routinely clean it to help to extend its lifetime. What is the cost of fixing a garbage disposal? The degree of the issue will determine whether fixing a garbage disposal costs somewhere between $50 and $200. How do I know when it’s time to replace my garbage disposal? It may be time to replace your garbage disposal if it shows severe damage, routinely breaks down, or is more than ten years old.

Fast and Efficient Plumbing Services in Eagle Rock

Client Reviews

Posted on Google Google
Ryan Haden profile picture
Ryan Haden
Google star 1Google star 2Google star 3Google star 4Google star 5Trustindex verifies that the original source of the review is Google.
Could not have been happier with Alex! We was right on time, polite, fixed all my kitchen sink issues and have me good tips on how to best maintain. I will for sure be using him again and highly recommend anyone who needs a great plumber to use his services as well. Thank you!
Posted on Google Google
Lorena Marcoe profile picture
Lorena Marcoe
Google star 1Google star 2Google star 3Google star 4Google star 5Trustindex verifies that the original source of the review is Google.
Talk about a professional...yes, I am talking about Alex Derks, Derks Plumbing. He is by far the most knowledgeable plumber we have ever had the pleasure of hiring. He's been in the plumbing business for years and it shows. Any questions you have re: plumbing issues, install, etc., Alex is your man. So happy with his work and he has a great sense of humor as well... extremely easy to talk to...thank you Alex!!!
Posted on Google Google
Andrew Jalil profile picture
Andrew Jalil
Google star 1Google star 2Google star 3Google star 4Google star 5Trustindex verifies that the original source of the review is Google.
Alex did a great job installing my kitchen faucet and an under-sink Aquasana water filter. He also addressed a few other plumbing-related issues. He was friendly and helpful. Excellent work!
Posted on Google Google
Abigail Bigham profile picture
Abigail Bigham
Google star 1Google star 2Google star 3Google star 4Google star 5Trustindex verifies that the original source of the review is Google.
Alex does what other plumbers cannot do! He is our go to.
Posted on Google Google
Danielle Driver profile picture
Danielle Driver
Google star 1Google star 2Google star 3Google star 4Google star 5Trustindex verifies that the original source of the review is Google.
Alex is very friendly and responsive. What a pleasure to work with!
Posted on Google Google
Lawrence Isaacs profile picture
Lawrence Isaacs
Google star 1Google star 2Google star 3Google star 4Google star 5Trustindex verifies that the original source of the review is Google.
Very very happy with the work Alex did for us replacing the tanks in our Aquasana filtration system. From first contact over the phone through job completion Alex was a pleasure to work with. He explained what he was doing, and why, every step of the way, and made sure we understood what we needed to do to maintain the system. Strongly recommend Alex!
Posted on Google Google
Joey Aucoin profile picture
Joey Aucoin
Google star 1Google star 2Google star 3Google star 4Google star 5Trustindex verifies that the original source of the review is Google.
Alex Derks has been such a lifesaver for me. Anytime I'm in a pinch with the plumbing in my home, Alex is only a phone call away and I've only seen great results from his work. He's reliable, knowledgable, and entirely trustworthy. A must-have source when owning a home.
Posted on Google Google
Eric Gorman profile picture
Eric Gorman
Google star 1Google star 2Google star 3Google star 4Google star 5Trustindex verifies that the original source of the review is Google.
After working with dozens of plumbing services in the LA area, I can confidently say Derks is the best in the business. On time, reliable and capable of even the most difficult tasks, Derks goes above and beyond to make sure your water system is working correctly.
Posted on Google Google
Jason Gruenbaum profile picture
Jason Gruenbaum
Google star 1Google star 2Google star 3Google star 4Google star 5Trustindex verifies that the original source of the review is Google.
Excellent know-how and fast!! Reasonable pricing and super responsive!!
Posted on Google Google
Jonathan Hepfer profile picture
Jonathan Hepfer
Google star 1Google star 2Google star 3Google star 4Google star 5Trustindex verifies that the original source of the review is Google.
Alex is an expert plumber, and he always goes out of his way to educate me about how to prevent future issues. Highly recommended!

Derks Plumbing has been providing professional plumbing services to Eagle Rock residents for over 20 years. Our experience and strong reputation have allowed us to grow, and we are proud to serve customers in 15 nearby areas, including Venice, Santa Monica, Beverly Hills, and more.

Contact

Hours of Operation

Monday: Open 24 Hours
Tuesday: Open 24 Hours
Wednesday: Open 24 Hours
Thursday: Open 24 Hours
Friday: Open 24 Hours
Saturday: Open 24 Hours
Sunday: Open 24 Hours

© 2026 Created by Localpro1

Scroll to Top