We are Available 24/7

Plumbing

how much to install a toilet
Plumbing

How Much Does It Cost to Install a Toilet? Price and Installation Guide

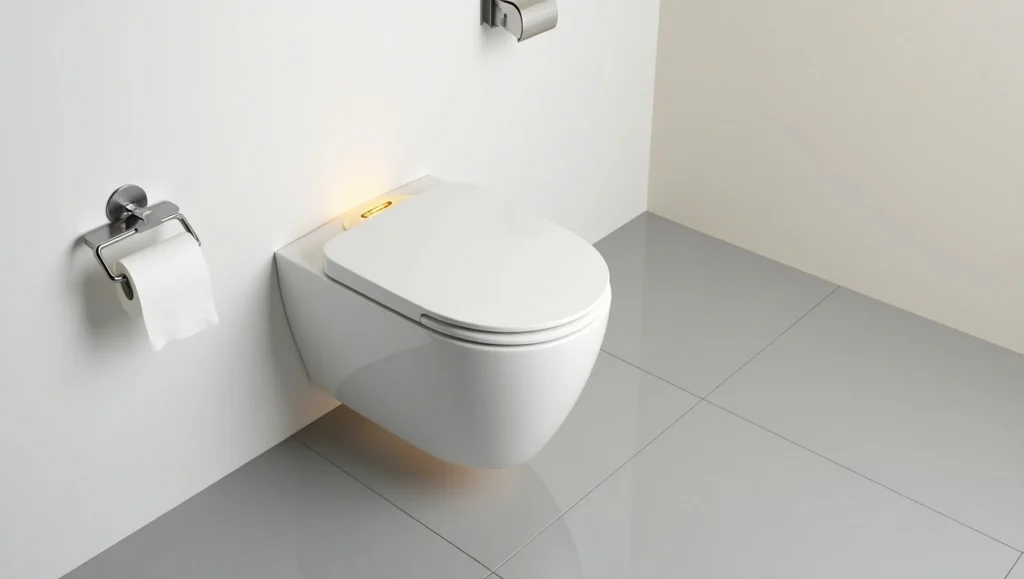
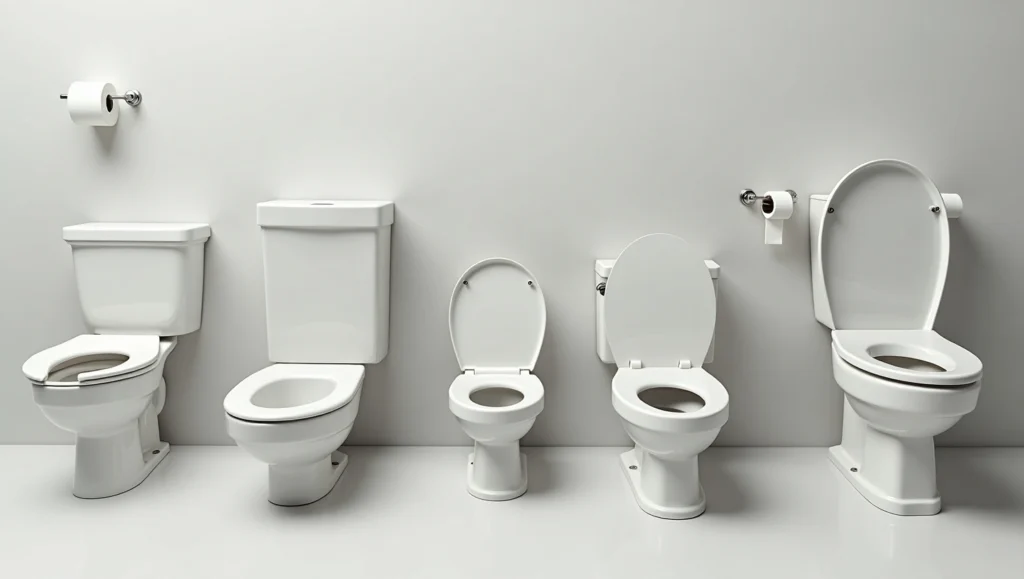
Curious about how much to install a toilet? Here is the Answer! Installing a toilet typically costs between $350 and $800, including the price of the toilet and labor. However, prices can rise to $2,500+ for high-end models or complex installations. This guide explores the key factors that influence toilet installation price, toilet replacement cost and compares different toilet types, and provides tips for budgeting effectively. Key Factors Affecting Toilet Installation Costs 1. Toilet Type and Material Costs The style and features of your toilet significantly impact the total cost to install toilet. Basic two-piece models start at $100–$500 for the unit, while wall-mounted or smart toilets require more labor and materials. For example, wall-mounted toilets often need structural adjustments, raising installation costs to $600–$2,400. Smart toilets with heated seats or self-cleaning functions can exceed $2,500 when installed. Low-flow and dual-flush toilets are mid-range options ($250–$1,500 installed) that save water and reduce utility bills over time. These models balance affordability and efficiency, making them popular for eco-conscious homeowners. Toilet Installation Price Table Toilet Type Toilet Unit Price Labor Cost Total Installation Price Range Notes Basic Two-Piece $100 – $500 $150 – $350 $250 – $850 Most common, easy to install One-Piece Toilet $200 – $800 $200 – $400 $400 – $1,200 Sleeker design, heavier to install Wall-Mounted Toilet $300 – $1,200 $300 – $1,200 $600 – $2,400+ Requires extra plumbing and framing work Smart Toilet $500 – $2,000+ $300 – $500+ $800 – $2,500+ Advanced features, higher labor Low-Flow/Dual-Flush $150 – $700 $150 – $350 $300 – $1,050 Water-saving, popular for efficiency 2. Labor Expenses and Regional Variations Plumbers typically charge $150–$450 for standard installations, but rates vary by location. Urban areas often have higher labor costs due to increased demand and living expenses. For instance, replacing a toilet in a ground-floor bathroom might cost $350, while upper-floor installations could add $75–$200 for plumbing adjustments. Complex jobs, like repairing broken pipes or reinforcing floors for heavy one-piece toilets, may require additional labor hours. Always request a detailed quote to avoid surprises. 3. Hidden Costs and Necessary Repairs Many homeowners overlook minor repairs that add to the total cost. Replacing a wax ring ($5–$20) or fixing a damaged flange ($50–$200) are common during installations. Older homes might need pipe upgrades or new shutoff valves, adding $100–$300 to the project. Removing and disposing of an old toilet also costs $75+, especially if it’s cracked or stuck to the floor. Discuss these potential expenses with your plumber beforehand. DIY vs. Professional Installation: Risks and Rewards While DIY installations save $150–$450 in labor, they risk leaks or improper sealing. Toilets require precise alignment with the sewer line, and even small mistakes can lead to water damage or mold growth. Licensed plumbers guarantee secure fittings and compliance with local building codes, which is crucial for resale value. Installing a toilet might seem like a tough job, but with the right tools and clear steps, it can be a simple DIY project. In this guide, we’ll walk you through how to install a toilet. How to Reduce Toilet Installation Costs Compare Multiple Quotes Get estimates from 3–4 licensed plumbers to find competitive rates. Check reviews to ensure quality workmanship. Choose Mid-Range Models Water-efficient toilets ($250–$950 installed) offer long-term savings without high upfront costs. Schedule Off-Peak Plumbers may offer discounts during slower seasons, like late winter. Professional Toilet Installation Services You Can Trust Wondering how much to install a toilet and want the job done right the first time? Our expert team offers reliable toilet installation & repair services that take the stress out of upgrading your bathroom. Whether you’re replacing an old unit or installing a brand-new model, we handle every step with care, precision, and affordable pricing. Skip the guesswork and potential leaks trust our skilled plumbers to deliver fast, clean, and lasting results that fit your budget and schedule. Reach out today and experience hassle-free toilet installation backed by quality and professionalism. Conclusion Toilet installation costs depend on your chosen model, plumbing complexity, and regional labor rates. Investing in a licensed plumber ensures durability and prevents costly repairs. For budget-friendly options, consider water-efficient designs or mid-range two-piece toilets. Always factor in potential hidden fees, and request itemized quotes to stay informed. By understanding these factors, you can transform your bathroom efficiently and avoid financial pitfalls. FAQS about How much to install a toilet 1. How much does it cost to install a toilet? The typical cost to install a toilet ranges from $400 to $1,300, depending on the toilet type, labor rates, and any additional plumbing work required. 2. What factors affect the toilet installation price? Key factors include the type of toilet (one-piece, two-piece, wall-mounted), local labor costs, whether plumbing needs to be moved or upgraded, and if old fixtures need to be removed. 3. Is it cheaper to replace a toilet than to install a new one? Replacing an existing toilet is usually less expensive, especially if the new toilet is similar in size and style. Costs can range from $220 to $900 for standard replacements. 4. Can I install a toilet myself to save money? Yes, DIY installation is possible for those with basic plumbing skills and the right tools. This can save $200–$400 in labor, but improper installation can lead to leaks or water damage. 5. How long does toilet installation take? A standard toilet installation typically takes 2–4 hours. More complex jobs, like moving plumbing lines, may take a full day or longer. 6. Are there extra charges I should expect? Possible extra charges include old toilet removal, plumbing modifications, weekend or emergency service fees, and costs for replacing supply lines or wax rings. 7. Do I need a permit to install or replace a toilet? Most simple replacements do not require a permit, but moving plumbing or making significant changes may require one. Always check your local building codes. 8. What is included in a professional toilet installation service? Professional services usually include removing the old toilet, installing the new one, connecting water supply lines, testing for leaks, and cleaning up the work area. 9. How often should I replace my
can you put bleach in toilet tank
Plumbing

Can You Put Bleach in Toilet Tank?

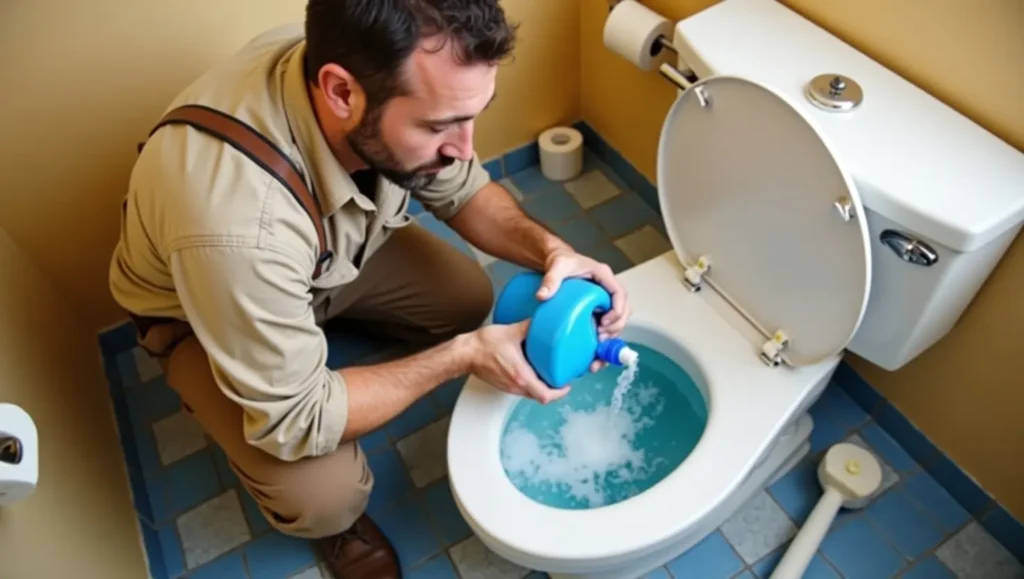
Can you put bleach in toilet tank? It’s a common question among homeowners looking for an easy way to keep their toilets clean. At first look, bleach appears to be the ideal solution it disinfects, removes odors, and provides a brilliant white finish. However, when it comes to your toilet tank, the solution is not as simple as you may believe. Using bleach in the toilet tank can be more harmful than beneficial. While bleach is effective at eliminating bacteria and clearing stains, it is not necessarily the safest option for your toilet’s interior components. The toilet tank is more than simply a water reservoir; it houses crucial components such as the flapper, fill valve and seals. Regular exposure to bleach may cause these parts to wear down prematurely, resulting in leaks and malfunctions. If you’ve ever thrown liquid bleach into your toilet tank in the hopes of finding a low-maintenance cleaning option, you’re not alone. It appears to be a simple trick: throw in the bleach, walk away, and enjoy cleaner toilets with each flush. Unfortunately, bleach is a caustic chemical. When it sits in the tank for an extended period of time, the rubber and plastic components disintegrate. Let’s look at why dumping bleach directly into the toilet tank might not be the best option, as well as safer alternatives for keeping your toilet clean. What Happens When You Add Bleach to the Toilet Tank? The principle behind using bleach in the toilet tank is straight forward constant disinfection and cleaning. However, most toilet makers advise against it. What’s the reason? Most toilet tanks have metal bolts, rubber gaskets, and plastic float arms. Bleach is corrosive. Rubber seals can degrade over time, plastic parts might split, and metal parts can corrode. When such components deteriorate, your toilet may start running continually or develop slow leaks. You may not notice any damage immediately away, particularly if you just use bleach on occasion. However, even minor exposure might have long-term consequences. The consequences could include higher water bills, weird noises from the tank, or puddles accumulating around the base of your toilet. So, while bleach does clean and disinfect, it is not necessarily the ideal option for the tank itself. Is There a Safer Way to Use Bleach in the Toilet? If you insist on using liquid bleach for toilet cleaning, the bowl, not the tank, is the ideal place to store it. Pour about a half-cup bleach into the toilet bowl and allow it to sit for 10-15 minutes. Scrub with a toilet brush and flush. This procedure disinfects and eliminates stains without exposing the toilet’s internal components to the corrosive effects of bleach. Another safe method is to extensively dilute bleach before using it in the tank. Adding only a modest amount (say, a teaspoon or two) to a gallon of water can lessen the likelihood of injury. Even so, most manufacturers advocate avoiding bleach in the tank. There are other bleach-based toilet cleaning tablets on the market, but exercise caution. Many of these tablets are intended for the bowl rather than the tank. When placed in the tank, they may slowly dissolve and coat the internal components with bleach residue, resulting in damage over time. Better Alternatives to Bleach for Toilet Tank Cleaning If you’re wondering how to clean a toilet tank without using harsh chemicals, don’t worry; there are gentler and safer alternatives. White vinegar is one of the most commonly recommended alternatives. It’s slightly acidic, which helps dissolve mineral buildup and mildew, but moderate enough not to corrode toilet components. You can add white vinegar to the tank and leave it for a few hours before flushing it. Baking soda is another viable alternative. It has natural deodorizing and cleansing properties, and when combined with vinegar, it produces a fizzy cleaning reaction that helps brush away filth. For normal maintenance, pour a cup of vinegar to the tank once a month to avoid buildup and odors without causing damage to the equipment. Hydrogen peroxide is a non-corrosive disinfectant that is suitable for most toilet components. It is frequently used as a bleach substitute, providing comparable cleaning strength without the same amount of harshness. Why Toilet Tank Maintenance Matters The toilet tank is easy to ignore because it is hidden, but maintaining it clean and functional is critical to your toilet’s overall efficiency. Mineral accumulation, mold, and mildew can accumulate in the tank over time. If left untreated, they can enter the bowl and disrupt the toilet’s flushing mechanism. Many homeowners only think about the bowl when cleaning their toilets, but the tank has a significant impact on how efficiently their toilet operates. A dirty or damaged tank can result in ghost flushing, water waste, or an unexpected leak. So, while it may seem like a good idea to just put bleach in there and be done with it, long-term upkeep necessitates a softer approach. Manufacturer Warnings and Guidelines It’s worth mentioning that most toilet manufacturers maintenance guidelines specifically state that bleach should not be used in the toilet tank. Doing so may void your warranty. They frequently recommend mild soap, diluted vinegar, or specialty toilet cleaners that are specifically designed to avoid damaging the tank components. Even bleach-based cleansers should be used carefully and in accordance with the manufacturer’s instructions. What appears to be an innocuous cleaning shortcut may result in pricey repairs or replacement parts in the future. What About Hard Water Stains? If you’re looking to remove hard water stains or rust from your toilet tank, bleach may not be the greatest option. It does not dissolve calcium or lime very well. Instead, a cleaner designed for hard water, or natural alternatives such as vinegar, can perform better with fewer negative effects. You can also prevent mineral deposits by flushing your tank on a regular basis and, if your plumbing system allows it, utilizing water softeners on occasion. Professional Help When Needed If you’re confused about what’s safe for your toilet tank

can you flush the toilet when the power is out
Plumbing

Can You Flush the Toilet When the Power Is Out?

When the power goes out, your first thought might be about flashlights or keeping your phone charged. But then reality hits: can you flush the toilet when the power is out? The short answer is yes in most cases. But the long answer depends on the type of toilet system you have, your water source, and how prepared you are. In this guide, we’ll cover: Whether toilets use electricity How many times you can flush without power What types of toilets work in an outage How to flush manually Emergency tips for staying ready Do Toilets Use Electricity? Most standard residential toilets do not use electricity. These gravity-fed systems rely on water pressure and a mechanical handle. When you flush, water in the tank flows into the bowl, using gravity to carry waste through the pipes no power required. However, there are exceptions: Smart toilets with automatic flushing or bidets Pressure-assisted toilets with electric pumps Upflush or macerating toilets in basements Toilets connected to well water systems Multi-story buildings with electric water pumps If you have one of these, your toilet might stop working during a power outage. How Many Times Can You Flush the Toilet Without Power? If you have a gravity-fed toilet, you get at least one free flush per tank. That’s because the tank already holds water ready for the next use. After that, it depends on your water source: City Water: You may continue to flush as long as water pressure is maintained. Well Water: The electric pump won’t run, so once your pressure tank is empty, you’ll need to manually refill the tank or bowl to flush. Pro Tip: Store a few gallons of water just in case especially during storm season or if you live in a rural area. Types of Toilets: Will They Flush Without Power? Gravity Flush Toilets The most common type in homes. These do not require electricity.Yes, you can flush during a power outage as long as there’s water. Pressure-Assisted Toilets Often found in commercial settings or large homes. Some use electric pumps to create flushing pressure.Flushing might be limited without electricity. Smart Toilets / Electric Bidets These require electricity for flushing, washing, or lid operation.No flush unless there’s a manual override or backup battery. Toilets in Well Water Homes If your home relies on a well pump, water stops flowing during an outage.Only one flush per tank you’ll need to pour in water manually after that. High-Rise or Multi-Story Buildings In some buildings, water is pumped electrically to upper floors.Toilets may stop flushing on higher levels if pumps fail. How to Flush a Toilet Manually (No Power or Water Pressure) If your toilet won’t flush on its own, here’s a manual flushing method that works: Method 1: Bucket Flush (No Need to Touch the Tank) Get a bucket with 1–2 gallons of water. Pour it quickly and steadily into the bowl. The gravity and force should push the waste down just like a normal flush. Use non-potable water if drinkable water is scarce (bathtub, pool, melted snow). Method 2: Tank Refill Method Remove the toilet tank lid. Pour water into the tank until it reaches the fill line. Use the handle to flush normally. This method feels more natural and may use less water than a bucket dump. What If You Have a Sewage Ejector System? If your home has a basement bathroom or plumbing below the main sewer line, it might use a sewage ejector pump. These pumps rely on electricity to move waste upward. During a power outage: The ejector stops working The basin can overflow You should not flush or use any water fixtures connected to the ejector If you’re unsure whether your home uses an ejector, check the basement or consult a plumber. What Not to Do During a Power Outage Don’t keep flushing if the tank doesn’t refillDon’t use electric toilets unless you have backup powerDon’t flush from basement bathrooms with ejector pumpsDon’t panic manual flushing works! Emergency Toilet Prep Tips To stay ready for blackouts: Store 3–5 gallons of water per toilet Fill your bathtub in advance if a storm is coming Keep wet wipes and disposable bags for emergencies Consider a portable camping toilet as a backup Have your plumbing inspected for ejector systems or vulnerabilities Install a battery backup for ejector pumps if applicable Flush Toilet With No Power: Key Takeaways Can you flush the toilet when the power is out? Yes, if it’s a gravity-flush model with water available. Most toilets do not require electricity, but smart or pump-powered systems might. You can flush manually with a bucket or by refilling the tank. Homes on well water and sewage ejectors need special attention. Plan ahead to avoid bathroom trouble during outages. Need Help With a Toilet That Won’t Flush? Call Derks Plumbing. If your toilet refuses to flush during or after a power outage, it might be more than just a blackout issue. Derks Plumbing Company Inc. is here to help. We provide: Emergency plumbing repairs Toilet installation and upgrades Sewage ejector inspections Plumbing system diagnostics We proudly serve Los Angeles with fast, reliable plumbing solutions day or night. Contact us or call for 24/7 emergency service. Final Thoughts: Can You Flush the Toilet When the Power Is Out? Absolutely but only if you understand your setup. Gravity flush toilets will work fine with water, while electric or well systems may need a manual workaround. By preparing ahead and knowing how to flush without power, you’ll keep your bathroom functional no matter what happens outside. Frequently Asked Questions   1. Can you flush the toilet when the power is out? Yes, in most homes with gravity-fed toilets, you can flush the toilet when the power is out as long as there’s water in the tank. If your water source is affected like a well system you may only get one flush until you manually add more water. 2. How do you flush a toilet manually without power? To manually

How to Replace and Install a Kitchen Sink
Plumbing

How to Replace and Install a Kitchen Sink at Home

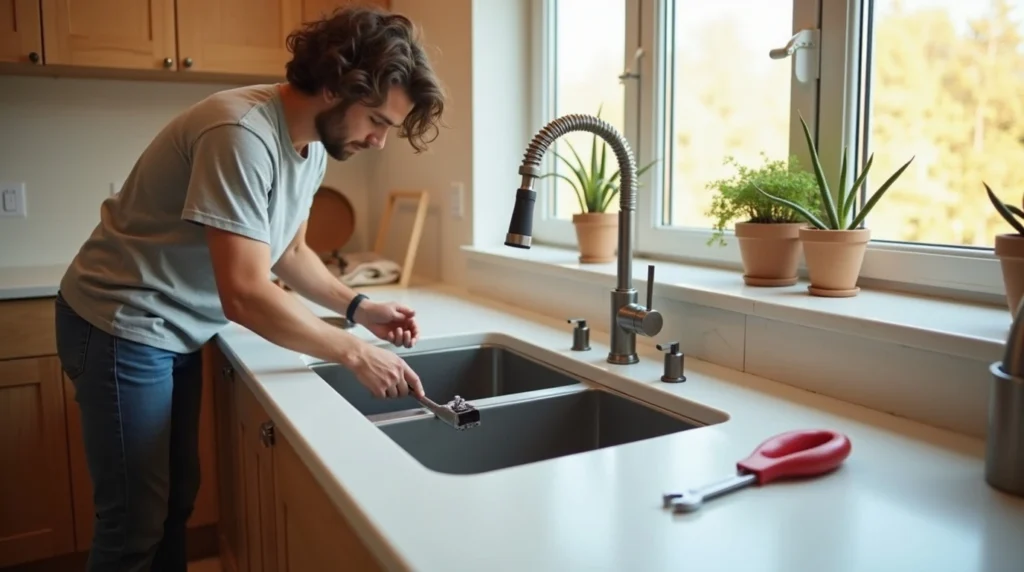
A leaking, cracked, or outdated sink can ruin your whole kitchen experience. The good news? You don’t always need to call a plumber. Most homeowners can handle a basic sink replacement with the right tools and a free Saturday morning. If you want to know how to replace and install a kitchen sink without making a mess or flooding your cabinets, you are in the right place. This guide walks you through every step, from picking the right sink to turning the water back on. Why Replace Your Kitchen Sink? Your kitchen sink works hard every single day. Over time, wear and damage are unavoidable. Here are the most common reasons homeowners choose sink replacement: Cracks or chips in the basin that trap bacteria and look terrible Persistent leaks under the sink that never fully go away Rust or stains that won’t scrub clean Upgrading the kitchen during a renovation Poor drainage that causes standing water Outdated style that clashes with new countertops or cabinets A new sink is not just cosmetic. It improves hygiene, water flow, and daily function. It also adds real value when you plan to sell your home. When Should You Consider Replacing a Kitchen Sink? Not every sink issue needs a full replacement. Sometimes a simple fix works. But here are clear signs it is time for a full kitchen sink replacement: The basin has a visible crack that runs along the bottom Water pools under your sink cabinet regularly with no clear source The sink is more than 15 to 20 years old and shows major wear You’re replacing your countertops and the cutout size will change The porcelain coating is flaking and exposing raw cast iron beneath You’ve had the same clog three times in one month despite proper cleaning If two or more of these apply, it is smarter to replace the sink than keep patching it. How to choose the perfect sink for your kitchen? Choosing the wrong sink is one of the biggest mistakes DIYers make. Before you buy, think through these factors carefully. Sink Mounting Style There are three main types: Drop-in (top-mount): Easiest to install. Sits in a cut hole and rests on the counter. Undermount: Mounted below the countertop for a clean look. Harder to install but looks great. Farmhouse (apron-front): Large, deep basin. Requires cabinet modification. For a first-time DIY sink installation, a drop-in sink is the most beginner-friendly choice. Material Options Material Pros Cons Stainless Steel Durable, affordable, easy to clean Can scratch, shows water spots Cast Iron Very durable, classic look Very heavy, needs strong support Composite Granite Scratch and heat resistant More expensive Fireclay Beautiful, durable Heavy and pricier Size and Basin Configuration Measure your existing cutout before buying anything. Standard kitchen sinks range from 24 to 36 inches wide. Single basins give you more room for large pots. Double basins let you multitask, like washing and rinsing at the same time. Faucet Hole Count Check how many faucet holes your new sink has. Most have one to four holes. Your existing faucet setup needs to match, or you will need to buy a new faucet too. Tools and Materials You’ll Need Before you start, gather everything. Stopping mid-job to run to the hardware store wastes time and creates risk. Tools: Adjustable wrench Basin wrench (essential for tight spaces) Plumber’s putty or silicone caulk Pipe wrench Utility knife Pliers Bucket and towels Flashlight or headlamp Screwdriver (flathead and Phillips) Tape measure Materials: New kitchen sink New drain assembly (usually comes with the sink) P-trap and drain pipe (replace if they look old) Plumber’s tape (Teflon tape) Garbage disposal mounting kit (if applicable) Water supply lines (replace old braided lines while you’re at it) Pro tip: Buy supply lines even if you think you don’t need them. Old lines crack when you loosen them. New ones cost under $10 and give you peace of mind. Step-by-Step Guide: How to Replace and Install a Kitchen Sink This is the full process. Take your time with each step. Rushing causes leaks. Step 1: Turn Off the Water Supply Find the shut-off valves under the sink. Turn them clockwise until they stop. Then turn on the faucet to release any pressure still in the lines. Place a bucket under the pipes. Water will drip when you start disconnecting. Step 2: Disconnect the Water Supply Lines Use an adjustable wrench to loosen the nuts connecting the supply lines to the shut-off valves and the faucet. Keep your bucket ready. Some water will still flow out even after shutting off the valves. Step 3: Disconnect the Drain and P-Trap The P-trap is the curved pipe under your sink. Loosen the slip nuts by hand or with pliers. Pull the trap away and empty any water into your bucket. If you have a garbage disposal, disconnect the drain hose and the electrical connection. Never skip unplugging it first. Step 4: Remove the Old Sink For a drop-in sink, look under the counter for mounting clips. Use a screwdriver to loosen each one until the sink lifts free from above. Run a utility knife along the old caulk seal around the sink edge. This breaks the bond. Then push the sink up from below or lift it from above. Old sinks can be heavy. Get someone to help you lift cast iron or farmhouse styles. Step 5: Clean the Countertop Opening Scrape off all the old caulk and putty from around the opening. Use a putty knife. The surface needs to be clean and flat for your new sink to seal properly. Wipe the area with a damp cloth and let it dry completely. Step 6: Prepare the New Sink Before lowering it in, attach as much as possible from above. This includes: Faucet installation Drain strainer or basket Garbage disposal flange (if applicable) Any clips that mount from below It’s much easier to attach these components when the sink is on a flat surface than when it’s already installed.

why my fridge is leaking
Plumbing

Why My Fridge Is Leaking? Causes and Easy Fixes

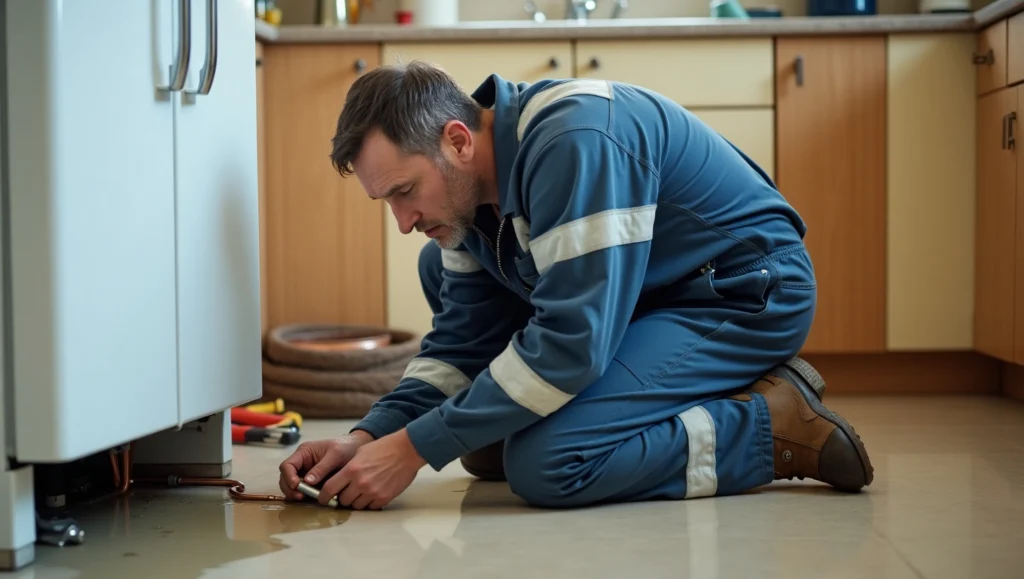
Your fridge is leaking because something inside it isn’t working as it should. This could be due to a clogged drain, a broken water line, too much humidity, or even a door that doesn’t close properly. Don’t worry most leaks are easy to fix once you know what’s causing them. In this guide, we’ll explore the reasons why my fridge is leaking, how to stop the problem, and whether a leaking fridge is dangerous. Let’s dive in! Common Causes of a Fridge Leaking Water 1. Clogged Defrost Drain: The Hidden Culprit Every fridge has a defrost drain a small tube that lets melted ice drip into a pan underneath. But if this drain gets blocked by food crumbs or ice, water can’t flow out. Instead, fridge leaking water inside or onto the floor. Signs of a Clogged Drain: A musty smell (like wet socks) coming from the fridge. Water collecting at the bottom of the fridge or freezer. How to Fix It: Unplug the fridge for safety. Locate the drain (usually at the back of the fridge). Use a turkey baster or pipe cleaner to flush the drain with warm water. This simple fix can stop fridge leaking water in minutes! 2. Blocked Water Supply Line: The Ice Maker’s Enemy If your fridge has an ice maker or water dispenser, a kinked or frozen water line could be the problem. When the line is blocked, water can’t reach the ice maker, so it leaks instead. Signs of a Blocked Line: The ice maker stops working. You hear gurgling noises from the fridge. How to Fix It: Check the water line (usually behind the fridge) for bends or ice. Straighten the line or thaw it with a hairdryer. 3. Damaged Door Seal: Letting Warm Air In The rubber strip around your fridge door (called a gasket) keeps cold air in and warm air out. If it’s torn or dirty, warm air sneaks in, creating extra condensation. This extra moisture can drip and look like a leak. Signs of a Bad Seal: The fridge feels less cold. You see frost buildup inside. How to Fix It: Clean the seal with soapy water. If it’s torn, replace it new seals cost about $20. 4. Cracked Drain Pan: The Forgotten Part Under your fridge, there’s a shallow pan that catches drips. Over time, this pan can crack or rust, causing water to leak onto the floor. How to Fix It: Pull out the pan and inspect it. If it’s damaged, buy a replacement from a hardware store. 5. High Humidity: When the Air Is Too Wet On muggy days, humid air enters your fridge every time you open the door. This moisture turns into water droplets, which can overflow the drain pan. How to Fix It: Place a dehumidifier near the fridge. Keep the door closed as much as possible. 6. Leaving the Door Open: A Simple Mistake If the fridge door doesn’t close properly, warm air rushes in, making the fridge work harder. This creates extra condensation, which leaks out. How to Fix It: Check for food blocking the door. Clean the seal to ensure it closes tightly. Is a Fridge Leaking Water Dangerous? Yes, a leaking fridge can be risky if ignored: Slipping Hazard: Water on the floor can cause falls. Mold Growth: Damp areas grow mold, which can make you sick. Electrical Damage: Water near plugs or wires can cause shocks or fires. Always clean up leaks quickly and fix the root cause! How to Stop Fridge Leaking Water: Prevention Tips Clean the Defrost Drain Monthly: Use warm water to flush out debris. Check the Water Line Every 6 Months: Look for kinks or ice. Replace Old Seals: Worn-out gaskets let in too much air. Keep the Fridge Full: A full fridge stays colder, reducing condensation Professional Leak Detection & Repair Services for Your Fridge If you’re tired of wondering why your fridge is leaking and want a quick, reliable fix, our expert leak detection and repair services are here to help. We understand how frustrating and messy fridge leaks can be, which is why our skilled technicians use the latest tools to find the exact source of the problem whether it’s a clogged drain, faulty water line, or damaged seal and fix it fast. Don’t let a small leak turn into a big headache; trust us to keep your fridge dry, safe, and running smoothly with care you can count on. Conclusion: Act Fast to Fix Leaks! Now you got the answer about why my fridge is leaking, you can tackle the problem quickly. Most leaks are easy to fix with simple tools like a pipe cleaner or a new drain pan. Remember: Ignoring a leak can lead to mold, slips, or even electrical fires. Check your fridge regularly, and use the tips above to keep it running smoothly. If you’re ever unsure, call a professional it’s better to be safe than sorry! By understanding the causes and solutions for water leaking from refrigerator, you’ll save money, protect your family, and extend your fridge’s life. Stay dry! FAQs Q1. Why is there water leaking from my refrigerator? A: The most common reasons are a clogged defrost drain, a blocked water line, or a broken door seal. Q2. How do I stop my fridge from leaking water inside? A: Clean the drain hole with warm water and check the door seal for damage. Q3. Can a leaking fridge make me sick? A: Yes mold from leaks can cause allergies or breathing problems. Q4. Should I unplug my fridge if it’s leaking? A: Yes! Always unplug it before cleaning or repairs to avoid shocks

Is It Safe to Run a Humidifier All Day in Winter?
Plumbing

Is It Safe to Run a Humidifier All Day in Winter?

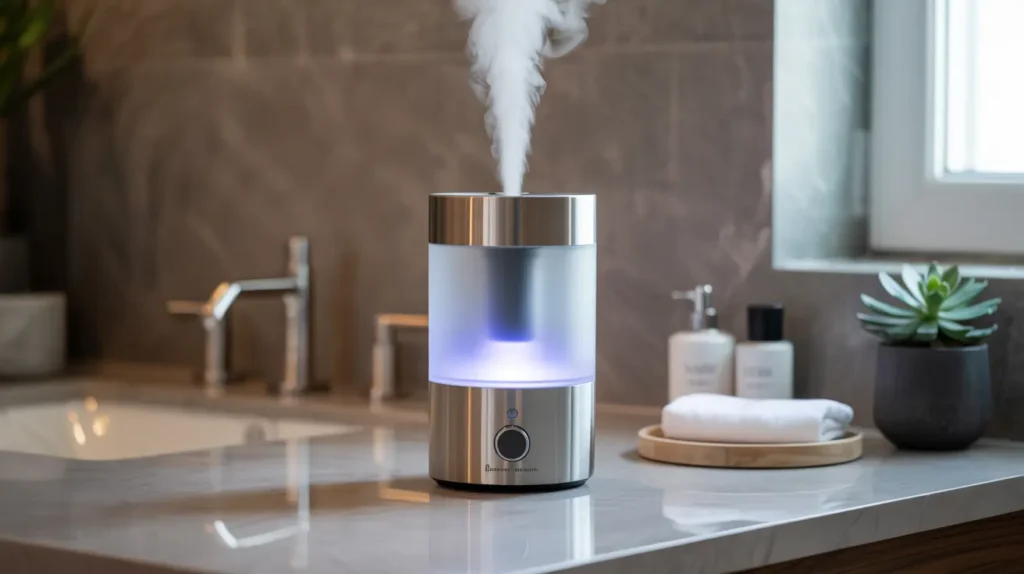
We use our heaters more often in the winter, which can make the air inside our houses very dry. Not only is dry air inside annoying, it can also be bad for your health. “Is it safe to run a humidifier all day in winter?” is a question that a lot of people ask. The short answer is yes, but only if you take good care of it. When you run a humidifier all day, it helps keep the humidity level steady. This can make your home feel cozier and maybe even healthy in the winter. Benefits of Running a Humidifier All Day Running a humidifier all day during winter offers several benefits: Prevents dry skin and lips: Dry air sucks moisture from your skin. Humidifiers help keep your skin hydrated and comfortable. Reduces cold and flu risks: Higher humidity lowers the chance of airborne viruses spreading. Eases asthma and allergy symptoms: Moist air helps keep airways clear and less irritated. Improves sleep: Humidifiers reduce dryness in your throat and nose, helping you breathe easier at night. Types of Humidifiers to Consider There are two main types of humidifiers: Cool Mist Humidifiers – These add moisture to the air and slightly cool down the room. Warm Mist Humidifiers – These use a heating element to release warm steam, creating a gentle mist. Here are other common types: Ultrasonic Humidifier: Uses sound waves to release a cool mist. Impeller Humidifier: Uses a rotating disk to produce a mist. Evaporator: Uses a fan to blow air through a wet filter. Steam/Vapor Humidifier: Boils water and releases cooled steam into the air. Each type works to maintain healthy humidity levels and can help reduce dry skin, sore throats, bloody noses, and breathing problems. If you experience any unusual moisture or suspect leaks from your humidifier, our Leak Detection Services can assist you. How to Maintain Your Humidifier To keep your humidifier safe and working well: Change the water daily, especially if it’s running all day or night. Use distilled or demineralized water instead of tap water. Clean the humidifier every 3 days using hydrogen peroxide or another disinfectant. Rinse all parts thoroughly to remove any cleaning chemicals. Replace filters as often as recommended by the manufacturer  more often if you use it continuously. Ensure the area around the humidifier stays dry. If storing the unit, empty and dry it completely first. To ensure your heating system supports your home’s comfort, consider our Water Heater Installation. Is It Safe to Run a Humidifier All Day in Winter? Yes, you can leave a humidifier on all day in the winter as long as you take care of it and keep it in good shape. If you take care of your humidifier, it will keep the air clean and wet. But if you don’t clean it right, mold and germs can grow on it. For more winter home comfort tips, visit our Emergency Plumbing Services. Final Thoughts Is it okay to leave a fan on all day in the winter? Yes, and a lot of people say to do it. Just make sure to clean and take care of the room. This can make your home warmer in the winter, protect your skin, improve the quality of the air inside, and help your lungs stay healthy. FAQs   Q1: Can I run my humidifier all day during winter? Yes, it is safe to run a humidifier all day in winter if you maintain it properly and keep indoor humidity between 30%-50%. Q2: What are the benefits of running a humidifier in winter? Humidifiers help prevent dry skin, ease breathing problems, reduce virus spread, and improve sleep quality. Q3: How often should I clean my humidifier? Clean your humidifier every 3 days to prevent mold and bacteria buildup. Change water daily for best results. Q4: Which type of humidifier is best for winter? Both cool mist and warm mist humidifiers work well. Choose based on your room temperature and personal preference. Q5: Can running a humidifier cause mold in my home? If humidity levels get too high or the humidifier is not maintained, mold can grow. Use a hygrometer to monitor humidity and clean the device regularly.

does humidifier make room warmer
Plumbing

Does Humidifier Make Room Warmer?

Particularly in the colder months, dry air in your house can be uncomfortable. It can make your family sick, cause dry skin and sore throats. Many people thus use humidifiers in a cold room to increase comfort. Still, a common question people ask is: Does Humidifier Make Room Warmer? Let us investigate the operation of a humidifier and its influence on room temperature. How Does a Humidifier Affect Temperature? Comfort is mostly dependent on temperature and humidity, which also define a humidifier. A humidifier increases air moisture. Your body keeps onto more heat and sweats less when the air is more humid. This makes you feel warmer even though your thermostat shows the same actual number. The short response is yes; it makes the room feel warmer, but it does not affect the actual temperature of the room. Difference Between Cool Humidifier and Warm   There are two main types of humidifiers: cool mist and warm mist. The difference between cool humidifier and warm models is how they release moisture: A cool humidifier sends out a mist that feels cooler. It uses a fan and wick filter to push out the moisture. A warm mist humidifier boils water and sends out warm steam, making the room feel a bit warmer. Even cool mist may sound like it would cool a room, that’s not really the case. Both types raise humidity, and humidity makes you feel warmer. Warm Mist Humidifiers Can Add Warmth Heat drives a warm mist humidifier to boil water and generate steam. In addition to adding moisture, this somewhat warms the air. For those wishing to feel more cosy in winter, it’s fantastic. Therefore, the answer is more clear with warm mist models if you are wondering whether a humidifier makes room warmer. They straight spew heat into the room. Certain homes even have a whole house warm air humidifier, which ties in with your heating system. This maintains home humidity in balance and adds to general warmth and comfort. Cool Mist Humidifiers Still Feel Warm However a cool humidifier can also cause you to feel warm. In what way? For the moisture in the air stops your body from losing heat. Your body loses less sweat even if the mist is cooler, so preserving your natural warmth in. Thus, even in a cold room, running a humidifier helps to make the environment seem warmer. Once more, does a humidifier create room warmth? Yes, even the cool ones act in this way! Does the Motor of the Humidifier Create Heat? Every electric device, including humidifiers, generates a small amount of heat running. This accentuates the general coziness of a room. Warm mist humidifiers generate more heat because they run heating elements. Little motors in even cool mist humidifiers emit a little warmth. Although this is not the primary factor causing a room to seem warmer, it does have some influence. Using a whole house warm air humidifier will help you to clearly see the heating effect since it runs alongside your furnace to distribute warmth and moisture throughout the air. Final Word on Humidifiers and Temperature Control Does a humidifier then make the room warmer? Indeed, increasing humidity helps your body to preserve heat. Both warm mist and cool humidifiers can help a room seem warmer and more pleasant. While their operation differs, cool humidifiers and warm ones both help to enhance the feel of your space. Fighting dry air and staying warm without turning on the heat is smart using a humidifier in a cold room. For long-term comfort and improved air quality throughout every room, adding a whole house warm air humidifier is even better. Therefore, a humidifier could be the ideal answer if you find cold rooms and dry winter air to be problems. Derks Plumbing fixes furnaces and HVAC systems. Ask us to do a free check-up. After looking over your system, we will recommend the best choices to enable you to keep comfortable and save money. In summer, we want you to remain cool; in winter, warm. One of our experts can schedule a visit to discuss how we might assist with your heating. Would like further information on ways we might assist you? Contact us right now. FAQs Related to Does Humidifier Make Room Warmer   Are hot humidifiers bad for you? Not exactly, but they can get rather hot, therefore they’re not great if you live with pets or children. Just make sure they remain clean to prevent bacterial or mold growth. Does a humidifier make a room colder? Cool mist humidifiers could make the air seem somewhat cooler, generally added humidity makes a room feel warmer, not colder. What’s the difference between warm and cool humidifiers? Warm humidifiers can somewhat heat a room and produce steam. Cool ones propel cool mist using a fan. Both assist with dryness, but in rather different ways. Do humidifiers make the room humid? Indeed, their main responsibility is that. To avoid dryness in your sinuses, throat, or skin, they moisten the air. Are warm humidifiers good for winter? Definitely. When it’s cold outside, their release of warm mist might make your room seem cozier.

Commercial Plumbing Eagle Rock
Plumbing

Should I Use a HVAC Service Contractor for Air Conditioning?

An AC that doesn’t work right in the middle of summer is the last thing you want. People often ask me, “Should I use a HVAC service contractor for air conditioning?” since I’m a plumber with more than 20 years of experience with HVAC. In short, yes. Yes, as long as you care about safety, speed, and saving money in the long run. We’ll talk about why it’s important to hire a professional, how to find a licensed AC contractor, what an HVAC repair contract really covers, and the pros and cons of HVAC systems that every homeowner should think about. Why Professional HVAC Service Matters It might be tempting to call a handyman or try to fix your air conditioner yourself when it breaks down or doesn’t work right. But HVAC systems are hard to understand. They have electrical parts, air pipes, sensors, thermostats, and more that make them up. A small mistake can cost you a lot of money or damage your home. A licensed AC contractor knows how to install systems correctly and is familiar with local building rules. They know how to safely handle refrigerants, make sure air flows well, and make sure systems are the right size for your home. This will keep your energy bills low and make sure your air conditioner works at its best. Should I Use a HVAC Service Contractor for Air Conditioning? The best thing about choosing an HVAC service contractor is that it gives you peace of mind. You’re not just hiring someone to fix a machine; you’re also hiring knowledge, responsibility, and long-term help. A licensed and qualified HVAC worker has to follow safety rules and perform at a certain level. Here’s why using a HVAC service contractor is a smart choice: System longevity: Professional servicing extends the lifespan of your HVAC unit. Energy savings: Technicians tune your system for optimal efficiency. Safety: They check for gas leaks, faulty wiring, and fire hazards. Proper sizing and installation: Ensures comfort without energy waste. Warranty protection: DIY repairs can void your manufacturer’s warranty. The Role of a Licensed AC Contractor A licensed AC worker is properly trained and has to answer to state licensing boards. Because they passed tough tests, keep their security up to date, and follow rules that protect your family and property, this means they are trustworthy. You, your system, and even your life are in danger if you hire someone who doesn’t have a license. A license proves that the person has gone through the required training and stays up to date on new HVAC technologies. In case you aren’t sure if someone is allowed, request to see proof or call your local builder licensing board. Why You Should Consider a HVAC Maintenance Contract An HVAC maintenance contract is like a membership that gives you peace of mind. It comes with regular tune-ups, cleaning, and inspections, as well as discounts on parts or repairs. It’s not enough to just find problems; you need to stop them before they become costly disasters. With a contract in place, you usually get: Priority service during peak seasons. Early detection of wear and tear. Consistent energy savings. Extended equipment lifespan. Most importantly, it provides a paper trail of maintenance, which is often required to validate system warranties. Understanding HVAC Pros and Cons Before you invest in any system or contract, you should understand the HVAC pros and cons. Every homeowner’s situation is different climate, budget, home size, and energy goals all play a role. Pros: Comfort control: Modern HVAC systems offer zoned heating and cooling. Energy efficiency: Newer systems use less power. Cleaner air: Advanced filters improve indoor air quality. Automation: Smart thermostats and scheduling save energy and money. Cons: Upfront cost: Installation and equipment can be expensive. Maintenance needs: Regular servicing is required. Component failure: Complex systems may have multiple failure points if not maintained. Choosing the right contractor mitigates most of these drawbacks, ensuring you get the best from your investment. DIY vs. Professional HVAC Work: What’s the Risk? DIY AC work might seem cost-effective, but it can often result in: Incorrect diagnostics Refrigerant mishandling (a legal issue in many areas) Electrical hazards Voided warranties Incomplete repairs that worsen the issue A HVAC service contractor ensures every job meets safety codes and functional standards. They carry insurance and liability coverage, so you’re not on the hook if something goes wrong. Signs You Need a HVAC Contractor Immediately You might be delaying that call to a licensed AC contractor, hoping the issue goes away on its own. Here are signs you shouldn’t ignore: Inconsistent room temperatures Frequent cycling on and off Strange noises or odors Spikes in electricity bills Water pooling around the unit Weak airflow If you experience any of these, it’s time to consult a HVAC service contractor before minor issues snowball into major repairs. How Often Should HVAC Systems Be Serviced? At least once a year, preferably before summer or winter, HVAC systems should be checked out and repaired. The best season for AC units is spring. If your device is used all year, like a heat pump, you might want to have it serviced every other year. A maintenance contract for your HVAC system can help you stay on track without having to keep track of the times yourself. Final Thoughts So, should I hire an HVAC service company to fix my air conditioner? Without a doubt, yes. The skills of a licensed AC contractor are very important whether you’re setting up a new system, doing seasonal upkeep, or having problems with an existing one. The pros of professional installation far outweigh the cons when it comes to safety, comfort, and the length of time that the system will last. If you’re in Los Angeles and want dependable, professional HVAC and plumbing services, check out Derks Plumbing Los Angeles. With decades of hands-on experience, we’re here to help keep your home cool, safe, and efficient year-round. FAQs 1. What’s the difference between an HVAC

What Is the Difference Between Heat and Temperature?
Plumbing

What Is the Difference Between Heat and Temperature?

Have you ever thought what is the difference between heat and temperature? People often use these two words to refer to the same thing, especially when talking about the weather, cooking, or even home tools. But in science, they stand for two different ideas about how things work. It is important to know these changes in physics, engineering, and plumbing systems, especially when working with heating elements like water heaters. This blog post will talk about the difference between temperature and heat, how they work together, and why it’s important to know the difference between heat and temperature in theory and in real life. You’ll have a good understanding of thermal energy vs. temperature, how heat moves, and how to measure temperature by the end. We’ll also talk about how these ideas can be used with home products and why installing your heater correctly is so important for saving energy. What Is Heat? Heat is a way that energy can be moved. If two processes are not at the same temperature, this can happen. It is called thermal equilibrium that heat always goes from something hotter to something cooler until they are both the same temperature. In the International System of Units (SI), heat is measured in joules (J). It can also be shown in calories or British Thermal Units (BTUs). The movement of particles inside a material is what makes heat. These particles make more heat when they move faster. Instead of being something that can be kept like a fluid, it’s energy that’s moving. Let’s look at a simple example: if you put a cold spoon into a hot coffee cup, the coffee will heat up the spoon. The spoon gets hotter because of this energy shift. What Is Temperature? Temperature, not heat, is a way to measure how fast the particles in a material are moving on average. That is, it tells us if something is hot or cold, but not how much heat energy it has. Degrees Celsius (°C), Fahrenheit (°F), or Kelvin (K) are widely used to measure temperature. It’s an intensive feature, which means it doesn’t change based on how much of the substance is there. A cup of boiling water and a full pot of boiling water are both 100°C, but the amount of heat in each is different because of the difference in volume. To sum up, temperature is a way to measure how much energy is moving, while heat is energy itself. What Is the Difference Between Heat and Temperature? To understand the difference between heat and temperature, you need to know the difference between measuring energy and energy itself. Even though they are linked, they are defined and act in different ways in science. Heat is the total energy that a substance’s molecules use to move. Temperature is the average amount of energy that molecules have to move. In other words, temperature vs. heat is about the amount of energy and how it is understood. Two containers, one small and one large, may heat up at different rates if you use the same flame. However, the bigger container will hold more heat because it is heavier. This basic idea is important for science-based fields and even for managing everyday appliances. As an example, just because your water heater is hot doesn’t mean it’s giving off enough heat for your home. When you figure out how energy efficient something is, the link between thermal energy and temperature comes into play. The Role of Heat and Temperature in Real Life Temperature and heat difference are more important to us than we think. These rules are used to make predictions about the weather, cook times, and even building plans. Heat movement systems in homes and buildings, such as HVAC and water heaters, are carefully planned and built using exact math. Not knowing the difference between temperature and heat can waste energy or even cause systems to stop working. That’s why it’s important to have experts who know about the science behind heating systems put them in your home. If your water heater isn’t working right or you want to update it, you might want to talk to a professional. At Derks Plumbing, we offer Water Heater Installation & Repair in Los Angeles to help ensure your systems are operating at peak performance. Our team is trained to evaluate both thermal energy vs temperature effects and optimize your unit accordingly. Thermal Energy vs Temperature Let’s talk more about how thermal energy is different from temperature. Thermal energy is the sum of the kinetic energies of all the particles in a material, while temperature shows the average kinetic energy. Picture a big pool and a small cup of water that is boiling. This cup is warmer than the pool, but the pool has more thermal energy because it is bigger. This is the reason why thermal energy is a wide property and temperature is an intensive property. This difference is very important for handling energy in big systems like power plants, climate control units, and water heaters. If you only look at temperature to guess thermal capacity, you might not get the right result or use too much energy. Heat Transfer Mechanisms Heat transfers in three ways: conduction, convection, and radiation. Let’s briefly describe how these relate to our main topic. Conduction: Direct transfer of heat through materials—like a metal spoon in hot soup. Convection: Heat transfer through fluids or gases—important in plumbing systems. Radiation: Transfer of heat through electromagnetic waves—like sunlight warming your skin. In plumbing, particularly with water heaters, convection plays a vital role. The water inside your tank gets heated and rises, while cooler water sinks, creating a continuous cycle. If your system isn’t functioning efficiently, even a high temperature might not deliver enough heat to your faucets or showers. Why It Matters in Plumbing and Heating Systems Homeowners can take better care of energy-efficient machines if they know the difference between heat and temperature. There may be more than one

can i use drain cleaner in a bathtub
Plumbing

Can I Use Drain Cleaner in a Bathtub?

Sometimes, after taking a shower, your bathtub gets clogged, and you feel the urge to clean it immediately. But you get confused and think, Can I use drain cleaner in a bathtub? Would it be safe for the health of my plumbing system and the environment? So here is the answer. Yes, you can use a drain cleaner in a bathtub, but be careful. This guide will help you identify when to use a drain cleaner safely by explaining the types of drain cleaners and their associated risks. It will also provide safer alternatives to chemical drain cleaners. What is drain cleaner and how does it work? A drain cleaner is a chemical used to clear clogs and debris in a household plumbing system, especially in sinks, showers and bathtubs. For example, Drano and Liquid Plumber are commonly used drain cleaners in the USA. These cleaners contain heavy chemical substances such as sulfuric acid and sodium hydroxide. They work by generating heat, which dissolves hair, grease, soap scum, and other blockage materials accumulated in your bathtub, allowing water to flow freely Despite their quick cleaning capabilities, these cleaners pose some health and environmental risks Potential Risks They can damage pipes and PVC plumbing When contact with the skin, it may cause burns  If their fumes are inhaled, they cause respiratory issues  These are toxic to pets, children and the environment They can damage the surfaces of the tubs and compromise the finish Although these substances are quick-acting, they cause more damage. These are very hazardous to handle, so use them with care When to use a drain cleaner? A drain cleaner may be used in emergencies, as it provides a quick solution. However, you must ensure that the correct drain cleaning method is used to prevent damage to the bathtub. You can also rely on drain cleaner when your plumbing system is newly installed, and it can withstand chemical reactions. Precautions are necessary when using any type of drain cleaner, which are as follows. Precautions while using drain cleaner Regardless of whether your bathtub has a slow drain or has been completely clogged, these are essential steps to follow while unclogging your bathtub drain: Read the labels carefully. Always read the instructions carefully, word by word, as stated by the manufacturer on the label. Put on safety equipment. Use gloves and glasses to avoid direct contact with drain cleaners, as they can splash out and cause burns to your skin. Ensure appropriate ventilation. Open the windows and turn on the exhaust fan, as drain cleaners produce toxic fumes that may damage your lungs. Do not mix drain cleaners. Mixing various cleaners may generate toxic chemical reactions such as explosions or poisonous gases. Never use a plunger after chemicals. If you have already swept the chemical cleaner down the drain, avoid using a plunger. It would spill hazardous liquid onto you. Avoid over-cleaning. Regular and excessive use of drain cleaner can damage pipes and compromise your plumbing. Keep them out of the reach of children and pets. Keep all drain cleaning products out of reach of children. Never leave the bathroom alone when using drain cleaners. Rinse thoroughly. When the clog is finally cleared, rinse the bathtub drain with a lot of water.  Safe alternative to chemical drain cleaner There are some other ways to clean out bathtub drains without using harmful chemicals, such as: Enzyme-based drain cleaners. These cleaners have natural enzymes or bacteria that consume organic matter. For example, Green Gobbler and Bioclean are safer alternatives for unclogging bathtub drains. These cleaners take a while to take effect but are gentle on pipes and the environment. Baking soda and vinegar. People usually use baking soda and vinegar to clean out bathtub drains. Pour half to one cup of baking soda into the drain, then add 1-2 cups of vinegar. Let them rest for 30 minutes, then flush them out.  Tool-based drain cleaners. These are objects such as bathtub drain openers, drain Snakes, and plungers that physically clean the blockage.  Check the bathtub drain diagram Suppose you encounter bathtub drain issues and are unsure about the bathtub’s structural integrity. Then, please refer to the bathtub diagram below. There is a clear explanation of the essential components, such as the overflow pipe, which will make your cleaning process easier and more effective. Measures to prevent future clogs Use mesh drain trap or hair catcher Use common household tips such as baking soda + vinegar to clean the drain monthly Avoid pouring greasy products and heavy soap down the bathtub In case of persistent clogs, call a plumber Conclusion Although a chemical drain cleaner can be used to clean your bathtub drain, it has more harm than benefits. It can damage pipes and your plumbing system, creating numerous health and environmental issues. You must follow precautions when selecting and applying chemical drain cleaners. Simple household measures, such as plunging, using vinegar and baking soda, or even a hair catcher, can prevent clogging. Don’t hesitate to call a professional drain cleaner plumber in case of a serious issue. FAQs Q1. Can I use Drano for my bathtub drain? Yes, if it is designed specifically for bathtub drains, otherwise avoid it. Q2. Can I use a liquid plumber in my bathtub drain? Although research indicates that liquid plumbers are safe to use, I recommend using them with caution or avoiding them altogether. Q3. Why does my bathtub keep clogging? It is usually caused by persistent scum, soap, or hair that has accumulated over time. Regular cleaning and drain mesh can prevent it. Q4. What is the most effective and safest way to unclog the bathtub drain? Using physical tools such as a plunger or vinegar with baking soda is the safest way to clean your bathtub drain. Q5. Do drain cleaners work in standing water? No, chemical-based drain cleaners don’t work in standing water. You must pour them directly down the drain.

Fast and Efficient Plumbing Services in Eagle Rock

Client Reviews

Posted on Google Google
Ryan Haden profile picture
Ryan Haden
Google star 1Google star 2Google star 3Google star 4Google star 5Trustindex verifies that the original source of the review is Google.
Could not have been happier with Alex! We was right on time, polite, fixed all my kitchen sink issues and have me good tips on how to best maintain. I will for sure be using him again and highly recommend anyone who needs a great plumber to use his services as well. Thank you!
Posted on Google Google
Lorena Marcoe profile picture
Lorena Marcoe
Google star 1Google star 2Google star 3Google star 4Google star 5Trustindex verifies that the original source of the review is Google.
Talk about a professional...yes, I am talking about Alex Derks, Derks Plumbing. He is by far the most knowledgeable plumber we have ever had the pleasure of hiring. He's been in the plumbing business for years and it shows. Any questions you have re: plumbing issues, install, etc., Alex is your man. So happy with his work and he has a great sense of humor as well... extremely easy to talk to...thank you Alex!!!
Posted on Google Google
Andrew Jalil profile picture
Andrew Jalil
Google star 1Google star 2Google star 3Google star 4Google star 5Trustindex verifies that the original source of the review is Google.
Alex did a great job installing my kitchen faucet and an under-sink Aquasana water filter. He also addressed a few other plumbing-related issues. He was friendly and helpful. Excellent work!
Posted on Google Google
Abigail Bigham profile picture
Abigail Bigham
Google star 1Google star 2Google star 3Google star 4Google star 5Trustindex verifies that the original source of the review is Google.
Alex does what other plumbers cannot do! He is our go to.
Posted on Google Google
Danielle Driver profile picture
Danielle Driver
Google star 1Google star 2Google star 3Google star 4Google star 5Trustindex verifies that the original source of the review is Google.
Alex is very friendly and responsive. What a pleasure to work with!
Posted on Google Google
Lawrence Isaacs profile picture
Lawrence Isaacs
Google star 1Google star 2Google star 3Google star 4Google star 5Trustindex verifies that the original source of the review is Google.
Very very happy with the work Alex did for us replacing the tanks in our Aquasana filtration system. From first contact over the phone through job completion Alex was a pleasure to work with. He explained what he was doing, and why, every step of the way, and made sure we understood what we needed to do to maintain the system. Strongly recommend Alex!
Posted on Google Google
Joey Aucoin profile picture
Joey Aucoin
Google star 1Google star 2Google star 3Google star 4Google star 5Trustindex verifies that the original source of the review is Google.
Alex Derks has been such a lifesaver for me. Anytime I'm in a pinch with the plumbing in my home, Alex is only a phone call away and I've only seen great results from his work. He's reliable, knowledgable, and entirely trustworthy. A must-have source when owning a home.
Posted on Google Google
Eric Gorman profile picture
Eric Gorman
Google star 1Google star 2Google star 3Google star 4Google star 5Trustindex verifies that the original source of the review is Google.
After working with dozens of plumbing services in the LA area, I can confidently say Derks is the best in the business. On time, reliable and capable of even the most difficult tasks, Derks goes above and beyond to make sure your water system is working correctly.
Posted on Google Google
Jason Gruenbaum profile picture
Jason Gruenbaum
Google star 1Google star 2Google star 3Google star 4Google star 5Trustindex verifies that the original source of the review is Google.
Excellent know-how and fast!! Reasonable pricing and super responsive!!
Posted on Google Google
Jonathan Hepfer profile picture
Jonathan Hepfer
Google star 1Google star 2Google star 3Google star 4Google star 5Trustindex verifies that the original source of the review is Google.
Alex is an expert plumber, and he always goes out of his way to educate me about how to prevent future issues. Highly recommended!

Derks Plumbing has been providing professional plumbing services to Eagle Rock residents for over 20 years. Our experience and strong reputation have allowed us to grow, and we are proud to serve customers in 15 nearby areas, including Venice, Santa Monica, Beverly Hills, and more.

Contact

Hours of Operation

Monday: Open 24 Hours
Tuesday: Open 24 Hours
Wednesday: Open 24 Hours
Thursday: Open 24 Hours
Friday: Open 24 Hours
Saturday: Open 24 Hours
Sunday: Open 24 Hours

© 2026 Created by Localpro1

Scroll to Top