We are Available 24/7

Plumbing

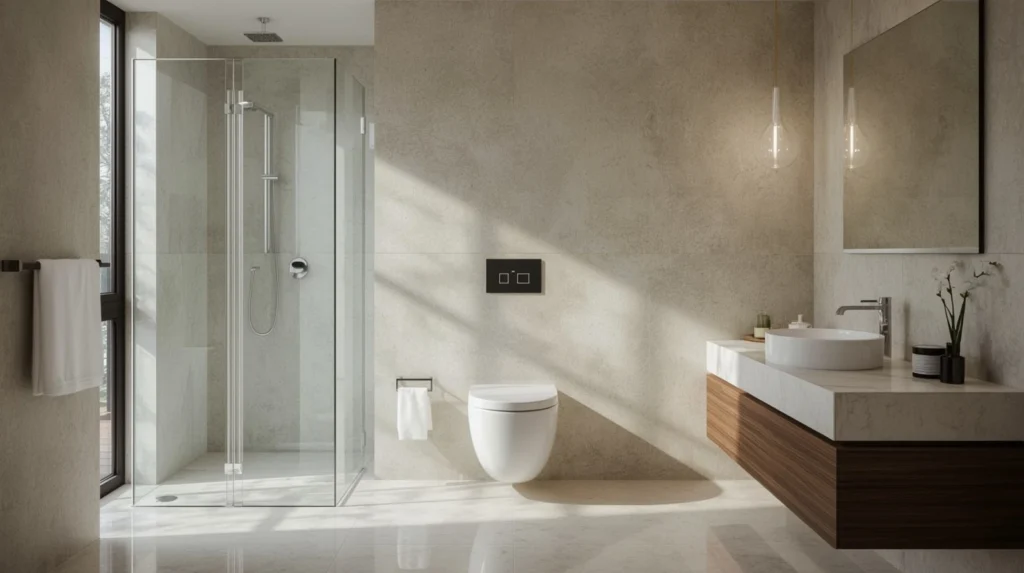
how do tankless toilets work, showing the water flow from the plumbing system directly into the flush mechanism and then into the sewer system, without using a tank
Plumbing

How Tankless Toilets Work | The Future of Bathrooms

Toilets that are tankless do not require water tanks to flush. Instead of using large tanks, they use high-pressure water that comes directly from your plumbing. This design eliminates the need for large tanks. The bathroom has become cleaner and smaller, but the flush remains strong. In this article, we will dive into how do tankless toilets work, their types, installation process, pros and cons, common problems, and much more. Whether you are renovating your bathroom or considering a more sustainable toilet solution, this guide has you covered. What is a Tankless Toilet? The term tankless toilet refers to toilets that do not require a water tank for flushing. They are also referred to as toilets with no tank. By using a high pressure flushing mechanism directly connected to the plumbing system, they enable a smaller design and eliminate the need for bulky tanks, giving your bathroom a more spacious, clean appearance. Modern, minimalist bathroom designs that do not have a lot of space are ideal for these toilets. It is common for tankless toilets to use strong water pressure from the home’s water supply to push waste down into the sewer system as opposed to traditional toilets with large water tanks. As well as saving space and water, these toilets also reduce clutter in the bathroom. How Does a Tankless Toilet Work? The best part of a tankless toilet is the way it functions. These toilets do not contain a tank to store water. Instead, they use high pressure water flow systems to ensure that every flush is fast and strong. Most of the time, a button or sensor is used to activate the flush. A special device is used to push the water through a special device, resulting in a strong flush without relying solely on gravity to perform the flush. The Flushing System: Tankless toilets utilize either pressure flush valves or flushometer toilet systems. Water moves rapidly and efficiently through these systems, resulting in much less water waste than gravity fed systems. The flush is usually more accurate and requires less water in comparison to gravity-fed systems. Some tankless toilets come with flush valves that direct the flow of water directly. By doing so, flushing is stronger while using less water. Some more advanced types come with automatic flush toilets for home use, which flush the toilet as soon as the user walks away, so there’s no need to do anything by hand. This new idea makes things easier and cleaner at the same time. Types of Tankless Toilets Tankless toilets come in various models, each catering to different preferences and needs. Whether you’re outfitting a commercial space or a compact bathroom, there’s a tankless toilet design that suits your space. 1. Wall-Mounted Tankless Toilets: Wall-mounted options are becoming increasingly popular in modern homes due to their sleek design and space-saving capabilities. They are installed on the wall, leaving the floor open for easier cleaning and a more visually appealing look. 2. Floor-Mounted Tankless Toilets:   Floor-mounted models offer a more traditional look but still eliminate the bulky tank. These toilets are perfect for those who want to upgrade to a more modern design while keeping the familiar style. 3. Commercial Tankless Toilets: These are often seen in large commercial spaces such as offices, airports, and stadiums. They use a pressurized flushing system to handle high volumes of waste quickly and efficiently. 4. Residential Tankless Toilets: For home use, tankless toilets are available in a range of styles and features, from basic models to those with advanced options like bidet functions or water saving technologies. They are ideal for homeowners who are looking to enhance their bathroom’s functionality without sacrificing style. 5. Tankless Bidet Toilet Seats: Some tankless toilets integrate bidet functions, offering a more luxurious bathroom experience. These toilets are perfect for those who want both a tankless flush and advanced hygiene features. The Pros and Cons of Tankless Toilets When considering whether to install a tankless toilet, it’s important to weigh the benefits against the potential drawbacks. Having used and installed these toilets, here’s what I can tell you about the pros and cons. Pros: Water Efficiency: Tankless toilets are incredibly water-efficient, reducing your water usage compared to traditional models. Many use just a fraction of the water, which contributes significantly to water conservation. Space-Saving: Without the large tank, these toilets save a considerable amount of space, which is ideal for smaller bathrooms or modern, minimalist designs. Modern Aesthetics: Tankless toilets are often sleeker and more visually appealing. If you prefer clean lines and an uncluttered look, these toilets fit the bill perfectly. Cons: Higher Initial Cost: The upfront cost of a tankless toilet, including installation, can be higher than traditional toilets due to the need for specialized equipment and plumbing adjustments. Installation Complexity: Tankless toilets often require professional installation, especially if your home’s plumbing isn’t already set up for pressurized systems. This can lead to higher installation costs. Water Pressure Dependency: Tankless toilets rely heavily on the water pressure from your home’s plumbing. If your water pressure is low, the flush may not be as powerful as needed. Wondering if you can flush your toilet during a power outage? Learn more in our guide on how power loss affects your toilet system. Tankless Toilet Installation Installing a tankless toilet is slightly more complex than installing a traditional one due to the need for high water pressure. If you’re installing one in your bathroom, here’s what you can expect: 1. Plumbing Modifications: A tankless toilet typically requires a dedicated water line and plumbing adjustments. The water pressure needs to be higher than that of a regular toilet, which may require installing a pressurized system or upgrading the existing plumbing. 2. Professional Installation: While some DIY enthusiasts might tackle a tankless toilet installation, it’s generally recommended to hire a professional plumber to ensure everything works smoothly. Installation often involves setting up the flushometer system, which is more intricate than a standard tank toilet. 3. Cost
why does my bathroom smell like sewage
Plumbing

Why Does My Bathroom Smell Like Sewage? Fix It Fast

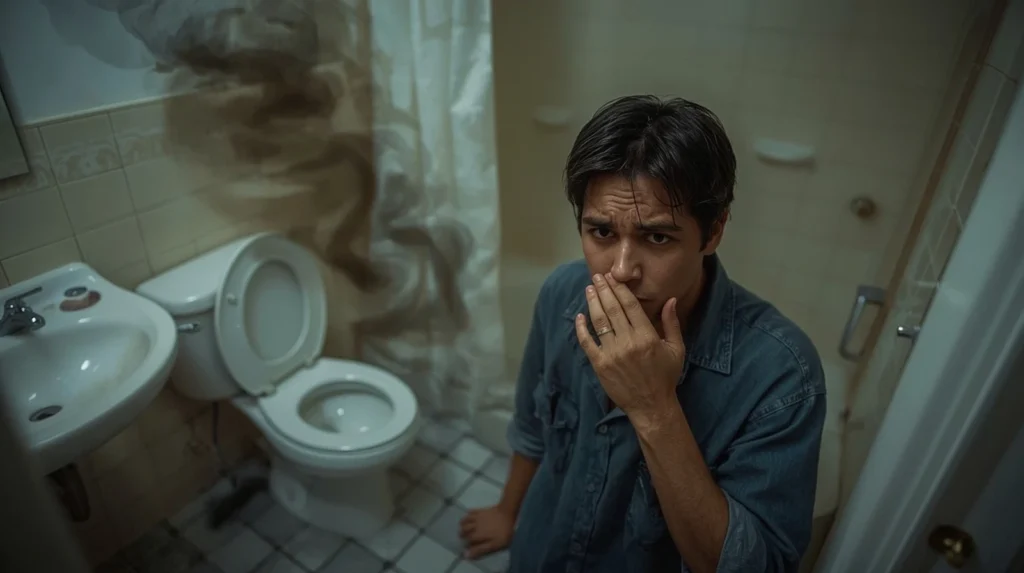
If you’ve ever walked into your bathroom and noticed a strong, unpleasant sewage smell in your bathroom, you’re not alone. A bathroom that smells like sewage can be both frustrating and concerning. Whether it’s a sewer gas smell in bathroom or a persistent bathroom sewer smell, understanding the cause and how to address it is essential. In this article, we’ll explore the common causes of these odors and provide actionable solutions to get rid of the smell. What Causes Sewage Smell in Your Bathroom? Sewage smell in bathroom environments is not only uncomfortable but can also signal underlying issues within your plumbing system. The sewer gas smell in bathroom usually stems from problems with drains, pipes, and other fixtures. Understanding the root causes of these smells can help in finding the most effective solution. Here are some of the main reasons why a bathroom smells like sewage: Understanding the Sewer Gas Smell in Your Bathroom What is Sewer Gas and Why Does it Smell Like Sewage? Sewer gas is a mixture of gases, including hydrogen sulfide, methane, and carbon dioxide, which can escape from your plumbing system. These gases have a distinct smell similar to rotten eggs or sewage. The presence of sewer gas odor in bathroom areas may be due to issues with your drainage system, blocked pipes, or improperly functioning vent systems. Understanding the composition and source of this sewer gas smell in bathroom can help in taking proper action to eliminate it. Why Does My Toilet Smell Like Sewer? One of the common questions homeowners ask is “Why does my toilet smell like sewage?” A toilet producing a sewage smell often points to a clog or blockage in the pipes or drainage system. Other factors, such as dried-out P-traps or faulty seals, can also contribute to the sewer odor in bathroom areas. A sewage smell from toilet is typically a sign that air is escaping from the sewer line, entering the bathroom, and causing unpleasant odors. Common Causes of Bathroom Odors Clogged Drains and Pipes One of the most common causes of bathroom odors is clogged drains and pipes. If your bathroom drain smells like sewer, it’s likely that debris, hair, soap scum, or other materials are obstructing the pipes. This blockage causes a buildup of waste, which leads to the emission of foul odors, including a strong septic odor in bathroom spaces. Dry P-Traps A dry P-trap is another common cause of bathroom sewer smell. P-traps are U-shaped pipes designed to hold water, preventing sewer gases from escaping into your bathroom. If the P-trap becomes dry due to a lack of use or irregular water flow, sewer odors can seep through. A bathroom that smells like sewer may simply have a dry P-trap. Ventilation Issues Improper ventilation is another factor that can contribute to unpleasant smells in the bathroom. Without adequate airflow, gases cannot escape and may build up, causing your bathroom to stink like sewer. Improving ventilation can help reduce the intensity of the sewer gas odor in bathroom spaces, which can otherwise linger and worsen over time. Health Risks of Sewer Smells in the Bathroom Is Sewage Smell in the Bathroom Dangerous? The answer is yes, prolonged exposure to sewage smell in bathroom environments can be hazardous to your health. Sewer gas contains harmful chemicals like hydrogen sulfide, which can cause headaches, dizziness, and respiratory issues when inhaled over extended periods. If you notice a consistent sewer odor in bathroom areas, it’s essential to address the source as soon as possible. Potential Risks from Sewer Gas Exposure The risks associated with sewer gas exposure include: Headaches and Dizziness: Prolonged exposure to sewer gas can cause frequent headaches, nausea, and dizziness due to the inhalation of toxic gases. Respiratory Problems: Sewer gases may irritate the lungs, leading to coughing, shortness of breath, and other respiratory issues. Fire Hazard: Methane, a component of sewer gas, is flammable. Although rare, a buildup of sewer gas in poorly ventilated areas can increase the risk of fire. How to Get Rid of Sewage Smell in Your Bathroom Unclogging Drains and Pipes To get rid of the sewer smell in bathroom, the first step is to address any clogs in the pipes. Here are a few ways to clear blockages: Use a Plunger: A plunger can help dislodge minor clogs in the toilet or bathroom drains, clearing the path for wastewater and preventing the sewer smell from building up. Apply a Drain Cleaner: For stubborn blockages, using a chemical or enzymatic drain cleaner can dissolve the clog and reduce bathroom smells like sewage. Snake the Drain: If the clog is deep within the pipes, a drain snake can help break it up and restore proper flow. Fixing Dry P-Traps To prevent sewer gas smell from escaping into the bathroom, make sure your P-traps are filled with water. If the trap has dried out: Run Water: Simply running water through the sink or toilet for a few minutes can fill the trap and stop sewer gas from leaking into the bathroom. Check for Leaks: Inspect the P-trap for any cracks or leaks that may need to be repaired to keep it working correctly. Improving Bathroom Ventilation A well-ventilated bathroom reduces the risk of sewer smells building up. Here are a few steps to improve airflow: Install or Repair an Exhaust Fan: A properly functioning exhaust fan helps expel air from the bathroom, preventing the buildup of moisture and sewer gases. Open Windows: If possible, open windows to allow fresh air into the bathroom, which can help dissipate the sewer odor in bathroom areas. Preventative Measures to Avoid Bathroom Odors Regular Bathroom Maintenance Tips To prevent future bathroom smells like sewage, consider these routine maintenance tips: Clean Drains Regularly: Use a drain cleaner or baking soda to clear debris from your pipes. Check for Leaks: Regularly inspect your bathroom fixtures, including the toilet, sink, and shower, for leaks or damages that could contribute to sewer smells. Maintain Proper Ventilation: Ensure your

How to Tell If Your Pipes Are Frozen
Plumbing

How to Tell If Your Pipes Are Frozen: Signs Symptoms and What to Do

Winter mornings hit different when you turn on the faucet and nothing comes out That moment of silence before panic sets in is one I know too well A few years back during a particularly brutal cold snap here in the Midwest my kitchen pipes froze solid overnight It was one of those learning experiences that forced me to figure out the signs of a frozen pipe quickly so I could avoid major water damage. Why Frozen Pipes Are a Serious Problem When water freezes inside a pipe it expands with incredible force and if the pressure gets too high the pipe can burst What happens when your pipes freeze is not just a minor inconvenience it can flood your basement damage drywall and ruin insulation. If you’re wondering are my pipes frozen or something else the most obvious clue is a sudden lack of water flow If water isn’t coming out of a faucet that normally works chances are you’re dealing with a frozen pipe. Common Areas Where Pipes Freeze First Pipes freeze in unheated spaces like basements crawl spaces attics and garages Pipes that run along exterior walls or under kitchen and bathroom sinks are particularly vulnerable too. The outside temperature plays a critical role Once it dips below 20°F you’re entering dangerous territory where unprotected pipes are most likely to freeze. Signs and Symptoms of Frozen Pipes The first symptom is usually no water flow from a faucet or shower When you turn on the tap and only hear a hiss or nothing at all it’s a strong sign that water is frozen somewhere in the line Next look for visible frost on the outside of the pipes You might see a layer of icy buildup on exposed piping in the basement or under a sink Then listen If you hear strange noises like clanging banging or gurgling when trying to use the water those sounds are often frozen pipes trying to push water through solid ice A bulging pipe is another major red flag This usually means the ice has expanded inside causing the pipe to stretch or crack If you see swelling or notice what looks like a crack it’s time to act fast Bad odors from drains or faucets can also mean trouble If the pipe is frozen the air trapped behind the ice has nowhere to go and it pushes back through the drain lines carrying unpleasant smells with it Finally look for damp spots or signs of water damage Water stains on ceilings or wet spots near baseboards often indicate a pipe has burst or is leaking due to freezing How to Know If Your Pipes Are Frozen and Not Something Else The first step is checking multiple faucets in the home If only one area has no water it’s likely a localized freeze Check accessible pipes near the trouble spot especially those along exterior walls You can also feel the pipe with your hand A frozen pipe will often feel much colder than nearby pipes Sometimes you may even hear a dull thud when you tap it with a screwdriver another frozen pipe symptom Thermal cameras or temperature probes can help too but most homeowners don’t have these on hand Still even without tools you can usually find the general area if you’re methodical How to Find Which Pipe Is Frozen Start from the faucet with no water and trace the pipe back toward your water source Look in unheated areas behind cabinets crawlspaces or basements If you’re wondering how to tell which pipe is frozen follow the cold trail Look for frost bulging or ice coating. If nothing is visible and you suspect a pipe behind the wall is frozen place your ear to the wall and listen while someone turns on the faucet You might hear a faint hiss or knocking These are often signs of a freeze. Can Frozen Pipes Burst Here’s How to Tell Yes frozen pipes can burst and they often do if left untreated for too long How to know if pipes burst from freezing Look for pooling water mildew smell or a sudden drop in water pressure. A burst pipe may start as a pinhole leak or full-on rupture If you see any water damage and suspect freezing odds are the pipe has already cracked What to Do If You Suspect Frozen Pipes First open the affected faucet to relieve pressure This helps prevent bursting and allows steam and thawed water to escape. Next locate the frozen section if possible Once you find it apply heat slowly You can use a hair dryer heat tape hot towels or a space heater pointed toward the area Never use an open flame or propane torch. Apply heat until full water pressure returns and be patient Frozen pipes don’t thaw instantly depending on how long they’ve been iced up it may take an hour or more. How to Prevent Pipes From Freezing Again Insulate all exposed pipes especially those in basements attics and garages Use foam sleeves or wrap them with heat tape Let faucets drip slightly during extremely cold nights This keeps water moving and reduces the chance of freezing Seal all gaps and cracks in your home’s exterior where cold air can enter This includes areas around windows vents and foundation walls If you live in a region where freezing is common consider installing permanent pipe insulation or rerouting vulnerable pipes into heated areas. When to Call a Professional Plumber If you can’t locate the frozen pipe or you’re not comfortable thawing it call a plumber immediately If the pipe has burst or you suspect it’s frozen behind a wall professional tools and thermal imaging will save time and money. I’ve had cases where even after doing everything right I couldn’t find the blockage In those cases it’s not worth risking more damage Get expert help by our Professional Plumbers in Eagle Rock & Surrounding Areas. Final Thoughts Act Quickly Before Frozen Pipes Become

How to Replace a Garbage Disposal?
Plumbing

How to Replace a Garbage Disposal? Quick & Simple

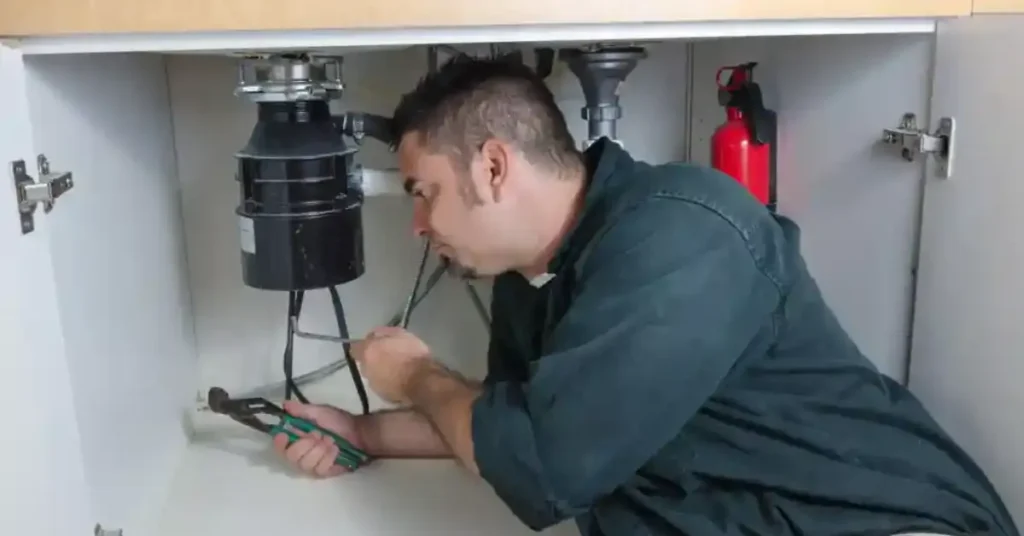
When your old unit starts leaking, making loud noises, or simply stops grinding food, it is time for a garbage disposal replacement. Replacing an old, failing disposal with a new, efficient unit is a home improvement task that most homeowners can handle with careful preparation. This detailed guide provides the expert knowledge you need for a safe and successful replacing a garbage disposal unit. The process of learning how to replace a garbage disposal involves safe electrical work and proper plumbing connections. By following our step-by-step instructions, you will gain the confidence to complete this essential kitchen repair yourself, ensuring your new food waste disposer works perfectly for years to come. What Is a Garbage Disposal? A garbage disposal, often called a food disposal, is an electric appliance installed under a kitchen sink between the drain and the trap. Its job is to shred food waste into tiny pieces. These small pieces then wash safely down the drain and into the sewer or septic system. This appliance has made kitchen cleanup much easier for millions of households. Modern disposals use impellers small metal blades or lugs to smash and spin food waste against a shredder ring. This process breaks down food like vegetable scraps and soft leftovers. A reliable garbage disposal helps keep food out of landfills, which is good for the environment. Knowing how this appliance works is the first step when you need to replace disposal. When to Replace Your Garbage Disposal Not all disposal problems mean you need to replace garbage disposal. Some issues, like a jam, can be fixed easily with a hex wrench and the unit’s reset button. However, certain signs tell you it is time for a new unit entirely. Persistent Leaks: If the unit is leaking from the bottom or the main body, the internal seals or grinding chamber may be cracked. This kind of damage usually means you must how to change food disposal. Frequent Clogging: If the disposal clogs often, even with proper use, the grinding components may be dull or the motor may be too weak for your household’s needs. Loud, Unusual Noise: A disposal that makes a loud, grinding, or humming noise but does not turn is likely dealing with a dead or failing motor. Attempting to repair a severely worn motor often costs almost as much as installing a new one. Need for Constant Resetting: If you have to press the reset button on the bottom of the unit all the time, the motor is struggling and close to burnout. Age: Most disposals last between 8 to 15 years. If your unit is older and having any issues, it is smart to plan for a garbage disposal replacement. You can read about: How Much is a Garbage Disposal Tools Needed to Replace a Garbage Disposal Gather these tools before you start. Having everything ready makes the job smoother and faster. Basic Hand Tools: Screwdriver set (flathead and Phillips) Adjustable wrench Pliers (standard and needle-nose) Hacksaw (for cutting old pipes if needed) Hammer Putty knife Plumbing Supplies: Plumber’s putty or silicone sealant Teflon tape Bucket (for catching water) Towels or rags Flashlight or work light Optional but Helpful: Disposal wrench (often comes with new units) Wire nuts (if electrical connections need replacing) Pipe wrench Safety Equipment: Safety glasses Work gloves Rubber gloves Most homeowners already own these tools. If you’re missing something, borrow from a neighbor or make a quick hardware store run. The total cost for any missing items rarely exceeds $30.Check your new disposal before starting. Make sure it includes mounting hardware and an installation guide. Some units come with power cords attached. Others require separate electrical connections. How to Replace a Garbage Disposal (Step-by-Step) Step 1: Turn Off the Power Safety comes first. Locate your circuit breaker box and flip the switch for the disposal. If you’re not sure which breaker controls it, turn off the main kitchen circuit.Test the disposal switch to confirm the power is off. Nothing should happen when you flip it. Some people tape over the switch to prevent accidental activation.For hardwired units, you’ll work with electrical wires later. If your disposal plugs into an outlet under the sink, unplug it now. This gives you one less thing to worry about during removal. Step 2: Disconnect the Drain Lines Place your bucket under the disposal. Loosen the slip nuts connecting the discharge tube to the disposal. Water will drain out, so keep that bucket positioned correctly.The dishwasher drain hose connects to the side of many disposals. Remove the clamp with pliers and pull the hose free. Cap the hose end with a small bag and rubber band to prevent leaks.Check for a second drain connection if you have a double sink. Disconnect this pipe the same way. Set all hardware aside in a container so you don’t lose small pieces. Step 3: Remove the Old Disposal Look up at the mounting assembly. You’ll see a metal ring with tabs or a snap ring. Different brands use different systems, but most work similarly.For InSinkErator models, insert a screwdriver into the mounting ring and turn counterclockwise. The disposal should release and drop. Be ready to support its weight.Other brands use a snap ring. Push up on the disposal with one hand while someone else removes the snap ring with pliers. Some units have mounting ears that twist to release.The disposal is heavy, often 10 to 15 pounds. Lower it carefully into your bucket or have a helper support it. Once free, disconnect the electrical connection if you haven’t already. Step 4: Remove the Mounting Assembly (If Needed) Examine the mounting flange in your sink. If it’s corroded or leaking, replace it. If it looks good and matches your new disposal’s brand, you can reuse it.To remove it, work from under the sink. Loosen the mounting screws on the ring. Push up on the flange from below while someone removes old putty from above with a putty knife.Clean the sink opening thoroughly. Remove all

How Many Gallons Does a Bathtub Hold
Plumbing

How Many Gallons Does a Bathtub Hold?

Understanding how many gallons a bathtub holds is crucial whether you are planning a bathroom remodel, comparing types of bathtubs, or simply want to conserve water. Bathtubs come in a wide range of shapes and sizes, and their water capacity can vary greatly based on tub size, bathtub dimensions, and tub style. This detailed guide will walk you through everything you need to know about bathtub gallon capacity and more. Average Gallon Capacity of a Bathtub On average, a standard bathtub holds between 40 to 80 gallons of water. The exact figure depends on several factors such as standard tub dimensions, tub water depth, and how deep the tub is filled. For instance, a typical alcove bathtub might hold about 60 gallons when fully filled, while a freestanding tub or soaking tub can easily exceed 80 gallons. Common Types of Bathtubs and Their Capacities Understanding types of tubs helps in estimating how many gallons each can hold. Here’s a quick overview: Alcove Bathtub A popular choice in smaller bathrooms, the alcove bathtub typically holds between 40 to 60 gallons. Freestanding Tub Known for style and luxury, freestanding tubs hold between 55 to 90 gallons, depending on the bathtub size. Soaking Tubs Soaking tubs offer deeper immersion, with capacities ranging from 60 to 110 gallons. A deep soaking tub or deep soaking tub with shower is perfect for a luxurious bath. Walk-In Tubs Designed for accessibility, walk-in tub dimensions are unique, with water capacities generally around 40 to 60 gallons. Bathtub Dimensions and Gallon Capacity Bathtub dimensions play a huge role in determining tub capacity. Let’s look at how size impacts water usage: Typical bathtub size: 60″ x 30″ x 14″ holds around 42 gallons. Small bathtub dimensions: 54″ x 30″ x 14″ hold about 40 gallons. Standard bathtub dimensions: Common in most homes, these hold 40 to 60 gallons. Standard bathtub depth and standard bathtub height also influence the volume. How to measure a bathtub: Measure the length, width, and depth. Multiply these in inches, divide by 231 to convert to gallons. Use a gallon bathtub calculator for precision. Gallons per Bath: What to Expect If you’re asking, “how many gallons does a bathtub hold?” or “how much water in a tub?”, you’re likely concerned about water usage. Here’s a breakdown: Average bath water used: 40–70 gallons How much water to fill bathtub: Depends on tub fill levels, but generally between 2/3 to full capacity How fast does a tub fill: Depends on your plumbing but averages around 4-7 gallons per minute Using a bathtub water calculator or estimating with tub volume in gallons can help you track usage. Water Efficiency and Sustainability Conserving water is more important than ever. Here are ways to improve bathtub water efficiency: Choose water-saving bathtubs Install flow restrictors or use eco-friendly tubs Compare bath vs shower water use showers often use less if kept short If you’re conscious of your bath water usage, consider smaller tubs or those with built-in water saving features. Knowing how much water does a bath use lets you make informed decisions. Comparing Tub Styles Different bathtub styles offer different benefits: Best bathtubs for water conservation: compact, shallow models Luxury bathtub gallons are higher due to larger tub size Use a bathtub size guide to compare tub size comparison across models Looking at best type of bathtub for your lifestyle can balance luxury with water use. Key Metrics at a Glance Tub Style Average Dimensions Gallon Capacity Alcove Bathtub 60″ x 30″ x 14″ 40-60 gallons Freestanding Tub 66″ x 32″ x 20″ 55-90 gallons Soaking Tub 60″ x 32″ x 22″ 60-110 gallons Walk-In Tub 52″ x 30″ x 40″ 40-60 gallons Small Bathtub 54″ x 30″ x 14″ 30-40 gallons Use this as a tub size guide for your home project. Final Thoughts: Choosing the Right Bathtub Whether you’re wondering how many gallons is a bathtub, or want to know the capacity of standard bathtub, knowing the bathtub gallon capacity helps in energy planning, water conservation, and smart home design. To summarize: Use bathtub measurements to estimate capacity Understand tub dimensions and water usage Use a gallon calculator to get accurate figures Whether you are looking to upgrade to a deep soaking tub, downsize to a small bathtub, or compare standard bathtub water volume, this guide has given you all the knowledge needed. Looking for reliable plumbing in Eagle Rock? Our Professional plumbers in Eagle Rock and surrounding areas deliver expert repairs, fast response times, and quality workmanship you can trust. FAQs: Bathtub Gallon Capacity How many gallons does a standard bathtub hold? A standard bathtub usually holds between 40 to 60 gallons of water. How do I calculate the gallons my bathtub can hold? Measure the length, width, and depth in inches, multiply them, then divide by 231 to convert to gallons. Which bathtub type holds the most water? Soaking tubs and freestanding tubs typically hold the most, sometimes exceeding 100 gallons. Are smaller tubs more water efficient? Yes, small bathtub dimensions use less water and are ideal for water conservation. Does the depth of a bathtub affect water usage? Absolutely. The deeper the tub, the more water it can hold. How many gallons does a deep soaking tub hold? Anywhere from 60 to 110 gallons, depending on the model. Do walk-in tubs use less water? They often use similar or slightly less water, around 40 to 60 gallons. Is a bath or a shower more water-efficient? Short showers typically use less water than full baths. Can I use a bathtub water calculator? Yes, online tools or formulas help estimate bathtub gallon capacity accurately. How fast can a bathtub fill? Most tubs fill at 4–7 gallons per minute, depending on plumbing setup.

how to change bathroom sink faucet
Plumbing

How to Change Bathroom Sink Faucet | 6 Easy Steps

If you’re thinking about changing faucet bathroom setups or looking for how to replace a bathroom faucet with a fresh, modern fixture, you’re in the right place. Many homeowners wonder how to install bathroom faucet hardware or how to change bathroom sink faucet parts without calling a plumber. The good news is, replacing old bathroom faucet setups and installing bathroom taps is a beginner-friendly project that can be tackled with simple tools and a bit of patience. Whether you want to learn how to install new bathroom faucet units or are just installing a bathroom sink faucet for the first time, this comprehensive guide is designed for you. We’ll cover all the steps how to remove faucet from bathroom sink, take out the old one, and put in a new bathroom faucet. We’ll also discuss the cost to replace bathroom faucet units and offer tips for replacing bathroom fixtures with ease. Tools Needed to Replace Bathroom Faucet Before you start uninstalling bathroom faucet equipment or assembling your new fixture, it’s important to gather all the tools needed to replace bathroom faucet parts. Here’s a checklist for your bathroom sink faucet assembly: Adjustable wrench (to loosen and tighten nuts) Basin wrench (very useful for tight spaces) Screwdrivers (flathead and Phillips) Plumber’s tape (for sealing connections) Bucket or small container (to catch any drips) Cleaning cloth or sponge Plumber’s putty (for leak proof seals if needed) Allen key (for some modern bathroom faucets) Having all tools on hand ensures changing faucet bathroom processes run smoothly from start to finish. Step by Step Guide: Replace Bathroom Sink Faucet Below is a step by step breakdown for how to replace a bathroom faucet. These detailed steps cover how to take off bathroom faucet units, remove an old bathroom sink faucet, and install new faucet in bathroom sink areas. Step 1: Turn Off the Water Supply Before you remove bath sink faucet parts, always shut off the water supply. Find the valves beneath your sink and turn them clockwise until tight. Turn on the faucet to drain any remaining water. Step 2: Disconnect Supply Lines Using an adjustable wrench, gently disconnect the water supply lines from the bottom of the faucet. Place a bucket underneath to catch any water that might drip out when you uninstall bathroom faucet components. Step 3: Remove the Old Bathroom Sink Faucet Here’s how to remove old bathroom faucet setups: Locate the nuts or fasteners holding the faucet under the sink. Use a basin wrench or regular wrench to loosen these. If you’re unsure how do you remove a bathroom faucet that is stuck, use a little penetrating oil to loosen tight connections. Disconnect the lift rod if your faucet has a drain stopper. Lift the old faucet from the sink. (This answers how to take out old bathroom faucet and how to remove an old bathroom sink faucet.) Tip: If the old faucet is stuck due to years of build up, gently pry around the base with a flathead screwdriver. Step 4: Clean the Sink Surface Before bathroom faucet assembly, wipe away all old plumber’s putty or grime from the area. This ensures your new fixture sits flush and prevents leaks when you install the new faucet in bathroom sink holes. Step 5: Bathroom Sink Faucet Assembly—Install New Bathroom Faucet Let’s dive into how to install bathroom faucet parts and assemble your new unit: Fit the new faucet: Place the gasket (or plumbers putty, if required) on the sink, then set the new faucet in the mounting holes. Secure underneath: Crawl below and thread the mounting nuts onto the faucet shanks. Tighten them with your basin wrench don’t over tighten, as this can crack the sink. Connect supply lines: Carefully attach the hot and cold water lines that run from your shut off valves to the faucet. Use plumber’s tape on the threads for a leak proof fit. Handle the drain: If you’re changing bathroom fixtures like the drain as well, follow the manufacturer’s instructions. Replacing bathroom fixtures together can provide a fully updated look. Step 6: Test Your Work—Sucessfully Change a Bathroom Faucet and Drain After your bathroom faucet assembly: Turn the supply valves back on. Slowly open the faucet and check for leaks underneath and around the handles/spout. If you spot a leak, immediately shut the water, tighten connections, and reapply plumber’s tape if necessary. This step answers how to change a bathroom sink faucet and ensure everything is sealed. Tips for Success When Replacing Bathroom Fixtures Double check all parts in the package before starting bathroom faucet assembly on your own. Take photos during uninstall bathroom faucet steps, so re-assemble is easier. Measure your existing holes this is key when considering how to install new faucet in bathroom sink setups. Always use caution and don’t force connections. If you are ever unsure, watch online videos or consult with a local hardware store professional. Final Thoughts Changing faucet bathroom fixtures doesn’t have to be a headache. Whether you’re looking for how to remove faucet from bathroom sink, how to install new faucet in bathroom sink, or how to change bathroom sink faucet entirely, this guide covers everything a beginner needs. With the right tools, clear instructions, and a little patience, you can replace bath sink faucet units, update your style, and save on the cost to replace bathroom faucet by doing it yourself. Don’t be afraid to start replacing old bathroom faucet hardware today your new, stylish bathroom awaits! Need professional help? Contact Derks Plumbing for expert Faucet Installation and Repair today! FAQs: Replacing & Installing Bathroom Taps How to remove bath sink faucet or replace bath sink faucet? Follow the same steps above, whether you’re swapping out a faucet on a bathroom or bath sink. How to replace a bathroom sink tap? The process for how to replace a bathroom sink tap or changing faucet bathroom style is identical remove the old tap, clean the area, and fit the new hardware. Can I install new

how to unclog a toilet
Plumbing

How to Unclog a Toilet | 5 Easy Steps That Actually Work

Everybody can relate to this awkward situation of a clogged toilet. Fortunately, it is an easy fix if you know the right methods to unclog your toilet effectively. Whether you are a homeowner, guest or someone who is in a hurry and wants to know how to unclog a toilet, you are at the right place. This guide will help you identify the cause of a clogged toilet and walk you through proven DIY solutions both with and without a plunger.  What causes a Toilet to Clog The most observable cause of a clogged toilet is the overuse of toilet paper. Flushing non-flushable items such as feminine products and insufficient water pressure may also be the reason behind a clogged toilet. Let’s learn how to unclog your toilet step by step.   5 Methods to Unclog Toilet Use a Plunger The best way to clear a clogged toilet is to use a plunger. Place it in the bowl in such a way it completely cover the hole. Press gently to prevent splashes and push continuously down. There are also other methods that can unclog your toilet without even using a plunger. These methods are as follows.  Using Hot Water It is very easy to unblock a toilet with water. Hot water can soften the clog and make it drain easily. Take a bucket of hot but not boiling water and pour it into the bowl. Let it rest for 10-15, minutes. After that flush the Toilet and clean it. Don’t use boiling water on porcelain as it can cause cracks.  Dish Soap People use detergents and dish soap for unclogging toilets. Dish soap can lubricate the pipes, making the clog slide down easily. In order to unblock a toilet, simply take half cup of liquid dish soap and pour it into the bowl. Wait for 10-20 minutes, and then flush out with hot water.  Baking Soda and Vinegar Method People usually use baking soda with vinegar to unclog the toilet. Just pour half to one cup of baking soda into the bowl and then 1-2 cups of vinegar. Let them rest for 30 minutes then flush them out. Don’t forget to wear gloves while cleaning your bathroom.  Unusual but Handy Tools Sometime a coat hanger and a plastic bottle can be used to unclog your toilet. Straighten the hanger and use it to push down the clog. Add some water and then flush your toilet. A plastic bottle can be used if you don’t have a plunger at home. Cut the opening of the bottle with a kitchen knife and place the opened part on the hole of the bowl. Press and release the bottle manually just like a plunger. It will create a vacuum pressure, which pushes the clog down the pipe.  Additional Tips for Unclogging Toilet As you have cleared the clog, now it is time to follow tips to prevent that trouble in the future   Do not flush non-flushable materials, baby wipes, cotton pads etc  Use less toilet paper and flush it gradually  Educate your children on what to flush and what don’t  Use hot water to clear small clogs regularly once a month  Do not use drano for toilets, as it is not safe for pipes  Use enzyme based cleaners for your toilets  When the Toilet won’t flush not clogged Sometimes, your Toilet is not clogged. It is just not flushing out properly which indicates that the problem is with the tank, not the drain. First inspect the flapper (the bottom rubber seal inside tank) and check whether it is sealing. A flush can also fail to occur due to a faulty chain, insufficient water or a disconnected handle. Only frequent cleaning with some repair can fix it. When to call a plumber If you notice multiple clogs in multiple drains and all the above mentioned tips don’t work then don’t hesitate to call us. We offer professional toilet installation and repair you can rely on. Conclusion A clogged toilet is not difficult to handle and you know it can easily done with the right instruments and a little knowledge. Whether you choose a plunger or hot water, dish soap or baking soda with vinegar, there are many easy ways of bringing things back to motion. Be aware of caustic cleaners such as Drano for toilets unless it explicitly works in the toilet.  Adopt preventive tips to avoid blockage issues in the future. In case the problem still exists, then call a plumber. 

How to fix a leaky toilet
Plumbing

How to fix a leaky toilet? 4 Easy Steps

In the beginning, nobody takes notice of a leaky toilet, but over time, when a repair is not provided, the constant leakage may cause your water bill to hit the roof. So, it is equally important for every homeowner or renter to know how to fix a leaky toilet before calling a plumber for repair. This blog is designed to help you to know about the type of your toilet, its essential parts to find a leakage, and applying step by step fixes to repair your leaky toilet. Everything to Know about Your Toilet Knowing the type and parts of your toilet will help you locate the problem easily. In the USA, commonly used toilets are two-piece and gravity flush toilets. Two-piece toilets consist of two parts: the tank and the bowl, while gravity flush toilets use gravity to push the waste away by pulling water from the tank through the bowel. Now, learn about their basic parts to find the root cause of your toilet problem. Basic Parts of Your Toilet with Functions Following are the basic parts of the toilet which may be involved in the leakage of your toilet Tank which holds the water for flush Bowl which gathers and drains the waste away Flapper is a rubber valve that maintains the water flow from the tank to the bowl. Most of the leakage results from damage Fill Valve which is responsible for refilling the tank after each flush Flush Valve is directly involved release during flush Wax Ring is placed under the toilet base which provides a seal between the toilet and the floor The Supply Line that attaches the toilet to the main water supply of your home How to find a leak It is very easy to detect a leaky toilet by hearing running water drops or trickling. But sometimes, it becomes difficult to locate the leakage due to the silent and slow water dripping. In such cases, you should put some food color into the tank and leave it for 10-15 minutes. After that check the bowl. If the bowl has color, then your toilet is leaking. You can also use dry tissues around the base and tank of your toilet to detect slow leakage. 4 Steps of Fixing a Leaky Toilet The following are the most typical issues that cause leaky toilets, and they can be fixed easily with simple tools and some basic repairs. Step 1: Change the Worn-Out Flapper The most frequent cause of leaky toilets is worn out or old flapper. A flapper is a rubber valve that acts as a seal preventing water backflow from the tank into the bowl. When this rubber gets cracked or becomes stiff over time it cannot provide the desired seal, resulting in water leakage into the bowl. First to repair the flapper shut off the water supply flush it to clear the tank, and replace the flapper with a new rubber valve. It is quite an easy way to repair toilet leakage without using any tools.  Step 2: Fill the Cracks in the Bowl or Tank A bowl and tank are two major parts of a toilet. Any crack would cause leakage of your toilet. Small cracks can be repaired using waterproof epoxy, but larger cracks would need a plumber for leaking toilets. Step 3: Install a New Waxing ring As you know the wax ring acts as a seal between your toilet and the floor. Over time, this ring can become damaged and fail. To fix this issue you have to lift the toilet with a putty knife and then replace the damaged wax ring with a new one.  It is quite challenging but you can do it easily with the help of a person. Step 4: Tightens the Bolts and Replace Washer Sometimes, the bolts between the tank and bowl get loose, causing water leakage. If leakage appears at the connection of the tank and bowl, grab a screwdriver or wrench and tighten the bolts. Do not over tighten the bolts, as they can cause cracks in your tank. If the leakage is still there, change the old washer for a new one. Make sure to shut off the water supply and empty the tank before replacing the washer. When to Call a Plumber After applying possible DIYs for your toilet leakage repair and the problem is still present then donot complicate things just go and call a plumber to fix your leaky toilet If you are not comfortable applying fixes or notice multiple leaks then it would be wise to call toilet repair plumber. Conclusion Sometimes a leaky toilet appears as an annoying problem but in most cases, you can handle it without calling a plumber with little research and using appropriate tools. Whether the leakage is due to older flappers, damaged waxing rings or lose bolts you can repair it easily. But if the problem continues or if you do not really know where the leakage is coming from then don’t forget to call a plumber. Want to learn toilet installation? Check out our blog: How to install a new toilet?

Troubleshoot Your Water Heater
Plumbing

How to Troubleshoot Your Water Heater: A Guide to Solving Common Issues

Water heaters are essential household appliances that ensure you have access to hot water for daily tasks like showering, washing dishes, and laundry. However, like any appliance, water heaters can encounter problems. When your water heater starts acting up, it’s important to diagnose the issue promptly to prevent further damage and ensure your home remains comfortable. This article will guide you through common water heater issues, using a set of diagnostic questions to help you identify the problem, and offer practical troubleshooting steps. Whether you’re dealing with cold water, strange noises, or other unusual behavior, understanding what might be wrong can save you time, money, and stress. What Type of Water Heater Do You Have? Before you can troubleshoot your water heater, it’s important to know the type of system you’re dealing with. Different types of water heaters have distinct characteristics and issues, so it’s essential to narrow this down: Gas (Natural or Propane) Gas water heaters are powered by either natural gas or propane. These systems are commonly found in homes that don’t have an electric hookup. If your gas heater isn’t working, the issue could be related to the gas supply, the pilot light, or the thermocouple. Electric Electric water heaters are powered by electricity and are widely used in homes. Common issues with electric water heaters include a malfunctioning heating element, a tripped circuit breaker, or a faulty thermostat. Tankless (On-Demand) Tankless water heaters heat water on demand, which makes them energy-efficient. If you’re experiencing issues with a tankless system, it could be a problem with the flow sensor, gas supply, or an error code displayed on the unit. Heat Pump/Hybrid Heat pump or hybrid water heaters use electricity to move heat from the air or ground to heat water. They are more energy-efficient than traditional electric water heaters. Issues can arise from the thermostat, airflow restrictions, or refrigerant leaks. How Old Is Your Water Heater? The age of your water heater can help you determine if it’s time for a repair or replacement. If you’re unsure about its age, check the serial number on the unit to find out when it was manufactured. The typical lifespan of a water heater depends on the type: Gas Water Heaters: 10–15 years Electric Water Heaters: 10–15 years Tankless Water Heaters: 20 years or more Heat Pump/Hybrid Water Heaters: 10–15 years If your unit is over 10 years old, it may be more cost-effective to replace it rather than repair it, especially if frequent issues arise. Age-Related Problems to Watch For: Rust or corrosion Leaking tank or pipes Frequent pilot light or power failures Inefficient heating Is Your Hot Water Not Working in…? Determining where the issue is happening in your home can provide valuable insight into what may be malfunctioning. The Whole House If there is no hot water anywhere in the house, the issue is likely with the water heater itself. The most common causes for this could include: A tripped circuit breaker (for electric units) A malfunctioning pilot light or gas supply (for gas units) A faulty thermostat A burned-out heating element Only One Faucet/Shower When hot water is only unavailable in one faucet or shower, the problem may lie with the fixture rather than the entire water heater. Common issues include: Clogged aerators or showerheads Broken or malfunctioning mixing valve Faulty faucet cartridge One Side of the House If the issue is limited to one part of the house (e.g., one bathroom or the kitchen), you may be dealing with poor water distribution. Check for issues like: Faulty plumbing or pipes Corrosion in the water lines A valve that’s closed or malfunctioning Is the Water Completely Cold or Just Lukewarm? Understanding whether your water is completely cold or just lukewarm can provide further clues: Completely Cold If the water is completely cold, it typically indicates a serious problem with the water heater. This could include: A tripped circuit breaker (electric heaters) No pilot light (gas heaters) A failed heating element or thermostat A clogged filter (tankless units) Lukewarm If the water is lukewarm, it may indicate that the thermostat is set too low or that the heating elements are starting to fail. Adjusting the thermostat or replacing the heating elements might solve this issue. Starts Hot, Then Turns Cold Quickly If the water initially heats up but then quickly turns cold, this is often a sign of a problem with the thermostat, sediment buildup in the tank, or a failing heating element. Have You Noticed Any of the Following? The following symptoms could provide a more specific diagnosis of your water heater’s issue: No Pilot Light / Error Code on the Unit For gas water heaters, if the pilot light is out, this is a clear sign that there is an issue with the gas supply or thermocouple. Check if the gas supply is on, and relight the pilot light following the manufacturer’s instructions. If the issue persists, the thermocouple might need to be replaced. For tankless systems, error codes can indicate problems with the flow sensor, temperature sensor, or other components. Refer to your unit’s manual to diagnose the error code. Strange Noises from the Tank Strange noises, such as popping or rumbling, often indicate sediment buildup in the tank, especially for older units. This sediment can interfere with the heating process and damage the tank over time. Flushing the tank can help remove sediment and restore normal operation. Water Leaking Around the Unit Leaks are a serious concern and can indicate a problem with the tank, valves, or pipes. If you notice water pooling around your unit, immediately turn off the power or gas supply and contact a professional plumber or technician to avoid water damage. Circuit Breaker Tripped For electric water heaters, a tripped circuit breaker is a common issue. This could be due to an overworked unit or a short circuit. Reset the breaker and check the system. If the breaker trips again, it might indicate a deeper electrical issue. Recently

Do you tip an ac repair guy
Plumbing

Do You Tip an AC Repair Guy? Simple Guide to Tipping

When it comes to HVAC services, many homeowners wonder, “Do you tip an AC repair guy?” The short answer is: it depends. Tipping an AC repair technician is not a requirement, but it is certainly appreciated if you feel the service was exceptional. While tipping is a common practice in certain industries like restaurants, it’s not always expected in the HVAC field. That said, providing a tip can go a long way in building a positive relationship with your technician and showing appreciation for their hard work. In this article, we’ll explore the etiquette around tipping AC repairmen, air conditioner installers, and other HVAC professionals, helping you decide when and how to offer a tip if you choose to. Understanding the simple guide to tipping for HVAC Services When it comes to services like air conditioning repair, one common question that arises is whether tipping is expected or necessary. While tipping might seem standard for some service industries like restaurants or taxi rides, it’s not always clear whether an AC repairman should receive a tip. This article will help clarify the norms, expectations, and guidelines surrounding tipping HVAC professionals. What is Tipping? Tipping, a practice where a customer provides a gratuity above and beyond the service cost, is a common way of showing appreciation for good service. But how does this apply to AC technicians or air conditioner installers? HVAC technicians often perform specialized and skilled labor, so understanding whether they expect tips or not can be tricky. Why Tipping an AC Repair Technician Matters While AC repair technicians do not typically rely on tips to sustain their livelihood, a thoughtful tip can go a long way in showing appreciation for their expertise and hard work. Tipping can also help build a positive relationship with your service provider, which may be beneficial for future service calls or emergency repairs. Building Relationships with Service Providers In the HVAC industry, as in other service industries, customer loyalty is highly valued. Offering a tip can create goodwill, fostering a relationship with a technician who may be more likely to prioritize your future service needs or provide additional advice. Do You Have to Tip AC Repair Technicians? It’s not required by law to tip AC repairman professionals. In many cases, your technician’s pay is already factored into the service charge, and in such situations, tipping is entirely optional. The decision to tip is typically influenced by the technician’s performance and the complexity of the work done. Tipping vs. Paying for Service Most HVAC companies charge a flat rate for services, which includes the technician’s labor and expertise. The tip, when offered, is seen as an additional gesture of thanks, but it’s not meant to replace the technician’s salary or commission. Are Tips Expected? While tips aren’t always expected, AC technicians often appreciate the gesture. However, most will not demand a tip, as their main compensation comes from their hourly wage or per-job fees set by their employers. You can read about: Why Is My AC Spitting Out Water How Much Should You Tip an AC Repair Technician? The typical amount for a tip varies depending on the complexity of the job, the cost of the service, and your personal satisfaction. Generally, the range falls between $10 and $50, but this can be higher or lower based on factors like job difficulty and time spent. Factors That Influence Tip Amount Some factors that may influence how much to tip include: Job complexity: A complicated installation or repair might warrant a higher tip. Service satisfaction: If the technician goes above and beyond, a larger tip may be appropriate. Total service cost: If the repair or installation costs a significant amount, the tip can reflect a percentage of the total charge. Situations Where Tipping is Appropriate Tipping is most appropriate when you’re happy with the technician’s work. If the AC technician fixed the issue quickly and professionally, a tip shows appreciation for their skills and effort. However, if the service was poor, a tip might not be necessary. Alternatives to Tipping If you don’t have the cash for a tip, there are still other ways to show your appreciation. Offering Positive Feedback Many technicians value online reviews or word-of-mouth recommendations. A glowing review or referral can go a long way in boosting their reputation and future business. Regional and Cultural Considerations Tipping practices vary across regions and cultures. In some areas, it may be more common to tip air conditioner installers, while in others, it’s not expected. You can read about: Can I Clean My AC Unit With A Hose The Pros and Cons of Tipping an AC Repair Technician Pros of Tipping Better Service: Tipping might encourage the technician to provide high-quality service. Building Rapport: A tip can lead to a more positive relationship with your technician for future services. Cons of Tipping Additional Cost: Not everyone has extra funds to tip, and it may not always be necessary. Not Always Expected: Some AC repair technicians do not expect or rely on tips, so it could be seen as unnecessary. When You Might Not Want to Tip Sometimes, it may not be appropriate to tip, such as when: The technician was unprofessional. The service was unsatisfactory. The company already includes gratuity in the bill. Conclusion Tipping an AC repair technician is not a requirement, but it can be a great way to show appreciation for excellent service. Whether or not you choose to tip depends on factors such as job difficulty, your satisfaction, and your budget. If tipping isn’t possible, non-monetary gestures like positive feedback can be just as valuable. Looking for reliable HVAC services in Eagle Rock? Our expert technicians are here to keep your home comfortable with repairs, installations, and maintenance! FAQs Is Tipping an AC Repair Technician Common Practice? In some places, tipping is more common than in others. It’s typically expected in areas where tipping is a cultural norm, but it’s not always mandatory. Whether it’s an AC repairman or air

Fast and Efficient Plumbing Services in Eagle Rock

Client Reviews

Posted on Google Google
Ryan Haden profile picture
Ryan Haden
Google star 1Google star 2Google star 3Google star 4Google star 5Trustindex verifies that the original source of the review is Google.
Could not have been happier with Alex! We was right on time, polite, fixed all my kitchen sink issues and have me good tips on how to best maintain. I will for sure be using him again and highly recommend anyone who needs a great plumber to use his services as well. Thank you!
Posted on Google Google
Lorena Marcoe profile picture
Lorena Marcoe
Google star 1Google star 2Google star 3Google star 4Google star 5Trustindex verifies that the original source of the review is Google.
Talk about a professional...yes, I am talking about Alex Derks, Derks Plumbing. He is by far the most knowledgeable plumber we have ever had the pleasure of hiring. He's been in the plumbing business for years and it shows. Any questions you have re: plumbing issues, install, etc., Alex is your man. So happy with his work and he has a great sense of humor as well... extremely easy to talk to...thank you Alex!!!
Posted on Google Google
Andrew Jalil profile picture
Andrew Jalil
Google star 1Google star 2Google star 3Google star 4Google star 5Trustindex verifies that the original source of the review is Google.
Alex did a great job installing my kitchen faucet and an under-sink Aquasana water filter. He also addressed a few other plumbing-related issues. He was friendly and helpful. Excellent work!
Posted on Google Google
Abigail Bigham profile picture
Abigail Bigham
Google star 1Google star 2Google star 3Google star 4Google star 5Trustindex verifies that the original source of the review is Google.
Alex does what other plumbers cannot do! He is our go to.
Posted on Google Google
Danielle Driver profile picture
Danielle Driver
Google star 1Google star 2Google star 3Google star 4Google star 5Trustindex verifies that the original source of the review is Google.
Alex is very friendly and responsive. What a pleasure to work with!
Posted on Google Google
Lawrence Isaacs profile picture
Lawrence Isaacs
Google star 1Google star 2Google star 3Google star 4Google star 5Trustindex verifies that the original source of the review is Google.
Very very happy with the work Alex did for us replacing the tanks in our Aquasana filtration system. From first contact over the phone through job completion Alex was a pleasure to work with. He explained what he was doing, and why, every step of the way, and made sure we understood what we needed to do to maintain the system. Strongly recommend Alex!
Posted on Google Google
Joey Aucoin profile picture
Joey Aucoin
Google star 1Google star 2Google star 3Google star 4Google star 5Trustindex verifies that the original source of the review is Google.
Alex Derks has been such a lifesaver for me. Anytime I'm in a pinch with the plumbing in my home, Alex is only a phone call away and I've only seen great results from his work. He's reliable, knowledgable, and entirely trustworthy. A must-have source when owning a home.
Posted on Google Google
Eric Gorman profile picture
Eric Gorman
Google star 1Google star 2Google star 3Google star 4Google star 5Trustindex verifies that the original source of the review is Google.
After working with dozens of plumbing services in the LA area, I can confidently say Derks is the best in the business. On time, reliable and capable of even the most difficult tasks, Derks goes above and beyond to make sure your water system is working correctly.
Posted on Google Google
Jason Gruenbaum profile picture
Jason Gruenbaum
Google star 1Google star 2Google star 3Google star 4Google star 5Trustindex verifies that the original source of the review is Google.
Excellent know-how and fast!! Reasonable pricing and super responsive!!
Posted on Google Google
Jonathan Hepfer profile picture
Jonathan Hepfer
Google star 1Google star 2Google star 3Google star 4Google star 5Trustindex verifies that the original source of the review is Google.
Alex is an expert plumber, and he always goes out of his way to educate me about how to prevent future issues. Highly recommended!

Derks Plumbing has been providing professional plumbing services to Eagle Rock residents for over 20 years. Our experience and strong reputation have allowed us to grow, and we are proud to serve customers in 15 nearby areas, including Venice, Santa Monica, Beverly Hills, and more.

Contact

Hours of Operation

Monday: Open 24 Hours
Tuesday: Open 24 Hours
Wednesday: Open 24 Hours
Thursday: Open 24 Hours
Friday: Open 24 Hours
Saturday: Open 24 Hours
Sunday: Open 24 Hours

© 2026 Created by Localpro1

Scroll to Top