An ongoing drip can be more than just bothersome; it’s wasting water, increasing your utility bill, and usually indicates a problem with the plumbing that needs to be addressed immediately. This detailed guide will give you the necessary knowledge and experience-based steps to properly diagnose and how to repair sink faucet issues.
The first step to diagnosing the problem of a leaking sink faucet and having a quiet bathroom or kitchen once again is to understand how your fixture works. We will walk you through the process of repairing that sink dripping water faucet and cover everything from figuring out which faucet type you have and replacing any parts that might be worn out.
Common Signs Your Faucet Needs Repair
Your faucet tells you when something’s wrong. Catch these signs early and you’ll avoid bigger problems.
Constant Dripping
A sink faucet leaking one drop per second wastes 2,700 gallons yearly. You’ll see water pooling around the base or dripping from the spout. This usually means worn washers or O-rings inside.
Reduced Water Flow
When water trickles instead of flows, mineral buildup blocks the aerator. You might also have debris in the cartridge or valve seat. This issue gets worse over time if ignored.
Handle Feels Loose or Stiff
A sink leaking from handle areas often starts with movement problems. Loose handles wobble when you turn them. Stiff handles need excessive force. Both signal internal wear.
Water Pools at the Base
Seeing water around your faucet base? The O-rings have likely failed. This creates a mess on your counter and can damage cabinets below. Fix it before mold grows.
Squealing or Grinding Sounds
Strange noises mean metal parts are rubbing together wrong. The washer might be worn out. Or sediment has built up inside. These sounds get louder as damage increases.
Temperature Control Issues
Can’t get the right water temperature? Your cartridge may be failing. This happens in single-handle faucets when internal parts degrade. You’ll struggle to find that perfect warm setting.
Tools and Materials You May Need
Having the right tools makes repairs faster and easier. Here’s what to gather before you start.
Essential Tools:
- Adjustable wrench (two are better)
- Phillips and flathead screwdrivers
- Allen wrench set (hex keys)
- Pliers (regular and needle-nose)
- Flashlight for seeing tight spaces
- Bucket or container for water
- Towels and rags
Common Replacement Parts:
- O-rings (various sizes)
- Washers (rubber and fiber)
- Valve seats
- Cartridges (match your model)
- Faucet repair kits
- Plumber’s grease
- Thread seal tape
Optional but Helpful:
- Basin wrench for tight spaces
- Penetrating oil for stuck parts
- Camera phone to document disassembly
- Masking tape to label parts
Buy a complete faucet repair kit at hardware stores. These cost $10-$25 and include common parts. Having extras saves you a second trip to the store.
Identify the Type of Faucet
Four main faucet types exist. Each repair is different. Here’s how to tell which you have.
Compression Faucets
These are the oldest styles. You’ll see two separate handles for hot and cold. When you turn a handle, it compresses a rubber washer against a valve seat. Most dripping kitchen tap problems in old homes involve this type. They’re simple but wear out faster.
Ball Faucets
Common in kitchens with one handle. Inside sits a rounded ball that controls water flow and temperature. You can spot these by the single handle that moves in all directions. They have more parts than other types. A sink dripping water faucet with this design often needs O-ring replacement.
Cartridge Faucets
These use a movable stem cartridge. They come in single or double handle versions. The handle moves up and down to control flow, side to side for temperature. Less prone to leaks than compression types. When learning how to fix sink faucet drip issues, these are mid-complexity repairs.
Ceramic Disk Faucets
The most reliable modern design. A single handle controls two ceramic disks that slide over each other. These rarely leak and last for years. When they do fail, you usually replace the whole cartridge. The newest faucets in most homes use this technology.
How to Tell What You Have
Look at your faucet handle. Two handles usually mean compression type. One handle that moves freely in all directions is likely a ball faucet. One handle with limited side-to-side and up-down movement suggests cartridge or ceramic disk. Check under your sink for the model number. Search it online to confirm the exact type.
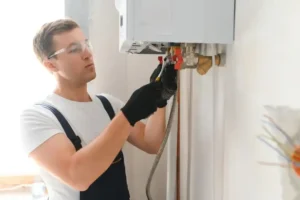
Step-by-Step: How to Repair Sink Faucet
Now let’s fix that leak. These steps work for most common problems.
Prepare Your Work Area
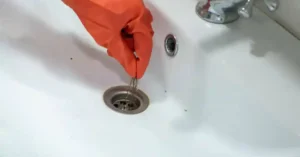
Turn off water supply valves under the sink. Turn both the hot and cold lines clockwise until tight. Open the faucet to drain remaining water. Place a bucket under the pipes. Plug the drain so small parts don’t fall in. Lay down towels to catch drips.
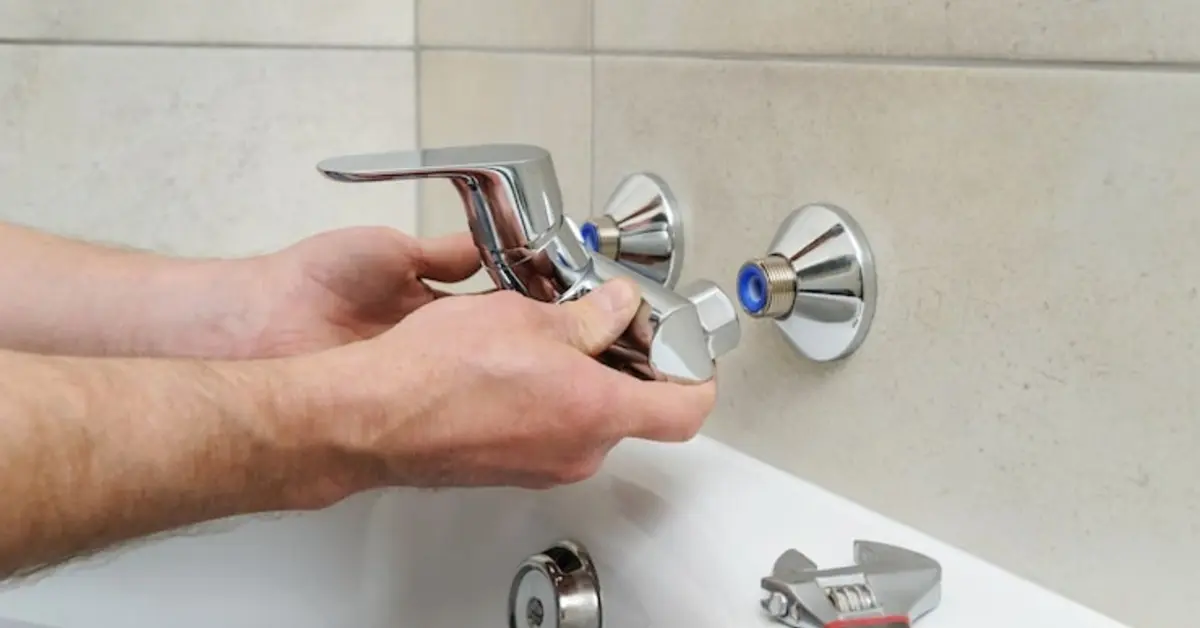
Remove the Faucet Handle
Look for a decorative cap on top of the handle. Pop it off with a flathead screwdriver. You’ll see a screw underneath. Use the right screwdriver or Allen wrench to remove it. Some handles have a set screw on the side instead. Wiggle the handle gently as you pull up. Stuck handles need penetrating oil and patience.
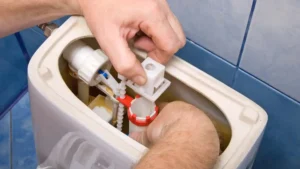
Access the Internal Components
Once the handle is off, you’ll see the inner workings. For compression faucets, use a wrench to unscrew the packing nut. For cartridge types, remove the retaining clip or nut. Take photos as you go. This helps during reassembly. Keep parts in order on a clean towel.
Inspect and Replace Worn Parts
- For Compression Faucets: Check the washer at the bottom of the stem. If it’s cracked or flat, replace it. Remove the screw holding it. Clean the valve seat with a cloth. Rough seats need a valve seat wrench to remove and replace. Apply plumber’s grease to the new washer before installing.
- For Ball Faucets: Replace all O-rings and springs. These come in repair kits. Pull out the old cam and ball. Check for corrosion or wear. Install new rubber seats and springs first. Then add the new ball and cam. Make sure the slot in the ball lines up with the pin.
- For Cartridge Faucets: Pull the old cartridge straight up. Some need pliers. Match it to a new one at the store. The replacement must be exact. Note the orientation before removing. Install the new cartridge the same way. If it goes in backward, hot and cold will be reversed.
- For Ceramic Disk Faucets: These rarely need repair. When they do, replace the entire cylinder. Unscrew the disk assembly from the faucet body. Clean sediment from the openings. Install the new assembly with the seals properly positioned. Don’t overtighten.
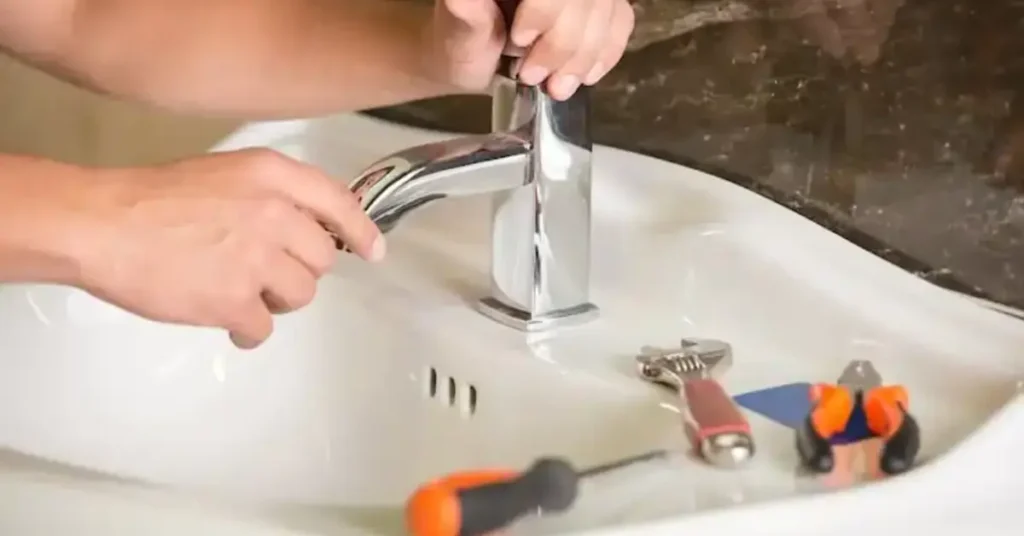
Reassemble the Faucet
Put everything back in reverse order. Don’t force parts together. They should fit easily if aligned correctly. Hand-tighten first, then use tools gently. Overtightening cracks plastic parts and damages seals. Replace the handle and test before finishing.
Test Your Repair
Turn the water supply back on slowly. Check for leaks around the base and handle. Let water run for a few minutes. Test both hot and cold. Move the handle through its full range. If you see leaks, you may need to tighten connections or replace another part.
Why Faucets Fail
Understanding what causes problems helps you prevent them. Here are the main culprits.
Normal Wear and Tear
Rubber parts dry out and crack over time. O-rings and washers compress from constant use. Most faucets need repairs every 5-10 years. High-use kitchen sinks wear faster than bathroom sinks. This is the most common reason for a sink leaking from handle areas.
Hard Water Damage
Mineral deposits build up inside faucets. Calcium and lime corrode metal parts. The aerator clogs first, reducing flow. Then deposits reach internal components. Areas with hard water see more problems. A water softener helps but doesn’t prevent all damage.
Improper Installation
When faucets aren’t installed correctly, they leak sooner. Cross-threaded connections fail quickly. Missing washers cause immediate problems. Some DIY installations skip important steps. Always follow manufacturer instructions exactly.
Low-Quality Materials
Cheap faucets use inferior parts. Thin rubber breaks down fast. Plastic components crack under pressure. Spending $100 more on a quality faucet saves money long-term. Brand reputation matters here.
High Water Pressure
Pressure above 80 PSI stresses faucet parts. Washers compress too much. O-rings blow out. Install a pressure regulator if your home has high pressure. Test pressure with a gauge from hardware stores. Proper pressure extends faucet life by years.
Temperature Extremes
Very hot water damages rubber seals faster. Cold climates can cause pipes to contract. Thermal cycling stresses metal connections. The constant expansion and contraction creates small leaks. These grow into bigger problems.
Preventing Future Faucet Problems
Simple habits keep your faucet working longer. Here’s how to avoid repairs.
Don’t Overtighten Handles
Turn faucets off with just enough force to stop the flow. Cranking handles down damages internal parts. Teach everyone in your home proper technique. This alone can double faucet life.
Clean Aerators Regularly
Unscrew the aerator tip every few months. Rinse out sediment and mineral buildup. Soak in vinegar if heavily clogged. This maintains water flow and reduces internal stress. Takes two minutes and prevents bigger issues.
Address Leaks Immediately
A small drip becomes a big problem fast. Water damage spreads. Mineral deposits accumulate. Parts that could have been saved get ruined. Fix small leaks the day you notice them. When you know how to fix sink faucet leak problems early, repairs cost less.
Use Your Faucet Correctly
Don’t hang things on the spout. Avoid side pressure on handles. These actions bend internal parts. Let children know faucets aren’t toys. Gentle use prevents most damage.
Install a Water Softener
If you have hard water, softening protects all plumbing. The investment pays off in fewer repairs. Your faucets, pipes, and water heater all benefit. Test your water hardness first to decide if you need one.
Schedule Annual Inspections
Check under sinks once a year. Look for small leaks or corrosion. Catch problems before they cause damage. Replace supply lines every 5-7 years as preventive maintenance. Braided stainless steel lines last longest.
When to Call a Professional Plumber
Some repairs need expert help. Here’s when to call the professionals.
You Can’t Identify the Problem
If you’ve taken the faucet apart and still can’t find the leak source, get help. Hidden problems require experience to diagnose. Professionals have seen every type of failure. They’ll identify issues you might miss.
Parts Are Corroded or Stuck
When parts won’t budge, forcing them causes more damage. Corroded connections need special tools. A plumber has extractors and heat sources to remove stuck components. Better to pay for help than break the faucet.
The Entire Faucet Needs Replacement
Installing a new faucet involves more than simple repairs. Supply line connections must be perfect. Sink holes might need modification. Mounting hardware varies by model. A pro ensures proper installation the first time.
You Have Supply Line Issues
Problems with pipes under the sink are beyond basic faucet repair. Leaking supply lines need immediate attention. Shut-off valves that won’t close require replacement. These tasks involve soldering or compression fittings. How to fix leaking sink faucet supply lines safely requires plumbing knowledge.
Water Damage Has Occurred
If leaks have damaged cabinets or walls, assess the full extent. A plumber can help prevent mold growth. They’ll check for hidden moisture. Sometimes what looks like a faucet leak comes from pipe problems behind walls.
You’re Not Comfortable with DIY
There’s no shame in hiring help. A mistake can cause flooding. If you feel unsure at any step, stop and call a plumber. The repair cost is less than water damage. Professional fixes also come with warranties.
You can read about: How Do I Repair a Leaky Bathtub Faucet
Conclusion
Understand how to repair sink faucet problems from start to finish. Many leaks are caused by worn-out O-rings, washers, or cartridges, and with basic tools and a bit of patience, most homeowners can handle these repairs on their own, saving a significant amount in service costs.
Start by identifying the type of faucet you have, then gather the right replacement parts and follow each step carefully. After completing the repair, always test the faucet to confirm the leak has been resolved. A little routine maintenance goes a long way in preventing bigger issues later.
Still, not every situation is DIY-friendly. If the problem is complex or you simply want expert assistance, Derks Plumbing delivers dependable Faucet Repair in Los Angeles with professional service and guaranteed results.
Don’t ignore that small drip the sooner you act, the less impact it will have on your wallet and your water bill.
FAQs
How long does it take to repair a leaking faucet?
Most simple repairs take 30-60 minutes. This includes shutting off water, disassembly, replacing parts, and testing. Complex repairs or stuck components can take 2-3 hours. First-time repairs take longer as you learn your faucet type.
Can I repair a faucet without turning off the water?
Never attempt repairs with water on. You’ll flood your kitchen and can’t safely remove parts. Always shut off supply valves under the sink. If valves are broken, turn off water at the main house shut-off.
Why is my faucet still dripping after I replaced the washer?
The valve seat is likely damaged. When seats get rough or corroded, new washers don’t seal properly. You need to smooth or replace the valve seat. Also check that you installed the correct size washer.
How often should I replace faucet parts?
Replace washers and O-rings every 5-7 years as preventive maintenance. Cartridges last 10-15 years. Ceramic disk cartridges can last 20+ years. Hard water areas need more frequent replacement. Replace parts when you notice any leaking.
What causes a faucet to leak from the base?
Worn O-rings cause base leaks. These rubber rings seal the connection between the faucet and sink. Over time they dry out and crack. Replacing them stops the leak. Sometimes loose mounting nuts also allow water to seep through.