A leaking, cracked, or outdated toilet is more than an eyesore. It wastes water, drives up your bill, and can damage your floor over time. The good news? You don’t always need to call someone right away. With the right tools and a free afternoon, most homeowners can handle this job themselves.
Learning how to install a toilet isn’t as hard as it looks. This guide walks you through every step, from shutting off the water to tightening the final bolt. You’ll also learn what it costs, how long it takes, and when it makes sense to bring in a pro.
How to Remove and Install a Toilet Yourself
Before you buy anything, know what you’re replacing. Most toilets fit a standard 12-inch rough-in, which is the distance from the wall to the center of the drain. Measure yours before shopping.
Removing the old toilet is the first step. Here’s how:
- Shut off the water supply valve behind the toilet.
- Flush to empty the tank and bowl.
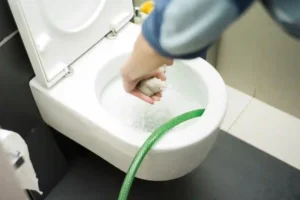
- Use a sponge to remove leftover water from both.
- Disconnect the water supply line.
- Unscrew the nuts from the floor bolts (closet bolts).
- Lift the toilet straight up and set it aside. Toilets are heavy, usually 60 to 100 pounds. Ask someone to help.
- Remove the old wax ring from the flange on the floor.
- Stuff a rag into the drain opening to block sewer gas.
Check the floor flange once the toilet is off. If it’s cracked or broken, fix it before installing the new toilet. A bad flange leads to leaks and rocking, no matter how well you do everything else.
Tools and Materials Needed to Install a Toilet

You don’t need a full toolbox, but you do need the right items.
Tools:
- Adjustable wrench
- Channel-lock pliers
- Putty knife or scraper
- Hacksaw (for trimming floor bolts if needed)
- Level
- Bucket and sponge
Materials:
- New toilet (tank and bowl, or one-piece)
- Wax ring (standard or extra-thick if your flange sits low)
- New closet bolts
- Supply line (braided stainless is best)
- Toilet seat and hardware
- Plumber’s tape (Teflon tape)
Skip cheap supply lines. A braided stainless line resists kinking and lasts much longer. This small upgrade saves you headaches later.
Step-by-Step Guide: How to Install a Toilet
Follow these steps carefully and you’ll have a working toilet in a few hours.
Step 8: Turn On the Water and Test

Remove the rag from the drain before the water comes on. Slowly open the supply valve. Let the tank fill. Flush two or three times and watch around the base and tank. No drips? You’re done. If you see any moisture at the base, the wax ring may not have seated correctly and will need to be reset.
Step 3: Lower the Toilet

Lift the toilet and line up the holes in the base with the closet bolts. Lower it straight down. Press firmly and evenly. The wax ring compresses to create a watertight seal. Don’t rock or shift the toilet once it touches the wax.
Step 1: Prep the Flange

Clean the old wax off the flange with your putty knife. Check that the flange is at or slightly above floor level. Insert new closet bolts into the slots on either side of the flange.
Step 2: Set the Wax Ring

Place the wax ring on the flange, wax side up. Some installers prefer to press it onto the toilet horn instead. Either way works. Don’t reuse an old wax ring, ever.
Step 4: Secure the Toilet to the Floor

Place plastic washers and metal washers over the bolts, then hand-tighten the nuts. Use a wrench to snug them up. Don’t overtighten. Porcelain cracks easily. Alternate sides as you tighten to keep pressure even. Use a hacksaw to trim bolts if they stick up too high, then snap on the plastic caps.
Step 5: Check If It’s Level

Use a level on the toilet. If it rocks, shim it with plastic toilet shims. This matters. A rocking toilet will break the wax seal over time and cause leaks.
Step 6: Attach the Tank

If you bought a two-piece toilet, attach the tank to the bowl now. Insert the rubber gasket, drop in the tank bolts, and lower the tank onto the bowl. Hand-tighten the nuts from inside the tank, then snug them with pliers. Again, alternate sides and don’t overtighten.
Step 7: Connect the Water Supply Line

Wrap Teflon tape on the supply valve threads. Connect the supply line to the bottom of the tank and to the wall valve. Hand-tighten, then give it a quarter turn with pliers.
Step 9: Install the Toilet Seat
Drop the seat bolts through the hinge holes and tighten from underneath. Most seats come with plastic nuts that hand-tighten fine.
How Long Does It Take to Install a Toilet?
For a first-timer, expect 2 to 4 hours. If you’ve done it before, 1 to 2 hours is realistic. Add time if your flange needs repair, the subfloor is damaged, or the old toilet is corroded and stuck.
Don’t rush the wax ring step. That’s where most DIY toilet plumbing problems start.
How Much Does It Cost to Install a New Toilet?
Here’s a realistic breakdown:
| Item | Estimated Cost |
| New toilet (standard) | $100–$400 |
| Wax ring | $5–$15 |
| Supply line | $10–$25 |
| Closet bolts | $5–$10 |
| Toilet seat (if separate) | $20–$80 |
| DIY Total | $140–$530 |
Hiring a plumber for toilet plumbing installation typically adds $150 to $350 in labor. High-end or wall-hung toilets cost more both for the unit and the install.
If you’re replacing a standard floor-mounted toilet with a similar model, the DIY route saves real money and isn’t hard to learn.
You can read about: Why Is My Toilet Making a Hissing Sound
Seven Signs That It’s Time to Get a New Toilet
Don’t wait for a full failure. Watch for these warning signs:
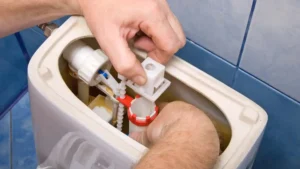
- Constant running — The flapper or fill valve is worn. Sometimes it’s a cheap fix, but older toilets may have multiple worn parts.
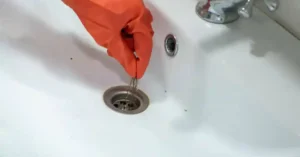
- Frequent clogs — If you’re plunging every week, the toilet likely has weak flush power or internal cracks.
- Cracks in the porcelain — Even hairline cracks grow. A crack in the tank or bowl means replacement, not repair.
- Wobbling — Rocking usually means a failing wax ring or damaged flange. Fix it fast or water will damage your subfloor.
- High water bills — A leaking toilet can waste thousands of gallons a month without being obvious.
- Age over 20 years — Older toilets use 3.5 to 7 gallons per flush. Modern low-flow models use 1.28 gallons. The savings add up.
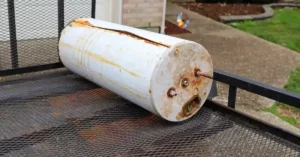
- Surface damage or staining — Permanent stains mean the porcelain glaze has worn down. The toilet traps bacteria and stays dirty no matter how much you clean.
If you see two or more of these signs together, it’s time to do a full toilet installation rather than patch the problem.
Toilet Installation Safety Tips You Shouldn’t Skip
This section doesn’t get enough attention in most guides.
- Always shut off the water before disconnecting anything.
- Wear gloves. Sewer gas and old wax aren’t things you want on your hands.
- Never stand on the toilet to reach something. It can crack the porcelain or break the seal.
- Keep the drain plugged with a rag while working to block sewer gas. Remove it before setting the toilet.
- If you smell strong sewer gas even after the toilet is installed, call a plumber. That can be a venting issue, not just the seal.
When to Call a Professional
Some toilet installs are straightforward. Others aren’t.
Call a licensed plumber if:
- The floor flange is cracked, corroded, or sitting below floor level
- The subfloor is soft or water-damaged
- You’re switching from a floor-mounted to a wall-hung toilet
- There’s no shutoff valve behind your toilet
- You’re doing a full bathroom remodel that moves drain lines
If you’re in the Los Angeles area and need expert help, Derks Plumbing handles all types of toilet plumbing installation, from simple swaps to full bathroom rough-ins. For local homeowners, Toilet Installation in Eagle Rock is one of the services the Derks Plumbing team specializes in, including flange repairs and complete installs done right the first time.
There’s no shame in calling a pro. A bad toilet install leads to water damage, mold, and bigger repair bills. Getting it done right is always worth it.

Conclusion
Replacing a toilet is one of the more manageable DIY plumbing jobs. Shut off the water, pull the old unit, set the wax ring carefully, and take your time connecting everything. Most people finish in an afternoon.
If something doesn’t look right, stop and ask. Water damage from a bad seal is far more expensive than a service call. Whether you do it yourself or hire Derks Plumbing, a properly installed toilet runs quietly, uses less water, and lasts for decades.
FAQs
Do I need a plumber to install a toilet?
No. Most homeowners can install a standard floor-mounted toilet themselves with basic tools. You’ll need a plumber for flange repairs, wall-hung toilets, or any work that involves moving drain lines.
What is the most common mistake when installing a toilet?
Setting the wax ring incorrectly. If you rock or shift the toilet after it touches the wax, the seal breaks. Lower it straight down and press firmly.
How often should a wax ring be replaced?
A wax ring should last the life of the toilet if it’s set correctly. Replace it any time you remove the toilet for any reason.
Can I install a toilet on the tile without cracking it?
Yes, but be careful lowering the toilet. Have someone help you guide it straight down. Don’t drag or slide it across the tile.
What is toilet rough-in size and why does it matter?
The rough-in is the distance from the wall to the center of the drain. Most homes have a 12-inch rough-in. Buying a toilet with the wrong rough-in size means it won’t fit properly against the wall.
How do I know if my flange needs replacing?
If the flange is cracked, corroded, or sits more than a quarter inch below floor level, replace it before installing the toilet. A bad flange causes rocking and leaks no matter how tight the bolts are.