We are Available 24/7

Plumbing

who is responsible for plumbing repairs in a rental
Plumbing

Who Is Responsible for Plumbing Repairs in a Rental?

People who rent and people who own homes often don’t agree on who is responsible for fixing plumbing problems in rented homes. People often ask this question in an emergency, like when a pipe bursts, a drain gets clogged, or a tap leaks. Sometimes the answer isn’t clear-cut because it depends on state rules, lease agreements, and the specifics of the damage. It is important to know the rules about who is responsible as a tenant, who is the landlord’s plumber in California, and when the renter is responsible for fixes. This will help you avoid legal problems, extra costs, and confusion. This article will explain the law, talk about common plumbing problems in renters, and explain who usually pays the plumber. Understanding Landlord-Tenant Laws Before you can figure out who is responsible for plumbing repairs in a rental, you need to look at the rules that govern landlords and tenants. Each state has its own set of rules, but most of them have similar main ideas. Most of the time, landlords are responsible for making sure their renters live in a safe, clean, and habitable space. This is called the “implied warranty of habitability.” A water system that works is an important part of that. By law, owners must make sure that the water supply, drainage, and fixtures such as sinks, toilets, and water heaters are all in good shape before the tenant moves in and for the duration of the lease. If something big breaks, the landlord will usually pay to fix it, unless the tenant caused the damage. It is very clear what these rules are in California. In California, landlords are responsible for fixing plumbing problems like leaks, clogged sewer lines, and broken water heaters. Tenants can sometimes not pay rent or even break the lease without being punished if they don’t make fixes when they’re supposed to. It depends on how bad the problem is. Lease Agreements and Plumbing Clauses State rules are the basis, but lease agreements can add more specifics. If you write your lease well, it will be clear what the renter is responsible for and what the landlord is supposed to take care of. As an example, some leases say that renters must keep drains clear of hair and food. In the event that the renter fails to do that and a clog happens, they might have to pay to have it cleared. Anytime a pipe breaks behind the wall or an old water heater stops working, the landlord is generally responsible. However, even if a lease says that renters are responsible for repairs, those things still need to be legal in the area. By law, a landlord can’t make tenants pay for big plumbing repairs that make the apartment unlivable. Common Plumbing Problems and Who Pays Let’s take a closer look at common plumbing issues in rentals and analyze who is responsible for plumbing repairs in a rental for each case. Leaky Faucets or Pipes: If the leak occurs due to normal wear and tear or aging pipes, it’s the landlord’s duty to fix it. However, if the tenant breaks a fixture due to misuse, they may be held accountable. Clogged Drains or Toilets: These are often a gray area. If the clog is due to a systemic issue like tree roots in the sewer line, the landlord must address it. But if the tenant flushed items like wipes or paper towels, they may be liable for the repair. Water Heater Issues: Landlords must provide hot water as part of habitability standards. If the water heater stops working due to age or defect, the landlord pays. If the tenant damaged it through negligence, the tenant could be charged. Burst Pipes: A burst pipe due to cold weather or deterioration falls under the landlord’s responsibilities. However, if the tenant failed to report a minor leak that later caused a burst, the costs might be shared. Low Water Pressure or Sewage Backup: These systemic issues are almost always the landlord’s concern, especially when multiple units are affected. In all of these examples, clear communication between landlords and tenants is essential. And most importantly, both parties must understand their obligations as defined in the lease and local law. When Are Renters Responsible for Plumbing Repairs? So, are renters responsible for repairs at all? The answer is yes but only in specific cases. Tenants are typically responsible for keeping the unit clean and reporting plumbing issues promptly. If they fail to do so and the issue gets worse over time, they might share in the repair costs. Examples of tenant responsibilities include: Avoiding the flushing of foreign objects (like sanitary products, cotton balls, or grease) down the toilet or sink. Not using chemical drain cleaners that can damage pipes. Reporting leaks, drips, or strange sounds as soon as possible. Keeping plumbing fixtures clean and free of mold or buildup. If tenants ignore these duties and plumbing problems occur as a result, landlords may justifiably deduct repair costs from their security deposit or send a bill. Landlord Plumbing Responsibilities in California If you live in the Golden State, landlord plumbing responsibilities California are clearly outlined in the California Civil Code. According to the law, landlords must ensure that the plumbing system is in good working order and complies with building and health codes. Here’s what California landlords are typically responsible for: Providing running water and hot water Fixing or replacing broken water heaters, pipes, or fixtures Repairing leaks that affect habitability Ensuring sewage systems function properly Maintaining compliance with the Uniform Plumbing Code Failure to meet these obligations can give tenants the right to take legal action or perform “repair and deduct,” where they pay for a fix and subtract it from the rent. That said, California law also recognizes tenant responsibilities. Tenants are expected to prevent further damage by acting quickly, avoiding misuse, and cooperating with repair personnel. What Tenants Should Do If a Plumbing Issue Arises If you’re renting and face a


What Is the Safest Water Piping Material
Plumbing

What Is the Safest Water Piping Material? (Types of Pipes)

This blog is written by a certified plumber from Derks Plumbing Company Inc., a trusted name in Los Angeles plumbing services. With over 15 years of hands-on experience in installing and repairing all types of residential and commercial piping systems including copper, PVC, PEX, galvanized steel, and more I’ve seen firsthand the pros and cons of each material in the field. In this blog, I’m sharing practical insights to help homeowners and contractors better understand plumbing and pipe fitting options based on real-world performance, reliability, and cost. What Is the Safest Water Piping Material? Safety is a must when it comes to water systems in homes. Your water lines carry clean, drinkable water throughout your home. Because of this, the materials they are made of need to be reliable, safe, and long-lasting. So, what is the best material for water pipes? Cross-linked polyethylene (PEX) and copper are always at the top of the list of the most popular and suggested materials. Both are commonly used in home plumbing for drinkable water lines and are known for being safe, long-lasting, and not corroding. Copper Pipes Copper lines have been used in plumbing for more than one hundred years because they are reliable, last a long time, and can handle high temperatures. For both hot and cold water supply lines in homes and businesses, copper is one of the most reliable materials. Because they don’t rust and are strong, these pipes are known to last a long time. This makes them one of the best materials for drinking water systems. There are two primary types of copper pipes used in plumbing: Rigid Copper Pipes (Hard Copper): These pipes are stiff and are long and straight. They are used for main water lines and other places where they don’t need to be flexible. Flexible Copper Tubing (Soft Copper): These pipes are more bendable, so they can be used in tight spots or places where they need to be bent, like under sinks or around corners. Copper pipes are usually sold by size, which is based on their diameter in millimeters. For homes, the most popular sizes are 15mm and 22mm. Copper pipe also comes in different thickness grades, which are important for different uses. Copper Pipe Grades: Type M: The thinnest gauge of copper pipe. It is most often used in residential applications but is better suited for water supply lines rather than heavier-duty systems. Type L: This medium-thickness pipe is more durable and is frequently used for drinking water lines in homes. It can withstand higher pressures than Type M. Type K: The thickest and most robust copper pipe, making it ideal for underground installations and heavy-duty systems, including main water lines. Strengths of Copper Pipes: Durability and Longevity: Copper is incredibly durable, offering a lifespan of 50+ years. It is resistant to cracks and breaks, even under high-pressure conditions. Corrosion Resistance: Copper resists corrosion better than many other metals and doesn’t rust like steel or iron. However, it can still be affected by extremely acidic or alkaline water over time. Safety: Copper is a non-toxic material, which is why it’s ideal for drinking water systems. It doesn’t leach harmful substances into the water supply, unlike some other materials. Temperature Tolerance: Copper is highly resistant to both high and low temperatures, which is why it’s used in hot water systems and also in heating applications. Recyclability: Copper is 100% recyclable, making it an environmentally friendly material choice. Old pipes can be recycled and reused without losing their quality. Ease of Installation: Although rigid copper pipes require soldering, flexible copper tubing can be used in tight spaces and doesn’t need specialized tools for installation. Weaknesses of Copper Pipes: Cost: Copper pipes are more expensive than other materials like PVC or PEX. The material cost itself, along with the installation labor, can make copper piping a pricier option. Exposure to Acidic Water: While copper resists corrosion, extremely acidic water can cause pitting and damage to the pipes, leading to leaks. Potential for Expansion and Contraction: Copper expands and contracts with temperature changes, which can lead to leaky joints or fittings if not properly installed. Environmental Concerns: Although copper is recyclable, its mining and manufacturing process can have significant environmental impacts, raising concerns among environmentally-conscious consumers. Harder to Modify: Rigid copper pipes require cutting and soldering, making repairs and modifications more complicated than materials like PEX, which can be simply clamped together. Summary:Copper lines are great for high-quality plumbing systems because they last a long time, are safe, and don’t rust. They are usually thought to be the best in plumbing and work great for both hot and cold water supply lines. But they are more expensive, can rust in salty water, and are harder to install than other materials like PEX or PVC. This means they aren’t always the best choice. Even with these problems, copper is still one of the safest materials for drinking water systems and a popular choice for pipes in homes and businesses. Galvanized Steel Pipes Galvanized steel pipes are made of steel that has a layer of zinc on it to protect it from rust and rusting. This kind of pipe was normal for indoor plumbing for decades before newer materials like copper and PEX became more popular. It was used in most homes built before the 1960s. Types of Galvanized Steel PipesCopper pipes have a lot of different types, but galvanized steel pipes only have a few. They come in different thicknesses and lengths, and their widths are usually between ½ inch and 2 inches. Fittings with threads are used to connect these pipes. Strengths of Galvanized Steel Pipes: Durability: These pipes are mechanically strong and resistant to physical damage. They can handle high pressure and heavy loads. Corrosion Resistance (Initially): The zinc coating initially prevents rust and corrosion, extending the pipe’s life in less humid environments. Long Service Life: With proper conditions, galvanized pipes can last 40–50 years. Fire Resistance: Steel is non-combustible, making galvanized pipes

$49 Drain Cleaning
Plumbing

$49 Drain Cleaning: The Real Cost of a Clogged Drain

I have worked as a qualified plumber for many years and have seen how a simple clogged drain can become a homeowner’s worst nightmare if they don’t take care of it right away. Our team has cleaned thousands of drains in Los Angeles and the neighboring regions at Derks Plumbing. One thing we’ve learned is that the real cost of a clogged drain isn’t just the time and money it takes to fix it. $49 Drain Cleaning Slogan is not a scam. That’s why we clean residential and commercial drains for $49 each. It’s not a trick. I think the price is fair for such a skilled service. Why $49 Makes Sense And Saves You Money We really mean $49 when we say that a drain cleaning in the USA. There are no secret costs. Our skilled professionals will be there ready to help if your sink drains slowly, your shower backs up, or your tub just won’t empty. This service was made to help people avoid the bigger costs, like broken pipes, water overflow, mold from leaks, and even slab problems in the worst cases. Now is not the time to wait until your house smells like a sewer or there is water up to your ankles. What You Get With Our Drain Cleaning Service Our $49 drain cleaning service comes with a registered plumber who has the right tools to quickly clear your drains. We check everything carefully, get rid of the clog the right way, and make sure everything is running smoothly. We’ll also tell you how to keep blocks from happening again. We offer a simple, professional service that will fix your drain problems quickly and without any extra costs or wait times. Why Clogged Drains Should Never Be Ignored One of the most important things I tell my clients is that clogs are a sign of trouble. If your sink gurgles or drains slowly, it means that something is getting stuck. If you don’t fix a clogged drain, it can cost you hundreds or even thousands of dollars in water damage or pipe breaks. That drain cleaner from the store might look like a quick fix, but they often make things worse. They damage your lines and rarely get the whole blockage clear. That’s why I always suggest getting a professional cleaning, which can be done for just $49. Some Other $49 Services We clean drains for $49, and we also offer other important plumbing services for the same price. For $49, our service includes simple, easy fixes like unclogging a toilet, fixing a small problem with the garbage disposal, or looking for leaks. You won’t be surprised by extra fees, and the work will be done by a licensed plumber who knows what they’re doing. When to Call Our Plumber for Assistance If you hear bubbling sounds, smell bad things, or see signs of trouble, you should call a plumber right away. Things can get worse if you wait too long, like pipes breaking or water backing up. It’s clear that you need professional help if you’ve tried homemade solutions and the problem still continues. You can save time, money, and a lot of stress by calling early instead of waiting until things get worse. Why Homeowners Trust Derks Plumbing We are providing all types of plumbing services from 20 years. Derks Plumbing name was made by being honest, skilled, and charging fair prices. Our specials on drain cleaning are meant to give real answers at prices that everyone can pay for. There are no scam or short term fixes. Nothing but good plumbing work done by qualified professionals the first time. When people look up how much it costs to clean their drains, they think it will be hundreds of dollars. If you want to snake or hydro-jet your whole house, the price will go up. However, if you call us early, $49 is all it takes to clear out most common drain jams. Final Advice from Myside I have done this job for a long time. And one thing I have learned is that water issues don’t go away on their own. Things keep getting worse. Don’t wait if your drain is giving you trouble. Please call us for low cost drain cleaning services. Derks Plumbing – Affordable, Professional, and Always Here to Help. Frequently Asked Questions about $49 Drain Cleaning   How do I know if I need professional drain cleaning? It’s time to call a professional if your washbasin, tub or shower drains slowly, makes noises like bubbling or smells bad. Fixes you make yourself may only last for a short time. For just $49, we can clean out your drain and get to the root of the problem before it gets worse. Is $49 really all I’ll pay? Oh, without a doubt. Common household obstructions are covered by our $49 drain cleaning deal. We will be completely transparent with you and not hide anything if the problem is more significant, such as a main sewer line problem. Do I need to be home during the service? Sure, we’ll require someone to identify the problem and grant us access. We consistently leave the area clean, and the majority of our jobs take less than an hour. Can you clean any drain for $49? Domestic sinks, tubs, and showers are among the many indoor drains that we clear out. We will provide you a price before we conduct any more work on your main sewer line, yard drain or clog caused by roots or damaged pipes. How often should I get my drains cleaned? In most cases, we advise doing it once a year. Grease, hair, and filth accumulate in bathrooms and kitchens with time. Maintaining a clean environment helps keep things running smoothly and saves money on repairs in the long run.

what does the furnace board do on most modern furnaces
Plumbing

What Does the Furnace Board Do on Most Modern Furnaces?

Should your house feature a furnace, you have most likely heard of the furnace control board but might not fully grasp its purpose or significance. Indeed, you might have wondered, “what does the furnace board do on most modern furnaces?” Though tiny, this part is absolutely vital for the performance, effectiveness, and safety of your heating system. The brain behind your heating equipment is really the furnace control board. Whether you have an electric or a gas furnace control board, its goal is to supervise and regulate every furnace operation—from ignition to shutdown. We shall discuss in this blog how this control board operates, how it varies depending on the type of furnace, and how circuit board troubleshooting is necessary to solve heating issues. We will also discuss the furnace control panel overall so you will have a complete view of what maintains the warmth and safety in your house. What Does the Furnace Board Do on Most Modern Furnaces? Simply said, the furnace control board runs your furnace as its system manager. This board takes over when your thermostat indicates a heat need. Like the blower motor and ignition system, it powers the components that must turn on; it also monitors safety switches, regulates the gas valve (in systems for gas furnace control board systems), guarantees the heating cycle finishes safely and effectively. On most modern furnaces, then, what does the furnace board accomplish? It takes all required actions to guarantee your furnace runs consistently, safely, and properly every time. Should even one component of the system fail, the control board typically detects the problem and either shuts down the system or generates an error code for circuit board troubleshooting. The Role of the Furnace Control Board Explained Every contemporary furnace features a control board to control activities from start to finish. These boards are clever devices that run your furnace like a computer runs a machine, not just timers or switches. Let’s examine the real events upon board activation: When the thermostat signals that heat is needed, the furnace control panel springs into action. The furnace control board receives the signal and begins the startup sequence: It checks all sensors and safety switches. It powers the ignitor or pilot light. If a flame is confirmed (in gas furnace control board setups), it opens the gas valve. It monitors the heat exchanger to prevent overheating. It turns on the blower to distribute warm air throughout your home. It continues to monitor for any faults during the cycle. If something goes wrong say a flame doesn’t ignite or a safety switch fails the furnace control board halts the system and may flash an error code for diagnostics. That’s where circuit board troubleshooting comes in. Differences Between Gas and Electric Furnace Control Boards Although the purpose is essentially the same, the operation of electric and gas furnace control boards differs. A gas furnace control board has to manage flame verification and igniting. It guarantees the safe combustion process and regulates the gas valve. This type of board focuses especially on devices such as pressure switches and flame sensors. Conversely, an electric furnace control board addresses heating elements and electric relays. These boards control high-voltage currents to heat the elements, hence heating the air. Although there is no gas ignition, electric furnace control boards still have to give safety top priority using temperature limits and overheat prevention. Why the Furnace Control Panel Is So Important Comprising the furnace control board and all its connections, the furnace control panel See it as your furnace’s dashboard and wiring center. Your control board would not have anywhere to handle operations without this panel. Every sensor, cable, and relay feeds into the furnace control panel, which then sends signals to the correct components. These panels can eventually fade. Wiring can get loose or rusted, or the control board itself might fail with age, dampness, or electrical surges. Circuit board troubleshooting therefore becomes essential. Circuit Board Troubleshooting in Furnaces If your furnace isn’t running or keeps shutting off unexpectedly, the issue might lie with the furnace control board. Common symptoms include: Furnace not responding to thermostat Blower running continuously Furnace ignites but shuts down quickly Blinking error codes on the control panel When dealing with circuit board troubleshooting, the first step is usually checking for error codes. Most furnace control boards flash LED codes when something is wrong. These codes help HVAC professionals determine if it’s a sensor problem, a gas issue, or a board malfunction. Sometimes, simply resetting the board or checking for loose wiring can solve the issue. However, more serious cases may require replacing the gas furnace control board or electric furnace control board entirely. How Modern Furnace Boards Improve Efficiency and Safety Older furnaces operated more like mechanical systems with fewer safety checks. Modern furnace control boards make today’s furnaces safer, more energy-efficient, and more responsive. Some modern boards are even programmable, allowing for multi-stage heating and precise blower control. They can communicate with smart thermostats and self-diagnose issues to help service technicians solve problems faster. Additionally, modern furnace control panels protect against dangerous conditions like: Gas leaks Overheating Short circuits Flame rollouts Blocked vents All of these are monitored and managed by the intelligent systems found on modern furnace control boards. When Should You Replace a Furnace Control Board? There’s no exact expiration date on a furnace control board, but they usually last around 10–15 years. Signs that it may be time to replace one include: Furnace failing to turn on or finish cycles Repeated error codes despite fixing parts Burn marks or damage on the board Unresponsive thermostat signals If you’re facing these problems, especially in colder months, it’s best to consult with professionals who can run accurate circuit board troubleshooting steps and advise whether replacement is needed. The Cost of Replacing Furnace Control Boards The cost to replace a gas furnace control board or electric furnace control board varies based on model and brand, but generally ranges between $300–$700

what is a dielectric union
Plumbing

What is a Dielectric Union? Understanding Its Importance in Plumbing

When it comes to plumbing, there are numerous components that play a vital role in ensuring water flows smoothly through your pipes without causing issues like corrosion or leakage. One such component that frequently receives unnoticed however is incredibly important is the dielectric union. but what is a dielectric union and why is it so critical for your plumbing system let’s explore this essential plumbing fitting, its function, and how it prevents damage to your pipes. What is a Dielectric Union A dielectric union is a unique type of pipe turning into used to enroll in two multiple pipes generally one metal and one non-metallic at the same time as preventing electric. powered modern from visiting among them. this is important when coupling water pipes made of various metals, along with copper and metallic. The dielectric union makes use of a non-conductive fabric manufactured from rubber or plastic to save you corrosion because of galvanic reactions In easy words, a dielectric connection serves as a barrier to prevent electric powered cutting-edge from flowing between various metallic pipes, that could result in pipe harm and leaks. that is specifically sizeable in advanced plumbing structures that use both copper and steel pipes. The Role of Dielectric Plumbing Fittings in Preventing Corrosion The main function of dielectric plumbing fittings is to protect pipes from a shape of corrosion known as “galvanic corrosion.” Galvanic corrosion takes the dielectric fitting is designed to create an insulated barrier among those metals, efficiently preventing the float of electricity and, therefore, stopping the corrosion procedure. this means that your pipes will final longer and require fewer repairs over time, saving you money and problem. How Does a Dielectric Union Work A dielectric union commonly incorporates a couple of critical components: Union body: That is the number one element of the quality, that’s screwed onto the pipes. its miles produced from substances which consist of brass, acknowledged for their durability. Insulating Sleeve: The insulating sleeve, usually composed of rubber or plastic, is positioned among the two notable metals like copper and steel. This sleeve inhibits electric powered conduction and minimizes the risk of galvanic corrosion. Rubber Gasket: The rubber gasket serves to set up a at ease seal between the pipe and the dielectric union, making sure that leaks do no longer occur. Locknut: The locknut is applied to lock the appropriate onto the pipes, stopping it from becoming unfastened over the years. While mounted correctly, a dielectric connection allows water to float easily through your machine on the equal time as making sure that the two metals live electrically remoted. This allows to keep away from leaks, rust, and the need for normal plumbing upkeep. Why Do You Need a Dielectric Union They want for a dielectric union emerges in particular while connecting copper pipes with metallic or iron pipes. this case regularly happens in plumbing structures that utilize various materials for extraordinary components of the setup. Stops Galvanic Corrosion: As stated previously, while distinct metals touch each other, they invent an electric powered circuit that can growth corrosion. A dielectric union prevents this from happening, safeguarding your plumbing machine towards early failure. Safeguards Your investment: A plumbing device is a huge investment, and preserving it’s far crucial for the durability of your residence or business. by way of utilizing a dielectric becoming, you forestall corrosion issues, which can help you save money within the future on repairs and replacements. Sturdiness: Dielectric unions are engineered for long-lasting overall performance. they may be built to undergo the stress of water shifting via the pipes even as safeguarding against electrolysis. Versatility: Dielectric unions are notably adaptable and can be applied throughout diverse plumbing structures, inclusive of both hot and bloodless water lines, as well as heating structures. Clean to insert: These unions are pretty simple to installation, particularly when handled via a qualified plumber. there’s no want to overhaul the entire plumbing machine; definitely upload the ideal dielectric plumbing fittings in which the pipes connect. Installation and Maintenance of Dielectric Unions Installing a dielectric union isn’t a difficult undertaking, however it demands accuracy to assure a safe and green connection. here’s a simple precis of how it also includes completed: Turn off the Water Deliver: Prior to starting any mission, it’s miles crucial to close off the water deliver to avoid leaks or spills all through the installation process. Trim the Pipes: When adding the union to a current machine, you can want to shorten the pipes on the area of the dielectric union. Prepare the Pipes: Make sure that the pipe ends are clean or even to save you any damage to the dielectric fitting during set up. Connect the Dielectric Union: Screw the dielectric union onto both pipes. The insulating sleeve ought to be located among the two awesome metals to keep away from electrical conductivity. ensure that it is firm and secure. Tighten the Connections: Rent a wrench to comfortable the fittings. exercise warning to keep away from overtightening, for the reason that this can harm the pipes or the joint. Test for Leaks: After installation, prompt the water deliver and investigate for leaks. If there aren’t any leaks gift, your setup is finished. At the same time as putting in a dielectric connection is a smooth assignment, it’s quality to touch an expert plumber if you feel uneasy with plumbing obligations. A qualified expert will assure that the union is installation correctly, thereby enhancing its performance. In case you need a professional to help you with the installation of dielectric plumbing fittings or every other plumbing requirement, make certain to check out our provider page at Derks Plumbing offerings. We provide expert plumbing answers to maintain your plumbing system in optimal shape. Common Issues with Dielectric Unions Though dielectric unions are built to endure for numerous years, they’re no longer without issues. here are a few regular problems you might face: Incorrect set up: If the dielectric union is not outfitted well, it may not reach preventing corrosion or leaks. it’s far essential to assure the right positioning of the insulating sleeve. Put on and Tear: With time, the rubber gasket or insulating sleeve may deteriorate due to water stress and natural wear. consistent maintenance is important. Compatibility troubles: No longer each dielectric union works with all forms of pipes. make sure to select the correct fitting for your device. Protect Your Plumbing System with Dielectric Unions A dielectric union is a critical plumbing device that enables to prevent corrosion, leaks, and harm added approximately with the aid of the galvanic response among distinctive metallic pipes. whether you are installing new pipes or solving a modern machine, using a dielectric fitting is essential for maintaining the integrity of your plumbing. For all your plumbing requirements, consisting of the set up of dielectric connections and additional fittings, ponder teaming with an expert plumbing company like Derks Plumbing. Our team of plumbers is skilled and organized to make certain that your plumbing gadget operates efficaciously and effortlessly. stop corrosion from damaging your pipes contact us nowadays FAQs About Dielectric Unions   What materials are dielectric unions made of? Dielectric unions are normally crafted from brass or copper for the union body and have an insulating sleeve made of rubber or plastic. The rubber or plastic component is what prevents the electrical conductivity among the connected pipes. Can i use a dielectric union for all sorts of pipes? Dielectric unions are normally used to attach pipes made from exclusive substances, including copper and metallic. however, you must continually make certain that the union is like minded with the precise type of pipe for your plumbing gadget. How do I understand if my plumbing device wishes a dielectric union? If you have copper and steel pipes linked to your plumbing gadget, you need a dielectric union to save you galvanic corrosion.

what is a drain board
Plumbing

What Is a Drain Board? Understanding This Underrated Kitchen Essential

Most likely, you’ve used or seen a drain board if you’ve ever cleaned dishes by hand. What is it, though, and why is it still useful in restaurants today? With the help of a qualified professional plumber with more than 20 years of experience working with kitchen plumbing systems, fixtures, and installations, this blog was written. We’ll help you understand the purpose of a drain board, a part of kitchen design that is often ignored but very useful, by using real-life examples. A drain board does more than just make things easier; it also works well, lasts a long time, and stops water from running off of newly washed dishes and produce. It also protects your countertops and makes your kitchen cleaner. What Is a Drain Board? – A Deeper Look Usually composed of stainless steel, plastic, or another water-resistant material, a drain board is a somewhat sloping, ridged surface. After washing dishes, produce, or kitchen tools, it lets extra water flow straight back into the sink from adjacent to a kitchen sink. Usually seen either as a separate item next to the sink or incorporated into the sink itself is a drain board. This basic tool reduces the possibility of mildew, germs, or warping on surrounding surfaces by keeping water from accumulating on counters. The main purpose is still channeling water back into the sink effectively, whether it’s attached to a countertop drainboard put separately or a kitchen sink with drainboard. A Brief History of Drain Boards People had to hand wash everything before dishwashers became a kitchen mainstay; drain boards were therefore absolutely essential. Older homes frequently included cast iron or porcelain sinks with built-in sink drain boards on either one or both sides. These let individuals effectively control water without having to continually dry counters. Although dishwashers are somewhat ubiquitous today, drain boards have not become useless. Thanks in fact for their practicality, simplicity, and flair; they are returning in contemporary kitchens. Types of Drain Boards You Should Know About There are several types of drain boards, and each one fits different kitchen styles and needs: 1. Integrated Drainboard Sink Kitchen Units Built right into the design of the sink, an integrated drainboard sink kitchen set has Usually they consist of fireclay, granite composite, or stainless steel. The benefit is It looks flawless, uses less space, and directs water exactly back into the sink. For their hygienic layout and clean style, many homes favor kitchen sinks including drainboards. There is no chance of water leaking between the sink and the drain board area as the drain board is part of the sink. 2. Removable Countertop Drainboards One stand-alone object you could put next to your sink or anywhere you would choose is a countertop drainboard. Renters or anyone else who wants not to change their current sink will find these fantastic. They are made from plastic, bamboo, silicone, and stainless steel among other materials. If you have limited sink space or need an additional drying room for big meals or events, a countertop drainboard is quite handy. You can just keep it tucked away when not in use. Why Are Drain Boards So Important? The modern kitchen is all about efficiency, cleanliness, and convenience. That’s exactly where drain boards shine. Let’s explore some of the key benefits. Keeps Countertops Dry and Clean Water from washed products pours straight onto the countertop without a drain board. Water stains, mold development encouraged by this can eventually harm your counters. Keeping your kitchen dry and tidy, a sink drain board effectively conducts water back into the sink. Enhances Kitchen Organization A drain board allows you to arrange wet dishes in a specific area, so maintaining the order in your kitchen. Stop cluttering your sink area or combining clean and dirty dishes. Maximizing space, a kitchen sink with drainboard offers a two-in-one answer. Saves Time and Effort Allow your drainboard sink kitchen arrangement to handle the task instead of always wiping water from your counters. Every time you wash dishes, you are saving time whether you go with a countertop drainboard or an integrated solution. Choosing the Right Drain Board for Your Kitchen If you’re considering adding or replacing a drain board, here are some tips to choose the right one: Assess your available space – If you have a small kitchen, a countertop drainboard may offer flexibility. For a larger, permanent solution, go for a drainboard sink kitchen unit. Consider the material – Stainless steel is durable and matches most kitchens. Plastic is budget-friendly. Bamboo and silicone offer eco-friendly, modern aesthetics. Think about usage – Do you cook often? Have a large family? Then a kitchen sink with drainboard may serve you best in the long term. How to Maintain Your Drain Board No matter what type of drain board you choose, maintenance is key. Here are some simple guidelines: Wipe it dry after each use to prevent water spots or mildew buildup. Deep clean once a week using a non-abrasive cleaner. If you have a stainless steel drainboard sink kitchen combo, avoid steel wool to prevent scratches. For countertop drainboard products, make sure they’re completely dry before storing them away. By taking care of your sink drain boards, you’ll extend their lifespan and keep your kitchen looking spotless. When Is the Right Time to Upgrade Your Drain Board? You might want to make changes if you keep seeing water on your counters, if your drain boards are broken or damaged, or if you are remodeling your kitchen. Adding a kitchen sink with a drainboard can be a good idea, especially if you pair it with modern taps and fixtures that use less water. Professional guidance on sink replacements or drainboard sink kitchen configurations as part of plumbing upgrades? Here at Derks Plumbing are the professionals ready to assist. Having years of expertise serving the Los Angeles area, we can install, fix, or direct you toward the finest answers for your kitchen layout. Final Thoughts So, what is a drain board?

why does my ac line keep freezing
Plumbing

Why Does My AC Line Keep Freezing? (Full Guide)

Few things irritate you more than discovering frozen AC lines in the house or finding your air conditioner frozen outside when summer temperatures climb and you depend on it to stay cool. You are most certainly not alone if you are asking why does my ac line keep freezing. This fairly common condition can indicate a number of potential HVAC system faults. This tutorial will explore in great detail the causes of frozen air conditioner lines, how to resolve them, and what you can do going forward to avoid them. Whether your house’s air conditioner line is frozen either inside or outside, this complete breakdown will enable you to identify the issue and find ways to keep cool once more. Understanding the Basics: What Is the AC Line? Understanding what we mean when we refer to “AC lines” helps us to better grasp why my ac line freezes before we delve into the causes. There are two major refrigerant lines in your air conditioner: a smaller liquid line and a bigger suction pipe often insulated. Between your inside evaporator coil and the outside condenser unit, these lines run refrigerant. Working correctly, the refrigerant moves between liquid and gas states, absorbing and releasing heat as needed. Should something throw off this sensitive procedure, the AC unit line frozen issue you are observing can result. Why Does My AC Line Keep Freezing? Now to the big question: why does my ac line keep freezing? Here are the broader causes you need to know: Low Refrigerant Levels Low refrigerant is one of the main reasons frozen AC lines in house systems occur. The pressure within the evaporator coil decreases in a system lacking adequate refrigerant. This causes the temperature of the coil to drop below freezing, therefore generating ice on the AC wires. You could be asking how low refrigerant levels get. Usually, it results from a leak elsewhere in the system. Refrigerant shouldn’t “run out” on its own; low refrigerant indicates probably an issue requiring expert repair. Dirty Air Filters A dirty air filter is another basic yet somewhat common reason you find your ac line frozen outside. Dirt, dust, and trash jammed in your air filter reduces airflow. Bad airflow over the evaporator coil causes the coil to get very cold, which results in a frozen air conditioner line either outside or maybe inside too. Regularly changing your air filters—about every one to three months—can greatly help to prevent this. Blocked or Closed Vents Pushing air over your evaporator coil and across your ductwork is done by the blower fan. Should the fan be faulty, either from a broken motor, poor bearings, or electrical problems, airflow will significantly reduce. The evaporator coil will get too cold without warm air constantly flowing over it, and you will shortly have frozen AC lines in house. Faulty Blower Fan The blower fan is responsible for pushing air over your evaporator coil and through your ducts. If the fan is malfunctioning — either due to a broken motor, bad bearings, or electrical issues — airflow will drop dramatically. Without warm air constantly moving across it, the evaporator coil will get too cold, and you’ll soon have frozen AC lines in house. Dirty Evaporator Coils Over time, occasionally the evaporator coil itself gets contaminated. The coil finds it difficult to absorb heat from the air since dust and dirt on its surface behave as insulation. Consequently, the colder refrigerant inside the coil can lead to the AC unit line freezing issue you are observing. Usually, an evaporator coil cannot be cleaned by a do-it-yourselfer. Professionally trained HVAC technicians will have the right tools and cleaning agents to accomplish this safely. Extremely Low Outdoor Temperatures Though less likely, particularly in warmer locations, occasionally low nighttime temperatures might cause ac line frozen outside conditions. Should the outdoor temperature drop drastically at night, particularly below 60°F, your AC might not run as it should, which would cause freezing. Thermostat Problems Particularly on cooler days, a thermostat set too low for too long might cause your AC system to run harder than required. Running continually could cause the evaporator coil to freeze your lines by getting overly cold. Similar problems can result from a broken thermostat failing to cycle the AC off as needed. Once more, if you find yourself wondering repeatedly why my ac line freezes; a wise action is to verify the thermostat settings and functionality. Signs You’re Dealing with a Frozen AC Line In addition to visually seeing ice on your lines, here are other signs you might be dealing with frozen air conditioner line outside or frozen AC lines in house: Warm air blowing from your vents Little to no airflow Hissing or bubbling noises (refrigerant leak indicator) Water pooling near your indoor air handler Higher than normal energy bills If you notice these symptoms, it’s crucial to act quickly. Running your AC with frozen lines can cause severe damage to the compressor — an expensive component to replace. What To Do If Your AC Line Freezes Should you find your ac unit line frozen, follow these guidelines: First, quickly switch off your air conditioning. Running the machine during a freeze could aggravate the harm. To speed ice thawing and promote air circulation, turn your thermostat to “fan only”. Then look at your air filter. Replace it if it’s filthy. Check then that every vent is open and free from obstruction. It’s time to call a professional HVAC specialist if you cannot identify any clear problems such blocked vents or unclean filters. You can have blower motor issues, filthy evaporator coils, or refrigerant leakage calling for professional repairs. How to Prevent Your AC Lines from Freezing Preventing frozen AC lines comes down to proper maintenance and monitoring. Here’s what you should be doing: Replace air filters regularly Schedule annual professional HVAC maintenance Make sure vents and returns are clear and open Pay attention to any unusual noises or smells Avoid setting the thermostat too low

How to Unclog a Garbage Disposal
Plumbing

How to Unclog a Garbage Disposal: Complete Step-by-Step Guide

Having more than two decades of practical expertise clearing and fixing garbage disposals, I have seen it all from entire system blockages brought on by grease buildup to jammed impellers brought on by chicken bones. Drawing directly from my twenty years in the plumbing business, this blog helps Los Angeles residents return their kitchens to full operation. Whether your issue is unusual scents, standing water, or a humming machine that won’t grind, the advice here is based on actual solutions that have worked repeatedly for my clients. A clogged garbage disposal can fast become a frustrating kitchen problem. whether it is strange smells, standing water, or a buzzing motor with no grinding, learning how to unclog a garbage disposal is crucial for keeping your kitchen functional and hygienic. This blog will guide you through information the reasons, signs, and symptoms, and more than one safe methods of unclogging garbage disposal gadgets. How to Unclog a Garbage Disposal Like a Pro The first thing you want to realize about the way to unclog a garbage disposal is that most troubles may be constant at home without the want for high-priced plumbing visits. the important thing is knowing the proper strategies and while to name in assist. Clogs frequently arise when beside the point materials are added into the system, or when regular maintenance is left out. Tackling the trouble early will assist you avoid deeper plumbing harm and highly-priced repairs. What Causes a Garbage Disposal Blockage? There are numerous factors that contribute to garbage disposal blockage. many of them stem from user habits. Pouring grease down the drain would possibly seem harmless in liquid form, but it solidifies quickly and clogs pipes. further, starchy, or fibrous foods like pasta, rice, celery, and corn husks can enlarge or wrap around disposal blades, leading to blockage. Over time, buildup from meals scraps, cleaning soap residue, and minerals from hard water can narrow the drain and reduce water flow, contributing to unclogging disposal needs. Even small utensils or kitchen particles might also fall in accidentally, leading to a whole stop of the disposal feature. Signs Your Garbage Disposal is Clogged A clear sign that you need a clogged disposal repair is status water inside the sink that received drain. this is typically the result of a blockage either inside the disposal chamber or the pipes main away from it. you might also listen a buzzing sound, which means the motor is attempting to run but cannot because the impellers are stuck. Odors that will not go away despite cleansing can also sign buildup inside the disposal. In a few cases, you can even observe water leaking from the bottom of the unit if a blockage has caused backpressure. Step-by-Step Method for Unclogging Garbage Disposal Before you start, always turn off the disposal. both unplug it or turn off the circuit breaker that powers it. safety need to usually be your top priority. Start by shining a flashlight into the disposal to check for visible obstructions. if you see something stuck, use tongs or pliers to carefully remove it. in no way stick your hand into the disposal even if it is unplugged. If there is nothing seen, try using the hex key that came with your unit (usually located at the bottom center of the disposal). Insert the key and rotate from side to side to manually free the blades. you might pay attention a click on once the obstruction is loosened. In instances where this does not work, a mixture of 1/2 a cup of baking soda and one cup of vinegar poured down the disposal can help. allow it fizz for 15 mins, then flush with boiling water. This breaks down grease and meals debris. If the water continues to be not draining, it could be time to detach and smooth the P-trap. place a bucket underneath the sink, unscrew the pipe phase, and clean out any particles. Reassemble and look at the device again. Preventative Maintenance Tips to Avoid Future Blockages After you have handled a garbage disposal blockage, prevention becomes key. always run cold water before, during, and after the usage of the disposal. This allows flush particles through the machine. avoid grinding fibrous vegetables, eggshells, coffee grounds, and bones. Easy your disposal weekly via running a few ice cubes and a citrus peel through it. This sharpens blades and neutralizes odors. everyday use of baking soda and vinegar also keeps things flowing easily. Professional Help for Persistent Clogs If you have tried all the house solutions and nevertheless face recurring issues, you might want professional help. issues like damaged blades, a component, or deep pipe clogs require expert tools and knowledge. Citizens in Southern California can advantage from expert assist like our Garbage Disposal installation Los Angeles service at Derks Plumbing. whether you need a restore or a brand-new installation, our educated technicians can ensure your kitchen device is running smoothly and efficiently. Common Myths About Unclogging Garbage Disposals Many owners assume pouring boiling water directly into the disposal will instantly clean clogs. even as hot water can help dissolve grease, it is best used after treatments like baking soda and vinegar. also, some people turn to chemical drain cleaners, which must be avoided completely. these can corrode the disposal’s internal components and pose a chance to your plumbing system. Another myth is that lemon peels alone will clean your disposal. while they help with odor, they do not remove buildup. everyday mechanical and natural cleansing methods work better. When is it Time to Replace Your Garbage Disposal? Sometimes, repeated issues mean the unit is simply old. if your disposal is over 10 years old, makes loud noises, jams regularly, or shuts off, you are probably better off replacing it than constantly investing in a clogged disposal fix. At Derks Plumbing, we not only specialize. In fixing clogs but also recommend modern, energy-efficient garbage disposals that make kitchen cleanup easier and less stressful. Final Thoughts Learning how to unclog a garbage disposal is a valuable skill that saves money and avoids kitchen disasters. while many clogs can be fixed with

How to Fix a Phantom Flush
Plumbing

How to Fix a Phantom Flush?

Even though nobody touched it, have you ever been sitting in your living room minding your own business and then heard your toilet flush? If so, you have personally encountered a phantom flushing toilet. Although it sounds eerie, many homes deal with this frequent plumbing problem. We will explore in great detail how to fix a phantom flush, why it occurs, and how you might avoid it going forward on this site. Many unhappy homeowners wonder how to fix a phantom flush. Usually indicating a steady leak of water from the tank into the bowl, a toilet that looks to flush itself is This leak causes the tank to empty sufficiently over time that the refill mechanism turns on to supply additional water, producing the sound of a flush without anyone there. Fortunately, most occurrences of phantom flush resolve themselves easily if you know what you are looking for. Let’s cover what you need to know about cracking this creepy plumbing riddle. What Causes a Phantom Flushing Toilet? Solving the issue requires knowing why your phantom flushing toilet behaves in such manner. A bad flapper is the most often occurring cause. At the base of your toilet tank, the rubber seal is called the flapper. It rises when you flush and closes back down later to retain tank water. This flapper may wear out, distort, or break over time causing tiny water leaks into the bowl. Additional causes could be a broken flush valve seat, overflow tube issues, or a too tight chain that slightly raises the flapper. The smallest difference can let enough water escape to initiate a toilet flushing on its own terms. Additionally interfering with sealing is sediment accumulation from hard water, which aggravates the phantom flush even more. How to Fix a Phantom Flush? Knowing the root of the issue now will help us discuss how to address a phantom flush. You should first want to check the flapper within your toilet tank. Take off the tank lid carefully then check inside. The flapper should be visible seated over the flush valve and fastened to a chain. Press down lightly on the flapper. You’ve located the problem if the phantom flushing stops! To get any dirt that might be stopping a tight seal off the flapper and valve seat, try using a sponge and vinegar. Still, most of the time the easiest and most successful fix is changing the flapper. Turn off the water supply to the toilet, flush it to empty the tank, unclip the old flapper, then clip in the new one. The chain should be somewhat slack, but not so much as it would catch under the flapper. Done right, this basic fix will stop your phantom flushing toilet and bring harmony back into your bathroom. Look over the flush valve and the overflow tube if the flapper isn’t the issue. Sometimes misalignments or cracks here can also cause leaks that set off phantom flushing. Under some circumstances, the flush valve assembly may have to be replaced. Why Phantom Flush Repair is Important Ignoring a phantom flush repair problem can cost more than only inconvenience. A slow leak can lose hundreds of gallons every month, which is shockingly large quantity of water! That is money literally running down the toilet. Consistent leaking can also occasionally ruin your flooring or raise your chance of more major plumbing issues down-stream. Learning how to remedy a phantom flush not only solves a bothersome issue but also protects your house and helps you save water bill expenses. When to Call a Professional for Phantom Flush Repair Although a basic DIY flapper replacement usually solves most cases of phantom flushing toilet, not every scenario is that simple. Should you replace the flapper and still find that your toilet flushes on its own, you may want to call a qualified plumber. Our staff can assist if you live in Los Angeles and discover that your toilet need more than a basic repair. We at Toilet Installation Los Angeles not only install toilets but also provide professional repair work. Whether it’s a full toilet replacement or a recurring phantom flush, Derks Plumbing can guarantee correct first-time completion of the task. Using a specialist guarantees accurate diagnosis of the problem. Phantom flushing can occasionally be brought on by undetected issues with the plumbing line itself or secret cracks in the toilet bowl. Early identification of those problems will help you avoid later more costly repairs. Preventing a Phantom Flushing Toilet Knowing how to cure a phantom flush is only one aspect; another is knowing how to stop it from occurring once more. Key is regular maintenance. Spend some time every few months looking over the elements within your toilet tank. Particularly around the flapper and flush valve, look for wear, warping, or mineral accumulation. If you reside in a hard water location, think about putting in a water softener. Hard water can hasten mineral accumulation inside your toilet, increasing leak likelihood. Furthermore avoid using strong chemical cleansers within the tank since they accelerate the deterioration of rubber components like the flapper. At last, treat the flushing mechanism of your toilet carefully. By stressing the internal components and resulting in early degradation, jerking or slamming the handle might aggravate phantom flush problems. Can a Phantom Flush Cause Long-Term Damage? In most cases, a phantom flushing toilet won’t immediately cause severe damage. However, the continuous cycle of filling and leaking can put extra strain on the internal parts of your toilet. Over time, this can lead to larger leaks, higher water bills, and even the need for a complete toilet replacement. If your toilet is older and experiencing multiple issues beyond phantom flushing — such as frequent clogs, weak flushing power, or cracks in the porcelain  it might make more financial sense to replace it entirely. Upgrading to a modern, water-efficient model can save you money in the long run and prevent future phantom flush headaches. And remember, when it’s time to

How to Fix a Shower Diverter
Plumbing

How to Fix a Shower Diverter

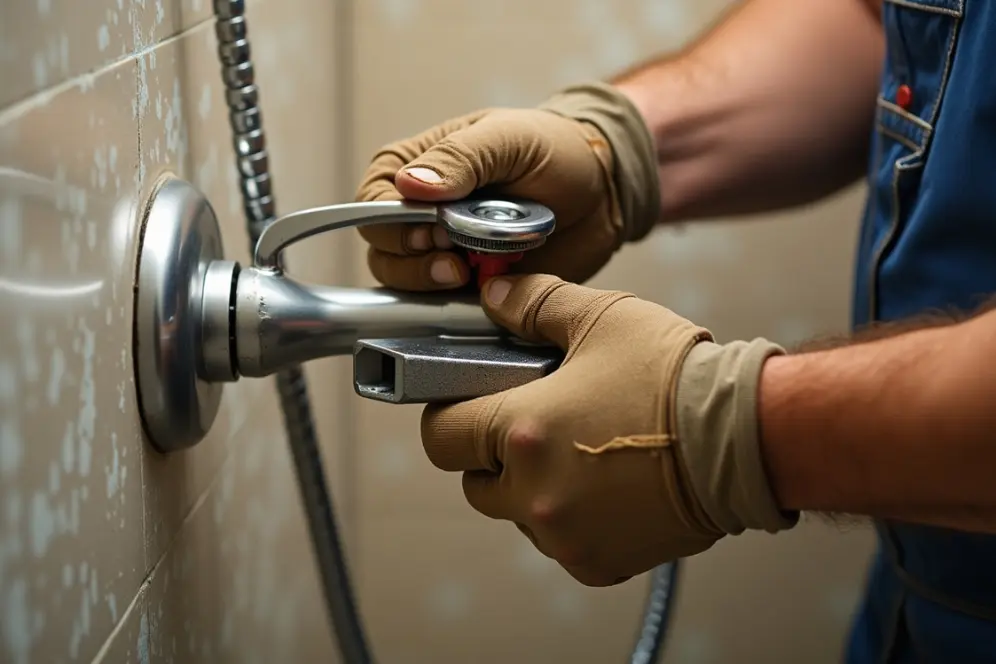
Is your shower pressure low? Does your shower spout leak when you’re showering? If so, you may need to fix a dirty or broken diverter. Luckily, this is a simple DIY job that only requires some plumber’s tape and a little elbow grease. In this article, we’ll walk you through everything you need to fix your shower diverter. What Is a Shower Diverter? The important part that switches the water from showerhead and bathtub faucet, a shower faucet. And very obviously, this system has to face damage issues as well. No worries if there is a problem you are facing, we are with you to guide step-by-step. Common Types of Shower Diverters There are three main types of shower diverters you might find in your bathroom: Three-valve diverter: Found in systems with separate hot and cold water knobs, plus a third that serves as the diverter. Tub spout diverter: This is common in bathtub/shower combos and older homes. A lever on the tub spout controls water flow. Two-valve diverter: This setup has one knob for water temperature and another that acts as the shower diverter. Tools Required to Fix the Shower Diverter If you are going to repair your shower diverter, then note the following tools you need: Screwdriver Adjustable wrench Replacement diverter valve (if needed) Pipe thread tape Towels or rags Plumber’s putty (optional) Signs Your Shower Diverter Needs Repair Some signs are there if your shower diverter needs replacement or small repairing. Difficulty in Operation There is an issue that can be caused by wear and tear of the shower diverter. When it is hard and requires more energy, maybe there is an issue with its internal parts. Leaks and Drips When the shower diverter shows you a leakage point, respond quickly to control the loss of water and other mechanisms. Water Flow Issues These issues often mean there’s a problem with the diverter mechanism or mineral buildup within the system. In the case of water pressure issues or flow, it is often going to repair. How to Fix a Shower Diverter Repairing a Leaking Shower Diverter Shut off Water Supply To shut off the water supply, find the main and branch shower valves. Use your wrench to turn the handle clockwise. Unscrew the Faucet First, the tub faucet handle and decor plate must be unscrewed. They are located on the front side of the tub faucet. Now, insert a screwdriver into the hole located on the end of the handle. Then turn the screwdriver counterclockwise until the set screw is loose. Simply lift the handle down and twist the decor plate off. Clean the Insides of the Faucet Mineral build-up around and inside the faucet might be causing it to leak. After unscrewing it, look for debris lodged inside it. Use a file or screwdriver to scrape off the grime. If you can’t clean it, soak the faucet in vinegar overnight and clean it easily the next day. Check the Flapper Check the condition of the rubber flapper. With time, it can begin to rot, causing water leakage. If the flapper is rotten, replace it with a new one. Reinstall the Items Reinstall the bathroom decor plate and faucet handle. Then, reconnect the hose and briefly test the shower diverter. You can read about: How To Unclog Shower Drain Preventive Maintenance for Shower Diverters The life of shower diverters can be increased, but it demands your daily preventive measures and maintenance by cleaning and scrubbing with an equal proportion of vinegar and water. Clean with a soft brush. Our Conclusion Dealing with the shower diverter is not a much difficult task, so just by keeping some important things in mind you can find the problem and repair it. But its regular maintenance can help you control issues that could put you in serious trouble. However, if you feel unsure about handling the repair yourself, it’s always a smart idea to call a professional. Derks Plumbing Company offers expert bathroom faucet diverter repair and complete plumbing services to get your shower back to perfect condition. Don’t hesitate contact Derks Plumbing today for reliable and affordable help!

Fast and Efficient Plumbing Services in Eagle Rock

Client Reviews

Posted on Google Google
Ryan Haden profile picture
Ryan Haden
Google star 1Google star 2Google star 3Google star 4Google star 5Trustindex verifies that the original source of the review is Google.
Could not have been happier with Alex! We was right on time, polite, fixed all my kitchen sink issues and have me good tips on how to best maintain. I will for sure be using him again and highly recommend anyone who needs a great plumber to use his services as well. Thank you!
Posted on Google Google
Lorena Marcoe profile picture
Lorena Marcoe
Google star 1Google star 2Google star 3Google star 4Google star 5Trustindex verifies that the original source of the review is Google.
Talk about a professional...yes, I am talking about Alex Derks, Derks Plumbing. He is by far the most knowledgeable plumber we have ever had the pleasure of hiring. He's been in the plumbing business for years and it shows. Any questions you have re: plumbing issues, install, etc., Alex is your man. So happy with his work and he has a great sense of humor as well... extremely easy to talk to...thank you Alex!!!
Posted on Google Google
Andrew Jalil profile picture
Andrew Jalil
Google star 1Google star 2Google star 3Google star 4Google star 5Trustindex verifies that the original source of the review is Google.
Alex did a great job installing my kitchen faucet and an under-sink Aquasana water filter. He also addressed a few other plumbing-related issues. He was friendly and helpful. Excellent work!
Posted on Google Google
Abigail Bigham profile picture
Abigail Bigham
Google star 1Google star 2Google star 3Google star 4Google star 5Trustindex verifies that the original source of the review is Google.
Alex does what other plumbers cannot do! He is our go to.
Posted on Google Google
Danielle Driver profile picture
Danielle Driver
Google star 1Google star 2Google star 3Google star 4Google star 5Trustindex verifies that the original source of the review is Google.
Alex is very friendly and responsive. What a pleasure to work with!
Posted on Google Google
Lawrence Isaacs profile picture
Lawrence Isaacs
Google star 1Google star 2Google star 3Google star 4Google star 5Trustindex verifies that the original source of the review is Google.
Very very happy with the work Alex did for us replacing the tanks in our Aquasana filtration system. From first contact over the phone through job completion Alex was a pleasure to work with. He explained what he was doing, and why, every step of the way, and made sure we understood what we needed to do to maintain the system. Strongly recommend Alex!
Posted on Google Google
Joey Aucoin profile picture
Joey Aucoin
Google star 1Google star 2Google star 3Google star 4Google star 5Trustindex verifies that the original source of the review is Google.
Alex Derks has been such a lifesaver for me. Anytime I'm in a pinch with the plumbing in my home, Alex is only a phone call away and I've only seen great results from his work. He's reliable, knowledgable, and entirely trustworthy. A must-have source when owning a home.
Posted on Google Google
Eric Gorman profile picture
Eric Gorman
Google star 1Google star 2Google star 3Google star 4Google star 5Trustindex verifies that the original source of the review is Google.
After working with dozens of plumbing services in the LA area, I can confidently say Derks is the best in the business. On time, reliable and capable of even the most difficult tasks, Derks goes above and beyond to make sure your water system is working correctly.
Posted on Google Google
Jason Gruenbaum profile picture
Jason Gruenbaum
Google star 1Google star 2Google star 3Google star 4Google star 5Trustindex verifies that the original source of the review is Google.
Excellent know-how and fast!! Reasonable pricing and super responsive!!
Posted on Google Google
Jonathan Hepfer profile picture
Jonathan Hepfer
Google star 1Google star 2Google star 3Google star 4Google star 5Trustindex verifies that the original source of the review is Google.
Alex is an expert plumber, and he always goes out of his way to educate me about how to prevent future issues. Highly recommended!

Derks Plumbing has been providing professional plumbing services to Eagle Rock residents for over 20 years. Our experience and strong reputation have allowed us to grow, and we are proud to serve customers in 15 nearby areas, including Venice, Santa Monica, Beverly Hills, and more.

Contact

Hours of Operation

Monday: Open 24 Hours
Tuesday: Open 24 Hours
Wednesday: Open 24 Hours
Thursday: Open 24 Hours
Friday: Open 24 Hours
Saturday: Open 24 Hours
Sunday: Open 24 Hours

© 2026 Created by Localpro1

Scroll to Top