We are Available 24/7

Plumbing

How Much Plumbing Cost in Los Angeles
Plumbing

How Much for Plumbing in Los Angeles? A Detailed Cost Guide

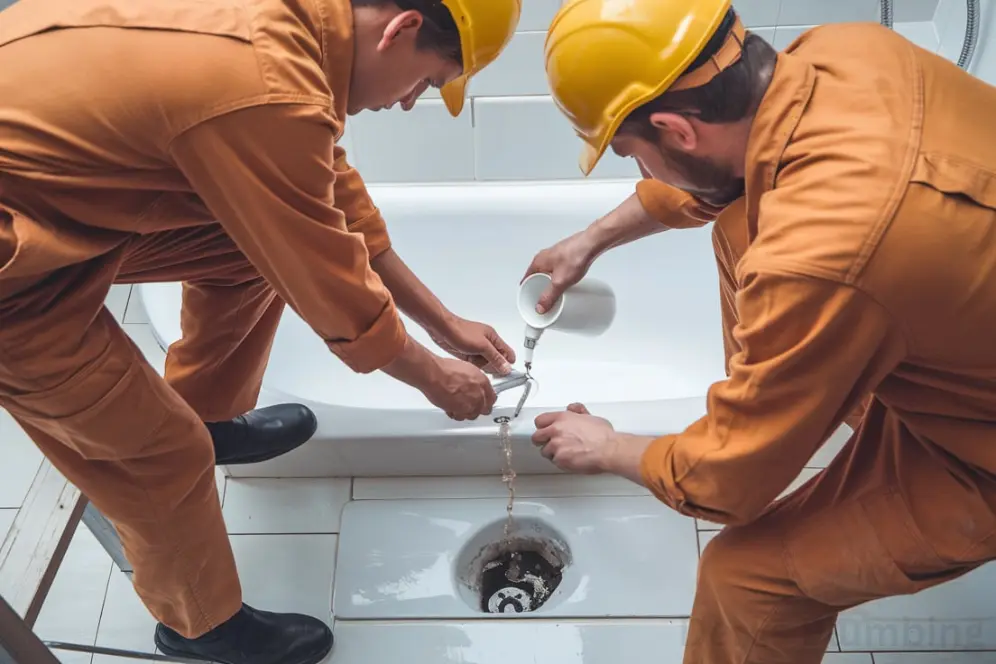
If you want to know how much plumbing cost in Los Angeles , it depends on what you need. A small fix might cost a few hundred dollars, but a complete system rebuild could cost thousands of dollars. Homeowners and business owners in LA can make smarter, more affordable choices when they know how much plumbing costs on average. Average Plumbing Pricing in Los Angeles Prices for plumbing services in LA run from $100 to $15,000 or more. For example, fixing a leak or cleaning out a drain is on the lower end. On the other hand, replacing a system or doing work on the sewer is on the higher end. Here is a quick look at what to expect: Service Average Cost (USD) Faucet/Leak Repair $100 – $300 Toilet Repair or Replacement $150 – $500 Drain Cleaning $100 – $300 Water Heater Installation $1,000 – $4,500 Sewer Line Repair $2,500 – $10,000+ Whole-Home Repiping $4,000 – $15,000+ Emergency Plumbing Services $200 – $1,000+ These prices are figures for typical plumbing work. The problem, the shape of the property, the choice of materials, and the time frame may all affect the final cost. What Affects Plumbing Costs? Costs depend mostly on the type of service. Fixing simple problems, like a faucet that leaks, costs a lot less than rebuilding a water heater or repiping a house. Copper pipes last longer but cost more than PEX pipes, so the material you choose is also important. In LA, plumbers usually get paid $75 to $150 an hour, and emergency calls often cost more. Inspection and permit fees can add $100 to $500 or more to the cost of a big job. Property Layout & Age Pipes that aren’t up to code or old houses in Los Angeles may need to be updated. Most of the time, these jobs cost more, especially if they are hard to get to or require walls to be broken. Plumbing costs more because bigger homes with more bathrooms or complicated layouts need more time, supplies, and planning. Tips to Find Affordable Plumbing in Los Angeles Always get multiple estimates and review what’s included to keep costs down. Make sure the plumbers you hire are licensed in your area. They will follow city code and usually give you better value in the long run. Find plumbing companies that offer reasonable services, preferably ones that offer maintenance plans or discounts during certain times of the year. Also, regular checks can help you escape emergencies that cost a lot more. Derks Plumbing: Your Affordable Plumbing Experts in LA Derks Plumbing is the best at providing honest and affordable plumbing services all over Los Angeles. Our licensed workers do high-quality work at fair, honest prices, from small repairs to full system installations. We’re here for you 24 hours a day, seven days a week for emergencies, and we never hide our prices. Call Now: +1 (323) 284-2410 Schedule Service: Best Plumbing Company in Los Angeles. Service Areas We proudly serve Los Angeles, Glendale, Burbank, Pasadena, Hollywood, and surrounding areas. We’re here to help affordably, reliably, and locally, whether you need to fix a leak or improve your pipes. Final Words The best answer to the question “How much does plumbing cost in Los Angeles?” is that it varies depending on what you need. However, you can choose who you hire, how much you pay, and how well the job is done. FAQ’s What’s the average cost to fix a leak in Los Angeles? Most leaks cost 150–350, but slab leaks or major pipe damage can exceed $1,000. How much does a plumbing system installation cost for a 2,000 sq. ft. home? Expect to pay 8,000–12,000 for a full installation with mid-range materials. Are there affordable plumbing options for low-income households? Yes! Many local companies offer payment plans or partner with nonprofits for assistance. Does plumbing pricing include permits? Not always, confirm with your provider to avoid surprise fees. Most leaks cost 150–350, but slab leaks or major pipe damage can exceed $1,000. Expect to pay 8,000–12,000 for a full installation with mid-range materials. Yes! Many local companies offer payment plans or partner with nonprofits for assistance. Not always, confirm with your provider to avoid surprise fees.
How to Handle a Plumbing Emergency
Plumbing

How to Handle a Plumbing Emergency: A Step by Step Guide

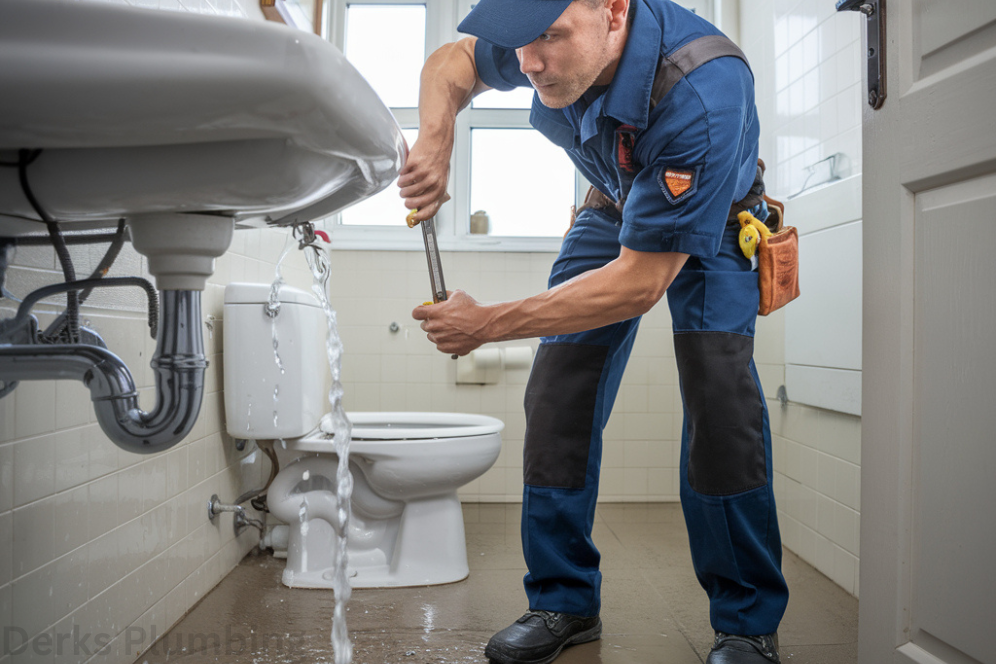
When a plumbing emergency strikes, panic can set in quickly. Burst pipes, overflowing toilets, or sudden leaks can cause significant damage to your home if not addressed promptly. Knowing how to handle a plumbing emergency is critical to protecting your property and avoiding costly repairs. In this guide, we’ll walk you through actionable steps to manage plumbing emergencies, when to call a professional plumber, and why Derks Plumbing is your trusted partner for emergency plumbing help in Los Angeles. What Constitutes a Plumbing Emergency? Not every plumbing issue requires immediate attention, but certain situations demand urgent action. Here’s how to identify a plumbing emergency: Burst pipes: Can flood your home within minutes. Sewage backups: Pose health risks and require instant intervention. No running water: Disrupts daily life and may indicate a major system failure. Gas line leaks: Extremely hazardous and require immediate shutdown. Severe clogs: Toilets or drains that overflow and won’t resolve with DIY methods. If you’re experiencing any of these issues, it’s time to seek emergency plumbing help. Immediate Steps to Handle a Plumbing Emergency Acting quickly can prevent minor issues from escalating. Follow these steps to manage plumbing emergencies effectively: Step 1: Shut Off the Water Supply Locate your home’s main water shut-off valve and turn it off immediately. This stops water flow, minimizing damage. For localized issues (e.g., overflowing toilet), shut off the valve near the fixture. Step 2: Turn Off the Water Heater If the emergency involves hot water lines, switch off your water heater to prevent overheating or damage. Step 3: Contain the Leak Use towels, buckets, or a wet/dry vacuum to contain standing water. For burst pipes, apply epoxy putty or pipe clamps as a temporary fix. Step 4: Call a 24hr Plumber Contact a licensed professional like Derks Plumbing for emergency plumbing help. Our team is available 24/7 to tackle urgent issues. When to Call a Plumber vs. DIY Fixes Understanding when to call a plumber saves time, money, and stress. Here’s a breakdown: DIY Fixes for Minor Issues Small clogs: Use a plunger or drain snake. Minor leaks: Apply pipe tape or tighten connections. Dripping faucets: Replace washers or cartridges. Signs You Need Professional Help Persistent clogs: Multiple backups in drains or toilets. Low water pressure: Could indicate hidden leaks or pipe corrosion. Foul odors: Sewer smells signal potential line breaks. Water discoloration: Rusty or brown water points to pipe damage. For these scenarios, rely on a 24hr plumber like Derks Plumbing to diagnose and resolve the issue safely. Common Plumbing Emergencies and How to Address Them Burst Pipes Burst pipes often occur due to freezing temperatures or aging infrastructure. Turn off the water, drain faucets, and call a plumber immediately. Sewage Backup Avoid contact with contaminated water. Evacuate the area and contact professionals equipped with safety gear and drain-clearing tools. Water Heater Failure No hot water? Check the pilot light or thermostat. If issues persist, shut off the heater and call for emergency plumbing help. Gas Line Leaks If you smell gas, evacuate immediately. Do NOT use electrical devices. Call your gas company and a licensed plumber to inspect lines. Why Choose a 24hr Plumber? Plumbing emergencies don’t wait for business hours. A 24hr plumber offers: Immediate response: Prevent further damage with round-the-clock service. Expertise: Trained to handle complex issues like slab leaks or main line breaks. Proper tools: Advanced equipment for efficient repairs. At Derks Plumbing, our team is always ready to restore your peace of mind. How Derks Plumbing Can Save Your Home When disaster strikes, you need a reliable partner. Derks Plumbing provides: 24/7 availability: Day or night, we’re just a call away. Licensed technicians: Expertise in all types of plumbing emergencies. Transparent pricing: No hidden fees—just honest, quality service. Visit our Emergency Plumber in Los Angeles service to schedule urgent repairs or learn more about our services. Don’t Wait—Act Now! Plumbing emergencies demand swift action. While DIY steps can buy time, professional intervention ensures long-term solutions. For residents in Los Angeles, Derks Plumbing is your go-to source for emergency plumbing help. 📞 Need Urgent Assistance? Call Derks Plumbing at [+1 323-284-2410] or visit Emergency Plumber in Los Angeles to book same-day service. Let us protect your home—today and always! FAQ’s What should I do if my pipes freeze? Turn off the water supply, open faucets, and gently thaw pipes with a hairdryer. Avoid open flames. If pipes burst, call a 24hr plumber. Can I ignore a slow drain? No, slow drains often escalate into severe clogs. Address them early or contact Derks Plumbing for preventive maintenance. How do I find my water shut-off valve? Typically located in basements, crawl spaces, or near water heaters. Labeled valves make identification easier. Why choose Derks Plumbing for emergencies? We combine speed, skill, and affordability to resolve plumbing emergencies efficiently. Turn off the water supply, open faucets, and gently thaw pipes with a hairdryer. Avoid open flames. If pipes burst, call a 24hr plumber. No, slow drains often escalate into severe clogs. Address them early or contact Derks Plumbing for preventive maintenance. Typically located in basements, crawl spaces, or near water heaters. Labeled valves make identification easier. We combine speed, skill, and affordability to resolve plumbing emergencies efficiently.

how to adjust water level in toilet tank
Plumbing

How to Adjust Water Level in Toilet Tank: A Step-by-Step Guide

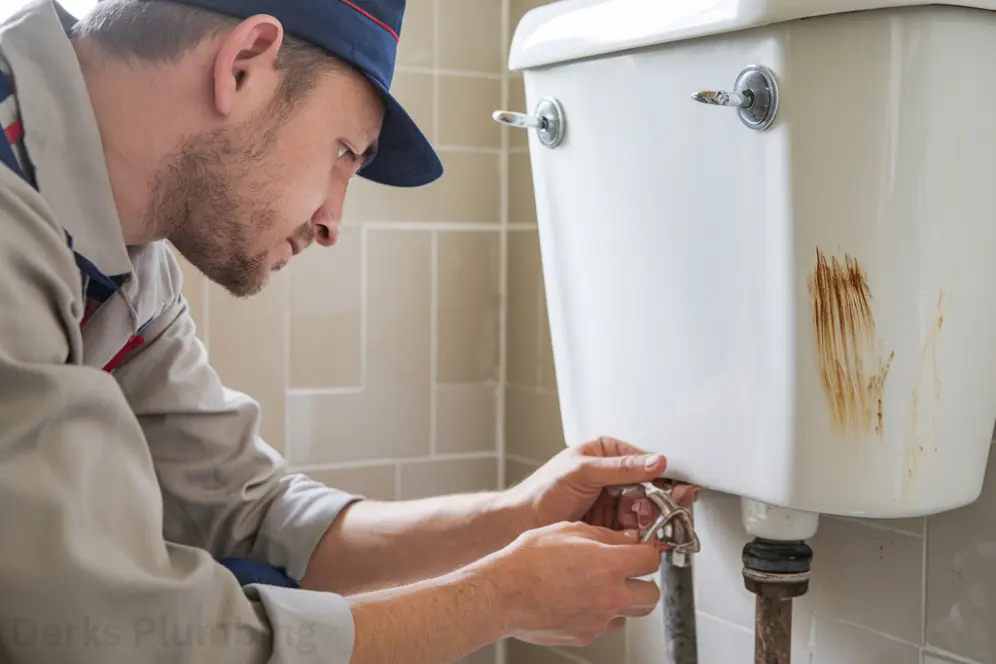
If you’re wondering how to adjust water level in toilet tank, the answer is simple: you can usually do it by changing the position of the float inside the tank. Whether you want to increase the water level in the toilet bowl, save water, or fix a weak flush, adjusting the float in the toilet is an easy DIY task that anyone can handle. In this guide, you’ll learn step-by-step how to change the water level in the toilet, why it matters, and how to keep your toilet working perfectly. Why Adjusting the Water Level in the Toilet Bowl Matters The water level in the toilet bowl isn’t just about looks. It affects how well your toilet flushes and can even impact your water bill. Too much water wastes money and might cause overflow. Too little water can lead to weak flushes and clogs. That’s why knowing how to adjust the water level in the toilet tank is a handy skill for every homeowner. Understanding the Parts: What Controls the Water Level? Before you start, it’s good to know what’s inside your toilet tank: Float: This is a small ball or cup that floats on the water. It tells the fill valve when to stop adding water. Fill Valve: This controls how much water goes into the tank. Overflow Tube: This prevents the tank from overflowing. When you flush, water leaves the tank and goes into the bowl. The float drops, the fill valve opens, and water refills the tank. Adjusting the float in toilet changes when the fill valve shuts off, which changes the water level in the tank and bowl. Step-by-Step: How to Adjust Water Level in Toilet Tank 1. Turn Off the Water Supply Find the shut-off valve behind your toilet and turn it clockwise to stop the water flow. This makes it safe and easy to work inside the tank. 2. Remove the Tank Lid Carefully lift off the tank lid and set it aside. The inside of the tank is clean water, so don’t worry. 3. Find the Float Type Ball Float (Float Arm): Looks like a ball on a metal rod. Cup Float (Float Cup): A cylinder that slides up and down the fill valve. 4. Adjust the Float For Ball Float: To increase water level in toilet bowl: Turn the screw at the top of the fill valve (where the float arm connects) clockwise. This raises the float and allows more water in. To lower water level: Turn the screw counterclockwise to lower the float. For Cup Float: Look for a clip or screw on the side of the fill valve. To raise water level: Pinch the clip and slide the float up, or turn the adjustment screw clockwise. To lower water level: Slide the float down or turn the screw counterclockwise. 5. Test the Water Level Turn the water supply back on. Let the tank fill and flush the toilet. Check the water level in toilet bowl and tank. Most tanks have a marked line showing the correct water level usually about an inch below the top of the overflow tube. 6. Repeat if Needed If the water level isn’t right, repeat the adjustment. Small changes make a big difference! Common Problems and Fixes Toilet keeps running: Water level may be too high. Lower the float. Weak flush: Water level may be too low. Raise the float. Water spills into overflow tube: Lower the float to prevent waste. Tips for Changing the Water Level in Toilet Always make small adjustments big changes can cause problems. If your toilet is old, parts may be worn out. Consider replacing the float or fill valve. If adjusting the float doesn’t work, check for leaks or blockages. Expert Toilet Repair & Installation in Los Angeles At Derks Plumbing Company, we specialize in toilet installation and repair in Los Angeles. Whether you’re dealing with a stubborn clog, a leaking tank, or need a brand-new toilet installed, our team has the expertise to get the job done right. ✅ Fast & Reliable Service✅ Experienced & Licensed Plumbers✅ Affordable Pricing✅ Emergency Repairs Available If you’re planning to install a new toilet, don’t miss our detailed Toilet Installation Guide If DIY fixes aren’t solving your toilet’s water level issues, don’t wait until the problem worsens. Let our professionals handle it for you. 📞 Call us today or visit our service page for more details:Toilet Installation & Repair in Los Angeles Conclusion Learning how to adjust water level in toilet tank is a simple way to keep your bathroom running smoothly. By understanding the float, fill valve, and overflow tube, you can easily increase the water level in the toilet bowl, save water, and fix most flushing problems. With just a screwdriver and a few minutes, you can change the water level in the toilet and avoid calling a plumber! FAQs Q1: How do I know if the water level in my toilet bowl is too low? A: If your flush is weak or the bowl looks emptier than usual, the water level may be too low. Adjusting the float in toilet can help fix this. Q2: Can I adjust the water level in any toilet? A: Most modern toilets let you adjust the float. Some very old models may need new parts. Q3: What if adjusting the float doesn’t work? A: There may be a problem with the fill valve or a leak. Try replacing worn parts or call a plumber if needed. Q4: How much water should be in the toilet tank? A: Most tanks should fill to about an inch below the top of the overflow tube. Check for a marked line inside your tank. Q5: Will increasing the water level in the toilet bowl fix a weak flush? A: Yes! A higher water level means a stronger flush. Just don’t set it too high, or you’ll waste water.

who to hire to get a water faucet installed
Plumbing

Who to Hire to Get a Water Faucet Installed: A Complete Guide

Installing a water faucet may seem straightforward, but improper installation can lead to leaks, water damage, or even costly repairs. Hiring the right professional ensures the job is done safely and efficiently. If you’re wondering who to hire to get a water faucet installed, this guide will walk you through your options, costs, and why hiring a licensed plumber is the smartest choice. Plus, discover how Derks Plumbing in Los Angeles delivers unmatched expertise for faucet installation and repair. Why Hiring a Professional Matters for Faucet Installation When it comes to plumbing tasks like faucet installation, cutting corners can backfire. Here’s why hiring a pro is essential: Expertise and Precision Licensed plumbers understand the complexities of plumbing systems, including water pressure adjustments, pipe connections, and local building codes. A poorly installed faucet can cause leaks, mold growth, or structural damage—issues a professional will avoid. Tools and Equipment Professionals come equipped with specialized tools like basin wrenches, pipe cutters, and sealants. DIY attempts often lack these resources, leading to incomplete installations or stripped fittings. Time and Convenience A plumber completes the job faster, saving you hours of frustration. For busy homeowners, this convenience is invaluable. Warranty Protection Many manufacturers require professional installation to validate warranties. Hiring a licensed plumber like Derks Plumbing ensures your faucet’s warranty remains intact. Who to Hire to Get a Water Faucet Installed? The answer is simple: a licensed plumber. Here’s why they’re the best choice: Licensed Plumbers Licensed plumbers undergo rigorous training and certification. They’re qualified to handle everything from basic installations to complex plumbing overhauls. For tasks like sink installation or fixing a leaky faucet, their expertise ensures long-term solutions. Handyman Services: A Risky Alternative While handymen may offer lower rates, they often lack plumbing-specific knowledge. Mistakes can lead to higher costs to install kitchen faucet repairs down the line. Specialty Plumbing Companies For advanced projects like integrating smart faucets or rerouting pipes specialty plumbers provide tailored solutions. However, standard faucet installations rarely require this level of specialization. Pro Tip: Always verify credentials, read reviews, and ask for proof of insurance before hiring. Cost to Install Kitchen Faucet: What to Expect Understanding the cost to install kitchen faucet helps you budget effectively. Here’s a breakdown: Average Installation Costs Basic faucet installation: $150–$300 High-end or smart faucets: $300–$600 Additional costs for sink installation: $200–$500 (depending on sink type) Factors Influencing Costs Faucet Complexity: Pull-down sprayers or touchless features increase labor time. Pipe Condition: Older pipes may need upgrades or repairs. Location: Labor rates vary by region. In Los Angeles, expect mid-to-high range pricing. Saving Money on Installation Bundle services (e.g., faucet and sink installation). Choose mid-range faucets with straightforward designs. Schedule plumbing work during off-peak seasons. Signs You Need a Plumber for Leaky Faucet A plumber for leaky faucet repairs is non-negotiable if you notice: Persistent dripping (wasting up to 3,000 gallons yearly). Low water pressure. Rust or mineral buildup around fixtures. Unusual noises (e.g., screeching or knocking). Delaying repairs can lead to higher water bills and pipe damage. Derks Plumbing offers rapid response times for leaky faucets in Los Angeles, preventing minor issues from becoming disasters. Sink Installation Cost: A Breakdown If you’re remodeling, understanding sink installation cost is critical: Drop-in sinks: $200–$400 (labor + materials). Undermount sinks: $300–$600. Farmhouse sinks: $500–$1,000+. Why Professional Sink Installation Matters Improper sealing or alignment can cause leaks, cabinet damage, or uneven countertops. Professionals ensure precise fitting and waterproofing. DIY vs. Hiring a Pro: Which is Better? When DIY Makes Sense Replacing a pre-installed faucet with the same model. You have prior plumbing experience. When to Hire a Pro Installing a new faucet type (e.g., switching from single-handle to dual-handle). Upgrading sinks or rerouting pipes. Addressing leaks or low water pressure. Why Choose Derks Plumbing for Faucet Services? When searching for who to hire to get a water faucet installed in Los Angeles, Derks Plumbing stands out: Licensed and Insured: Guaranteed compliance with local codes. Transparent Pricing: No hidden fees get upfront quotes for cost to install kitchen faucet or sink installation cost. 24/7 Emergency Services: Fast fixes for burst pipes or severe leaks. Satisfaction Guarantee: We don’t rest until your faucet works flawlessly. Conclusion Knowing who to hire to get a water faucet installed ensures your home’s plumbing remains efficient and leak-free. From sink installation cost savings to hiring a plumber for leaky faucet emergencies, trust Derks Plumbing for reliable, affordable service in Los Angeles. Ready to Upgrade Your Faucets? Visit Derks Plumbing and explore our service Faucet Repair & Installation Services in Los Angeles. Let our experts handle the hard work—so you can enjoy flawless water flow! FAQ’s How long does faucet installation take? Most jobs take 1–2 hours, but complex setups may require half a day. Can I install a faucet without shutting off the water? No always shut off the water supply to avoid flooding. What’s included in the cost to install kitchen faucet? Labor, materials, and disposal of old fixtures. How often should faucets be replaced? Every 10–15 years, or sooner if leaks persist. Does Derks Plumbing offer warranties? Yes! We provide a 1 year labor warranty on all installations. Most jobs take 1–2 hours, but complex setups may require half a day. No always shut off the water supply to avoid flooding. Labor, materials, and disposal of old fixtures. Every 10–15 years, or sooner if leaks persist. Yes! We provide a 1 year labor warranty on all installations.

linear shower drain pros and cons
Plumbing

Linear Shower Drain Pros And Cons

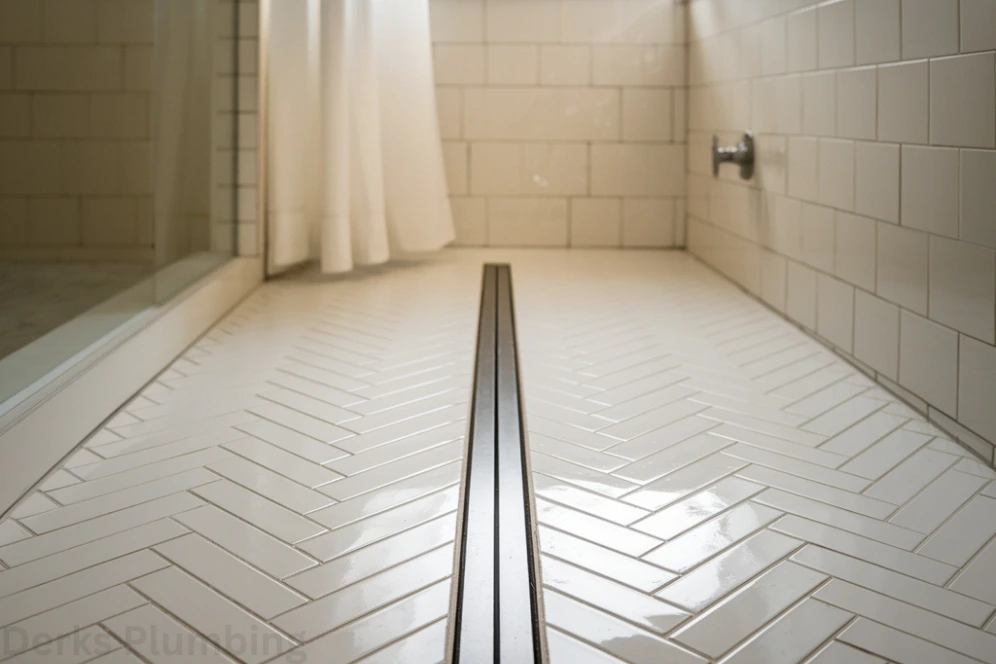
Linear shower drains are revolutionizing bathroom design, offering sleek aesthetics and practical functionality. Whether you’re renovating your bathroom or building a new one, understanding the linear shower drain pros and cons is essential. At Derks Plumbing, we specialize in modern plumbing solutions, including the installation and maintenance of linear shower drains. In this guide, we’ll explore the benefits, drawbacks, and types of shower drains, along with tips for integrating tile in linear drain designs. Let’s dive in! What Is a Linear Shower Drain? A linear shower drain is a long, narrow drainage system installed along one edge of a shower floor. Unlike traditional center drains, it features a discreet channel that efficiently directs water toward the drain. Its minimalist design complements contemporary bathrooms, making it a popular choice for homeowners seeking style and performance. How Does a Linear Drain Work? The linear drain shower system uses gravity to guide water into a concealed channel. The channel is covered with a grille (often customizable) that allows water to flow through while catching debris. This design ensures faster drainage and reduces standing water, enhancing safety and hygiene. Linear Shower Drain Pros and Cons Before investing in a linear shower drain, weigh its advantages and limitations. Pros of Linear Shower Drains Sleek, Modern Aesthetics The minimalist design of linear drains elevates bathroom aesthetics, creating a seamless look, especially when paired with tile in linear drain layouts. Superior Drainage Efficiency Linear drains cover a larger surface area, reducing water pooling and speeding up drainage compared to traditional point drains. Flexible Installation Options These drains can be installed against a wall, in the center, or along the shower entrance, offering design flexibility. Accessibility The low-profile design makes linear drain showers ideal for curbless or walk-in showers, improving accessibility for seniors or individuals with mobility challenges. Easy Maintenance Many models feature removable grilles, simplifying debris cleanup and reducing clogs. Cons of Linear Shower Drains Higher Cost Linear shower drains are typically pricier than traditional drains due to their specialized design and installation requirements. Complex Installation Proper installation demands precise sloping (grading) of the shower floor toward the drain, often requiring professional expertise. Limited Compatibility Retrofitting a linear drain into an existing shower may require significant structural changes. Grille Maintenance Metal grilles can develop mineral deposits over time, necessitating regular cleaning to maintain appearance. Types of Shower Drains: How Does a Linear Drain Compare? When choosing a drainage system, consider these types of shower drains: Point Drains (Traditional Center Drains) Circular drain located at the shower’s center. Affordable but prone to water pooling. Less visually appealing compared to linear shower drains. Linear Drains Long, narrow channel for efficient drainage. Ideal for large showers or open-concept designs. Pairs beautifully with tile in linear drain configurations. Trench Drains Similar to linear drains but wider and often used in commercial settings. Requires more floor space. Slot Drains Ultra-slim, grille-free design. High-end option but costly. Integrating Tile in Linear Drain Designs One of the standout features of linear shower drains is their compatibility with custom tiling. Here’s how to maximize the tile in linear drain setup: Tile Selection Tips Choose large-format tiles to minimize grout lines and enhance the seamless look.Opt for slip-resistant materials like textured porcelain or natural stone.Match the drain grille finish to your tile color for a cohesive aesthetic. Installation Best Practices Ensure the shower floor slopes at 2% toward the linear drain.Use waterproofing membranes to prevent leaks.Hire professionals like Derks Plumbing for precise grading and tile alignment. Maintenance Tips for Linear Drain Showers To keep your linear drain shower in top condition: Remove and clean the grille monthly to prevent clogs.Flush the channel with hot water and vinegar to dissolve soap scum.Inspect seals and joints annually for leaks. Need Drain Cleaning in Los Angeles? Trust Derks Plumbing! Clogged drains ruining your day? Our Drain Cleaning in Los Angeles services ensure fast, lasting solutions. From linear shower drains to sewer lines, we tackle all blockages with advanced tools like hydro-jetting and camera inspections. Why Choose Us?24/7 Emergency ServiceLicensed and Insured TechniciansAffordable, Upfront Pricing Don’t let a slow drain dampen your routine. Visit drain cleaning los angeles to book your service today! Conclusion Understanding the linear shower drain pros and cons helps you make informed decisions for your bathroom upgrade. While these drains offer unmatched style and efficiency, professional installation is key to maximizing their benefits. For expert guidance or maintenance, trust Derks Plumbing your partner in modern plumbing solutions. Contact us at Derks Plumbing and let our team bring your vision to life! FAQ’s Are linear shower drains more expensive than traditional drains? Yes, linear drains cost more upfront due to materials and installation complexity. However, their durability and aesthetic appeal justify the investment. Can I install a linear drain in an existing shower? Retrofitting is possible but may require re-sloping the floor and adjusting plumbing. Consult Derks Plumbing for a feasibility assessment. Do linear drains work with all tile types? Yes! Tile in linear drain setups accommodate ceramic, porcelain, stone, and mosaic tiles. How often should I clean my linear drain? Clean the grille monthly and flush the channel quarterly to prevent buildup. Are linear drains prone to leaks? Proper installation and waterproofing minimize leak risks. Always hire experienced professionals. Yes, linear drains cost more upfront due to materials and installation complexity. However, their durability and aesthetic appeal justify the investment. Retrofitting is possible but may require re-sloping the floor and adjusting plumbing. Consult Derks Plumbing for a feasibility assessment. Yes! Tile in linear drain setups accommodate ceramic, porcelain, stone, and mosaic tiles. Clean the grille monthly and flush the channel quarterly to prevent buildup. Proper installation and waterproofing minimize leak risks. Always hire experienced professionals.

how to repair cut in copper pipe
Plumbing

How to Repair Cut in Copper Pipe: A Complete Guide

Copper lines are often used in plumbing systems because they last a long time and don’t rust. But accidents, getting old, or damage from the outside can cut a copper pipe, which can cause leaks that can cause a lot of water damage if they are not fixed quickly. If this is happening to you, don’t worry there are several good ways to fix a copper water pipe and get your plumbing working again. Do-it-yourself solutions can help for a short time, but if you want a long-lasting and skilled solution, you might want to hire a company like Derks Plumbing Company Inc. We are experts at fixing copper pipes and will make sure that your whole plumbing system works perfectly. This detailed guide will show you several ways to fix a copper pipe, making sure you have all the information, tools, and skills you need to get the job done quickly and correctly Understanding Copper Pipe Damage Common Causes of Copper Pipe Damage Before diving into repairs, it’s essential to understand what causes a cut in a copper pipe. Common reasons include: Accidental Drilling or Sawing – Home renovations or installations may accidentally puncture a pipe. Corrosion Over Time – Chemical reactions inside the pipe can weaken its structure. Freezing Temperatures – Water expands when frozen, causing the pipe to burst. Excessive Water Pressure – Too much pressure can stress the pipe and lead to leaks. Physical Damage – External forces, such as construction work, can result in a cracked or cut pipe. Identifying the cause helps determine the best copper pipe clamp repair or alternative solution. Tools and Materials Needed for Copper Pipe Repair Basic Tools: Pipe cutter or hacksaw Emery cloth or sandpaper Flux brush and flux paste Propane torch Adjustable wrench Measuring tape Deburring tool or file Pipe wrench Repair Materials: Copper pipe and couplings Solder and flux (for soldering repairs) Copper pipe clamp repair kits Compression couplings SharkBite slip fittings Epoxy putty Pipe repair tape Pipe repair clamps   8 Methods for Repairing Copper Piping 1. Soldering Two Couplings & Piece of Pipe (Code Approved / Permanent) Soldering is the most traditional and reliable way to repair copper pipes. It involves removing the damaged section of the pipe and installing a new piece of copper pipe with couplings. This method is ideal for homeowners or professionals looking for a long-term, permanent solution. Steps: Turn Off the Water Supply: Before you start, locate your main water shut-off valve and turn it off to stop water flow. Drain the Pipe: Open the nearest faucet to ensure all water is drained from the pipe. Cut Out the Damaged Section: Use a pipe cutter to remove the section with the cut or crack. If you’re using a hacksaw, make sure the cut is straight to avoid uneven connections. Clean the Pipe Ends: Use emery cloth to clean the ends of the copper pipe where you’ll be applying the flux. Clean the insides of the couplings as well. This will remove any oxidation or rough edges that could interfere with the soldering process. Apply Flux: Use a flux brush to coat the ends of the pipe and the inside of the coupling with flux. This is a crucial step, as flux helps the solder flow and ensures a secure seal. Insert a New Copper Pipe Section: Place the new copper pipe between the two couplings. Heat and Solder the Joints: Use a propane torch to heat the pipe and the coupling evenly. The flux will melt and allow the solder to flow into the joint. Once the solder begins to melt, apply it around the joint until it forms a strong seal. Let it Cool and Test: Allow the soldered joints to cool for a few minutes before turning the water back on. Check for leaks at the repair site by turning on the water slowly and inspecting the joint. ✔ Advantages: Provides a strong, permanent seal Code-approved method for repairs Durable and reliable solution ❌ Disadvantages: Requires soldering skills and proper equipment Can be difficult for beginners 2. Compression Couplings (Code Approved / Permanent) Compression couplings offer a solder-free solution to copper pipe repairs. They’re a great option for DIYers or those looking for a quicker repair. Compression couplings create a tight seal by using a rubber ring inside the coupling that compresses when tightened. Steps: Shut Off the Water: As with all repairs, turn off the water supply and drain any water left in the pipe. Cut Out the Damaged Section: Use a pipe cutter to remove the damaged section of pipe. Deburr and Clean the Pipe Ends: After cutting, use a deburring tool to remove any sharp edges from the cut ends. Clean the pipe with an emery cloth to ensure a smooth surface for the compression coupling. Install the Compression Nuts and Rings: Slide the compression nuts and rings onto the pipe. Install the Compression Coupling: Place the compression coupling over the pipe ends and align it with the seals inside the coupling. Tighten the Nuts: Using a wrench, tighten the compression nuts to create a tight seal around the rubber ring. Be careful not to overtighten, as this could damage the pipe. Test for Leaks: Turn the water supply back on and check for any leaks at the repair site. ✔ Advantages: Easy to install, no soldering required Code-approved method Ideal for DIY repairs Works well in tight spaces ❌ Disadvantages: The fitting may be bulkier than a soldered joint Requires careful tightening to avoid leaks 3. SharkBite Slip Coupling (Code Approved if Done Correctly / Permanent) SharkBite fittings are a modern, tool-free solution for copper pipe repairs. These fittings use a push-to-connect mechanism that doesn’t require soldering or special tools, making them a favorite for fast repairs. Steps: Turn Off the Water and Drain the Pipe: Shut off the water and drain the pipe to eliminate excess water. Cut Out the Damaged Section: Use a pipe cutter to remove the damaged portion of

How to Reset Tankless Water Heater
Plumbing

How to Reset Tankless Water Heater

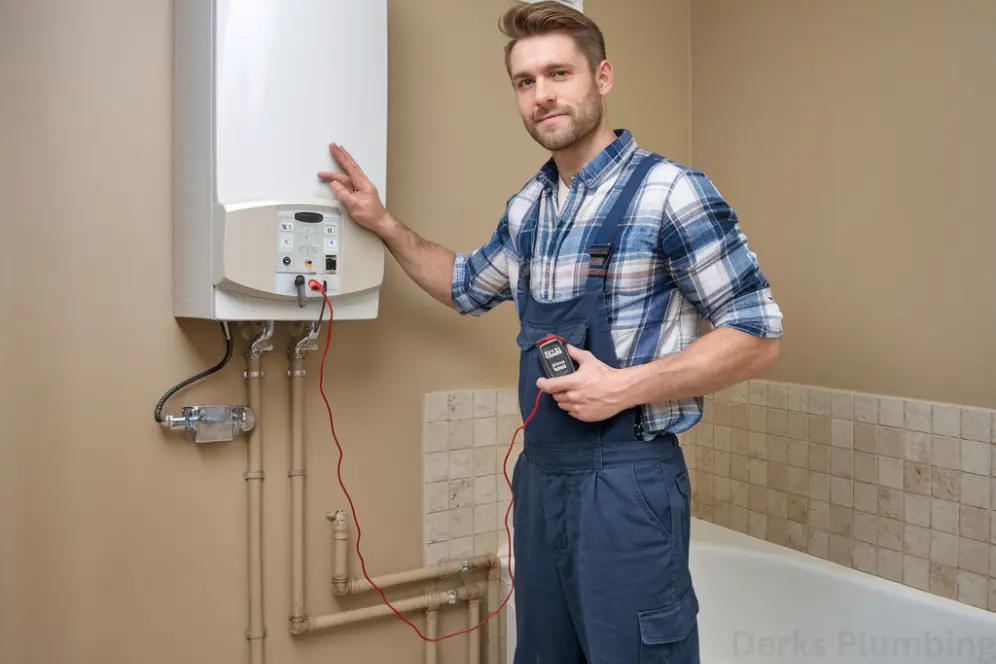
How to reset tankless water heater is crucial for maintaining its optimal performance and ensuring a steady flow of hot water in your home. If you’re facing persistent issues, consider professional tankless water heater installation and repair services from Derks Plumbing. Common Issues Requiring a Reset While how to reset tankless water heater is a simple process, certain issues may necessary to restore normal operation. Common scenarios include: Power Surges: Electrical disturbances can disrupt the system’s functionality, requiring a reset. Overheating: If the unit detects temperatures exceeding safe limits, it may shut down as a protective measure. Tankless water heater error codes: Specific malfunctions trigger error codes, indicating the need for troubleshooting and potential resetting. Blocked Air Supply or Exhaust: If the venting system is obstructed, the unit may shut down as a safety precaution. Flame or Ignition Failure: Issues with the gas supply or ignition system may prevent the unit from heating properly. Understanding these common issues is the first step in effective tankless water heater troubleshooting. If problems persist, it may be time to consult Derks Plumbing Company Inc. for expert solutions. Step-by-Step Guide to Resetting Your Tankless Water Heater Follow these steps for how to reset tankless water heater effectively: 1. Turn Off the Power: Locate the circuit breaker dedicated to your unit and switch it off. 2. Shut Off the Gas Supply (For Gas-Powered Models): Turn off the gas valve connected to your unit. 3. Access the Unit: Depending on your model, remove a cover plate to access internal components. 4. Locate the Reset Button: It is typically red and labeled as “Reset.” 5. Press the Reset Button: Firmly press the button. You may hear a click, indicating that the unit has been reset. 6. Reassemble the Unit: Replace insulation and secure the cover plate back into position. 7. Restore Power and Gas Supply: Switch the circuit breaker back on and turn on the gas valve. 8. Test the System: Turn on a hot water tap to ensure the system is functioning correctly. If resetting doesn’t solve the problem, contact Derks Plumbing Company Inc. for expert tankless water heater troubleshooting. Decode Tankless Water Heater Error Codes Modern units display tankless water heater error codes when issues arise. Understanding these codes is important for effective tankless water heater troubleshooting. Common Error Codes and Their Meanings: Error Code 10: Indicates an issue with the air supply or exhaust. Error Code 11: Indicates ignition failure due to gas supply issues or a malfunctioning igniter. Error Code 16: Signals overheating from a clogged heat exchanger or restricted water flow. Error Code 29: Denotes a problem with the heat exchanger’s thermistor, possibly due to a short circuit. Error Code 33: Signals a problem with the heat exchanger’s temperature sensor. Error Code 90: Indicates combustion abnormality, often due to poor venting or inadequate gas supply. If you are struggling with persistent tankless water heater error codes, our team at Derks Plumbing Company Inc. can diagnose and fix the problem. Preventive Maintenance Tips Regular maintenance is key to ensuring the longevity and efficient performance of your tankless water heater. Here are some essential tankless water heater maintenance tips: Descale the System Mineral buildup can hinder performance. Flush the system annually to remove scale deposits. Clean the Inlet Filter Debris can accumulate in the inlet filter, restricting water flow. Regularly inspect and clean the filter to maintain optimal performance. Looking to extend the lifespan of your tankless water heater and improve its efficiency? Check out our detailed guide on How to Clean a Tankless Water Heater to keep your system running smoothly. Inspect Venting Poor ventilation can cause overheating and system shutdowns. Regularly check for obstructions or blockages in the venting system. Check for Leaks Leaks in the plumbing or the unit itself can cause performance issues. Inspect the connections and pipes for any signs of water leakage. Monitor Water Pressure Tankless water heaters operate best within a specific pressure range. Ensure your water pressure is stable and within the manufacturer’s recommended limits. Schedule Professional Servicing Even with regular DIY maintenance, having a professional inspect your unit annually can help prevent major issues and extend its lifespan. When to Seek Professional Help If how to reset tankless water heater does not resolve the issue, it may require professional servicing. Some signs that indicate you need expert assistance include: Repeated Error Codes: If your unit keeps displaying tankless water heater error codes, it may require in-depth troubleshooting beyond a simple reset. No Hot Water After Resetting: Persistent heating issues may indicate a faulty component, gas supply problem, or a deeper system malfunction. Strange Noises or Smells: Odd noises, burning smells, or gas odors could signal a dangerous malfunction that needs immediate attention. Water Leaks: If you notice leaks around the unit, it could be a sign of internal damage or faulty connections. Inconsistent Water Temperatures: If your hot water fluctuates frequently or is not reaching the desired temperature, professional servicing may be necessary. For reliable and expert tankless water heater installation and repair services, contact Derks Plumbing Company Inc. today. Our experienced technicians can diagnose and resolve all your water heater concerns efficiently. FAQ’s How often should I reset my tankless water heater? You should only reset your unit when necessary, such as after an error code appears or after a power surge. Frequent resets may indicate underlying issues that require professional attention. What should I do if my water heater keeps needing a reset? If your unit frequently requires resets, it may have a persistent issue like overheating, mineral buildup, or gas supply problems. Derks Plumbing Company Inc. can diagnose and resolve the problem. Why is my tankless water heater not heating after a reset? This could be due to an unresolved tankless water heater error code, a gas supply issue, or a clogged inlet filter. Check for additional problems or seek professional help. Can I prevent my water heater from needing frequent resets? Yes, following tankless water heater maintenance tips such as

How Does a Plumber Find a Water Leak Underground
Plumbing

How Does a Plumber Find a Water Leak Underground

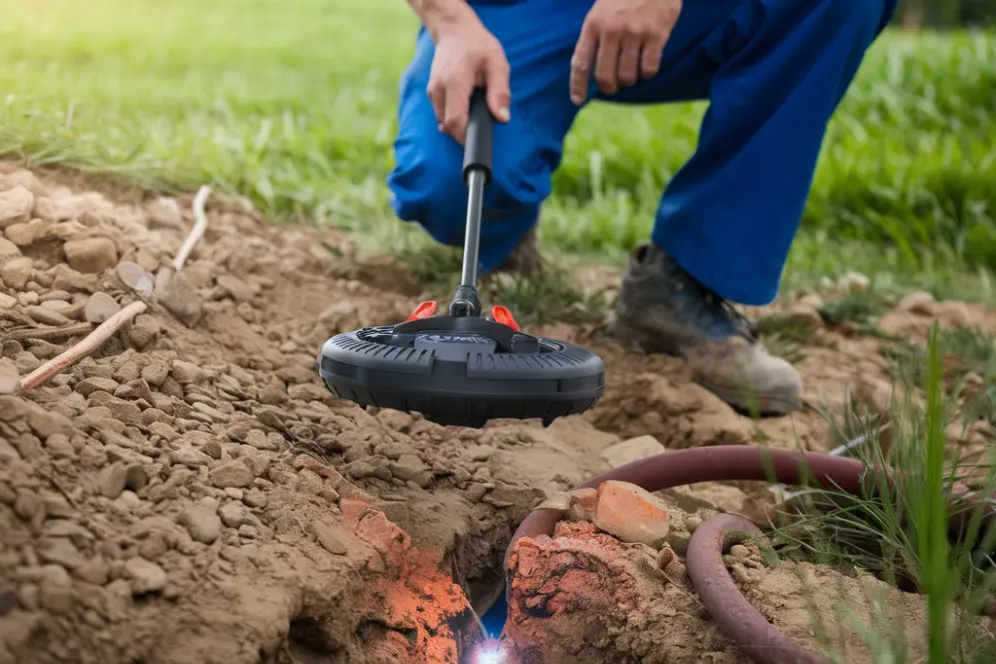
How does a plumber find a water leak underground? This is a common question homeowners ask when they notice signs of water damage but cannot see the source of the problem. Detecting underground water leaks requires specialized knowledge and advanced tools. A professional plumber follows a systematic approach to identify and fix these leaks before they cause extensive damage. In this comprehensive guide, we’ll explore the various methods plumbers use for finding underground water lines with leaks, the latest tests to detect water leak, and the potential costs, including the plumbing bill for water leak check. Signs You May Have an Underground Water Leak Before a plumber starts the detection process, you might notice warning signs of an underground leak. These include: Unexplained high water bills – A sudden spike in your water bill without increased usage could indicate a hidden leak. Wet or soggy patches in your yard – Patches of grass that are greener or consistently damp suggest leaking water beneath the surface. Cracks in your foundation – Persistent water leaks can weaken the foundation, leading to visible cracks in walls or floors. Low water pressure – A hidden leak reduces the amount of water reaching your fixtures. Mold or mildew growth – Excess moisture from leaks can create the perfect environment for mold and mildew. Sounds of running water – If you hear water running when all taps are turned off, there could be a leak underground. If you observe any of these signs, it’s crucial to call a plumber to perform tests to detect water leak and prevent further structural damage. The Best Leak Detection Tools: Professional Training and Licensing 1. Visual Inspection A plumber’s first step in detecting underground water leaks is a thorough visual inspection. They examine visible plumbing connections, walls, flooring, and outdoor areas for signs of moisture buildup, pooling water, or foundation damage. 2. Water Pressure Testing Also known as isolation testing, this method helps pinpoint leaks by measuring fluctuations in water pressure. The plumber attaches a gauge to a faucet or fixture and turns off the main supply. If the pressure drops, it indicates a leak somewhere in the system. This is an effective way of finding underground water lines with leaks. 3. Video Pipe Inspection For more precise leak detection, plumbers use waterproof, high-resolution cameras attached to flexible rods. These cameras allow them to visually inspect underground pipes without the need for extensive excavation. Video inspection is highly effective for identifying cracks, corrosion, and leaks inside water lines. 4. Thermal Imaging Cameras These infrared cameras detect temperature variations caused by leaking water. If a hot water pipe is leaking underground, the thermal camera will highlight the temperature difference, allowing for accurate leak detection. 5. Acoustic Leak Detection (Listening Devices) Using sophisticated listening devices such as ground microphones, listening discs, and deck plates, plumbers can amplify the sound of leaking water. These tools help in detecting underground water leaks even beneath concrete or asphalt surfaces. 6. Soil Probes Soil probes, or pipe probes, are used to listen for underground leaks in sewer lines and water mains. By inserting the probe into the soil, plumbers can detect water escaping under pressure, determining the depth and precise location of the leak. 7. Dye Testing Dye testing is a non-invasive method often used in pools, toilets, and irrigation systems. A plumber introduces a high-visibility dye into the water system. If a leak is present, the dye will appear in the affected area, making it easier to locate the leak. Tests to Detect Water Leak To confirm the presence of a leak, plumbers perform a variety of tests to detect water leak, such as: Hydrostatic Testing – This test pressurizes the plumbing system to check for any loss of pressure, indicating a leak. Tracer Gas Testing – A harmless gas is pumped into the pipes, and special sensors detect escaping gas, accurately locating leaks. Meter Testing – Plumbers compare water meter readings over time to check for unusual water loss. Finding Underground Water Lines with Leaks Plumbers rely on advanced technology for finding underground water lines with leaks. Electronic pipe locators and ground-penetrating radar (GPR) help map underground plumbing networks, ensuring precision when targeting leak-prone areas. These tools minimize unnecessary digging, reducing labor costs and property damage. Cost Considerations: Plumbing Bill for Water Leak Check The plumbing bill for water leak check varies based on several factors, including: Leak location and depth – Leaks that are harder to access require more time and specialized equipment. Type of detection method used – Advanced techniques like thermal imaging and video inspections may increase costs. Extent of the repair needed – Minor leaks cost less to repair compared to extensive pipe replacements. Many plumbing companies offer upfront pricing and free estimates, helping homeowners budget for the necessary repairs. Professional Leak Detection Services in Los Angeles If you suspect an underground water leak, timely action is critical to prevent extensive damage and high water bills. At Derks Plumbing Company, we specialize in leak detection services in Los Angeles. Our expert plumbers use state-of-the-art equipment to locate and repair leaks efficiently, ensuring minimal disruption to your property. With years of experience in finding underground water lines with leaks, we offer reliable solutions tailored to your plumbing needs. Contact us today for professional and prompt leak detection services in Los Angeles. FAQ’s How does a plumber find a water leak underground? A professional plumber uses advanced techniques like acoustic leak detection, video pipe inspection, and thermal imaging cameras to pinpoint leaks accurately without unnecessary excavation. What are the signs of an underground water leak? Common signs include high water bills, wet yard spots, foundation cracks, mold growth, and low water pressure. How much does a plumbing bill for water leak check cost? The cost depends on the complexity of the leak, the detection method used, and the extent of repairs needed. Do I need to dig up my yard to fix an underground leak? Not necessarily. Many leaks can be

how to detect water leak under concrete slab
Plumbing

How to Detect Water Leak Under Concrete Slab

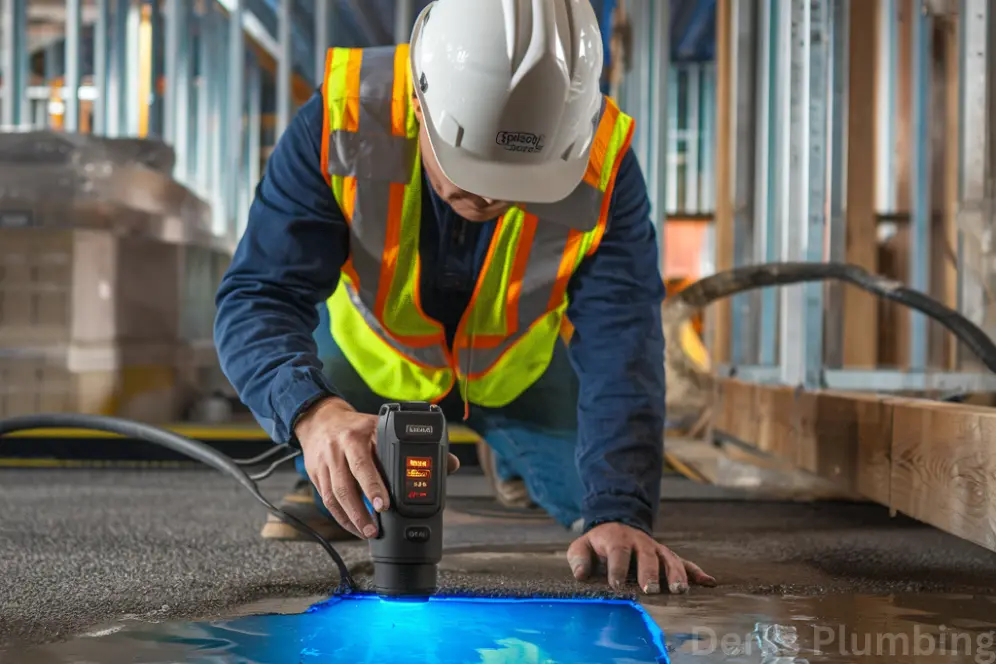
If you don’t find and fix water leaks under concrete slabs right away, they can do a lot of damage to your home’s base. Finding these leaks is important to keep your property’s structure safe and avoid having to pay for expensive fixes. So, how can you find a water leak under a slab of concrete? People often don’t know that there is water under the concrete slab for a long time, but there are signs that they can look for. Whether you see wet spots, high water bills, or a quick rise in humidity, it’s important to know what could be causing it and how to find it. What you need to do to find a leak under a concrete slab and how to fix it are both covered in this guide. Additionally, we will talk about ways to fix slab leaks, including how professional plumbers do it. Signs of a Water Leak Under Concrete Slab The first step in detecting a water leak under a concrete slab is noticing the warning signs. Homeowners should be vigilant for the following: Unexpected Wetness: Damp areas or puddles on your floor, particularly in low-traffic areas, might indicate water under the concrete slab. Water Bills: A sudden increase in your water bill without any change in usage could point to a leak. Sound of Running Water: Hearing the sound of water running, even when all faucets are off, may suggest a hidden leak. Cracks in the Concrete: If your concrete floor is showing signs of cracking or shifting, it could be the result of a water leak undermining the slab. Humidity or Mold: A rise in humidity levels or the presence of mold on walls or floors can also be associated with leaks under the slab. How to Detect Water Leak Under Concrete Slab Now that you know the common signs, let’s dive into the methods of detection. There are several techniques for finding water under concrete slab, ranging from simple observation to professional equipment. Visual Inspection First, look at the concrete that you can see for cracks or other clear signs of water buildup. There may be a leak under the concrete floor if you see wet spots or dampness. Also, check the walls around the area for mould growth or wet spots. Listening for Water Sounds If you’re unsure, another method is listening closely. Turn off all water sources in your home and listen for any sounds of water running underneath the slab. This can be a clear indication of a leak that needs attention. Moisture Meter With a wetness meter, you can find a leak more accurately than any other method. With these tools, you can find secret water under concrete floors, which helps you find the source of a leak without damaging the floor. At your local hardware shop, you can either rent or buy a moisture meter. Pressure Testing A lot of the time, plumbers use pressure tests to find water leaks under a concrete slab. A expert will cut off the water supply lines and lower the pressure to see if it drops, which means there is a leak. This method works well for finding leaks in water systems that run below the slab. Thermal Imaging Thermal cameras can detect temperature variations in the concrete, highlighting areas where water is present. Since water tends to be cooler than the surrounding concrete, thermal imaging can help locate the leak without causing any damage to the floor. Listening Devices Plumbers often use special hearing tools to find leaks because they can hear the sound of water leaking under the slab. These sensitive tools can pick up even the faintest sounds of water moving through pipes, which helps techs find the leak’s exact location. The Risks of Delaying Water Leak Detection Ignoring a water leak under concrete can lead to significant damage. Over time, water can weaken the foundation of your home, leading to cracks, structural instability, and even costly repairs. Mold growth is another concern, which can lead to health problems for your family. Additionally, water leaks under concrete slabs can lead to higher utility bills, as the water is constantly running through the pipes even when not in use. Addressing the leak quickly will not only save you money in the long run but also protect your home from further damage. How to Repair a Water Leak Under Concrete Slab As soon as you find a water leak under your concrete slab, you need to fix it. Small leaks can sometimes be fixed by making a few small changes, but big leaks usually need to be fixed by a professional. In general, this is how slab leak fix works: Step 1: Identify the Source of the Leak It’s important to find the exact position and source of the leak before any repairs can be made. These are the times when pressure tests, thermal images, and listening devices are very useful. A plumber can figure out how bad the damage is once they find the leak. Step 2: Excavation and Access For big leaks, you might need to dig up the area. In this method, the broken pipe is found by breaking through the concrete slab. Depending on where the leak is, this could take a lot of drilling and breaking of the concrete floor. Step 3: Pipe Replacement or Repair Once the pipe is accessible, the plumber will either repair or replace the damaged section of the pipe. In some cases, relining the pipes is an option, where a new lining is inserted into the existing pipe to prevent further leaks. Step 4: Restoration The area is fixed up or replaced, and then it is recovered. The concrete slab is resealed, and the floor is brought back to how it was before. Some homes may choose to just patch the area with concrete if the damage isn’t too bad. Step 5: Preventive Measures Installing pressure regulators, doing regular maintenance checks, and making sure your plumbing is

how much ph does drain cleaner have
Plumbing

How Much pH Does Drain Cleaner Have?

Drain cleaners can have a pH ranging from highly acidic to strongly alkaline, depending on their ingredients. Many conventional chemical drain cleaners are strongly alkaline, with some products having a pH above 12. For example, a safety data sheet for Drano Max Gel Clog Remover lists a pH range of 11.5 to 13.5. However, not every drain cleaner has the same pH, so checking the specific product label and safety data sheet is important. Understanding the pH of drain cleaner helps homeowners recognize its chemical strength, potential hazards, and limitations. If you’re dealing with a clogged kitchen sink, bathroom drain, or shower, knowing how these products work can help you choose an appropriate cleaning method and avoid unnecessary plumbing problems. What Does pH Mean in Drain Cleaner? The pH scale measures how acidic or alkaline an aqueous solution is. It generally ranges from 0 to 14 under standard conditions. pH below 7: Acidic pH of 7: Neutral pH above 7: Alkaline, also called basic For example, lemon juice is acidic, while many soap solutions are alkaline. Chemical drain cleaners can be much more corrosive than everyday household products. The pH scale is logarithmic, meaning a change of one pH unit represents a tenfold change in hydrogen ion activity under comparable conditions. However, pH alone does not tell you everything about a cleaner’s strength or how dangerous it is. Its ingredients, concentration, and ability to cause chemical burns also matter. What Is the Typical Drain Cleaner pH Level? The drain cleaner pH level depends on the product’s chemical formulation. There is no single pH value that applies to every drain opener. Type of drain cleaner General pH characteristics Strongly alkaline chemical cleaner Often above pH 12 Acidic chemical drain cleaner Below pH 7, sometimes extremely acidic Enzyme-based drain cleaner Varies by formulation; may be mildly acidic, neutral, or alkaline Biological drain treatment Depends on its ingredients and formulation These are general descriptions rather than guaranteed ranges for every product. Always consult the manufacturer’s documentation for an exact value. Why Are Many Drain Cleaners Highly Alkaline? Many conventional drain cleaners use sodium hydroxide, also known as lye or caustic soda, or other alkaline ingredients. These chemicals can help break down certain organic materials, including grease, hair, and other residue that contributes to clogs. Some formulations also contain additional ingredients to support cleaning or help protect compatible plumbing materials. However, a strongly alkaline cleaner is not suitable for every blockage. A solid object, a damaged pipe, or a severe obstruction caused by accumulated debris may require mechanical removal rather than chemical treatment. What Is the pH of Drano? The pH of Drano depends on the specific product and formulation. A safety data sheet for Drano Max Gel Clog Remover reports a pH of 11.5 to 13.5. This places that formulation in the strongly alkaline range. Other products sold under the Drano name may have different ingredients or purposes, so this range should not be applied to the entire product line. The manufacturer’s instructions also matter. Drano Max Gel is intended for certain clogged or slow-running household drains, but its manufacturer warns against using it in toilets and advises against using a plunger during or after treatment if the drain has not cleared. Residual cleaner could splash back and cause injury. Before using any drain opener, check: The exact product name and intended application The ingredient information and safety warnings The manufacturer’s directions for use Any restrictions involving plumbing fixtures or disposal systems The recommended precautions for skin and eye protection You should never assume that two drain cleaners are interchangeable simply because they have similar names or purposes. Why Does the pH of Drain Cleaner Matter? The pH of drain cleaner helps explain how the product behaves, but it is only one factor in deciding whether it is suitable for a clogged drain. 1. It Helps Explain Chemical Action Strongly alkaline cleaners can help break down certain fats and organic materials. Acidic drain cleaners use different chemical reactions and may be formulated for particular types of obstructions. Neither type is guaranteed to remove every clog. A blockage made from a solid object or a buildup deep inside the drainpipe may not respond to chemical treatment. 2. It Affects Handling Risks Strongly acidic and strongly alkaline products can cause serious skin and eye injuries. Even a small splash can be dangerous, particularly when a concentrated cleaner contacts the eyes. Use the protective equipment specified on the label, keep children and pets away from the work area, and avoid leaning over the drain while applying the product. 3. It Matters for Plumbing Compatibility A cleaner’s suitability depends on its formulation, concentration, contact time, and the materials in your plumbing system. Some products are specifically designed for use with common household plastic and metal pipes when used as directed. Others may be unsuitable for particular fixtures, pipe materials, or plumbing systems. Repeated chemical treatments are not a reliable solution for an underlying problem such as a damaged pipe, recurring grease buildup, or a blockage caused by a foreign object. Can Drain Cleaner Damage Pipes? Yes, certain drain cleaners can damage plumbing materials or fixtures if they are incompatible with the system or used incorrectly. However, the risk varies by product. Strong acidic cleaners can be particularly corrosive to some metals, porcelain, and other materials. Strongly alkaline products can also be hazardous to certain materials and surfaces under particular conditions. Before using a drain cleaner, consider these points: Read the label: Check whether the product is approved for your type of drain and plumbing. Avoid repeated treatments: If the clog keeps returning, identify its cause instead of repeatedly applying chemicals. Never combine products: Mixing incompatible cleaners can produce dangerous heat, splashes, or toxic gases. Do not assume a complete blockage is safe to treat: Chemical liquid can remain trapped in the pipe and create a hazard during later work. Stop if the product fails: Follow the label’s instructions for an unsuccessful treatment and seek professional help

Fast and Efficient Plumbing Services in Eagle Rock

Client Reviews

Posted on Google Google
Ryan Haden profile picture
Ryan Haden
Google star 1Google star 2Google star 3Google star 4Google star 5Trustindex verifies that the original source of the review is Google.
Could not have been happier with Alex! We was right on time, polite, fixed all my kitchen sink issues and have me good tips on how to best maintain. I will for sure be using him again and highly recommend anyone who needs a great plumber to use his services as well. Thank you!
Posted on Google Google
Lorena Marcoe profile picture
Lorena Marcoe
Google star 1Google star 2Google star 3Google star 4Google star 5Trustindex verifies that the original source of the review is Google.
Talk about a professional...yes, I am talking about Alex Derks, Derks Plumbing. He is by far the most knowledgeable plumber we have ever had the pleasure of hiring. He's been in the plumbing business for years and it shows. Any questions you have re: plumbing issues, install, etc., Alex is your man. So happy with his work and he has a great sense of humor as well... extremely easy to talk to...thank you Alex!!!
Posted on Google Google
Andrew Jalil profile picture
Andrew Jalil
Google star 1Google star 2Google star 3Google star 4Google star 5Trustindex verifies that the original source of the review is Google.
Alex did a great job installing my kitchen faucet and an under-sink Aquasana water filter. He also addressed a few other plumbing-related issues. He was friendly and helpful. Excellent work!
Posted on Google Google
Abigail Bigham profile picture
Abigail Bigham
Google star 1Google star 2Google star 3Google star 4Google star 5Trustindex verifies that the original source of the review is Google.
Alex does what other plumbers cannot do! He is our go to.
Posted on Google Google
Danielle Driver profile picture
Danielle Driver
Google star 1Google star 2Google star 3Google star 4Google star 5Trustindex verifies that the original source of the review is Google.
Alex is very friendly and responsive. What a pleasure to work with!
Posted on Google Google
Lawrence Isaacs profile picture
Lawrence Isaacs
Google star 1Google star 2Google star 3Google star 4Google star 5Trustindex verifies that the original source of the review is Google.
Very very happy with the work Alex did for us replacing the tanks in our Aquasana filtration system. From first contact over the phone through job completion Alex was a pleasure to work with. He explained what he was doing, and why, every step of the way, and made sure we understood what we needed to do to maintain the system. Strongly recommend Alex!
Posted on Google Google
Joey Aucoin profile picture
Joey Aucoin
Google star 1Google star 2Google star 3Google star 4Google star 5Trustindex verifies that the original source of the review is Google.
Alex Derks has been such a lifesaver for me. Anytime I'm in a pinch with the plumbing in my home, Alex is only a phone call away and I've only seen great results from his work. He's reliable, knowledgable, and entirely trustworthy. A must-have source when owning a home.
Posted on Google Google
Eric Gorman profile picture
Eric Gorman
Google star 1Google star 2Google star 3Google star 4Google star 5Trustindex verifies that the original source of the review is Google.
After working with dozens of plumbing services in the LA area, I can confidently say Derks is the best in the business. On time, reliable and capable of even the most difficult tasks, Derks goes above and beyond to make sure your water system is working correctly.
Posted on Google Google
Jason Gruenbaum profile picture
Jason Gruenbaum
Google star 1Google star 2Google star 3Google star 4Google star 5Trustindex verifies that the original source of the review is Google.
Excellent know-how and fast!! Reasonable pricing and super responsive!!
Posted on Google Google
Jonathan Hepfer profile picture
Jonathan Hepfer
Google star 1Google star 2Google star 3Google star 4Google star 5Trustindex verifies that the original source of the review is Google.
Alex is an expert plumber, and he always goes out of his way to educate me about how to prevent future issues. Highly recommended!

Derks Plumbing has been providing professional plumbing services to Eagle Rock residents for over 20 years. Our experience and strong reputation have allowed us to grow, and we are proud to serve customers in 15 nearby areas, including Venice, Santa Monica, Beverly Hills, and more.

Contact

Hours of Operation

Monday: Open 24 Hours
Tuesday: Open 24 Hours
Wednesday: Open 24 Hours
Thursday: Open 24 Hours
Friday: Open 24 Hours
Saturday: Open 24 Hours
Sunday: Open 24 Hours

© 2026 Created by Localpro1

Scroll to Top