We are Available 24/7

Plumbing

why is the pressure in my shower low
Plumbing

Why Is the Pressure in My Shower Low?

After a demanding day, have you ever entered a shower expecting a pleasant, leisurely rinsing, only to find a shower with low pressure? If your question is, “Why is the pressure in my shower low?” You are most certainly not alone. This annoying problem afflicts many households. A low pressure shower can make an interesting event very irritable. But don’t panic; knowing the causes and fixes for shower low water pressure will enable you to restore the powerful, revitalising flow you are due. We shall go over all you need to know about no water pressure in shower problems on this blog. We will go over the typical causes of this issue, how to resolve it, and when you should give expert advice top thought. By the conclusion, you will have a whole view of how to permanently solve low water pressure! Common Causes: Why Is the Pressure in My Shower Low? A shower with low pressure can have several causes, and occasionally, it is more than one aspect influencing the situation. Let’s explore the primary reasons behind this dilemma. Among the most often occurring causes are blocked showerheads. Minerals and waste from your water can accumulate within the little showerhead nozzles over time. Low pressure showers follow from this accumulation blocking water flow. You are even more prone to suffer with this if your neighbourhood has hard water. Problems with the plumbing system in your house are another regular reason. Mineral deposits can cause pipes to corrode or block, therefore greatly influencing your water pressure. Older homes are particularly prone to have antiquated plumbing that affects the pipe flow to your shower, thereby determining the water availability. Sometimes the issue starts outside your house. Should problems with the municipal water supply arise, you may find shower low water pressure over your house. Finding out whether your neighbors are experiencing such issues is always a smart idea. Should they be, it could be time to give your local water provider a call. One other consideration is pressure balancing valves. These valves regulate the hot to cold water mix. Should they malfunction or wear out, they may not let enough water reach the showerhead. In shower settings, this can result in no water pressure, particularly in cases when another person in the house is using water concurrently. At last, your water pressure may be greatly affected by a concealed leak in your plumbing system. You will most certainly experience the impacts in the form of a low pressure shower if water is leaking before it ever gets to your shower. How to Fix a Shower With Low Pressure Knowing the typical causes today will help us to discuss how to cure a low pressure shower. Cleaning your showerhead comes first and most importantly easiest. Pull it from the wall and overnight soak it in vinegar. This can clean any choked nozzles and remove mineral buildup. Clean it, then rinse it completely and reattach it to observe whether the pressure changes. Should cleaning prove ineffective, look at the plumbing in your house. Around your pipes, search for any noticeable leaks, leaking water, or corrosion indicators. You should also look at your primary shut-off valve. Should it be partially blocked, the water supply to the whole house may be restricted, so depriving shower of water pressure. Changing your showerhead with a high-pressure model is also another fix. If your old showerhead was worn out or ineffective, these could significantly affect the water flow optimization. Occasionally the problem can be attributed to a malfunctioning pressure-balancing valve. Especially if these valves are hidden behind walls, replacing or fixing them usually calls for expert assistance. This is when it makes sense to call a specialist like Derks Plumbing. You might want to think about adding a water pressure booster pump if poor pressure permeates your house overall. Once and for once, this gadget solves your low pressure shower issues by greatly raising the pressure across your house. Can a Water Heater Affect Your Shower Pressure? Your water pressure in shower low problems may be much influenced by your water heater, but you might not know it. Your water heater may be the cause if you find that the pressure lowers solely when running hot water. Inside the water heater tank, sediment can restrict water flow and plug pipes. Flushing your water heater is one of the regular maintenance tasks that helps to avoid this accumulation and keeps your system operating as it should. Furthermore, if the pipes of the water heater are either too small or partially blocked, they could choke off water supply to your shower, therefore producing no water pressure in shower conditions when you wish a wonderful hot shower. Is It Normal for a Shower to Lose Pressure Over Time? Sometimes, especially in older homes, showers losing pressure over the years is quite common. Corrosion and scale accumulation over aging pipes can progressively lower their interior diameter. This causes low pressure showers by restricting water flow. Still, just because something is typical does not mean you have to live with it. Many of these problems can be avoided from worsening with regular maintenance and sporadic plumbing system updates. If the galvanized steel pipes in your house are old, it could be time to think about substituting contemporary materials like copper or PEX pipe. This solves your low pressure shower as well as potential leaks and water damage prevention. Why Does My Shower Pressure Drop When Someone Else Uses Water? Ever find that your shower pressure decreases when someone runs the washing machine or flushes the toilet? This is so because the plumbing in your house attempts to simultaneously supply water to several outlets. Most homes are constructed with plumbing systems sharing water supply pipes. Multiple fixtures in use split the available water among them, which clearly results in a shower poor scenario water pressure. You might try running appliances at different times to correct this, or you might modify your plumbing to
how do you clean hard water stains off glass
Plumbing

How Do You Clean Hard Water Stains Off Glass? | Complete Homeowner’s Guide

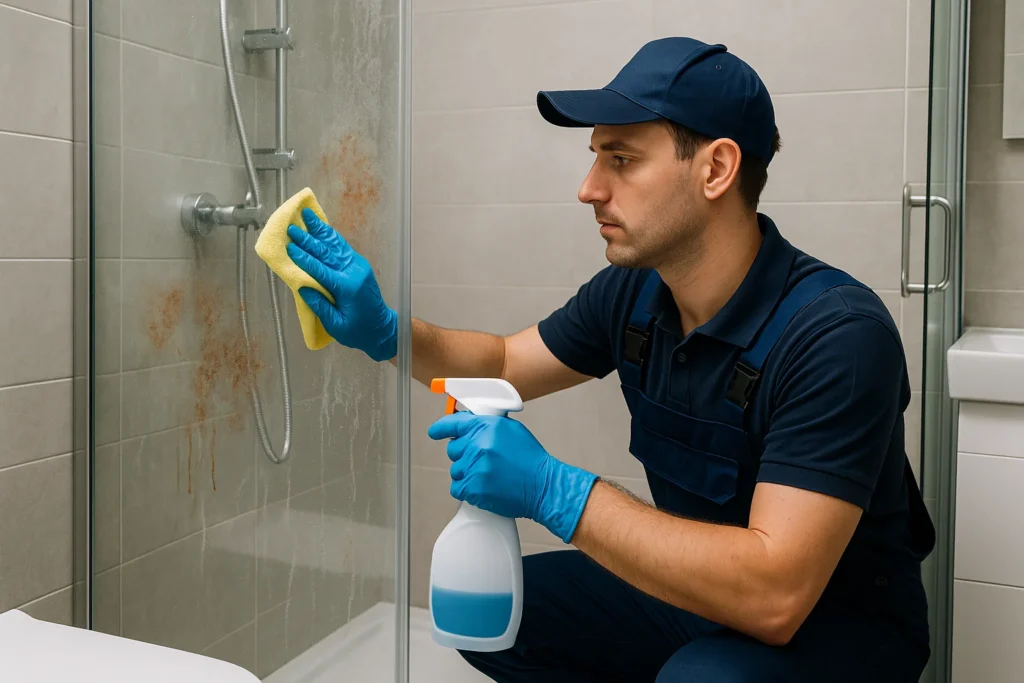
Dealing with insistent mineral deposits on your bathroom mirrors or shower doors can be challenging. If you have ever wondered, “how do you clean hard water stains off glass?” you are not alone. These hazy, chalky imperfections are not only aesthetically unpleasant but also difficult to get rid of using ordinary cleaning agents. Luckily, there are consistent methods to remove these marks and stop them from returning. Hard water is that which has high mineral content, including magnesium and calcium. Water spots on glass shower doors, windows, faucets, and other bathroom surfaces follow from evaporation it. These deposits solidify and grow more difficult to clear over time. This book will bring you through expert techniques, preventative advice, and natural and commercial cleaning options to help you clear your glass surfaces. Understanding Hard Water Stains Know what creates hard water stains before you begin scrubbing. Hard water’s minerals combine with air and soap to form a film that hooks onto your glass. Thus, the outcome Water marks on shower glass and around fittings are constant. These marks are not just ugly; over time, they etch into the glass and cause lasting damage. Shower doors are particularly prone since they often lack quick drying ability and get wet frequently. This helps water spots on shower doors to grow and gather easily. How Do You Clean Hard Water Stains Off Glass Safely and Effectively? If you’re dealing with hard water buildup, don’t worry. You don’t need fancy equipment or expensive chemicals to see real results. The key is using the right approach for your specific type of stain. Natural Methods That Work Starting from things already in your kitchen is one of the easiest approaches. A strong, natural acid, white vinegar dissolves mineral accumulations. Press paper towels soaked in vinegar onto the impacted sections of your shower glass. Give them 20 to 30 minutes. Remove the towels then, using a non-scratch sponge or cloth, gently scrub. Rinse well; then, dry with a microfiber towel. Still another useful tool is baking soda. It produces a bubbly reaction when mixed with vinegar that removes dirt. To make a paste, mix baking soda with a small bit of water. Treat the soiled areas with it; let it sit for fifteen minutes; then, spray with vinegar. Scrub gently; then, rinse under warm water. Lemon juice behaves much as vinegar does. While leaving a nice scent, lemon’s citrous acid helps break down stains. Halved a lemon, then straight-forwardly brush it on the stained glass; rinse and dry. Commercial Cleaners Should natural techniques prove insufficient, several commercial treatments intended especially for water marks on shower glass abound. Search under “lime and scale remover” or “calcium deposit cleaner.” These are developed to dissolve mineral accumulation without damaging your glass. Always get directions from the manufacturer. While utilising strong chemical cleansers, wear gloves and guarantee appropriate ventilation. Use a Magic Eraser With melamine foam sponges also known as Magic Erasers some users have had fantastic success. Damp the sponge lightly and gently scrub the soiled sections. These are very useful on water spots on glass shower doors. Prevention Is Key One aspect of the war is cleaning. Preventing problems is the actual secret to perfect glass. Here’s how you might reduce hard water stains across time: At the base of your door, install a glass shower door leak guard to stop water from gathering and drying on the glass. These leak guards less likely stains developing close to the door’s bottom edge. Using a squeegee or soft cloth, dry your shower doors following each usage. This leaves mineral deposits but eliminates water before it evaporates. Cover your glass with water-repellent. Products meant for windscreen like Rain-X also fit windows and shower doors. They produce a slick surface that allows water to bead up and roll off, therefore lowering the possibility of water spots on shower doors. If hard water runs consistently in your house, use a water softener. Before they get to your taps, this system eliminates extra minerals, therefore preserving appliances, plumbing fittings, and glass surfaces. Are Hard Water Stains Permanent? If neglected for a long period, hard water stains may become permanent. The minerals can scratch the glass, producing microscopic pits or a frosted appearance not easily removable with regular cleaning. This is why it’s crucial to respond fast and apply correct techniques to remove and stop stains. Should your shower doors already reveal such damage, expert restoration could be required. Still, in many cases regular maintenance and cleaning will help to bring clarity and gloss. What Not to Do Avoid using steel wool, razor blades, or harsh abrasive cleaners on your glass. These can scratch the surface, making it easier for future stains to develop. Stick with non-abrasive tools and gentle scrubbing to protect your glass over time. Final Thoughts Though they are somewhat prevalent, hard water stains may be removed and your glass will remain shining with a little work and persistence. Whether your bathroom has long-standing water marks on shower glass or water spots on glass shower doors, the advice in this tutorial will help bring clarity and gloss back. Derks Plumbing is here to assist you whether you’re ready to update plumbing or investigate softener installations or better care of the water systems in your house. Visit our website Derks Plumbing to learn more or schedule a consultation today. FAQs About Cleaning Hard Water Stains on Glass Q: How often should I clean my shower doors to prevent hard water stains? Ideally, you should wipe down your shower glass daily after use. A weekly deep clean with vinegar or a glass-safe cleaner will also help keep stains away. Q: Can I use vinegar every day on glass? Yes, vinegar is gentle enough for daily use, but always rinse and dry thoroughly to prevent residue. Q: Is lemon juice safe for all types of glass? Lemon juice is safe for standard glass but avoid using it on coated or treated glass surfaces without checking the manufacturer’s

what is a rooter service
Plumbing

Unlock the Secret: What Is Rooter Service and Why It Matters

Wondering about what is a rooter service? When you encounter plumbing problems at home or in your business, one of the first things that might come to mind is calling a plumber. But if the issue involves stubborn drain blockages, slow drainage, or even tree roots invading your pipes, you may be looking for a service that’s a bit more specialized. This is where rooter services come into play. Rooter services are a must-know for anyone dealing with persistent clogs, especially when tree roots or built-up debris are involved. In my experience, rooter services have been invaluable in solving some of the most troublesome plumbing issues. They tackle the deeper, trickier blockages that conventional cleaning methods often can’t reach, making them a great choice for homeowners and businesses alike. What Exactly Is Rooter Service? Rooter service is a plumbing service specifically designed to address and eliminate deep-rooted clogs that regular plumbing tools and techniques can’t fix. These are often caused by tree roots growing into pipes or the accumulation of debris, grease, and other materials over time. It involves the use of a rooter machine, also known as a plumbing auger, which is an advanced tool that helps clear obstructions from drains and sewer lines. It’s not just about clearing a simple clog, it’s about dealing with blockages that are entrenched in your pipes and can potentially cause major damage to your plumbing system. Why Do You Need Rooter Service? If you’ve ever had a clogged drain that just wouldn’t clear, you may know how frustrating it can be. Standard methods might not be enough to restore proper flow, and that’s where rooter service comes in. Tree root intrusions are a common cause of plumbing issues that rooter services address. Tree roots can grow into your pipes over time, looking for moisture. As they infiltrate the pipes, they can cause serious blockages, cracks, or even pipe collapse. Rooter machines can cut through these roots and clear the path, allowing water to flow freely again. Another reason for rooter service is slow or backed-up drains. If you notice that your drains are taking longer than usual to empty or there’s a foul smell, chances are there’s a significant buildup in your pipes. The rooter service can not only clear the blockage but also prevent further damage to your plumbing system. How Does Rooter Service Work? The process of a rooter service is straightforward but very effective. Here’s a breakdown of how it typically works: Initial Inspection: A plumbing professional starts by assessing your plumbing system to understand the type and location of the clog. Sometimes, they might use a camera to inspect the pipes, ensuring they know exactly what they’re dealing with. Using the Rooter Machine: Once the issue is identified, the rooter machine, a specialized auger with a rotating cable or blade is inserted into the drain or pipe. The machine’s rotating action helps break up tree roots, debris, and other obstructions. Clearing the Pipes: The rooter machine breaks apart the roots or blockages, allowing the water to flow again. After the pipes are cleared, the plumber may flush the system with water to remove any remaining debris. Follow-Up Solutions: In some cases, plumbers might recommend additional treatments like pipe inspections or preventive maintenance to ensure that your system stays clear and free of future blockages. When Should You Consider Rooter Service? You should consider rooter service if you’re dealing with one of the following plumbing issues: Frequent Clogs: If you’re constantly having to deal with clogged drains or toilets, rooter service can provide a lasting solution by clearing deep-seated blockages. Slow Drainage: If your sinks, bathtubs, or showers are draining slowly, it’s often a sign that something is stuck deep in the pipes. Tree Root Damage: If you live in an area with mature trees, tree roots can invade underground pipes, causing severe blockages and potential pipe damage. A rooter service can clear these roots and restore proper flow. Sewage Backups: If you’re experiencing sewage backups or foul smells in your home, it’s a clear indicator that something serious is blocking your sewer line. Rooter service can clear the pipes and prevent further damage. Benefits of Rooter Service Rooter services offer a range of benefits for homeowners and businesses, including: Effective Clearing of Deep Blockages: Rooter services target blockages that are not easily removed by regular plunger or chemical methods, ensuring a long-term fix. Prevention of Bigger Issues: Timely rooter service can prevent serious plumbing problems such as burst pipes, water damage, or full sewer line replacements. Fast and Efficient: Rooter machines are designed to work quickly, clearing blockages in a matter of hours instead of days. Protects the Plumbing System: By removing debris and roots, rooter service helps extend the lifespan of your plumbing system, preventing costly repairs in the future. Rooter Service vs Other Plumbing Services When compared to traditional drain cleaning or other plumbing services, rooter services offer a more targeted approach to specific, persistent problems. While a basic drain cleaning might help with minor blockages, rooter service is specifically designed to address the stubborn, deep-rooted issues like tree roots or major buildup. This makes it a more powerful and efficient solution for tough plumbing problems. Conclusion Rooter services are a vital part of any plumbing system’s maintenance, especially when it comes to dealing with complex blockages caused by tree roots or debris. If you’re experiencing frequent clogs or slow drainage, a rooter service can quickly address the issue, ensuring that your plumbing system remains in good working condition. Whether you’re a homeowner or a business owner, understanding the benefits and process of rooter service can save you a lot of time, stress, and money in the long run. Facing Plumbing Blockages? Our rooter service clears tough clogs and tree root blockages fast. Get your pipes flowing again! Call (232) 284-2410 Request Rooter Service Now

Should I Replace Copper Pipes in My Home
Plumbing

Should I Replace Copper Pipes in My Home?

If you’re wondering, should I replace copper pipes in my home, you’re not alone. Many homeowners face this question as their plumbing systems age. While copper piping has long been known for its strength and durability, it doesn’t last forever. Like all things, copper pipes can break down over time, and when they do, they can cause leaks, water damage, and even affect your water quality. How Long Do Copper Pipes Last? The life of copper pipe depends on several factors water quality, pipe thickness, installation methods, and environmental conditions. On average, copper pipes last between 40 to 70 years. If your home is over 40 years old and still has its original plumbing, it may be time to evaluate whether you need copper pipe replacement. There are two common types of copper pipes: Type M (thinner wall): Typically lasts 20–50 years. Type L (thicker wall): More durable, lasting 50+ years. Warning Signs It’s Time to Replace Copper Pipes Even if your copper pipes aren’t that old, they can still fail due to wear and tear or poor water chemistry. Some signs to watch for include: Discolored or metallic-tasting water Frequent leaks or pinhole leaks Low water pressure Greenish stains around joints or under sinks Visible corrosion or warping If you’re seeing any of these issues, ask yourself: should I replace copper pipes in my home now, before they cause a major plumbing emergency? Risks of Keeping Old or Corroded Copper Pipes Old pipes may seem like they’re working fine, but hidden corrosion can sneak up on you. Corroded copper pipes can leach copper into your drinking water, which is harmful in high amounts. Plus, leaks that go unnoticed can lead to costly damage in walls, floors, or ceilings. In addition, tiny pinhole leaks might not make a mess right away, but over time, they can promote mold growth, weaken your home’s structure, and increase your water bill. Why Are Copper Pipes Failing Earlier Today? Water chemistry plays a huge role in how long copper pipes last. If you have acidic water, high chlorine levels, or hard water with a lot of minerals, these can all accelerate corrosion. That means even newer homes may deal with early copper pipe failure. In places with aggressive water or inconsistent water pressure, even thick-walled copper piping might show cracked joints, discoloration, or slow leaks after only a couple of decades. When Should I Replace Copper Pipes in My Home? You don’t always need to replace your whole plumbing system. But there are a few cases where copper pipe replacement is strongly recommended: Frequent leaks: If repairs are becoming regular, full repiping may save you money in the long run. Major renovations: If you’re remodeling a kitchen, bathroom, or basement, that’s a smart time to update the piping. Visible corrosion: If you can see green-blue corrosion on pipes, especially at joints, it’s a red flag. Water damage: Evidence of past leaks could mean current pipes are nearing the end of their lifespan. Old age: If your home was built before the 1980s and still has its original pipes, replacement is likely overdue. Copper Pipe Replacement Options If you’re ready for a change, you’ve got a few piping options: PEX (cross-linked polyethylene): Flexible, affordable, and easier to install, especially in tight spaces. CPVC (chlorinated polyvinyl chloride): Rigid like copper, but resistant to corrosion and chemical damage. New copper piping: A good choice for sections of your plumbing that require heat resistance or durability. Each has its pros and cons. A professional plumber can guide you based on your home’s needs, local code, and budget. Can I Replace Just Part of the System? Yes. If only some sections are damaged or showing signs of age, a partial copper pipe replacement might work for now. However, if leaks or corrosion are showing up in multiple spots, it’s usually better and more cost-effective to replace the entire plumbing system. How Much Does It Cost to Replace Copper Pipes? The cost to replace copper pipes varies depending on the size of your home, how much drywall needs to be removed, and the type of piping you choose. While repiping can be a big investment, it can add value to your home and give you peace of mind. Here’s a visual representation of the average cost to replace copper pipes, comparing common piping materials like PEX, CPVC, and Copper. Benefits of Replacing Old Copper Pipes Better water pressure Cleaner, safer drinking water Fewer leaks and repairs Improved home value Peace of mind knowing your plumbing system is up-to-date Need Help with Copper Pipe Replacement? Still wondering, should I replace copper pipes in my home? It’s best to consult with an experienced plumber who can inspect your system and give honest advice. Whether you’re seeing warning signs or just want peace of mind, Derks Plumbing is here to help. We offer expert sewer line maintenance and repair, repiping services, and honest guidance for homeowners across Los Angeles. Contact us today for a full inspection or a free estimate on your pipe replacement project. Visit Derks Plumbing Company Inc. to learn more about our repiping and plumbing services. FAQs – When to Change Out Copper Refrigerant Lines   1. How long do copper refrigerant lines last? Copper refrigerant lines can last 20–25 years if properly installed and maintained. However, corrosion, leaks, or physical damage can shorten their life. 2. What are the signs I need to replace refrigerant lines? Look for oil stains around your AC unit, poor cooling performance, hissing noises, or visible cracks and corrosion on the air conditioner copper lines. 3. Can I reuse old refrigerant lines with a new AC system? It’s not always a good idea. If the hvac refrigerant line is old, damaged, or the new unit uses a different refrigerant type, it’s safer to replace the lines. 4. Is it expensive to replace refrigerant lines? The cost can vary but typically ranges between $200 to $700 depending on line length, accessibility, and refrigerant type.

What Causes Heat Exchanger to Crack
Plumbing

What Causes Heat Exchanger to Crack? | Find Out Now

Curious about what causes heat exchanger to crack? A cracked heat exchanger occurs due to overheating, poor airflow, improper furnace sizing, condensation buildup, or years of wear and tear. These cracks allow dangerous gases like carbon monoxide to leak into your home, making timely detection and repair critical. Below, we explore the mechanics of heat exchanger failures, symptoms to watch for, and actionable solutions to keep your household safe. The Role of a Heat Exchanger in Your Furnace A heat exchanger is a metal chamber inside your furnace that transfers heat from burning fuel to the air circulating through your home. Its walls separate toxic combustion gases (like carbon monoxide) from the breathable air in your ducts. When cracks form, this barrier fails, risking exposure to hazardous fumes. 5 Primary Causes of a Cracked Heat Exchanger 1. Poor Airflow Strains the System Dirty air filters, blocked vents, or closed registers restrict airflow, forcing the furnace to overheat. This excess heat warps the metal over time, creating stress fractures. For example, a clogged filter reduces airflow by up to 50%, causing temperatures inside the exchanger to spike. 2. Incomplete Combustion Overheats the Metal When burners don’t receive enough oxygen, fuel burns incompletely, producing excess heat. Flames turn yellow instead of blue, and the heat exchanger endures higher temperatures, accelerating metal fatigue. 3. Oversized or Undersized Furnaces Oversized furnaces short-cycle (turn on/off frequently), causing the exchanger to expand and contract rapidly. This thermal stress weakens seams. Condensation from frequent starts can also rust the metal. Undersized furnaces run constantly, overheating the exchanger and leading to premature cracks. 4. Condensation and Rust Incorrectly sized systems or lack of use allows moisture to accumulate. Over time, this moisture rusts the exchanger’s walls, thinning the metal until cracks form. 5. Normal Wear and Tear Even well-maintained exchangers degrade after 15–20 years. Repeated heating/cooling cycles fatigue the metal, eventually causing hairline fractures. Cracked Heat Exchanger Symptoms: How to Spot Trouble Unusual Odors A rotten egg or metallic smell signals combustion gases leaking into your air. These odors often accompany a cracked exchanger and require immediate attention. Irregular Flame Behavior Flickering or dancing flames indicate air leaks from the exchanger. Yellow flames (instead of steady blue) suggest incomplete combustion due to cracks. Soot or Discoloration Dark streaks around the exchanger or burners show escaping gases depositing soot. Health Symptoms Headaches, dizziness, or nausea may indicate carbon monoxide exposure. Install CO detectors near bedrooms and furnaces. Unusual Noises Popping or banging sounds occur when metal cracks expand during heating cycles. The Dangers of a Broken Heat Exchanger A cracked exchanger isn’t just a repair issue it’s a safety hazard: Carbon monoxide poisoning: Odorless CO gas can cause flu-like symptoms, unconsciousness, or death. Fire risk: Escaping gases may ignite nearby materials. System failure: Untreated cracks worsen, often requiring full furnace replacement. Solutions for a Heat Exchanger Crack Professional Inspection HVAC technicians use infrared cameras and pressure tests to detect hidden cracks. Annual inspections catch early signs of wear. Repair or Replace? Small cracks: Rarely repairable; most codes require exchanger replacement. Severe damage or old units: Replace the entire furnace for long-term safety. Preventative Maintenance Replace air filters every 1–3 months. Keep vents open and unobstructed. Schedule annual tune-ups to clean burners and check airflow. Trust Derks for Expert HVAC Service When your heating or cooling system acts up, Derks Plumbing is here to help. From cracked heat exchangers to poor airflow and strange furnace noises, our licensed HVAC technicians quickly pinpoint the problem and deliver reliable, lasting solutions. We prioritize your comfort and safety with routine maintenance, emergency repairs, and full system replacements when needed. At Derks Plumbing Company, it’s not just about fixing systems—it’s about keeping your home safe, cozy, and running smoothly all year round. Conclusion: Act Fast to Prevent Disaster A cracked heat exchanger jeopardizes your family’s health and safety. Recognizing causes like poor airflow, aging systems, or improper sizing helps prevent failures. Stay alert to symptoms like strange odors or flame changes, and prioritize annual HVAC checkups. Addressing cracks early avoids costly replacements and ensures your furnace heats your home safely for years to come. FAQs About what causes heat exchanger to crack Can I fix a cracked heat exchanger myself? No. DIY repairs risk improper sealing and exposure to toxic gases. Always hire a licensed technician. How much does replacement cost? Exchanger replacements range from $1,500–$2,500, while new furnaces cost $4,000–$6,000. How long do heat exchangers last? Most last 15–20 years with proper maintenance. Are newer furnaces less prone to cracks? Yes. Modern units have thicker, corrosion-resistant metals and better airflow design.

What Does a Water Hammer Arrestor Do
Plumbing

What Does a Water Hammer Arrestor Do?: Save Your Pipes

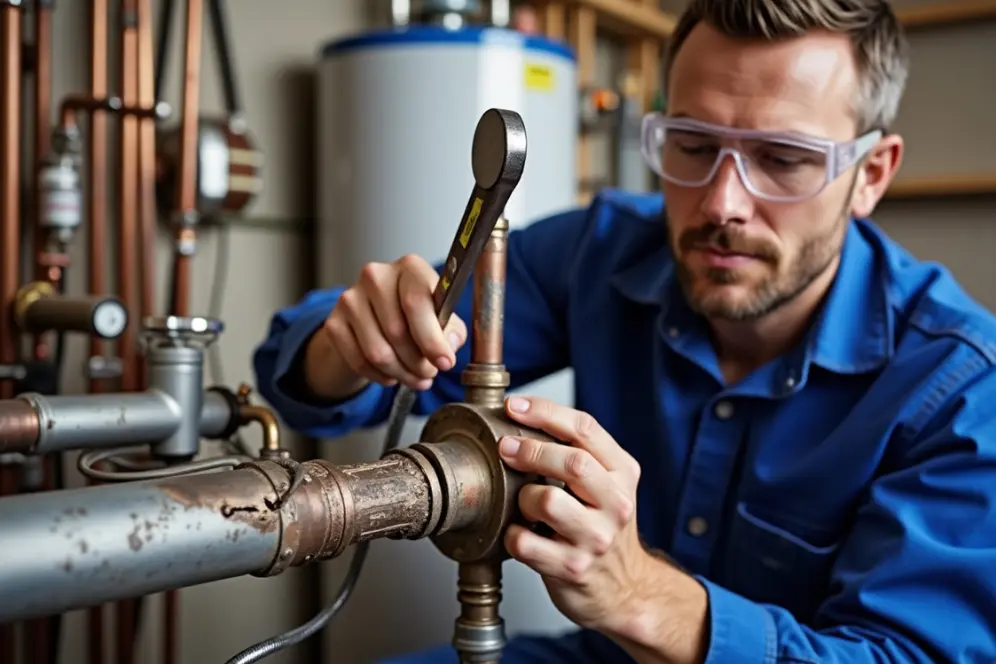
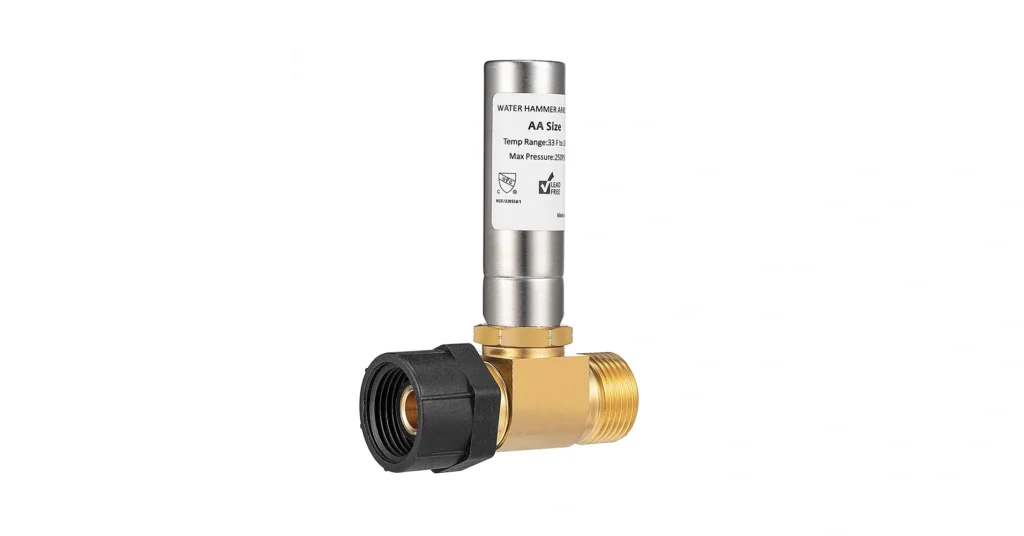
Ever heard a loud banging noise from your pipes when you turn off a faucet? That’s a water hammer, and it’s not just annoying. It can damage your plumbing over time. The good news is there’s a simple fix. A water hammer arrestor absorbs shock waves in your pipes. It stops that banging noise and protects your plumbing from potentially damaging pressure spikes. Let’s explore what does a water hammer arrestor do and why your home might need one. Understanding the Water Hammer Phenomenon Water hammer happens when water flow stops suddenly in your pipes. Think of it like a car hitting the brakes hard. The water was moving fast, and now it has nowhere to go. This creates a shock wave that travels backward through your pipes. The pressure spike can reach hundreds of pounds per square inch. Your pipes shake and bang against walls and supports. Common causes include: Quick-closing valves: Modern washing machines and dishwashers shut off water instantly. This creates the perfect conditions for a water hammer. High water pressure: When your home’s water pressure exceeds 80 PSI, you’re more likely to experience problems. The faster the water moves, the harder it hits when stopped. Long pipe runs: Water traveling through long stretches of pipe builds momentum. When it stops, the impact is stronger. The banging sound you hear is actually your pipes hitting against framing or other surfaces. Over time, this constant vibration loosens connections and can cause leaks. So, What Does a Water Hammer Arrestor Do? A water hammer arrestor acts like a shock absorber for your plumbing system. When water pressure surges, the device absorbs the impact before it can damage pipes or fittings. The arrestor creates a cushion of air or gas that compresses when water hits it. This compression absorbs the shock wave’s energy. Instead of banging through your pipes, the pressure dissipates safely. Think of it like catching a baseball with a glove instead of a bare hand. The glove absorbs the impact and protects your hand. A plumbing hammer arrestor does the same thing for your water lines. These devices install directly into your plumbing at problem areas. They work automatically every time you turn off a faucet or an appliance shuts off water flow. How a Water Hammer Arrestor Works The mechanics are simple but effective. Inside the hammer arrestor valve, there’s a sealed chamber containing air or gas. A piston or diaphragm separates this chamber from your water supply. When water flow stops suddenly, the pressure surge pushes against the piston. The air or gas compresses, absorbing the shock. Once the pressure normalizes, the piston returns to its starting position. The process happens in milliseconds. You won’t notice anything except the absence of that annoying bang. Key components include: The sealed air chamber maintains consistent pressure over time. Unlike old-fashioned air chambers that can become waterlogged, modern hammer arrestors use a permanent seal. The piston mechanism allows for repeated compression cycles without wearing out. Quality units can handle thousands of pressure spikes without losing effectiveness. The threaded connection makes installation straightforward. Most models use standard pipe sizes that fit existing plumbing configurations. Why Water Hammer Arrestors Are Important Protecting your plumbing investment should be a top priority. A water hammer creates stress on every joint and connection in your system. Prevents pipe damage: Repeated shock waves weaken pipe walls and joints. Small cracks can develop into major leaks. The repair costs far exceed the price of prevention. Protects appliances: Your washing machine, dishwasher, and other water-using appliances have internal valves. Water hammer can damage these components and shorten appliance lifespan. Reduces noise pollution: The constant banging disrupts your peace. It’s especially problematic at night when someone uses the bathroom. Maintains water pressure: Damaged pipes and fittings can affect water pressure throughout your home. An air hammer arrestor keeps everything working as designed. Extends system life: Your entire plumbing system lasts longer when protected from shock damage. This means fewer repairs and lower maintenance costs over time. Building codes in many areas now require water hammer arrestors on certain fixtures. This reflects growing recognition of their importance in modern plumbing systems. Types of Water Hammer Arrestors Several designs serve different applications and budgets. Choosing the right type depends on your specific needs. Piston-type arrestors use a spring-loaded piston against a sealed air chamber. They’re durable and reliable for high-pressure applications. These work well for washing machines and dishwashers. Diaphragm-type arrestors feature a flexible rubber diaphragm separating water from air. They’re compact and affordable. Perfect for installations with space constraints. Bladder-type arrestors contain a sealed bladder filled with gas. They offer excellent performance and long service life. Often used in commercial applications. Mini arrestors install directly at fixtures like toilets and sinks. They’re small enough to fit behind walls or under cabinets. Great for targeted problem-solving. Whole-house systems install at the main water line. They protect your entire plumbing system with one device. Best for homes with widespread water hammer issues. Size matters when selecting hammer arrestors. Larger devices handle higher flow rates and provide more cushioning capacity. Match the arrestor size to your pipe diameter and water pressure. Signs You Need a Water Hammer Arrestor Pay attention to these warning signals from your plumbing system. Loud banging noises: This is the most obvious sign. If your pipes bang when you shut off water, you need protection. Rattling pipes: Even without loud bangs, vibrating or rattling pipes indicate pressure problems. The shaking can loosen connections over time. Leaking joints: Water hammer gradually weakens pipe connections. Slow leaks often start at joints and fittings subjected to repeated shock. Appliance problems: If your washing machine or dishwasher valve malfunctions frequently, water hammer might be the culprit. The pressure spikes damage internal components. Visible pipe movement: Pipes shouldn’t move when water turns off. If you can see them jumping or shaking, the pressure surge is severe. Recently installed fast-closing valves: Modern appliances and fixtures close quickly. This increases water hammer risk

how long does a septic system last
Plumbing

How Long Does a Septic System Last? Complete Guide to Lifespan, Maintenance, and Care

If you very own a property that is predicated on a septic system, you`ve in all likelihood asked yourself: “How long does the septic system last?” This is an important query due to the fact your septic machine is a highly-priced and vital part of your home`s wastewater management. Replacing it may cost lots of dollars, so knowing its life expectancy and the way to extend it is key. In this special guide, we`ll explore: The common septic tank lifespan and machine components Common reasons for failure, which include leach field problems The function of septic field lines in machine health Maintenance recommendations to assist your machine final decades By the end, you`ll have a clear concept of the way long a septic machine lasts and what you could do to maximize its existence Average Lifespan: How Long Does a Septic System Last? On average, a septic machine lasts 20 to 40 years. Some structures can ultimate even longer with right care, even as others fail in much less than 15 years because of bad protection or set up problems. But to absolutely answer “How long does a septic system last?”, we want to have a take a observe all its foremost components: Septic Tank Lifespan The tank itself is the coronary heart of your septic machine. Here`s a breakdown primarily based totally on material: Concrete tanks: 30–40 years or more Fiberglass or plastic tanks: 20–30 years Steel tanks: 15–20 years (rust is the largest problem) Drain Field and Leach Field Lifespan Even if the tank is in suitable condition, the leach area frequently determines how long your septic system lasts. Most drain fields ultimate 20–30 years, however they could fail a whole lot quicker if overloaded or clogged. Leach field problem like which include root intrusion or soil saturation are foremost reasons of machine failure. Septic Field Lines These underground pipes distribute effluent into the soil. If septic field lines collapse, crack, or clog, your machine will forestall functioning properly. Typically, they ultimate 20–30 years, much like the leach area. Factors That Affect Septic System Lifespan When thinking about how long does a septic machine ultimate, it`s essential to recognize what impacts its durability: Quality of Installation A poorly established machine will fail a whole lot earlier than one which meets code and makes use of first-rate materials. Maintenance Habits Regular pumping each 3–five years can upload a long time in your septic tank lifespan. Skipping protection results in sludge buildup, which clogs septic field lines and damages the leach area Water Usage Excessive water use overwhelms the machine. Spreading laundry masses in the course of the week and solving leaks reduces pressure at the machine. Soil Conditions Sandy soils permit wastewater to clear out  naturally, even as clay soils can reason drainage problems and leach field problem over time. 5. What You Flush Flushing non-biodegradable items (wipes, female products, grease) shortens lifespan with the aid of using clogging pipes and unfavorable the leach area. Common Signs of Septic System Failure Even the best-maintained machine can expand issues. Recognizing caution symptoms and symptoms early can prevent lots of dollars: Slow Drains: If more than one furniture drain slowly, the tank or septic field lines is probably clogged. Sewage Backup: Wastewater backing up into sinks or bathrooms is a extreme pink flag. Standing Water in Yard: Pools of water or lush inexperienced grass close to the leach area frequently imply leach field problem Foul Odors: Bad smells across the tank or drain area normally suggest a leak or overflow. If you spot any of those symptoms, name a septic expert immediately. Leach Field Problems: The Leading Cause of Failure One of the maximum not unusual place motives a septic machine fails earlier than attaining its complete septic tank lifespan is a compromised leach subject. Why? Because the leach subject is answerable for filtering and dispersing wastewater into the soil. If this machine fails, even a brand new tank can`t paintings properly. Common Leach Field Problems Include: Clogged pipes because of grease, solids, or tree roots Soil saturation from heavy rainfall or overwatering the yard Collapsed or broken septic field  lines due to riding heavy automobiles over the drain subject Preventing those problems is the important thing to extending how lengthy a septic machine lasts. Role of Septic Field Lines Septic field lines are the lifelines of your machine. They distribute wastewater frivolously throughout the leach subject for correct filtration. If they break, end up blocked, or are crushed, wastewater can again up into your house or flood your yard. Protect them by: Never riding or parking at the drain subject Planting best grass above the machine—keep away from bushes with invasive roots Inspecting the traces at some point of ordinary preservation visits How to Extend the Life of Your Septic System Want to make your machine closing forty years or more? Follow those professional tips: Pump Regularly Every 3–five years, relying on family length and usage. Monitor Water Use Fix leaks and unfold out water-heavy sports like laundry and showers. Flush Wisely Only human waste and septic-secure rest room paper have to move down the rest room. Protect the Drain Field Avoid using over it and save you soil compaction that damages septic field lines. Address Issues Early If you observed leach field problem, name a expert immediately. Following those steps will assist maximize your septic tank lifespan and save you early device failure. FAQs: How Long Does a Septic System Last? Q1: What is the common septic tank lifespan? Most tanks ultimate 20–forty years, relying on cloth and care. Q2: How do leach discipline issues have an effect on lifespan? Severe leach field problem like clogs or soil saturation can shorten device lifestyles through a long time. Q3: Do septic discipline strains want replacement? Yes. Most septic field lines ultimate 20–30 years however can fail early if overloaded. Q4: Can right preservation enlarge how lengthy a septic device lasts? Absolutely! With precise care, a device can exceed forty

Why Does It Smell Like Skunk in My House?
Plumbing

Why Does My House Smell Like Skunk? | 6 Common Causes

If your house suddenly smells like a skunk, the odor may be coming from outside, your plumbing system, or another source inside the property. Skunk spray has a strong sulfur-like odor, but sewer gas, dry drain traps, damaged plumbing connections, and certain chemical products can produce similar smells. Identifying the source is important because each problem requires a different solution. Homeowners and renters may notice the smell when waking up, using the bathroom, or entering a basement or utility room. The location and timing of the odor can provide useful clues, but they cannot confirm the cause on their own. This guide explains the common reasons for skunk-like odors, how to handle them safely, and when to contact a plumber or pest control professional. What to Do When Your House Suddenly Smells Like a Skunk Before trying to remove the smell, consider whether it could indicate an immediate safety hazard. Some odors that resemble skunk spray can come from natural gas or sewer gas, so it is important to take the right precautions. Check for a possible gas leak: If the odor resembles rotten eggs or sulfur and you suspect natural gas, leave the building immediately. Do not operate electrical switches, use flames, or attempt to locate the leak yourself. Call your gas utility or emergency services from a safe location. Notice where the odor is strongest: If there is no immediate hazard, consider whether the smell is concentrated near a bathroom, kitchen sink, basement, window, or exterior door. Consider outdoor sources: Skunks and other wildlife can produce strong odors that enter through open windows, doors, or ventilation openings. Avoid mixing cleaning products: Do not combine bleach, ammonia, acids, or other household chemicals to remove an unidentified odor. Such combinations can release dangerous fumes. Contact the appropriate professional: A plumber can investigate sewer and drain odors, while a qualified wildlife or pest control professional can help with suspected animal-related problems. If anyone experiences breathing difficulty, dizziness, confusion, or other concerning symptoms, leave the affected area and seek appropriate emergency assistance. Common Reasons Your House Smells Like a Skunk A skunk-like smell does not always mean a skunk has been near your property. Several household and environmental problems can create a similar odor. An Actual Skunk Outside Your Home Skunks release a powerful defensive spray containing sulfur-containing compounds called thiols. The odor can travel into a house through open windows, exterior doors, garage openings, and other gaps in the building. This may explain why you woke up and found that your house smells like a skunk, especially if a window was left open overnight. However, the timing alone does not prove that a skunk is responsible. The odor may be strongest near a window or exterior wall, and you might notice a similar smell outside. If the source is an animal in a crawl space or another enclosed area, attempting to approach or remove it yourself may be unsafe. What to do: Once a gas leak and other immediate hazards have been ruled out, ventilate the affected area when safe. Keep pets away from the suspected source and contact a qualified wildlife or pest control professional if an animal may be sheltering near the house. Sewer Gas Entering Through the Plumbing System Sewer gas can produce a sulfur-like or rotten-egg odor that people sometimes mistake for skunk spray. It may enter the home through a dry drain trap, damaged pipe, faulty plumbing connection, or problem with the plumbing vent system. A drain trap normally holds water that blocks sewer gases from entering the room. When a sink, shower, or floor drain is unused for a long time, that water can evaporate and remove the protective seal. The odor may become noticeable in a bathroom, basement, laundry room, or near a floor drain. Persistent sewer odors should not be ignored because the source may require professional attention. What to do: If the smell is clearly associated with a drain and there is no suspected gas leak or immediate danger, a plumber can inspect the trap, seals, venting, and drainage system. Avoid using strong chemicals to cover the smell because they may create additional hazards without correcting the underlying problem. A Dry or Damaged Bathroom Drain A skunk smell in bathroom areas can sometimes be traced to a drain that is not properly blocking sewer gases. This is particularly common in spaces that receive little use, such as guest bathrooms, basement showers, and utility-room floor drains. A damaged toilet seal or loose plumbing connection may also allow odors to escape around a fixture. You may notice the smell near the toilet base, under a sink, or around a shower drain. If the odor appears after running water or becomes stronger in a particular bathroom, those details can help a plumber identify where to investigate. What to do: If an unused drain appears to be the source and there are no safety concerns, running water into it may restore the trap’s water seal. If the smell returns quickly, remains strong, or comes from around the toilet or pipe connections, arrange a professional inspection. A Damaged Sewer Line or Plumbing Vent A cracked sewer pipe, deteriorated pipe joint, or faulty vent system can allow unpleasant gases to enter indoor spaces. The odor may be noticeable in a basement, near plumbing fixtures, or around an area where drainage pipes run through the property. Other warning signs can include slow drains, gurgling sounds, recurring sewer odors, or several plumbing fixtures developing problems at the same time. These symptoms do not automatically mean the sewer line is damaged, but they warrant further investigation. What to do: A qualified plumber can examine the drainage and vent systems and determine whether the problem involves a drain trap, pipe connection, or sewer line. Depending on the findings, the inspection may include a sewer camera to check the condition of the pipe. Natural Gas or Another Sulfur-Like Odor Natural gas supplied to homes is typically odorized so that leaks can be

Is It Bad to Flush Hair Down the Toilet?
Plumbing

Is It Bad to Flush Hair Down the Toilet? | Plumbing Risks Explained

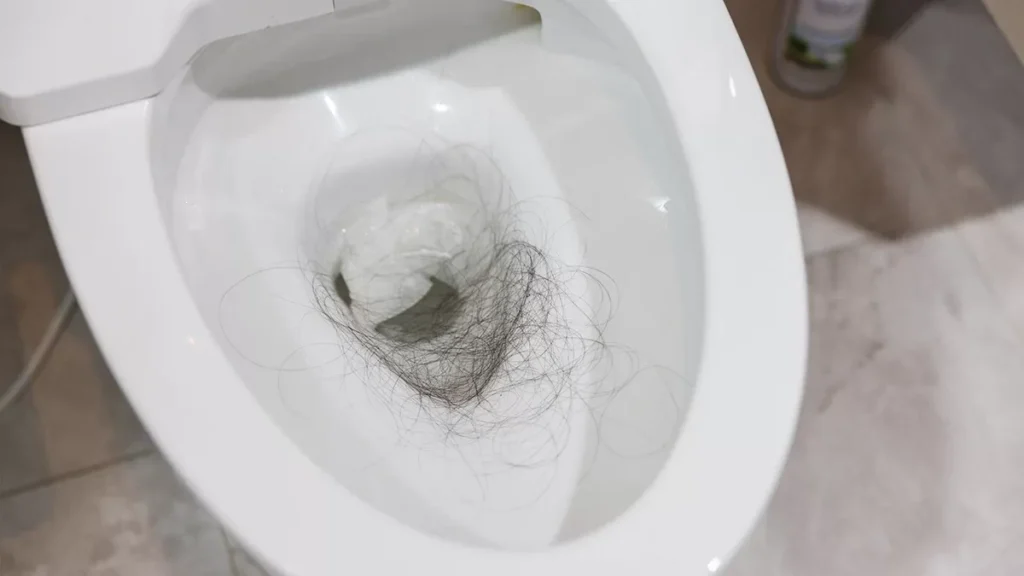
Hair appears to be safe to the naked eye when it falls out or is shaven off, and yes, when cleaning a hairbrush in the bottom of the toilet. But Hair is like any other substance that is difficult to precipitate. Since it disappears after flushing, a lot of people believe it is disintegrating in water just like toilet paper. But it’s above the noise.  But is it bad to flush hair down the toilet? Hair is not soluble in water, and it can damage your plumbing. It coagulates in the drain and, with fat, grease, soap scum, and other matter, can congeal into very robust blockages that are extremely expensive to remove.  Can I flush the hair down the toilet?  Another frequent inquiry is whether or not I can flush hair down the toilet when there is only a small amount.  The safest answer is no, but two are better than one.  One single little strand of hair isn’t going to block or clog up your plumbing. But the issue isn’t one flush it’s multiple flushes over weeks or months.  Each real hair can catch on ridges along the insides of your pipes. Once one strand sticks, additional hair begins collecting around it. As the accumulation grows, it can slow drainage or cause a complete blockage.  Even Baby wipes, flushed regularly in small quantities, can cause such havoc that it takes a couple of months to realise what’s happened. It’s why you really should toss hair clumps in the trash, not the toilet.  Is It Bad to Flush Hair Down the Toilet?  Is it bad to flush hair down the toilet? Well, knowing how hair moves in the pipes makes the answer obvious.  1:Hair Doesn’t Break Down  Unlike toilet paper, hair is barely altered once it goes in water.  Keratin, the protein that makes up human hair, is very tough and naturally resistant to decay. Even after months inside plumbing, hair generally remains strain-free.  2:Hair Easily Tangles Up  Hair hairs are curls around itself and the other surface object.  It snags on:   Inside your plumbing,  Pipe joints  Rough pipe surfaces  Mineral buildup  Existing debris  Every additional strand fills the clog. Once attached, every additional strand increases the size of the clog.  3:Hair Attracts Other Debris and Waste  Hair on its own hardly ever results in blockages. It’s just that it acts as a net, capturing:  Grease  Soap   Scum  Toothpaste  Dirt  Food   Toilet waste  As this substance builds up, the sense of blockage thickens and can become almost impossible to remove.  4:Hair is resistant to most drain cleaners.  Lots of homeowners believe that chemical drain cleaners will take care of the problem.  Conventional drain cleaners are ineffective against hair since keratin is resistant to the majority of household chemicals. This is why you usually need:  A toilet auger  Drain snake  Hydro-jetting  Plumbing services offered by experts. What Happens When You Flush Hair? Few people ever consider what happens after they flush the toilet.  This is the typical trip.  Step 1: Hair Passes Through the Toilet Trap  The toilet’s trapway is large enough for the hair to pass through the first time without causing a blockage.  At this point, everything appears normal.  Step 2: Hair reaches the drain pipe  Hair gets caught on when in the drain line:  Pipe jointing  Minor Cracks  Rough finish  Mineral Deposits  This is the start of clog formation.  Step 3: Debris Begins to Accumulate  The trapped hair, over time, snags other materials that travel down your pipes.  Those are  Soap scum  Grease  Toilet waste  Mineral deposits  The obstruction becomes increasingly larger, ever so slowly but surely, with each flush.  Step 4: Drainage Has Slowed to a Drip or Stop  When the blockage increases in size, you will start seeing some warning signs such as:  Slow flushing toilets  Water rises, then drains away  Gurgling sounds  Backups around lately  Turning a blind eye to these symptoms and it usually results in a worsened blockage.  Step 5: Total Blockage   Ultimately, there is so much hair that the wastewater can no longer flow easily.  At this point you notice that:  Toilet overflows   Toilet overflows Sewage backups   Sewage backups   Several slow draining drains   Costly repairs to your plumbing   Why Toilets Aren’t Designed to Handle Hair Toilets are built around a specific flushing mechanism designed to move waste and toilet paper through the drain. The design assumes everything going down will break apart in water quickly. Toilet paper manufacturers test their products to ensure they disintegrate within seconds of being soaked. Waste breaks down naturally. Hair does neither. The toilet trap the curved section at the base of the toilet holds a water seal that blocks sewer gas from entering the home. It is not shaped to catch or filter hair. Hair passes through it and continues into the drain line. The drain line slopes at a specific angle to move water and waste toward the sewer using gravity. Hair, once it sticks to a pipe wall or joint, does not move with that flow. It stays and accumulates. No part of a residential toilet or standard drain system is designed to handle hair. It simply does not belong there. Can hair clog a toilet?  Can hair clog the toilet?  ANSWER: Yes. HAIR IS SO STRONG! Although hair is thin and feathery, it’s extremely strong when knotted up. A solid ball of hair combined with grease and soap is one of the most difficult things to remove from a pipe. The longest hair causes the most problems, for it has the greatest chance to get caught on other materials. When flushed down the toilet, pet hair and beard clippings can also lead to significant blockages. It may not clog immediately, but you are greatly increasing the risk by flushing repeatedly.”  Different Types of Hair That Can Cause Plumbing Problems  Not all hair is the same in plumbing, but all of them could potentially cause a clog.  1:Long Hair  Long strands, once knotted, are also more likely to

how to replace a toilet flange and wax ring
Plumbing

How to Replace a Toilet Flange and Wax Ring: A Complete Guide

When it comes to home plumbing repairs, one of the most common issues is a cracked toilet flange or a bad wax ring. These can cause leaks, bad odors, and even structural damage if left unaddressed. If you’ve noticed a water leak around your toilet or experienced unpleasant odors, chances are you need to replace a toilet flange and wax ring. In this guide, we’ll walk you through the process of how to replace a toilet flange and wax ring, ensuring your toilet remains in good working condition for years to come. What is a Toilet Flange and Wax Ring? Before we get into the step-by-step process of replacing a toilet ring flange, it’s important to understand what these components are. The toilet flange is the circular piece of plumbing hardware that connects the toilet to the drain pipe in your floor. It also ensures a secure fit so your toilet doesn’t move or leak. The wax ring is placed between the toilet and the flange, creating a seal that prevents water from leaking out. Over time, both the flange and the wax ring can become damaged. A cracked toilet flange will result in an unstable toilet, while a worn-out or damaged wax ring can cause leaks and odors. In either case, replacing these parts is essential for maintaining a fully functional toilet. Why Should You Replace a Toilet Flange and Wax Ring? Replacing a toilet flange and wax ring is a relatively simple task for homeowners, but it’s crucial for maintaining the functionality of your bathroom. If you notice any of the following bad wax ring symptoms, it’s time to take action: Water pooling around the toilet: This could indicate that the wax ring is no longer sealing the toilet properly. Unpleasant odors: If you smell sewer gases or a musty odor, it may be due to a compromised wax ring. A wobbly toilet: A loose or cracked toilet flange will cause the toilet to wobble when you sit on it, which can lead to further damage. Now that you understand the importance of replacing these components, let’s dive into the step-by-step guide for how to replace a toilet flange and wax ring. Tools You’ll Need to Replace a Toilet Flange and Wax Ring Before you get started, make sure you have all the necessary tools. Here’s a list of what you’ll need for this project: Wrench or pliers A new toilet flange and wax ring A putty knife Screwdriver Utility knife Tape measure Towel or sponge Gloves A bucket or bowl (for water removal) Step-by-Step Guide: How to Replace a Toilet Flange and Wax Ring Step 1: Turn Off the Water Supply Start by turning off the water supply to your toilet. Locate the shut-off valve behind the toilet and turn it clockwise to close it. Once the water is turned off, flush the toilet to remove as much water as possible from the tank and bowl. Use a towel or sponge to soak up any remaining water from the tank and the base of the toilet. Step 2: Disconnect the Toilet Next, disconnect the toilet from the water supply line. Use a wrench or pliers to remove the nut that connects the water line to the toilet tank. Once the water supply is disconnected, it’s time to remove the toilet from its position. Step 3: Remove the Toilet With the water supply disconnected, it’s time to remove the toilet. Start by loosening the bolts that hold the toilet to the floor. These bolts are usually located at the base of the toilet. Use a wrench or screwdriver to remove the nuts and washers, then gently lift the toilet off the flange. Be careful when lifting the toilet to avoid damaging the wax ring or flange. Step 4: Inspect the Toilet Flange Once the toilet is removed, inspect the toilet flange for any damage. A cracked toilet flange will need to be replaced, as it cannot provide a secure connection for your toilet. If the flange is in good condition, you can proceed with replacing the wax ring. If the flange is cracked or damaged, you’ll need to replace it before proceeding further. Step 5: Remove the Old Wax Ring Use a putty knife or utility knife to remove the old wax ring from the base of the toilet. Wax rings are sticky and can be difficult to remove, but it’s essential to get rid of all remnants of the old ring to ensure a proper seal with the new one. Clean the area around the flange to remove any debris or wax residue. Step 6: Install the New Wax Ring Once the area is clean, it’s time to install the new wax ring. Place the new wax ring on the toilet flange, making sure it’s centered. If the wax ring comes with a plastic insert, make sure it’s aligned properly in the center of the ring. Some homeowners choose to warm the wax ring slightly before installation, as this can help it form a better seal. Step 7: Replace or Install the Toilet Flange (if Necessary) If your toilet flange was cracked or damaged, now is the time to replace it. Simply remove the old flange by unscrewing any remaining bolts or screws. Install the new flange by securing it to the floor with screws or bolts. Ensure the flange is level and properly aligned with the toilet drain pipe. If you’re just replacing the wax ring, skip this step. Step 8: Reinstall the Toilet With the wax ring and flange in place, it’s time to reinstall the toilet. Carefully lower the toilet onto the flange, ensuring that the toilet bolts fit through the holes in the toilet base. Press down gently on the toilet to compress the wax ring and create a tight seal. Once the toilet is in place, secure it to the floor by tightening the nuts onto the toilet bolts. Be careful not to overtighten, as this could crack the toilet or

Fast and Efficient Plumbing Services in Eagle Rock

Client Reviews

Posted on Google Google
Ryan Haden profile picture
Ryan Haden
Google star 1Google star 2Google star 3Google star 4Google star 5Trustindex verifies that the original source of the review is Google.
Could not have been happier with Alex! We was right on time, polite, fixed all my kitchen sink issues and have me good tips on how to best maintain. I will for sure be using him again and highly recommend anyone who needs a great plumber to use his services as well. Thank you!
Posted on Google Google
Lorena Marcoe profile picture
Lorena Marcoe
Google star 1Google star 2Google star 3Google star 4Google star 5Trustindex verifies that the original source of the review is Google.
Talk about a professional...yes, I am talking about Alex Derks, Derks Plumbing. He is by far the most knowledgeable plumber we have ever had the pleasure of hiring. He's been in the plumbing business for years and it shows. Any questions you have re: plumbing issues, install, etc., Alex is your man. So happy with his work and he has a great sense of humor as well... extremely easy to talk to...thank you Alex!!!
Posted on Google Google
Andrew Jalil profile picture
Andrew Jalil
Google star 1Google star 2Google star 3Google star 4Google star 5Trustindex verifies that the original source of the review is Google.
Alex did a great job installing my kitchen faucet and an under-sink Aquasana water filter. He also addressed a few other plumbing-related issues. He was friendly and helpful. Excellent work!
Posted on Google Google
Abigail Bigham profile picture
Abigail Bigham
Google star 1Google star 2Google star 3Google star 4Google star 5Trustindex verifies that the original source of the review is Google.
Alex does what other plumbers cannot do! He is our go to.
Posted on Google Google
Danielle Driver profile picture
Danielle Driver
Google star 1Google star 2Google star 3Google star 4Google star 5Trustindex verifies that the original source of the review is Google.
Alex is very friendly and responsive. What a pleasure to work with!
Posted on Google Google
Lawrence Isaacs profile picture
Lawrence Isaacs
Google star 1Google star 2Google star 3Google star 4Google star 5Trustindex verifies that the original source of the review is Google.
Very very happy with the work Alex did for us replacing the tanks in our Aquasana filtration system. From first contact over the phone through job completion Alex was a pleasure to work with. He explained what he was doing, and why, every step of the way, and made sure we understood what we needed to do to maintain the system. Strongly recommend Alex!
Posted on Google Google
Joey Aucoin profile picture
Joey Aucoin
Google star 1Google star 2Google star 3Google star 4Google star 5Trustindex verifies that the original source of the review is Google.
Alex Derks has been such a lifesaver for me. Anytime I'm in a pinch with the plumbing in my home, Alex is only a phone call away and I've only seen great results from his work. He's reliable, knowledgable, and entirely trustworthy. A must-have source when owning a home.
Posted on Google Google
Eric Gorman profile picture
Eric Gorman
Google star 1Google star 2Google star 3Google star 4Google star 5Trustindex verifies that the original source of the review is Google.
After working with dozens of plumbing services in the LA area, I can confidently say Derks is the best in the business. On time, reliable and capable of even the most difficult tasks, Derks goes above and beyond to make sure your water system is working correctly.
Posted on Google Google
Jason Gruenbaum profile picture
Jason Gruenbaum
Google star 1Google star 2Google star 3Google star 4Google star 5Trustindex verifies that the original source of the review is Google.
Excellent know-how and fast!! Reasonable pricing and super responsive!!
Posted on Google Google
Jonathan Hepfer profile picture
Jonathan Hepfer
Google star 1Google star 2Google star 3Google star 4Google star 5Trustindex verifies that the original source of the review is Google.
Alex is an expert plumber, and he always goes out of his way to educate me about how to prevent future issues. Highly recommended!

Derks Plumbing has been providing professional plumbing services to Eagle Rock residents for over 20 years. Our experience and strong reputation have allowed us to grow, and we are proud to serve customers in 15 nearby areas, including Venice, Santa Monica, Beverly Hills, and more.

Contact

Hours of Operation

Monday: Open 24 Hours
Tuesday: Open 24 Hours
Wednesday: Open 24 Hours
Thursday: Open 24 Hours
Friday: Open 24 Hours
Saturday: Open 24 Hours
Sunday: Open 24 Hours

© 2026 Created by Localpro1

Scroll to Top