We are Available 24/7

Author name: alodn

How to Unclog a Persistent Toilet Issue
Plumbing

How to Unclog a Persistent Toilet Issue

A clogged toilet is an inconvenience most homeowners face at some point, but a persistent clog can quickly escalate from frustrating to problematic. If you’re wondering how to unclog a persistent toilet issue, this comprehensive guide will help you tackle the problem effectively and prevent future occurrences. Persistent toilet clogs often arise from improper usage, underlying plumbing issues, or ageing systems. To address this plumbing challenge, let’s dive into the causes, solutions, and preventive measures. Understanding the Causes of Persistent Toilet Clogs Knowing how to unclog a persistent toilet issue starts with identifying the root cause. Here are the most common culprits: Effective Solutions to Unclog a Persistent Toilet Issue Addressing how to unclog a persistent toilet issue involves a combination of tried-and-true methods and professional interventions. Plunge It Right The plunger remains a household staple for clearing minor clogs. Use a flange plunger specifically designed for toilets to ensure a proper seal over the drain. Pump it vigorously several times to loosen the blockage. Deploy a Plumbing Snake For deeper clogs, a plumbing snake (or auger) can reach where a plunger can’t. Insert the snake into the toilet drain and carefully rotate it to break apart the clog. This tool is especially effective for stubborn blockages. Harness the Power of Hot Water and Soap If the clog isn’t too severe, pour a bucket of hot water (not boiling) mixed with a generous amount of dish soap into the toilet bowl. The soap helps lubricate the clog while the hot water softens and dislodges it. Try a Baking Soda and Vinegar Mix A natural and safe method for minor clogs involves baking soda and vinegar. Pour one cup of baking soda into the toilet, followed by one cup of vinegar. Let it fizz for about 30 minutes before flushing with hot water. Seek Professional Help Sometimes, DIY solutions aren’t enough. Persistent clogs could indicate more complex problems requiring professional equipment and expertise. Preventing Persistent Toilet Clogs While knowing how to unclog a persistent toilet issue is important, prevention is even better. Here’s how to reduce the likelihood of future clogs: When Should You Replace Your Toilet? Sometimes, persistent clogs may signal it’s time for a new toilet. Common signs include: For a seamless transition, consider professional toilet installation services. Experts ensure your new toilet is installed securely and functions optimally. Why Choose Derks Plumbing? At Derks Plumbing, we’re experts in handling even the toughest toilet problems. Whether you’re trying to figure out how to unclog a persistent toilet issue or need a new toilet installed, our team delivers top-notch service you can trust. We specialize in toilet installation Los Angeles services and offer comprehensive plumbing solutions for residential and commercial properties. With affordable pricing and unmatched expertise, Derks Plumbing is your go-to choice for all your plumbing needs. Contact us today for a reliable, stress-free solution. Conclusion Dealing with how to unclog a persistent toilet issue can be frustrating experience. Still, with the right approach and tools, you can effectively resolve the problem and prevent it from recurring. While DIY methods like plunging and using a plumbing snake can often help, persistent clogs may indicate deeper plumbing issues that require professional attention.

Illustration of what is the best liquid drain cleaner being poured into a sink to resolve a clog effectively.
Plumbing

What is the Best Liquid Drain Cleaner?

What is the Best Liquid Drain Cleaner? Blocked drains are a common problem in many homes, and when water starts to pool in sinks, showers, or bathtubs, it’s easy to feel anxious. You might ask, “What is the Best Liquid Drain Cleaner?” The solution relies on how severe the blockage is, the kind of pipes in place, and your environmental considerations. In this article, we will examine different liquid drain cleaners, highlight their advantages and disadvantages, and provide guidance on the optimal choice for keeping drains clear and healthy. At Derks Plumbing, we understand the importance of maintaining clean and clear drains, so let’s dive in and find the best solution for you! Understanding Drain Cleaners Liquid drain cleaners are chemical formulations created to dissolve or collapse blockages in plumbing. They are frequently utilized for unblocking drains and reinstating the finest flow. Several house owners choose them because of their simplicity of operation. Instead of contacting a plumber right away, without a doubt, pour the solution into the drain, permit it to take impact, and then rinse with water. Even though while inquiring, “What is the best liquid drain cleaner?” There are a couple of elements to don’t forget. The form of obstruction you’re dealing with, your plumbing system, and the materials inside the cleaner are all crucial. Certain drain cleaners contain strong chemicals, while others are designed to be more environmentally friendly and gentle to your plumbing. Chemical vs. Eco-Friendly Liquid Drain Cleaners When considering “What is the best liquid drain cleaner?” One of the initial aspects you’ll face is deciding between a chemical-based option or an environmentally friendly product. Each has its advantages, yet they fulfil distinct roles. Chemical drain cleaners, which include Drano Max Gel or Liquid-Plumr, are identified for their powerful, short-performing formulas. These gadgets can decompose grease, hair, soap residue, and diverse materials that result in blockages. However, they frequently include corrosive substances like sodium hydroxide or sulfuric acid, which can damage your plumbing over time and may pose handling risks. Conversely, environmentally safe liquid drain cleaners such as Green Gobbler and Bio-Clean are more secure choices that utilize enzymes or natural components to decompose organic matter. Although they might require more time to function than their chemical equivalents, they are more considerate of your plumbing and the ecosystem. These items are frequently biodegradable and safe for health, making them an excellent option for eco-minded homeowners. For more severe or persistent clogs, chemical cleaners may be quicker, but for routine upkeep and a milder method, eco-friendly cleaners tend to be the optimal choice. No matter which type you select, always ensure you read the instructions on the label and use the product properly to prevent harm to your pipes. What is the Best Liquid Drain Cleaner for Tough Clogs? When encountering a difficult clog, numerous individuals wonder, “What is the best liquid drain cleaner for significant obstructions?” This is where items such as Drano Max Gel and Liquid-Plumr are utilized. These powerful cleaners are intended for tough blockages. They function by dissolving grease, hair, soap residue, and various debris that could be blocking your pipes. For an especially tough blockage, think about utilizing a gel-type cleaner instead of a liquid. Gel cleaners usually adhere to the blockage for extended durations, enabling them to function more effectively. They work particularly well for sluggish drains that have gathered debris over time. Allowing these products sufficient time to dissolve the debris could enable you to remove the blockage without having to contact a plumber. Although these products are efficient, it’s crucial to apply them in moderation. Excessive use of chemical drain cleaners may cause pipe deterioration or harm, particularly in ageing plumbing systems. Moreover, they can lead to ecological damage if not discarded appropriately. Always review the label for safe disposal guidelines and refrain from overuse. What is the Best Liquid Drain Cleaner for Maintenance? If you seek a drain cleaner to upkeep your drains and avert future clogs, eco-friendly alternatives such as Green Gobbler or Bio-Clean are outstanding selections. These products contain natural bacteria or enzymes designed to decompose organic matter, thus stopping the accumulation of clogs. They operate at a slow pace, making them safer for your plumbing and the environment. For routine use, a natural drain cleaner can assist in maintaining your pipes in excellent shape without endangering your plumbing system. Utilizing them monthly can help maintain clear drains and lower the chances of facing bigger blockages later on. If you are managing especially tough water or mineral deposits, certain products have unique formulas to tackle these problems. Environmentally friendly liquid drain cleaners are also a great option for homes with septic systems. In contrast to chemical cleaners, these items are safe for septic systems and will not interfere with the natural bacteria essential for the system’s efficient operation. The Risks of Using Liquid Drain Cleaners Although liquid drain cleaners can offer a fast solution, it’s crucial to recognize the dangers linked to regular usage. Many chemical drain cleaners are corrosive and may harm pipes, particularly older ones or those constructed from plastic. Extended contact with aggressive chemicals can cause corrosion and fissures, leading to leaks or even ruptures in the plumbing system. Moreover, liquid drain cleaners can harm the environment if they are not discarded correctly. Regular use of chemical cleaners could also result in clogs worsening as time goes on. Overusing drain cleaners might conceal a deeper plumbing issue that needs expert help. If your drains keep getting blocked even after using cleaners, it may be time to seek advice from a plumber. If you require additional assistance with removing persistent blockages or wish to guarantee the lasting well-being of your plumbing system, think about contacting a professional plumber. At Derks Plumbing, we focus on professional drain cleaning in Los Angeles to deliver comprehensive and enduring solutions. How to Maintain Healthy Drains To avoid clogs and the desire for frequent liquid drain cleaner use, it’s vital to preserve your drains. Here are

how long does a tankless water heater lasts
Plumbing

How Long Does a Tankless Water Heater Last?

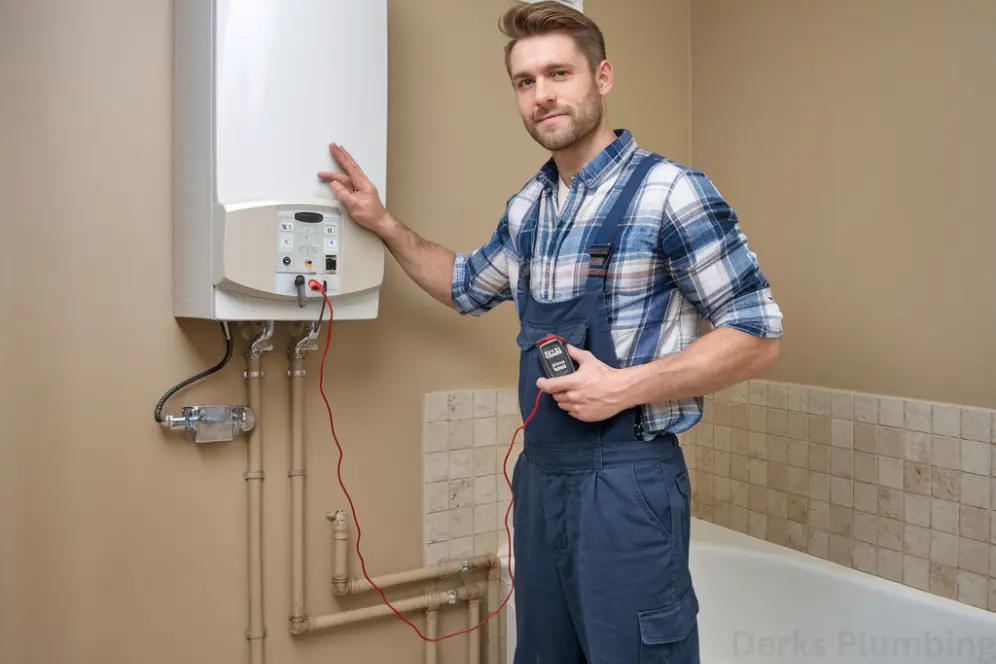
How Long Does a Tankless Water Heater Last? If you’re thinking about upgrading your private home’s water heater system, you would perhaps have asked yourself, “How long does a tankless water heater last?” The answer to this question is a significant detail when settling on regular water radiators and their tankless choices. Regularly, tankless water heaters have a life expectancy of 20 to 25 years, which is prominently longer than traditional capacity tank water heaters, for the most part enduring a cycle of 10 to 15 years. To expand the life expectancy of your tankless water heater, it means a lot to make specific safeguarding, setup, and utilization. In this article, we’re ready to test the strength of tankless water heaters, the components that influence their life expectancy, and the rules for maintaining your device’s performance as the year progresses. The Lifespan of Tankless Water Heaters The everyday lifespan of a tankless water heater ranges from 20 to 25 years, which makes it an amazing long-term investment. In contrast to standard tank water heaters that hold water stored and constantly heated, tankless versions heat water completely while required. This on-demand characteristic minimizes wear and tear, leading to a longer lifespan. In case you’re thinking, “How long does a tankless water heater last as opposed to a conventional one?” The distinction is clear. Tankless structures commonly have a lifespan that’s almost double, providing a long time of dependable hot water when nicely maintained. Factors Influencing the Lifespan of Tankless Water Heaters No doubt tankless water heaters are designed for durability; their lifespan is based on multiple elements. Let’s take a look at more closely the factors that affect how long your tankless water heater lasts: Water Quality The quality of the water in your home can directly affect the durability of your tankless water heater. Hard water, characterized by using expanded amounts of calcium and magnesium, may cause mineral accumulation within the system. With time, this diminishes efficiency and adds additional strain on the heat exchanger. Frequency of Use The frequency with which your family makes use of hot water also affects the system’s longevity. Dwellings with high demand, like the ones desirable for huge families or featuring several bathrooms, would possibly go through increased put and tear. However, tankless systems are built to control high usage more efficiently than conventional water heaters.With regular protection, even all through common use, you can help a tankless water heater’s lifespan stay closer to its maximum expected length. Proper Installation An inadequately installed tankless water heater may bring about decreased efficiency and early deterioration. Correct installation guarantees that the system operates at its best performance and endures for as long as it can.At Derks Plumbing, we provide expert installation services to ensure you get the most out of your system and answer your question, “How long does a tankless water heater last?” Routine Maintenance Consistent maintenance is a key factor in assessing the longevity of a tankless water heater. Yearly maintenance activities like flushing the system, cleaning filters, and checking components can stop minor issues from escalating into significant problems. Brand and Model Quality Not every tankless water heater is made the same; that’s why the question arises, “How long does a tankless water heater last”. Models from trusted brands that are of high quality generally endure longer and function more dependably than lower-cost, less efficient options.Putting money into a premium system might raise initial expenses, but it can greatly improve the lifespan of your tankless water heater, ultimately saving you money over time. Signs Your Tankless Water Heater May Need Replacement Despite receiving appropriate maintenance, a water heater cannot endure indefinitely. Here are several indications that it might be necessary to change your system: Inconsistent Water Temperature: If your water heater has difficulty keeping a consistent temperature, it may suggest that parts are worn out. Increasing Energy Costs: Decreased efficiency could indicate the system is exerting extra effort to heat water. Regular Repairs: If you find yourself contacting a plumber frequently, it could be more economical to replace the unit. Ongoing Mineral Accumulation:  If descaling fails to enhance performance, the heat exchanger might be excessively damaged. How to Maximize the Lifespan of Your Tankless Water Heater To ensure how long your tankless water heater lasts closer to 25 years, follow these tips: Routine Flushing Mineral accumulation can damage the heat exchanger and decrease efficiency. Performing an annual flush of the system aids in eliminating these deposits and ensures the unit operates efficiently. Clean or Substitute Filters Contaminated filters limit water flow and make the system exert more effort. Regularly inspect and clean filters to ensure peak performance. Supervise Water Standards Setting up a water softener or pre-filter can lessen the impact of hard water, decreasing scale formation and extending the lifespan of your water heater. Arrange Expert Evaluations Yearly check-ups by certified plumbers can detect and resolve possible concerns before they escalate into significant issues. At Derks Plumbing, we provide extensive maintenance programs to ensure your system remains in excellent condition. Benefits of Tankless Water Heaters Tankless water heaters are not just durable, but they also provide numerous benefits: Energy Efficiency: By heating water solely as required, tankless systems minimize energy loss, decreasing your utility expenses. Space-Efficient Design: Their small dimensions make them perfect for residences with restricted space. Endless Hot Water:  Relish in an uninterrupted flow of hot water without the concern of depletion. If you’re still wondering, “How long does a tankless water heater last, and is it worth it?” The longevity and efficiency of these units make them a valuable choice. Why Choose Derks Plumbing for Your Tankless Water Heater Needs? For installing, servicing, or changing tankless water heaters, Derks Plumbing is the reliable name you can count on. With extensive experience and a dedication to client satisfaction, we guarantee you maximize your system’s potential. Why Select Us? Professional Installation: Correct installation is essential for determining how long your tankless water heater lasts. Maintenance Plans: Our expert services encompass routine flushing, evaluations, and

Electric vs gas tankless water heater
Plumbing

Electric vs Gas Tankless Water Heater Which One Is Best For You

Wondering about electric vs gas tankless water heater? When choosing between an electric and gas tankless water heater, the decision hinges on energy efficiency, installation requirements, operating costs, and your home’s existing infrastructure. Electric models are generally easier to install and more energy-efficient in mild climates, while gas units excel in delivering higher flow rates for larger households. This guide will unpack every detail you need to make an informed choice, from upfront costs to long-term environmental impact. What Are Tankless Water Heaters? Tankless water heaters, also called “on-demand” systems, heat water directly without storing it in a tank. When you turn on the hot water tap, cold water travels through a heat exchanger, where it’s instantly warmed by either an electric element or gas burner. How Tankless Systems Work Electric models use coiled heating elements similar to those in kettles, while gas units ignite a burner to create heat. Gas systems require venting to expel combustion gases, whereas electric models don’t. For detailed guide about how tankless water heater work read our blog. Electric vs Gas Tankless Water Heaters: Key Differences 1. Energy Efficiency Electric tankless heaters convert 98–99% of energy into heat, compared to 80–85% for gas models. However, gas units often cost less to operate in regions with low natural gas prices. Example:A household using 40 gallons of hot water daily pays $150/year for electric vs $115 for gas in areas with $0.12/kWh electricity and $1.20/therm gas. 2. Flow Rate and Performance Gas models outperform electric ones in simultaneous use cases: Gas: 5–7 gallons per minute (GPM) Electric: 2–5 GPM A gas unit can handle a shower and dishwasher running together, while an electric system may struggle. 3. Installation Complexity Factor Electric Gas Venting Required No Yes Electrical Upgrade 240V N/A Gas Line Requirement No Yes   Electric models cost $500–$1,500 to install vs $1,200–$3,000 for gas. Cost of Electric vs Gas Water Heaters Upfront Costs Electric: $500–$1,200 Gas: $800–$1,800 Operating Costs (Annual) Region Electric Gas Northeast U.S. $220 $160 Southern U.S. $180 $135   Environmental Impact Electric models produce zero direct emissions, making them cleaner in areas with renewable energy grids. Gas units emit 45–55 kg of CO₂ annually for an average household. Choosing Between Gas or Electric Water Heaters Best For Electric: Small households (1–3 people) Mild climates Homes without gas lines Best For Gas: Large families Cold climates Existing gas infrastructure Not sure what size unit fits your needs? Check out our detailed guide on what size of tankless water heater do I need to make the right choice for your home. Wondering about the lifespan of your unit? Learn more in our full guide on how long does a tankless water heater last and find out when it might be time for a replacement. Expert Tankless Water Heater Installation in Los Angeles Ready to upgrade your home’s hot water system? Whether you’re leaning toward an electric or gas tankless water heater, our local team specializes in seamless, code-compliant installations to Los Angeles homes. Derks Plumbing handle everything from helping you choose the right model to professional setup and maintenance so you enjoy endless hot water with zero hassle. Trust our experienced technicians for reliable Tankless Water Heater Installation & Repair and experience the comfort and efficiency you deserve. Contact us today to schedule your service! Conclusion Gas or Electric water heater? For most households, gas tankless water heaters provide better performance for multi-fixture use, while electric models shine in efficiency and ease of installation. Consider your local energy costs, climate, and usage patterns before deciding. Newer hybrid systems combining both energy sources are also emerging as versatile options. FAQs Do tankless water heaters use gas or electricity? Both types exist! Electric models use heating coils, while gas units burn natural gas or propane. Are all tankless water heaters gas? No 33% of U.S. tankless installations are electric, particularly in warmer states. Will switching to a tankless water heater reduce my utility bills? Most homeowners see noticeable savings over time due to higher energy efficiency, especially if you have a household with moderate to low hot water demand. Are there any drawbacks to tankless water heaters? The main drawbacks are higher upfront costs and potential installation complexity, especially for gas units needing venting and gas line upgrades. Also, electric models may struggle with high simultaneous demand. What is the cold water sandwich effect in tankless water heaters? It’s a brief burst of cold water that can occur between hot water uses. Some premium models include buffer tanks or recirculation pumps to eliminate this effect.

role of clean out in plumbing system
Plumbing

Role of Clean Out in Plumbing System

Role of Clean Out in Plumbing System The role of cleanout may not be the most crucial thing in your property; in any case, it means quite a bit to the proper activity of your pipe framework. The role of clean out in plumbing systems is fundamental, whether you are managing obstructions, performing routine redesign, or deflecting significant pipe issues. In this blog, we will concentrate on what cleanouts are, the reason they’re significant, where they’re found, how to hold them, and the manner in which they monitor the honesty of your plumbing system. What Is a Clean Out in Plumbing? A plumbing cleanout is a sealed pipe that allows entry into your plumbing system for cleaning, examinations, and maintenance. connected to your house’s primary sewer line or different important pipelines, cleanouts enable plumbers to reach and remedy problems without requiring great excavation or disassembly of pipes.The reason for the role of clean out in plumbing systems is especially to aid in maintenance and problem-solving, thereby saving time, lowering prices, and minimizing harm to your property. Why Is a Clean Out Important? Ensures Proper Maintenance A primary role of clean out in plumbing systems is to facilitate convenient access for maintenance. As time passes, waste, grease, and buildup can gather in your pipes, causing blockages that interfere with your plumbing system. Cleanouts provide a straightforward access point for plumbers to clear these clogs effectively.For those who own homes, this indicates: Prevents Plumbing Emergencies Plumbing emergencies frequently arise when small problems go undetected and develop into larger issues. Cleanouts assist in detecting and resolving potential issues early, averting expensive and disruptive emergencies like sewage backups or fractured pipes. Simplifies Inspections The role of clean out in plumbing systems also involves making inspections easier. When plumbers evaluate the condition of your pipes, cleanouts enable them to utilize tools such as sewer cameras to accurately identify the precise location and type of problems.This accuracy minimizes uncertainty and guarantees precise, effective repairs. How Does a Plumbing Cleanout Work? A cleanout offers direct entry to your pipes, enabling plumbers to resolve problems without taking apart extensive parts of the plumbing system. Here’s the way it functions: Access Point: The cleanout acts as an entry point into the plumbing system.Examination: Plumbers have the skills to utilize cameras or other diagnostic equipment to assess the state of the pipes.Cleaning: Plumbers can eliminate debris, grease, or other blockages using tools such as drain snakes or hydro jets.Repairs: When a repair is necessary, the cleanout enables plumbers to quickly pinpoint and tackle the problematic area. The cleanout accelerates these processes and reduces invasiveness, emphasizing its vital role of clean out in plumbing systems. Where Are Clean Outs Located? The positioning of cleanouts is planned to enhance their effectiveness. Exterior Cleanouts Exterior cleanouts are usually placed outside the house, close to the foundation. These cleanouts link to the primary sewer line and allow access to resolve major plumbing problems. Interior Cleanouts Positioned within bathrooms, kitchens, or laundry areas, interior cleanouts are compact and meant to address blockages in branch lines. Roof Cleanouts In some homes, roof cleanouts are installed as an alternative access point for plumbing maintenance. These are connected to the venting system and can be used when other cleanouts are not easily accessible. Benefits of Plumbing Clean-Outs Cost Efficiency The role of clean out in plumbing system also contributes to saving costs for homeowners. Cleanouts simplify maintenance access, removing the necessity for expensive and disruptive methods such as excavation. Improved System Longevity Consistent cleaning and examination via cleanouts can greatly prolong the longevity of your plumbing system by avoiding blockages and minimizing damage. Enhanced Safety Obstructed sewer pipes can result in dangerous situations, such as sewage overflow and unpleasant smells. Cleanouts ensure proper drainage, contributing to a safe and hygienic environment. Maintenance Tips for Clean-Outs Maintaining your plumbing systems in proper condition is vital for the overall well-being of your plumbing system. Regular Inspections Regularly inspect your cleanouts to confirm the caps are secure and that there are no indications of damage. A broken or absent cap can permit debris to infiltrate the system, leading to obstructions. Professional Maintenance Arrange yearly maintenance with a qualified plumber. This guarantees that your cleanouts and plumbing system are unobstructed and functioning effectively. Prevent Clogs Avoid flushing non-biodegradable items like wipes, feminine hygiene products, or paper towels. These items can cause clogs that even cleanouts might struggle to resolve. Common Issues Related to Clean-Outs Although cleanouts are very efficient, they are not free from issues. Damaged Caps An absent or broken cap can let dirt or insects infiltrate the system, resulting in blockages or contamination. Hidden or Inaccessible Cleanouts Certain older houses might lack cleanouts placed in easily reachable spots, which can complicate maintenance. Blocked Cleanouts In some instances, the cleanout may get blocked, necessitating expert help to resolve. Why Choose Derks Plumbing for Cleanout Services? At Derks Plumbing, we recognize the essential part of the role of clean out in plumbing systems. Our team of certified plumbers focuses on cleanout services, guaranteeing your system operates smoothly and effectively. What Sets Us Apart? Specialized Expertise: Our plumbers are skilled in managing all varieties of cleanout setups and upkeep.Modern Equipment: We utilize state-of-the-art technology to examine and care for your plumbing system.Customer-focused Method: Your contentment is our main goal, and we strive to offer dependable, cost-effective solutions. Whether you require regular maintenance, a cleanout installation, or urgent plumbing services, Derks Plumbing is ready to assist. Conclusion The role of clean out in plumbing systems is critical for keeping up with the productivity and steadfastness of your confidential home’s pipes. Cleanouts are basic for guaranteeing your lines stay clear and your plumbing system works effectively, aiding reviews, and taking off outrageous plumbing issues. In case you’re facing a plumbing problem or require assistance along with your cleanouts, rely upon Derks Plumbing. Our professional team is ready to offer professional solutions customized to your requirements. Reach out to us today and allow us to hold your plumbing

Wondering "Why is my toilet not flushing?" Discover common causes, DIY fixes, and expert solutions. Contact Derks Plumbing for reliable toilet repair services in Los Angeles.
Plumbing

Why Is My Toilet Not Flushing? Simple Proven Fixes

It’s a situation we’ve all encountered at some point, you go to flush the toilet, and it doesn’t work. Panic sets in, frustration builds up, and the question arises: “Why is my toilet not flushing?” It can be an inconvenience at the best of times and a nightmare at others. Whether it’s a slow flush, a partial flush, or the dreaded complete lack of flushing, understanding what’s going on inside the toilet tank is the first step toward solving the issue. I’ve had my fair share of plumbing mishaps over the years, and I’m here to break it down for you with a clear and simple guide. Common Causes for a Toilet That Won’t Flush Toilets are deceptively simple machines, but sometimes things just go wrong. When your toilet refuses to flush properly, the issue usually stems from one of these common causes. 1. Clogged Toilet Bowl One of the most common reasons for a toilet not flushing is a simple clog. If you’ve recently used a large amount of toilet paper or flushed something that shouldn’t be flushed, like wipes or sanitary products, you could have a blockage. Even though many things are labeled “flushable,” they can cause a backup. How to fix it:Grab a plunger, and give it a few firm pumps. If the clog doesn’t clear up, try a toilet auger for a deeper reach. In severe cases, you may need to call a plumber. 2. Low Water Level in the Tank If the water level in your toilet tank is too low, the flush will lack the necessary force to push everything through the pipes. This issue often arises if the water supply valve isn’t fully open or if there’s an issue with the fill valve inside the tank. How to fix it:Take the lid off the tank and check the water level. It should be about an inch below the top of the overflow tube. If it’s too low, you may need to adjust the fill valve to ensure enough water enters the tank. 3. Malfunctioning Flush Valve A faulty flush valve can prevent water from entering the toilet bowl when you press the flush lever. Over time, the rubber flapper that seals the flush valve may wear out, become misaligned, or get dirty. When this happens, the water won’t fully flow into the bowl, and your flush won’t have enough power. How to fix it:Examine the flush valve for any damage or debris. If the flapper is worn out or cracked, replace it. A new flush valve assembly might also be required if the problem persists. 4. Faulty Toilet Handle or Lift Chain A common issue I’ve encountered is a malfunctioning toilet handle or lift chain. Over time, the handle may become loose or the lift chain might disconnect or become tangled. Without the proper mechanical connection between the flush lever and the flapper, you won’t be able to initiate a proper flush. How to fix it:Inspect the handle and lift chain. If the chain is disconnected or too tight, adjust it to ensure it moves freely when you press the handle. If the handle is loose, tighten the screws to make sure it functions properly. 5. Blocked Vent Stack You may not immediately think of it, but a blocked vent stack can disrupt your toilet’s flushing ability. The vent stack helps air flow properly through the plumbing system, ensuring that water moves smoothly through the pipes. If the vent stack is blocked (for example, by leaves, debris, or even birds nesting), it can create a vacuum effect that prevents your toilet from flushing completely. How to fix it:This can be a tricky problem to diagnose and often requires a professional. The vent stack is typically located on the roof of your home, and trying to clear it yourself can be dangerous. If you suspect a blockage, it’s best to call a plumber to inspect and clear the vent. 6. Insufficient Water Pressure In some cases, low water pressure can affect the functioning of your toilet. If the water pressure is weak, it won’t provide enough force to flush waste down the drain. How to fix it:If other appliances in your house are also experiencing low water pressure, the problem might be with your main water supply. In this case, you’ll want to contact your local water utility company. However, if it’s isolated to your toilet, check the fill valve to see if it’s working correctly. Replacing the valve may restore normal water pressure. 7. Sediment Buildup in the Tank Over time, sediment from hard water can accumulate in your toilet tank, affecting the function of internal components like the flush valve or fill valve. This buildup can prevent the toilet from flushing properly and cause it to run constantly or weakly flush. How to fix it:Clean your toilet tank by draining it and scrubbing away any visible buildup. You can also use a descaling solution designed for toilet tanks to remove hard water deposits. Regular maintenance will help prevent this issue in the future. 8. Old or Worn Toilet Parts Lastly, if your toilet is old or has seen a lot of use, the internal parts may simply be worn out. The components like the fill valve, flush valve, and handle can degrade over time, leading to frequent flushing issues. How to fix it:Consider replacing older parts with newer, more efficient versions. It may be a good idea to call a plumber if you’re unsure which parts need replacing. An upgrade can ensure that your toilet continues to work efficiently for years to come. When to Call a Professional In many cases, DIY fixes like plunging or adjusting the tank components can resolve minor issues. However, there are times when a more complex issue arises, and you might need a professional plumber. For instance, a blocked vent stack or problems with the plumbing system might require specialized knowledge and tools. If you find that your toilet problems persist or if you’re dealing

how to clean tankless water heater
Plumbing

How to Clean Tankless Water Heater

How to Clean Tankless Water Heater If you’re interested in knowing how to clean tankless water heater, you have found the ideal place. Regular cleaning is essential to ensure that your tankless water heater operates effectively, providing hot water effortlessly. By performing proper maintenance, you can enhance its lifespan, reduce energy consumption, and maintain consistent performance. This guide will thoroughly explain everything you need to know about cleaning your tankless water heater. Why Cleaning a Tankless Water Heater is Important A tankless water heater operates by heating water even as it passes through the device. As time passes, minerals, which include calcium and magnesium in difficult water, can also collect on heating elements, which decreases overall performance and increases electricity intake. Failing to maintain your tankless water heater may additionally cause: Understanding the way how to clean tankless water heater prevents those troubles and guarantees your system remains in an extremely good situation. How Often Should You Clean Your Tankless Water Heater? The frequency of cleaning depends on the hardness of your water and how often you use the heater. For soft water: Clean your heater at least once a year.For hard water: Consider cleaning every six months to prevent excessive mineral buildup. Regular cleaning is especially important in areas with hard water, as mineral deposits accumulate more quickly. Step-by-Step Guide: How to Clean Tankless Water Heater Maintaining your tankless water heater may appear daunting, yet it’s a simple procedure. Here’s a comprehensive guide to assist you in handling the task: Turn Off the Power and Water Supply Prior to beginning, ensure the power to the unit is switched off. If it’s an electric heater, turn it off at the breaker box. For gas models, disable the gas supply. Turn off the water valves linked to the unit to avoid any leaks while cleaning. Gather the Necessary Supplies You’ll need: Connect the Hoses The majority of tankless water heaters include service valves for maintenance. Connect the hoses to the cold and hot water connections and position the other ends in a bucket. Flush the System Using vinegar for flushing is a safe and environmentally friendly method to clean your heater. It effectively eliminates limescale while preserving internal parts. Rinse the Unit Once you finish flushing, unplug the pump and hoses. Reconnect the hot and cold water pipes. Turn on the water valves and rinse the unit with fresh water for 5–10 minutes to clear any leftover solution. Specific Challenges When Cleaning Tankless Water Heaters Hard Water Deposits Residences with hard water are more susceptible to mineral accumulation. To address this, utilize a premium descaling solution in every cleaning cycle. Setting up a water softener can also lessen how often cleaning is needed. Clogged Filters Tankless water heaters feature small filters that capture debris. These must be inspected and cleaned each month to ensure adequate water flow. Tips to Maintain a Clean Tankless Water Heater Understanding how to clean tankless water heater involves more than just cleaning it. Here are some more helpful suggestions: Install a Preliminary filter This stops debris and sediment from getting into the unit. Inspect the venting system Make sure the venting is free from blockages for gas-operated units. Arrange expert evaluations Yearly assessments by specialists such as Derks Plumbing can detect problems before they worsen. Signs Your Tankless Water Heater Needs Cleaning Even if you are careful with maintenance, it’s important to identify the indicators that your tankless water heater requires cleaning: If you observe these indicators, it’s time to adhere to the steps mentioned earlier on how to maintain a tankless water heater. When to Call a Professional Though many homeowners can handle cleaning a tankless water heater, certain circumstances require professional skills. Reach out to Derks Plumbing if: Why Choose Derks Plumbing? At Derks Plumbing, we focus on cleaning, servicing, and fixing tankless water heaters. Our team employs cutting-edge tools and methods to guarantee your system is completely cleaned and functions effectively. We are dedicated to delivering excellent service customized to your requirements, whether it involves routine maintenance or resolving particular problems. Prevent limescale accumulation from affecting your water heater—count on Derks Plumbing to maintain your system in top condition. Conclusion Understanding the process of how to clean tankless water heater is essential for preserving its effectiveness and lifespan. Routine cleaning eliminates detrimental mineral accumulation, guarantees steady hot water, and helps control your energy expenses. Although the procedure is simple, enlisting experts such as Derks Plumbing to manage the task can conserve your time and guarantee comprehensive outcomes. Get in touch with Derks Plumbing now to arrange a cleaning or upkeep service.

How does a garbage disposal work
Plumbing

How Does A Garbage Disposal Work?

A garbage disposal is an important cooking appliance that gets rid of food waste quickly. It fits under your kitchen sink and breaks down food scraps into small pieces that are easy to flush down the drain. But how does a garbage disposal work? What are the most important things that make it work? This article will explain the working methods of trash disposal, what its main parts are, how to keep it in good shape, and a lot more. Purpose of Garbage Disposal Garbage disposals serve a simple but very useful purpose. It helps cut down on the loss of food that would otherwise go to the trash or landfill. Because of this, there is less trash, and it’s easier and faster to clean up the kitchen. It keeps your kitchen smelling fresh by grinding food waste into small pieces that don’t get stuck in drains. A garbage disposal is basically a machine that gets rid of trash and handles food scraps quickly and with little trouble. How Does a Garbage Disposal Work? To understand how a garbage filter works, you need to know how it’s put together. Food scraps are put into the grinding chamber when you turn on the garbage disposal. There, rotating blades break them up into smaller bits. The small particles are then washed away by moving water, which makes their way down the drain and into the pipes. The Stages of How a Garbage Disposal Works: Food Waste Enters the Grinding Chamber: Food scraps are flushed into the grinding chamber from your sink drain. Grinding Process: The motor activates the garbage disposal blades, which rotate rapidly, grinding the food waste into smaller pieces. Flushing Through the Drain: Once the food is ground into small particles, cold water helps push it through the disposal’s drain line, where it flows safely to the sewer or septic system. The whole process happens quickly, in just a matter of seconds, transforming large food scraps into fine particles that are easy to manage. Key Parts of a Garbage Disposal System To better understand how a garbage disposal works, let’s take a look at the critical garbage disposal parts that make this system function effectively. Motor: The motor is the heart of the garbage disposal, responsible for rotating the blades and powering the grinding mechanism. The motor typically runs between ½ to 1 horsepower, depending on the model. Grinding Chamber: This is the compartment where food waste is ground into smaller particles. Inside the chamber, the food waste is broken down by garbage disposal blades. Flywheel: The flywheel is a disk that rotates when the motor is turned on. It connects to the grinding components and helps crush the food waste. Grinding Blades: These blades are responsible for breaking down the food scraps. The blades are mounted on the flywheel, and as the flywheel spins, the blades shred the food into tiny bits. Discharge Tube: The discharge tube sends the ground waste out of the disposal and into the drain line, from where it travels to the sewer or septic system. Mounting System: The mounting system holds the garbage disposal unit in place under the sink and attaches it to the sink drain. Reset Button: If the garbage disposal becomes jammed or overheated, the reset button can be pressed to restart the motor and allow it to resume normal operation. Garbage Disposal Blades and Their Role in Grinding One of the most important components of a garbage disposal is the garbage disposal blades. These sharp blades spin at high speeds to crush and grind the food waste inside the grinding chamber. There are two types of blades commonly used: Impeller Blades: These are blunt, metal blades that move food waste around and force it toward the grinding plate. Grinding Plates: These are serrated metal surfaces that work in tandem with impeller blades to finely chop food waste. Over time, these blades may require garbage disposal blades replacement if they become dull or damaged. Proper care and occasional replacement of blades ensure that your garbage disposal continues to work efficiently. Understanding the Garbage Disposal Motor and How It Powers the Unit The motor in a garbage disposal is critical to the unit’s performance. It powers the grinding blades, helping them spin at speeds that crush food scraps. The motor is connected to a flywheel that turns the blades, and this spinning motion is what creates the grinding action. If the motor fails or gets overheated, the disposal will stop working, leading to the need for garbage disposal troubleshooting. Regular maintenance and checks are essential to ensure that the motor remains in good condition. The Importance of Proper Garbage Disposal Use To get the most out of your garbage disposal, it’s essential to know how to use a garbage disposal properly. Here are some key tips: Use cold water: Always run cold water when the disposal is on to help solidify any fats or oils, making it easier to break them down. Feed waste slowly: Avoid overloading the disposal by feeding it food scraps gradually. Avoid putting large, hard items down the drain: Bones, fibrous vegetables, and large quantities of food can damage the blades or cause clogs. By using the garbage disposal correctly, you’ll help prevent damage to the sink waste disposal system and extend the lifespan of the appliance. How to Maintain Your Garbage Disposal Proper garbage disposal maintenance is key to ensuring that your unit lasts as long as possible and works efficiently. Regular cleaning helps prevent odors, and timely repairs prevent small issues from becoming major problems. Maintenance Tips: Clean the grinding chamber: Use ice cubes or citrus peels to clean the blades and remove stuck food scraps. Deodorize regularly: Running a mixture of baking soda and vinegar through the disposal can eliminate bad odors. Check for leaks: Inspect the seals and pipes regularly to avoid any leaks that could cause water damage. Garbage Disposal Troubleshooting: How to Fix Common Problems Even the best garbage disposal units

How Much is a Garbage Disposal?
Plumbing

How Much is a Garbage Disposal?

How Much is a Garbage Disposal? A garbage disposal is an important tool in each modern kitchen, making it less difficult to get rid of food waste and maintain cleaner surroundings. However, if you’re considering obtaining one, the initial query you may possibly pose is, “How much is a garbage disposal?” The reaction is based on factors including the type, brand, and dimensions, and if you appoint a professional for setup, Typically, the charge for a garbage disposal unit falls between $50 and $300. If you require expert setup, assume paying an additional $100 to $400, based on how complex the process is. This results in a complete price starting from $150 to $700. Despite the fact that those expenses can also differ based totally on your area, the country of your plumbing, and the specific version you pick out. Understanding How Much Is A Garbage Disposal Costs The cost of garbage disposal is affected by more than one element. Continuous feed disposals, which function as long as the strength is on, are normally less highly priced, starting from about $70 to $250. These are ideal for homes that often utilize their disposal. Conversely, batch feed disposals, operational only with a stopper in the drain, tend to be somewhat pricier, costing between $150 and $350. These models are perfect for families who have safety worries, particularly those with kids. Horsepower also influences the pricing. Units that offer 1/3 horsepower are appropriate for light use and generally range in price from $50 to $100. For moderate usage, a 1/2-horsepower model is a preferable option, costing between $75 and $150. For larger families or significant usage demands, a unit with 3/4 horsepower or more, costing between $150 and $300, will offer increased durability and efficiency. The cost is also influenced by the quality of materials and the brand’s image. Disposals featuring stainless steel parts tend to be more robust but are generally pricier. Well-known brands provide enhanced functionalities and extended warranties, making them a valuable investment. Additional Costs Beyond the Unit In addition to the expense of the trash disposal unit, there may be other costs. When you are swapping out an old unit, the costs for removal and disposal may range from $50 to $150. Items such as sink flanges or power cords, often sold separately, can increase the total cost by $20 to $50. If your home’s plumbing or electrical systems require improvements to support the new unit, costs may rise even more. The costs of installation differ based on whether you choose to do it yourself or employ a professional. Installing a disposal on your own can be cost-effective but demands tools, time, and a bit of plumbing expertise. Errors can result in leaks or malfunctioning, which might be more expensive to repair in the future. Employing professionals guarantees a dependable installation, with expenses generally between $100 and $400. Choosing the Right Garbage Disposal Choosing the appropriate garbage disposal goes beyond simply considering the cost. It’s crucial to take into account your home’s requirements, the characteristics of the unit, and its longevity. If your household is small and produces minimal food waste, a simpler model with less horsepower could be adequate. Nonetheless, bigger families or those who cook often ought to consider purchasing a unit with greater horsepower to manage the demands. Noise levels are an additional aspect to take into account. Certain models include noise insulation, allowing for quieter operation, which can be a notable benefit in open-concept kitchens. An extended warranty serves as a positive sign of quality and dependability, providing reassurance with your purchase. When Should You Replace Your Garbage Disposal? If your current garbage disposal frequently clogs, emits bad odors, or makes unusual noises, it could be the right moment to replace it. Units that drip water under the sink or struggle to grind food waste properly show signs of degradation. While fixes may work for minor issues, older disposals often require replacement to ensure peak performance and safety. Why Trust Derks Plumbing for Garbage Disposal Installation? At Derks Plumbing, we understand that the set up or substitute of a garbage disposal is an important choice for homeowners. That is why we offer professional recommendation and professional set-up offerings to ensure a smooth experience. Drawing on years of enjoying helping neighborhood house owners, we own the information to suggest the most suitable fashions in line with your requirements and economic plan. Our group is committed to providing craftsmanship, making sure your new garbage disposal is established well and operates effectively for decades beforehand. We provide aggressive prices and clear estimates, ensuring there are no sudden costs. Whether you’re changing a vintage unit or installing a disposal for the first time, you could assume Derks Plumbing for great service. Conclusion So, how much is a garbage disposal? The cost varies based on the type, horsepower, brand, and installation method. While units range from $50 to $300, professional installation can bring the total to $150 to $700. Investing in a quality garbage disposal and proper installation ensures long-term efficiency and convenience. If you’re ready to upgrade your kitchen, Derks Plumbing is here to help. Our team offers reliable and affordable garbage disposal installation services, tailored to meet your needs. Contact us today to schedule an appointment and experience the difference a professional installation makes!

How to unjam a garbage disposal
Plumbing

How to Unjam a Garbage Disposal

In today’s modern kitchen, garbage disposal has become essential. If it works, everybody ignores it, but when it gets jammed or stuck, that’s when problems begin. Wondering how to unjam a garbage disposal? Then you are in the right place. This 5 step guide will guide you on everything you need to know in case your garbage disposal stops working. How do you know if your garbage disposal is stuck? Before jumping directly to a solution, let’s confirm the issue. There are some signs that show something stuck in garbage disposal. For example, when you come into the kitchen and turn on your food disposal, it starts humming but not grinding; also if you notice that water is flowing back or there is smoke or smell, these are the signs of your garburator stuck. Moreover, during winter, your frozen food items might be the cause of your frozen garbage disposal. Causes of garbage disposal jam  The following are the reasons why your garbage disposal was seized Wiry food items such as celery, artichokes, and corn husks Raw materials like bones and pits of fruits Grease and fat can also make your garbage disposal jammed Excess quantity of food that overloads the motor can make your food disposal stuck Accidental falling of objects such as caps inside the garburator Safety precautions before starting any fixes Do not put your hand directly into the garbage disposal Always cut off the power supply before applying any procedure Make sure to have a tool kit that contains an Allen wrench, tongs or wooden spoon handle Use a flashlight to see any object stuck, such as a spoon, bone, husk or other solid item How to Unjam a Garbage Disposal Step by step In order to fix food waste disposer, follow these easy steps to make it work again. 1. Use an Allen or disposal wrench Garburators usually have a tiny hex-shaped hole connected to the disposal base. Put an Allen wrench in it and rotate it side-by-side. This movement would help release the stuck impellers located inside the garbage disposal, and they would start moving freely. 2. Press the Reset Button Search for a tiny red or black button at the base of the disposal unit. It is the reset knob. Press this button to reset your device. If your garbage disposal seized due to overheating or overloading, this reset trial would fix it. 3. Manually clear stuck objects  Turn on the flashlight to locate objects. Clean out any obstructions within the unit using pliers or tongs. 4. Use a wooden spoon handle Use a wooden spoon handle to manually rotate the impeller through the drain opening. It is quite an old but useful solution to move the stuck food waste disposer. 5. Test the disposal Please turn on the switch at your disposal and run cold water through it. If the water starts moving freely with the usual grind sounds, do thank me because your disposer is fixed. What If Your Garbage Disposal Is Still Jammed? Despite applying the above procedure, if your disposal is still stuck, follow deep fixes such as Disassemble garbage disposal if you are confident enough to open the unit easily and move the impeller or are good at electricity Call a professional if your motor is completely dead Tips to prevent future jams Do not put any tough objects such as bones, eggshells, and fibrous food items into the disposal  After using the disposer, make sure to run cold water through it  Do not overload your disposal and prefer small pieces of food  Clean out the impellers by using ground ice cubes and lemon peel at least once a month Conclusion Don’t let your garbage disposal ruin your mood. Follow the easy steps with the simple tools mentioned above and unjam your disposal in no time. After applying all DIY and the problem is still present, call a professional garbage disposal plumber for timely repair. FAQs Why is my garbage disposal humming but not grinding? Usually a humming sound is produced when your garbage disposal has something stuck in it, and its flywheels are not moving. Humming means your disposal is jam not broken. Can I use hot water for frozen disposal? Never use boiling water for cleaning as it damages your old PVC lines. However, you can use warm water to clean your garbage disposal. Can I use another tool instead of an Allen wrench? If you don’t have a wrench, you can gently move the flywheel with a wooden stick or pliers.  Can I use a drain cleaner to unjam garbage disposal? Avoid chemical-based cleaners because they can destroy your plumbing and corrode internal parts of your disposal. Use natural remedies or mechanical tools to clean them. What to do when my garbage disposal isn’t turned on at all? First, check the power supply and circuit breaker. If it is fine then press the reset button at the base of your unit.

Fast and Efficient Plumbing Services in Eagle Rock

Client Reviews

Derks Plumbing has been providing professional plumbing services to Eagle Rock residents for over 20 years. Our experience and strong reputation have allowed us to grow, and we are proud to serve customers in 15 nearby areas, including Venice, Santa Monica, Beverly Hills, and more.

Contact

Hours of Operation

Monday: Open 24 Hours
Tuesday: Open 24 Hours
Wednesday: Open 24 Hours
Thursday: Open 24 Hours
Friday: Open 24 Hours
Saturday: Open 24 Hours
Sunday: Open 24 Hours

© 2025 Created by Localpro1

Scroll to Top

How Can We Save the Day?