Is It Bad to Flush Hair Down the Toilet?
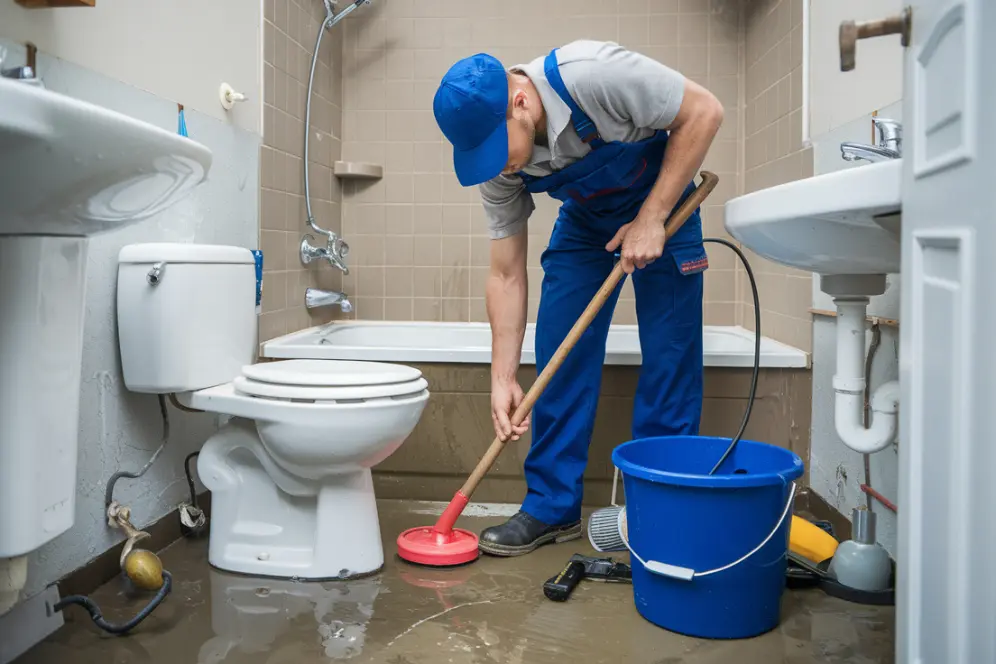
It might seem harmless to toss a few strands of hair into the toilet bowl after grooming, but have you ever stopped to ask: is it bad to flush hair down the toilet? While it may seem like a small act, the long-term consequences can be severe for your home’s plumbing system. Toilets are designed to handle waste and toilet paper, not other materials like hair. Still, many homeowners unknowingly flush hair thinking it’s okay. In this blog, we’ll explore why flushing hair down toilet pipes is a major no-no, what really happens when hair enters your plumbing system, the costly risks involved, and what you should do instead. You’ll also learn how improper habits like flushing hair can shorten your toilet’s lifespan, cause clogs, and lead to expensive repairs. Let’s break it all down. Why Is It Bad to Flush Hair Down the Toilet? The short answer is yes is it bad to flush hair down the toilet? Absolutely. Flushing even small amounts of hair can create serious plumbing issues over time. Hair, whether long or short, does not break down easily like toilet paper. Instead, it clumps together, tangles with other debris, and clogs your pipes. You might not notice any issue right away, but over time, that buildup becomes worse. If you frequently find hair in toilet water or see clumps going down the drain, you’re slowly feeding a future plumbing disaster. What Happens When You Flush Hair? When you flush hair, it doesn’t just vanish. It travels through your home’s drain pipes where it can get stuck. Because hair is made of keratin a strong, fibrous protein it resists breaking down in water. The strands can catch on rough pipe surfaces or joints. Once some hair is caught, it acts like a net, trapping other waste and particles that follow. That’s how small hair turns into big plumbing problems. The more often you’re flushing hair, the more buildup you create. In many cases, blockages form deep within the plumbing, where a plunger or drain cleaner won’t reach. Eventually, you’ll face slow drains, backflow, and even complete toilet failure. Hair in Toilet: What Kind of Hair Causes Issues? It’s not just long hair that’s a problem. Even tiny stubble from shaving can contribute to clogs. When these short pieces of hair in toilet water begin to build up, they often mix with soap scum, grease, and other organic material to form a solid blockage. So, whether it’s hair from brushing, shaving, or trimming, flushing it can lead to trouble. Hair from pets is also a hidden culprit. If you’re cleaning out a brush or trimming your dog and flush the clippings, you’re worsening the problem. Why Toilets Aren’t Designed to Handle Hair Toilets use a siphon-flushing system with a narrow trapway. These are engineered to move waste and toilet paper efficiently with the least amount of water. Hair doesn’t dissolve or disperse in the same way. The flushing power of a toilet simply isn’t strong enough to push clumped-up hair toilet debris all the way to the sewer. This means that flushed hair is likely to settle in your home’s pipes or within your sewer line. How Flushing Hair Leads to Bigger Problems The most common outcome of flushing hair down toilet systems is a slow-draining toilet. You may notice that water takes longer to swirl and flush. As the clog builds, you’ll likely experience full blockages. These clogs may also affect your toilet’s flush valve and internal parts. Pressure issues, weak flushes, or leaks can all result from hidden hair clogs disrupting your system’s flow. If you’ve ever dealt with repeated toilet repairs without an obvious cause, you might have a hidden hair buildup. Worse yet, over time, trapped hair can affect not just the toilet but your main sewer line. This can lead to wastewater backups, flooding, and damage to your property. What Should You Do Instead of Flushing Hair? Now that we’ve answered is it bad to flush hair down the toilet, let’s talk about what you should be doing. Always throw hair into the trash. This includes hair from hairbrushes, razors, clippers, or pet grooming tools. You can also collect hair into a tissue and dispose of it in a wastebasket. If you’re brushing or shaving near the toilet, resist the urge to toss that hair in even if it’s just a few strands. Another smart move is to install drain guards or hair catchers in your sink and tub. These prevent loose hair from sneaking into your drains in the first place. Preventing Plumbing Problems From Flushed Hair To avoid costly toilet repairs caused by hair buildup, follow these simple tips: Never flush hair of any length down your toilet. Regularly clean your drains and toilet trapways. Watch for early signs like slow drainage, gurgling, or bubbles in the toilet bowl. Get routine plumbing inspections to catch unseen issues. If you suspect that flushing hair has already caused a clog, it’s best to have a professional plumber inspect and clean your system. Need Toilet Repairs in Los Angeles? We Can Help At some point, persistent flushing issues may require more than just plunging. If you’re dealing with recurring problems, weak flushes, or water leaks after flushing hair, you may need help from the pros. Derks Plumbing specializes in Toilet Installation and Repair in Los Angeles. Whether it’s replacing a damaged toilet, clearing hair clogs, or fixing valves and seals affected by buildup, our expert team is here to help. We’ll make sure your toilet is running smoothly no matter what went down the drain. Is It Ever Okay to Flush Any Hair? No regardless of length, amount, or source, flushing hair down toilet systems is a bad idea. Toilets are not designed for anything beyond human waste and toilet paper. Some people assume short hair or a few strands are fine, but as mentioned, this leads to slow build-up and eventual clogs. To play it safe, treat all hair like a